Just another way to extend the Chuck Jaws

UKworkshop.co.uk

Help Support UKworkshop.co.uk:

This site may earn a commission from merchant affiliate links, including eBay, Amazon, and others.
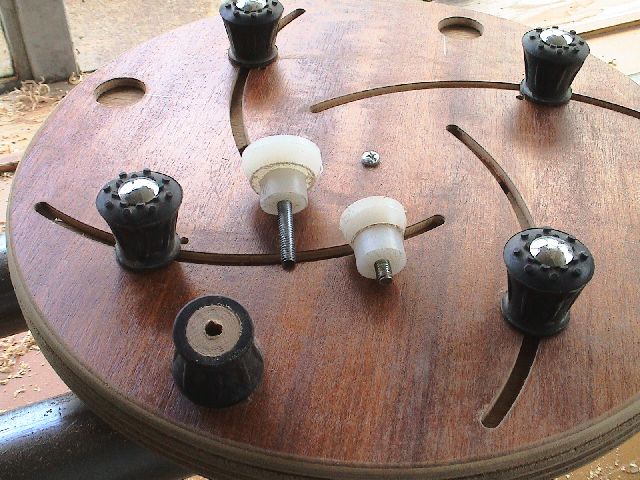
Looks like you have done a good job. I am a little curious about why you put the metal reinforcement strips on the back of the jaws rather than the front, though. I can't see where they will do any good back there. If they were on the front under the screw heads they would spread the load of the screw heads over a wider area. On the back they will just act as spacers between the plywood and the chuck slides,

Oversize jaws, even the metal ones designed for the purpose, are intended only for light cuts and sanding at low speeds. Please use them with caution, because I know of one turner who sustained a life threatening injury when his home made jaws failed.

Take care
Bob
 
For those on a budget a simpler way of achieving the same is to reverse turn between centres with a friction drive.
1. Attach a disc to the headstock with a faceplate, screw chuck or chuck jaws - I use offcuts of various sheet material such as MDF
2. Turn a groove in the disc to centre the bowl - as I've used this method for many years there is usually a previous disc with a suitable or nearly suitable step already on it.
3. Place the bowl in the groove on the disc and bring up the tailstock and apply light presure.
4. Turn away the spigot or reshape the base of the bowl as you wish.

Obviously with this method you are limited by the swing of the lathe. The wood plate jaws come into their own when working outboard or with a swivelling headstock.
 
bobham wrote
I am a little curious about why you put the metal reinforcement strips on the back of the jaws rather than the front,
Hello Bob.
The reason for this is that i was trying to keep everything flush,and because i had c/s bolts.
If i'd have c/s the strips which are only 2.5mm thick,to take the bolts,i would have lost the little amount of strength they were giving.
The strips were also put on instead of me using ferrules as suggested.This i feel would also have made the ply weaker at those points,by drilling a larger hole to take them.
It made sense when doing it,but i have no engineering background either,and if you feel that it unsafe to use Bob,i would rather not use it.
Just something to try that didn't cost much so nothing to lose. :)
Paul.J.
 
Mark Hancoch wrote
For those on a budget a simpler way of achieving the same is to reverse turn between centres with a friction drive.
Hello Mark.
Thanks for that but i'm not really sure what you mean.
Is it like a Jam fitting but with the tail stock to support it
:?
Something else to learn.
Paul.J.
 
Hi, Paul:
Since you have the full thickness of the ply under your screw heads it should be fine. I just meant that I don't see where the strips on the back of the jaws are contributing any strength to the joint. If they were mortised into the front of the jaws and countersunk for the screws they would distribute the force of the screw heads over a larger area and also prevent wear between the plywood and the screws.

Since you only have four gripping points rather than the eight that commercial jumbo jaws provide I think that Chas' suggestion about using the tailstock for support is a good one.

Take care
Bob
 
Paul

Yes that's exactly it - like a jam chuck with tailstock support. The problem with a jam chuck is that you can damage the rim of the bowl. With the method I described the groove is there just to help centre the bowl. Without the tailstock the bowl won't stay in place.
Hope that's a bit clearer
 
Bobham wrote
I don't see where the strips on the back of the jaws are contributing any strength to the joint.
Hello Bob.
I have now taken your advice,and Chas's,by putting ferrules in the holes where the bolts go through,and putting the metal strips on the front.It does seem better somehow :?
I haven't set them in as i feel this will weaken the ply too much.So will try this for now.
Also what do you think of the buttons.They are 2 pieces of 6mm leather glued together with the bottom one being chamfered all round to give that bit of extra grip.They are fixed using kitcen cupboard connectors.
If you or anyone else can see any safety problems arising please let me know.


Paul.J.
 
Paul, re: the buttons I am not sure that leather is firm enough, unless it is the good old shoe sole or horse harness variety.

They are also rather shallow and I think could do with some spacers underneath.

Try turning some buttons and spacers from old Plastic Kitchen Chopping boards. (will post picky shortly, need to go up the shed)

I usually pick some up from the local pound shop when passing if TLOML is reluctant to release any.
 
Chas.
The leather is from the old belts that used to drive our machines at work,it really is tough stiff stuff,try saying that when you've had a few :roll:
How thick should the buttons be,these are 12mm.
Paul.J.
 
Paul.J":1d89e5tx said:
Chas.
The leather is from the old belts that used to drive our machines at work,it really is tough stiff stuff,try saying that when you've had a few :roll:
How thick should the buttons be,these are 12mm.
Paul.J.

That should be fine, the thickness is more a matter of moving the gripping area a little further from the chuck to improve the leverage factor.

Here's some I use, the walking stick buttons are good, you can usually find then at a reasonable price in the local markets.

DSC02134.JPG
 
Hi all,

sorry I am late, my ISP had a little problem.
Couple of years ago I wanted to use cole jaws. I had plans to build them of ply, until I found this synthetic building material.

Over here it is called TRESPA, no clue under what name and whether it is available in Britain.

I used 10 mm (3/8") for a diameter of 500 mm (20"), it drills and taps easily and is much stronger than plywood. I fixed them to Oneway flat jaws. Here they are used with Vicmarc buttons.
colejaws.jpg


Hope this is still useful to someone.

Hans
 
Hans.
That looks a nice neat job,shows my effort up by me using some old scrap ply :(
How have you fixed yours to the chuck.Did you have to strenghten this material,and how did you cut the segments :?: :?:
Paul.J.
 
Here's the mod that I sometimes use with my cole jaws when I have a hollow form or shape that the normal short bolts can't hold...

click for larger image

It works well but you may want to wrap the exposed threads with something to stop anything straying into their path

Duncan
 
ive got a bit of a bone (daft/stupid) question guys, why is it that you feel the need to have these special jaws? is it just to carry large pieces, or is it so you can finish a piece with no visible "holding" method, my point being that ive turned some large pieces and not had any problems, or am i being REALY thick here? :?: :sign3:
 
wood yew believe it !":ssifmkmy said:
ive got a bit of a bone (daft/stupid) question guys, why is it that you feel the need to have these special jaws? is it just to carry large pieces, or is it so you can finish a piece with no visible "holding" method, my point being that ive turned some large pieces and not had any problems, or am i being REALY thick here? :?: :sign3:

In the main "so you can finish a piece with no visible "holding" method" such as removing a spigot as opposed to leaving a socket which may not be so obtrusive.
 
WYBI Wrote
my point being that ive turned some large pieces and not had any problems
How have you been doing it Dave.Tell us your secret :shock:
It just seems a quicker and safer way to me to do it.Even though i haven't tried it yet. :oops:
Paul.J.
 

Latest posts

Back
Top