Steve Maskery
Established Member
Hi folks
I've just made a pocket hole jig, and it works nicely.
I considered making Ian's from GW a few months back, but I didn't want to buy a dedicated tool, and I wanted one that could be used on sheet material for carcases etc.
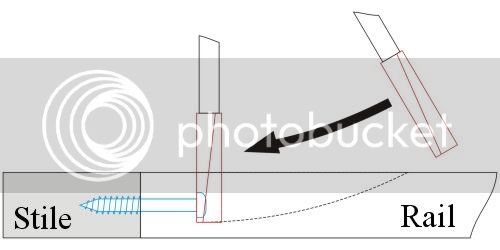
This version uses a standard router, and whilst this version may not do framing quite as easily as Ian's, it's not bad and easier, I think, on the edge of a large sheet (I'm thinking Wardrobe here).
Anyway this is what it look like:

It consists of a router cradle, which lets it move in an arc,

The white strips are Formica
Underneath there is a clamping plate and a guide plate:

which are adjusted into position with Bristol levers and T-nuts. If it looks as if it is only just being held on, it's because I wanted the pressure point to be directly inline with the cut.
In due course the main fence will have a bushing to enable me to drill the pilot hole for the screw - it's being made for me even as we speak.
So I clamp it to my workmate, set it up for a cut, do all the ones at this position, then reset the guide for the other position. For sheet work the two plates underneath are removed and the cradle is clamped directly to the panel.
The only disappointment is that as I was cutting the main slot I didn't move the toggle clamp out of the way. It's cost me a 5/16th cutter which I had only just had sharpened, and knackered up the rubber foot at the same time.
Anyone suggest improvements?
Cheers
Steve
I've just made a pocket hole jig, and it works nicely.
I considered making Ian's from GW a few months back, but I didn't want to buy a dedicated tool, and I wanted one that could be used on sheet material for carcases etc.
This version uses a standard router, and whilst this version may not do framing quite as easily as Ian's, it's not bad and easier, I think, on the edge of a large sheet (I'm thinking Wardrobe here).
Anyway this is what it look like:

It consists of a router cradle, which lets it move in an arc,

The white strips are Formica
Underneath there is a clamping plate and a guide plate:

which are adjusted into position with Bristol levers and T-nuts. If it looks as if it is only just being held on, it's because I wanted the pressure point to be directly inline with the cut.
In due course the main fence will have a bushing to enable me to drill the pilot hole for the screw - it's being made for me even as we speak.
So I clamp it to my workmate, set it up for a cut, do all the ones at this position, then reset the guide for the other position. For sheet work the two plates underneath are removed and the cradle is clamped directly to the panel.
The only disappointment is that as I was cutting the main slot I didn't move the toggle clamp out of the way. It's cost me a 5/16th cutter which I had only just had sharpened, and knackered up the rubber foot at the same time.
Anyone suggest improvements?
Cheers
Steve


