Japanese - Western hybrid...WIP

UKworkshop.co.uk

Help Support UKworkshop.co.uk:

This site may earn a commission from merchant affiliate links, including eBay, Amazon, and others.

woodbloke

Established Member
Joined
13 Apr 2006
Messages
11,770
Reaction score
1
Location
Salisbury, UK
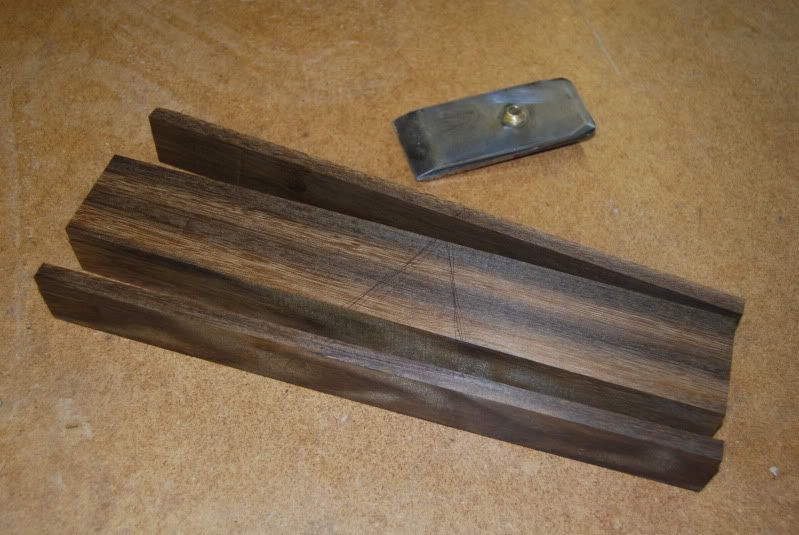
I had a really great day round at Mike Huntley's bi-monthly Japanese tool bash yesterday and what made it even better was the the weather, for once, was glorious. One of the guys brought along a couple of hybrid pull planes, made aka JK fashion but with cut down, thick blades from an old woody, which intrigued me and as I've got one of these so I'm in the process of attempting to make a similar plane at the moment. A proper Japanese dai is fiendishly difficult to make accurately and it's even more diabolical to fit the blade as there are no parallel edges to it...the only flat bits are the bevel and the back of the blade.

This is as far as I've got thus far, with the three main sections being made out of some greenheart, which is very heavy stuff, blade shown behind:
DSC_0002-6.jpg


The main section has now been cut into two sections, with the blade being bedded at 42deg.
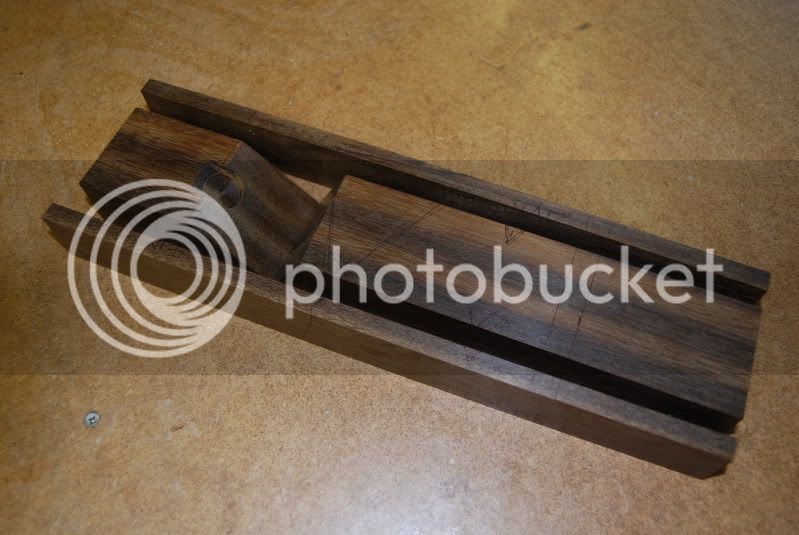
DSC_0003-4.jpg


...after doing a little bit of research on the Tools from Japan site. My plane will have a lignum mouth though:
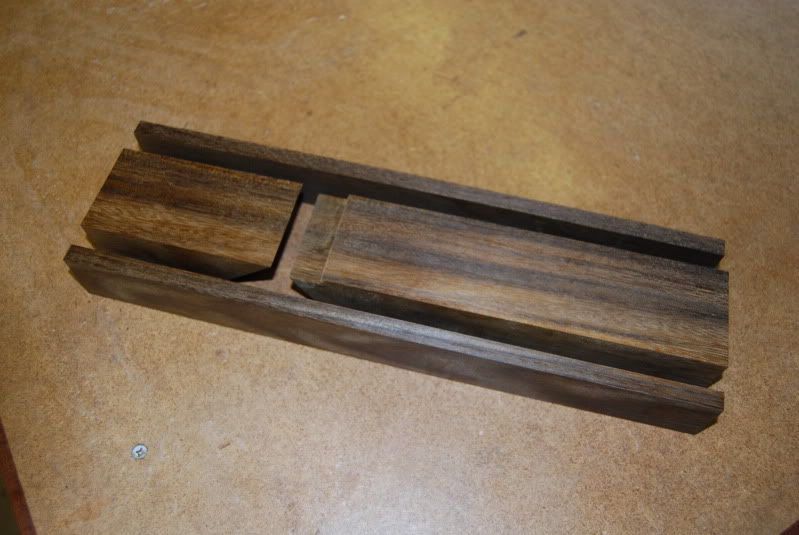
DSC_0004-8.jpg


...which will be screwed into place with a couple of tiny No4 brass screws, set below the surface of the sole...the rebate for the mouth is shown. I'll also probably insert some lignum wear strips at the toe and heel as well of the dai, total length of which will be 260mm. The final shot shows the four sections:
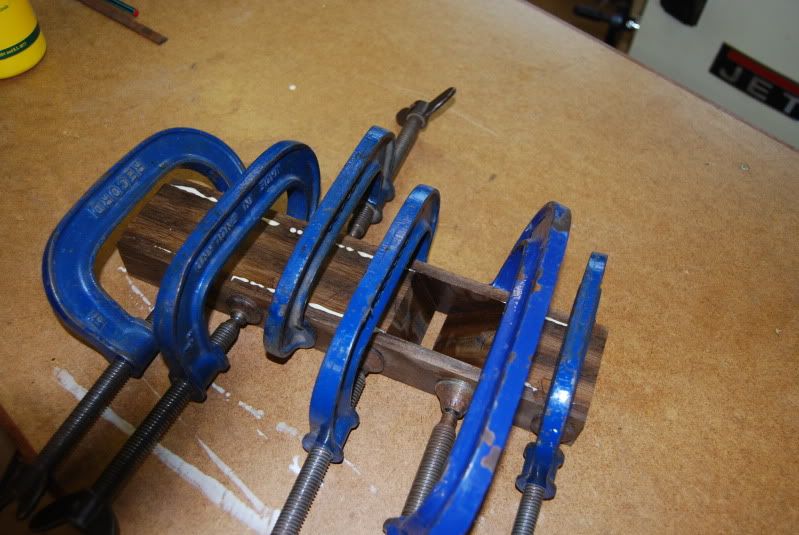
DSC_0005-6.jpg


...glued together. The mouth looks quite big here, but remember it's a thick iron and the lignum insert will be shot in to leave a mouth that's righty tighty. I'll leave the glue to harden off overnight and then skim all surfaces through the Jet 260 to true everything up, after which the steel pin and wedge need to be made. More on the 'morrow :wink: - Rob
 
Superb stuff Rob...I am really getting into these designs...as you know.

If you need a piece of real lignum vitae officiale for your mouth let me know....I may have some pieces big enough.

Cheers

Jim
 
jimi43":of82bo7y said:
If you need a piece of real lignum vitae officiale for your mouth let me know....I may have some pieces big enough.
Cheers
Jim
Thanks for that Jim...appreciated :wink: I have a small lump of the 'real deal' and have already cut off a small slitherino ready to glue in today. Should be able to get it finished as well by COP today - Rob
 
woodbloke":duai5nh6 said:
jimi43":duai5nh6 said:
If you need a piece of real lignum vitae officiale for your mouth let me know....I may have some pieces big enough.
Cheers
Jim
Thanks for that Jim...appreciated :wink: I have a small lump of the 'real deal' and have already cut off a small slitherino ready to glue in today. Should be able to get it finished as well by COP today - Rob

No problems Rob...just let me know if you need any. And...as Pete says..watch out for them there splinters!

Jim
 
It's finished and making nice, long, ribbon shavings, but it just needs a final tune-up before I take any pics, which I'll do tomorrow - Rob
 
That was quick! Better than wasting all those weekdays going to work! I'm sure it will be up to your usual high standards and am looking forward to seeing it complete.
 
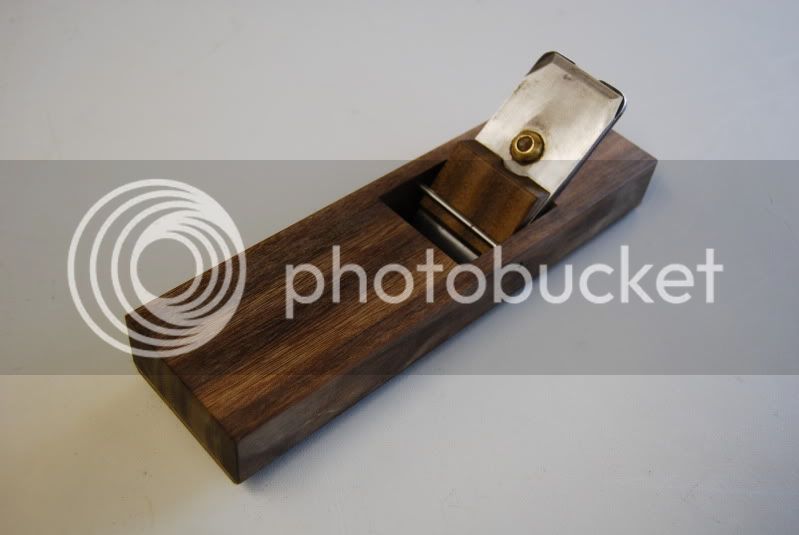
As promised, here are some pics of the finished plane, complete with the all important shavings. Firstly is a shot of the complete thing:

DSC_0001-6.jpg


In common with the true Japanese planes, I've used a steel pin for the bar which makes it a lot easier than doing the traditional JK wooden bar. The wedge is an off-cut taken out of the centre section when the internal frogs were cut. The blade is bedded at 42deg and as it's made from greenheart, it's quite a weighty little beast...the scales tip at .945kg which is about 2.08lbs so not too shabby for a wooden plane that's only 260mm long. The next pic is a shot of the:

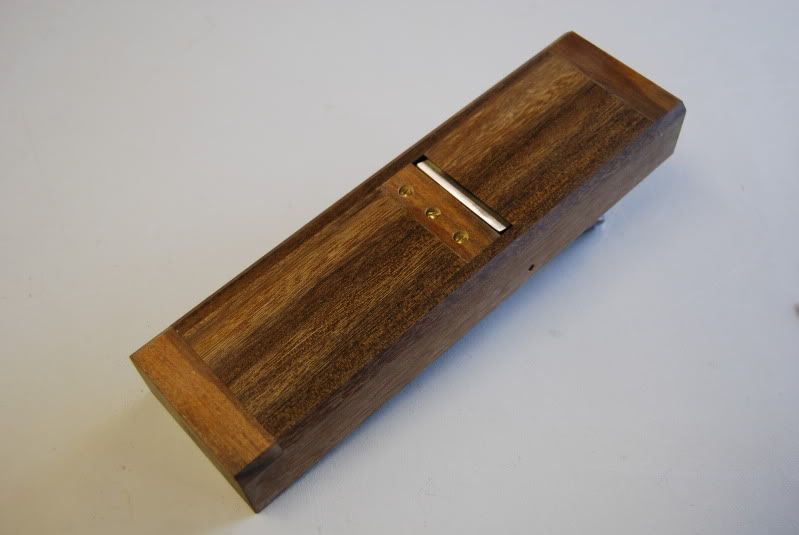
DSC_0002-7.jpg


...sole with the two lignum wear strips at each end and the lignum insert at the mouth which has been screwed in place with three small brass rh screws. Doing it this way makes it easy to get a fairly tight mouth, but even so I took a couple of shavings too much off the leading edge and so this morning have inserted a thin piece of card on the bed to bring the iron forward a smidge. In point of fact, the greenheart is almost as hard as the lignum, so the wear strips aren't critical, but might be useful if the dai was made from something softer like oak. The next pic is a:

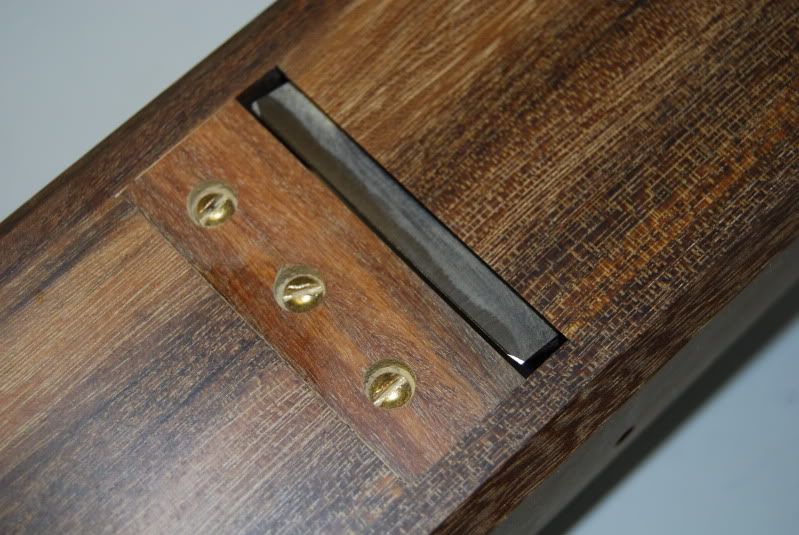
DSC_0003-5.jpg


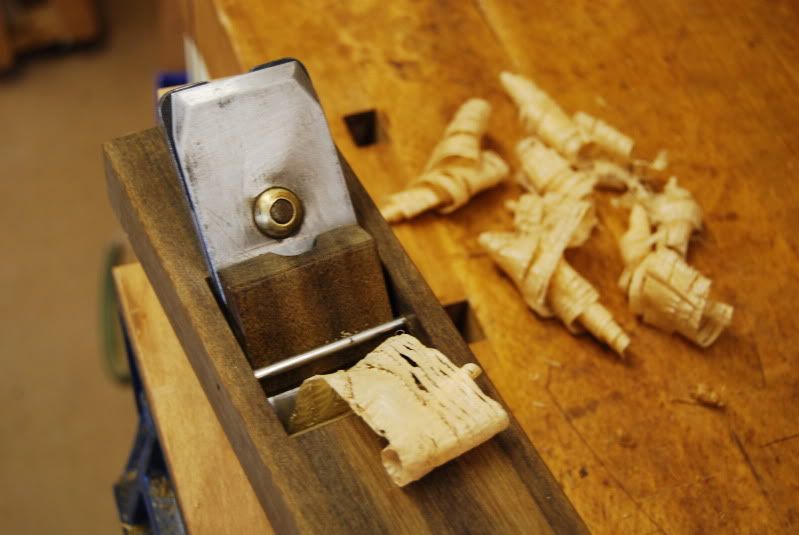
...close up of the mouth, which is now about .5mm. I tested it out using some bits of gash pine:

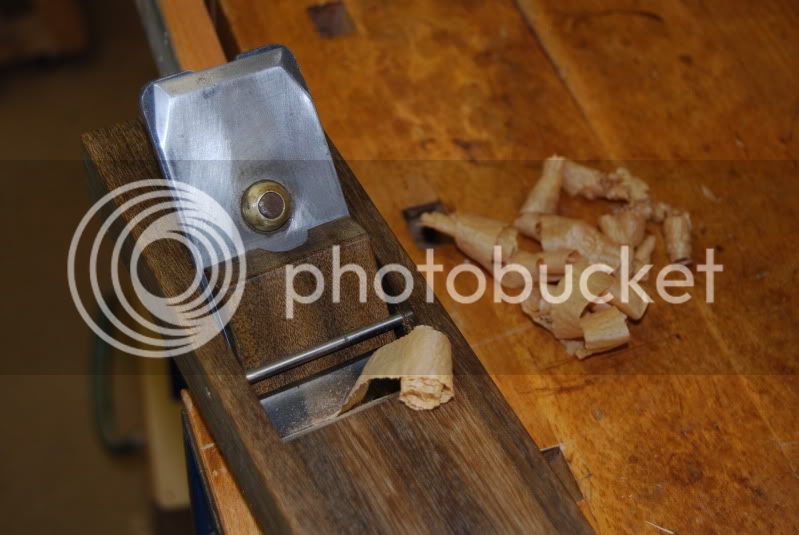
DSC_0004-9.jpg


and then tried it on some elm:

DSC_0005-7.jpg


...so it's working quite nicely. As I mentioned at the beginning, true Japanese dai's are difficult to make and even more so if you make one to fit a respectable Japanese blade but this half-way house seems a decent sort of compromise if you want to have a go at making a pull plane. As ever, comments good, bad or indifferent welcomed.

Edit - would somebody please remind me not to use Greenheart the next time I do this sort of caper :evil: :evil: - Rob
 
Just as tidy as I thought it would be!

A few questions if I may...

Could you say a bit more about shortening the blade - presumably as it is an old-style steel + iron blade this is fairly easy to do with just a hacksaw as you would only be cutting the soft iron? The resulting blade+cap iron is longer than a Japanese plane would have though - does it get in the way at all?

Also, for those of us not skilled in the eastern ways of working, could you use the self-timer or an assistant to take a photo showing us how you hold it in use, please? Are there different grips for use on a surface or an edge?
 
Paul Chapman":2ngv21t2 said:
Looks very nicely made, Rob.

Cheers :wink:

Paul
Thanks Paul. This was an interesting little exercise to do and the finished plane works well. The only problem I have now is finding somewhere to put it, either on the 'Tool Wall' or under the bench as the collection :oops: :oops: of planes has grown somewhat - Rob
 
AndyT":1q9x3pxt said:
Just as tidy as I thought it would be!

A few questions if I may...

Could you say a bit more about shortening the blade - presumably as it is an old-style steel + iron blade this is fairly easy to do with just a hacksaw as you would only be cutting the soft iron? The resulting blade+cap iron is longer than a Japanese plane would have though - does it get in the way at all?

Also, for those of us not skilled in the eastern ways of working, could you use the self-timer or an assistant to take a photo showing us how you hold it in use, please? Are there different grips for use on a surface or an edge?
Andy, these are just bog standard thick old blades from woodies...just cut them down with a hacksaw and clean up with a file. The irons are usually laminated (or the older ones were) so it's not too bad, but if you get a newer one (say from an Emir plane) the way I've done it is to use a Dremmel with a metal cutting disc which works well.
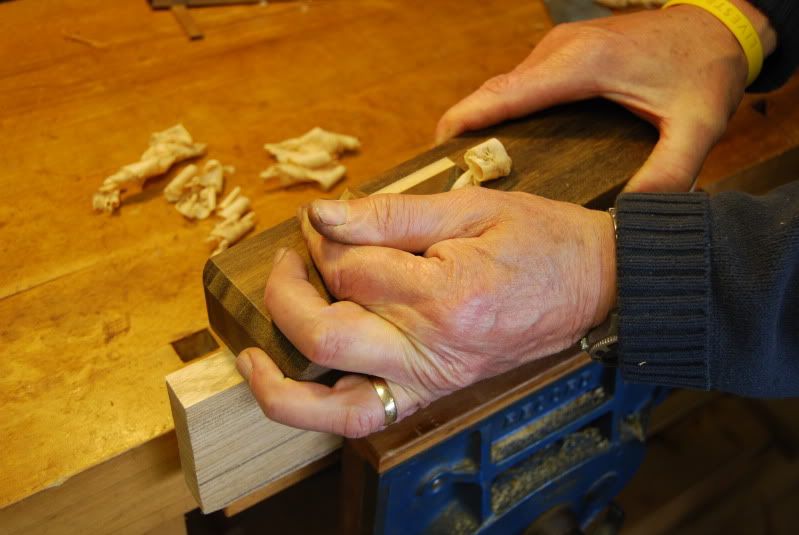
I'll take another pic showing the grip, but essentially for a RH user, the the RH palm is placed across the front of the dai with the fingers gripping the side. The LH is positioned behind the cutter and cradles the back of the dai, with the forefinger resting in the 'v' crook 'twixt the iron and dai...there's also an upward pressure applied with the finger onto the back of the blade as the plane is pulled. The blade as shown is a bit longer that a Japanese one, but doesn't seem to get in the way too much - Rob
 
Nice one Rob! And most importantly it works brilliantly!

I have another blade I want to use for a kanna...might chicken out and go your route...mmm thinks...is a dai too much...what do you think?

Does greenheart glue up well? What glue did you use? I am not familiar with using it so I was wondering if oil was a problem as it is with LV?

Cheers mate and thanks for posting...really nice job! =D>

Jimi
 
Paul Chapman":14x8ejle said:
woodbloke":14x8ejle said:
[collection :oops: :oops: of planes has grown somewhat


Yes, stop it - I'm having trouble keeping ahead of you :lol:

Cheers :wink:

Paul
29 now...getting scary for a minimalist :-" :---) like me (that includes 'shaves) :mrgreen: - Rob
 
Nice. Also very quick!

I have been having similar thoughts myself (none original), although for a western style Krenovish smoother. I need to finish a couple of other projects first, but recon on using that construction method as it should be easier than chiseling the throat from solid, and modern glues render the traditional method unnecessary. Also have a woodie blade knocking around looking for a use...
 
Andy Ryall's came round yesterday evening for a play and it soon became very apparent that the iron 'floats' on the bed, even when under pressure from the wedge, which is definitely not giving enough pressure :oops: against the pin, so modifications are in hand :D today. Even looking at JK's smoother on the 'Tool Wall' it's clear that the iron in that plane isn't rock solid and will still move a fraction.

Still, looking on the bright side...there's no chatter :mrgreen: - Rob
 
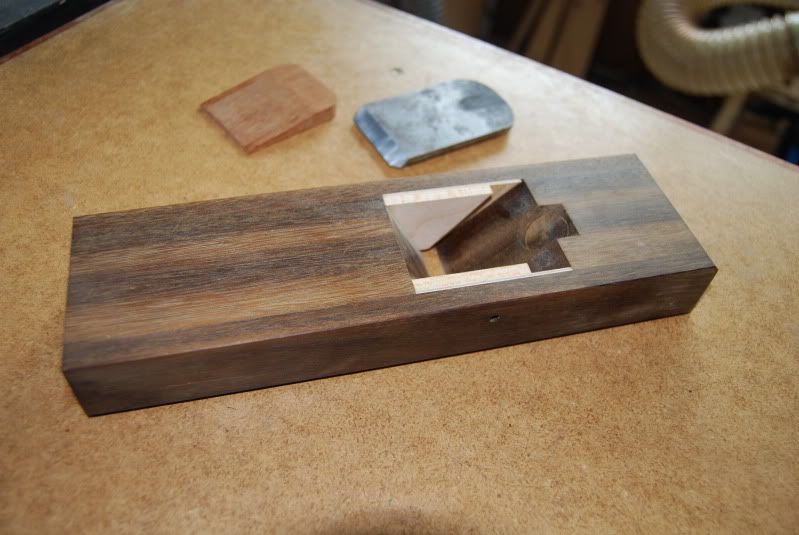
This morning, I decided to strip the whole thing into it's component parts and after some work, I ended up with this:

DSC_0004-10.jpg


I initailly made the width a bit 'baggy' so this has been reduced by fitting a couple of triangular bits of thin birch ply to the inside of the throat, having first knocked out the pin. Then I used some scraps of 5mm maple glued to the ply to form a tapered recess each side to hold a wedge, shown near the blade. I've turned this into a somewhat Japanese type of thing by cutting it down a bit more, and then epoxying part of the off-cut into the remainder of the slot. It's then been cut and shaped (Proxxon mini-drill and disc sander) to more or less the correct shape. This means that it's more effective for adjustment when tapped with a hammer. The blade is now very solid on the bed when the wedge is tapped home. I did think about re-using the chip breaker but in the event:

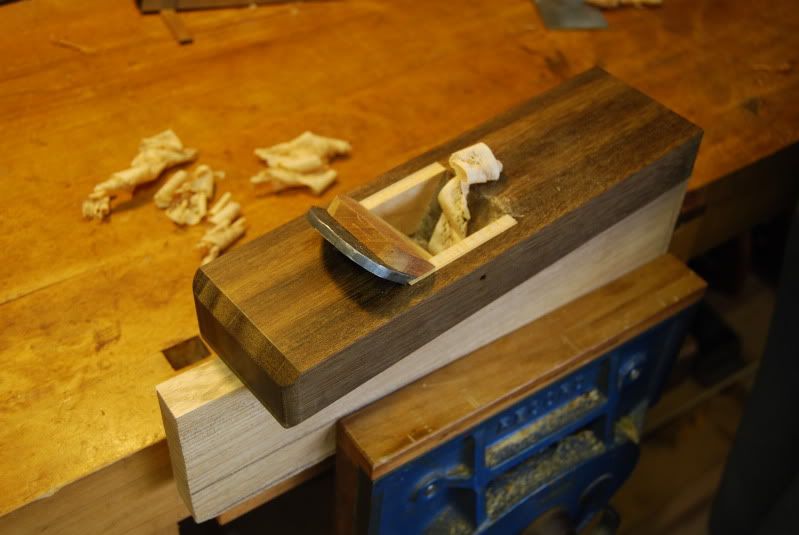
DSC_0005-8.jpg


...it wasn't needed as once the blade had been re-honed (and I also had to grind on some 'ears' to the corners) it was taking really good shavings, this on some brown ash.

This is the grip:

DSC_0006-8.jpg


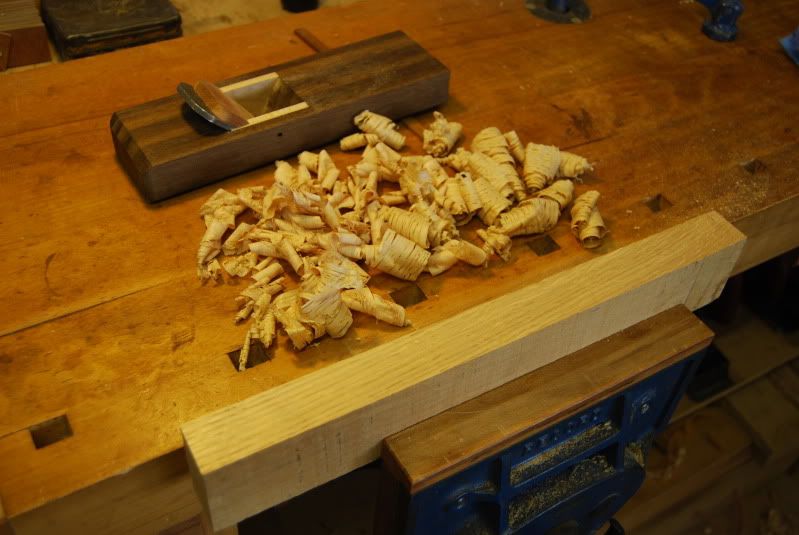
...that you use, with the LH forefinger curled behind the back of the iron. I then tried it on some oak:

DSC_0007-3.jpg


...with equal success. This is obviously a bit of an Alfie's dinner :lol: but it does now work much better than it did last night - Rob
 
Have you made the plane just for the fun of it, Rob, or will it do something that you can't do just as well with your other planes?

Cheers :wink:

Paul
 
Back
Top