I've got a new box idea!

UKworkshop.co.uk

Help Support UKworkshop.co.uk:

This site may earn a commission from merchant affiliate links, including eBay, Amazon, and others.
I have got family visitors (holidays) staying a few days, so things have come to a stop.

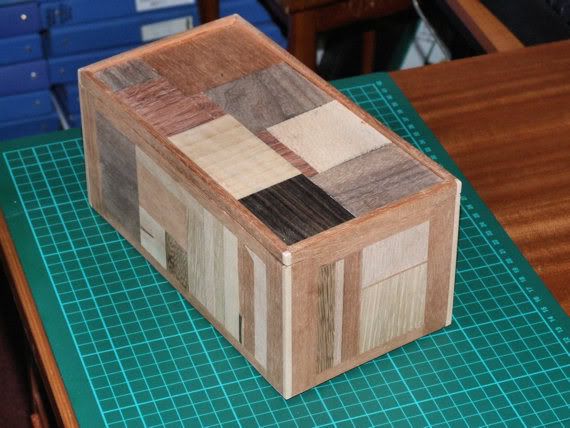
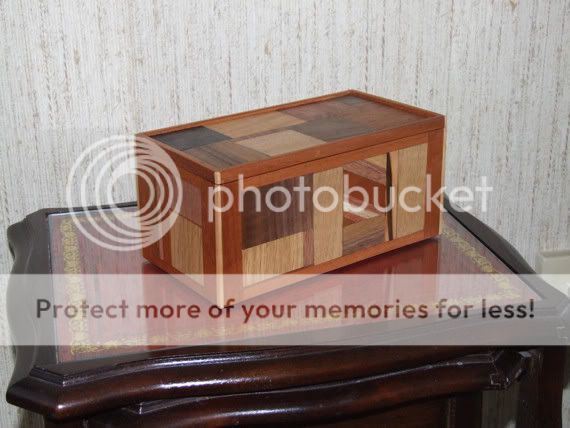
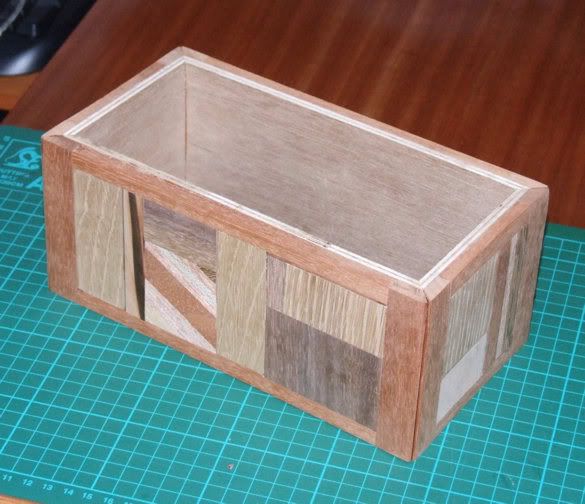
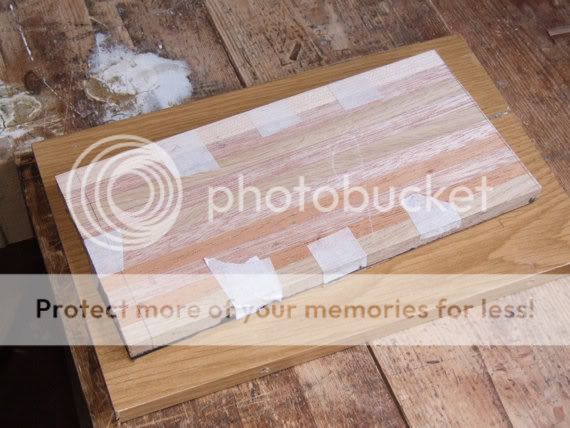
I have a box in progress at the moment , the first as a trial run. So I would be quite happy to make a further box using donated pieces.

So shall we say using donated pieces after 21 st Aug.
 
DW - merely a suggestion, but instead of laying the pieces long grain down, have you thought about laying them end grain down. Might be a nice idea to get all your timbers (donated and your own stock) and cut them into small cubes, say 6 or 8mm square. These could then be arranged on a piece of ply, using all the different colours to form a definite mosaic pattern (like wot the Romans did). I would initially work out the design on paper, with the colours that were needed, transfer the design to some ply and then use a slow setting epoxy (original Araldite) to glue the pieces to the substrate in the correct place. The gaps between the individual blocks (once the glue had set) could then be filled with more epoxy to form a solid sheet and then you would need to get out the orbital sander and dust mask to level the whole panel off, finish by hand sanding. It's only an idea but I think would look very effective - Rob
 
Thanks for your idea, I guess that I could saw off end grain blocks off of small batten around 7mm and that could possibly look something like harequin pattern.

Looks like I shall be busy.

Havent got any
ash, elm, plane, yew and some of the garden fruit tree species. :wink:
 
Returned to the workshop for a few hours today and then had to retire, it went over 90F in there.

However all sides haved now been glued to former and await cutting off as sections.

17-4.jpg
 
The sections were cut from ply former and faces were then sanded with an orbital sander, to be honest this was not a 100% success, some areas have sanded deeper that other parts. I did not fancy putting the pieces through the thicknesser either with grain directions as they are. So next time I shall have to think a little deeper.

Next step was putting the section ends against a 45% router cutter bit and that was a success. I had also decided that the ends would look a little bland and have not cut all the way to the edge because I am going to insert contrasting stringers down the join.

I will most probably line the top edges of the box to hide the ply former as well.

Glued the box up in parts this time, on a flat board using blocks to ensure squareness of project. this also worked well and lightweigt clamps were used at top edges.

19-5.jpg


Picture taken this morning with glue set and waiting for a decent hour to go out to the workshop to continue.

18-3.jpg
 
Got a bit more done today.

Cleaned up the corners with a rebate router bit to around 4mm.

20-2.jpg


Then decided to sharpen all edge tools. Used three of those cheapo diamond plates (now 5 years old and still going strong) but then stuck down 4 strips of wet & dry to a sheet of glass. 3C, 6C, 12K & 25K.
Its the first time I have gone on to W&D and its certainly worth the extra effort.
The corner stringers were awaiting glue to set at the sharpening time.

21-2.jpg


Then prepared the strips pictured below in readiness for the lid to bi used on box.

22-2.jpg


.My neighbour called in and said he is off to Alaska,(going to see it whilst there is still some ice I suppose) so when I enquired of his route I asked if he could bring me back some American tools as the exchange rate is good for us at the moment.

Cant think what to get at the moment but he will be in Vancouver and L.A.
 
woody now you have opened the door, or should i say lid.

can you imagine how hard we are going to push you down the slope :twisted:

interesting thought, need to check whether canadian prices are as low as american ones :?

some lee valley/ veritas stuff would be a good place to start :roll:

nice box

paul :wink:
 
I have a confession to make, no woodwork today, I went timber hunting!

23-2.jpg


24-2.jpg


Took a trip upto Yandles in Somerset and collected 12 different hardwoods, total haul 4 cu.ft. (cost just over the ton.)
 
I do like to see those big lumps of purple heart it makes me feel wanton in a woody way.
Cheers Mike
 
Thursday morning and it got to lunchtime without any work on the box done, I decided I had to tidy up my workshop, even took the carpets up and beat them.

After lunch returned to the lid and I am using veneers this time, again using up offcuts. The top (outside lid) was veneered first and stuck down with neat pvc glue applied to both surfaces and then taped, the rear of the lid was then rebated to drop in box and then veneered with larger pieces of veneer.
Veneering is not recommended after having 2 pints of wallop (with lunch) I nearly caught the chisel once as it was falling but stopped in time.
The glued lid with veneers was sandwiched between two old drawfronts and trapped in the vice together with clamps under terrific pressure.
Thirty minutes later removing boards from vice and they had completely stuck down.
They have cleaned up quite nicely (no pics of that today but will show later)
Photographs of wip today without clean up of veneers.

25-1.jpg


26-1.jpg


28-1.jpg


27-1.jpg


29.jpg
 
The lid has been veneered both sides and cleaned up also the lid has been rebated around all edges in preparation for a beading to be attached.

There is one dirty join on veneer between the walnut and a light coloured veneer but I think I will live with this one rather than cut out and replace with a fresh piece.

30.jpg
 
Got to that final day today.

Not without some mishaps,
The lid was completed, beading added all round and stringers put to corners to match box. A lot of sanding.
Base was fitted. (in the top box area :cry: 
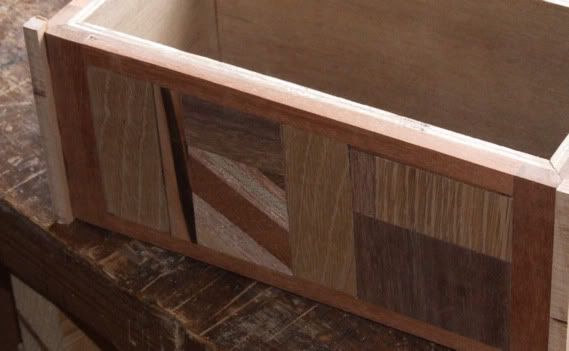
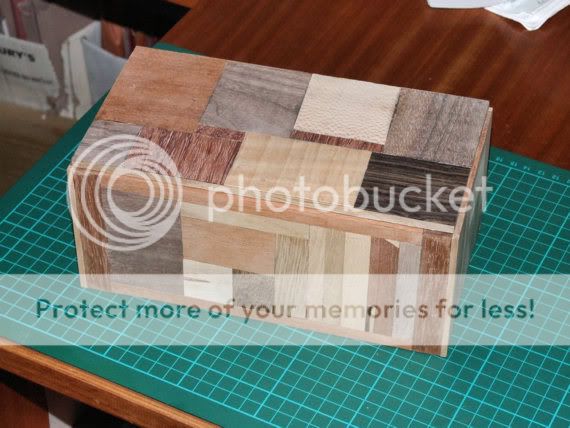
)and had to be relocated to the bottom.
Then dropped the lid on workshop floor and had to start sanding again. Also when cutting corners out for stringers on lid, the chisel over did a cut, which necessitated a glue and clamp up.

But in the end I am quite satisfied to show the box.

31.jpg


So will give a coat of shellac and wax polish and add to my collection.
 
Got the finish on the box over the past two days, gave it a coat of clear shellac and then waxed polish.

32.jpg


33.jpg


34.jpg


Thanks all for looking and your helpful comments.
I have got a selection of timbers (over 25 species) from friends and my own purchases so hopefully I can produce more boxes and to a higher standard in the future.
 

Latest posts

Back
Top