Hi all
it seems this is the place i could put this so here goes. I'm about to build an irregularly shaped wardrobe. I have not done this before and I'm not sure how successful I will be, but I'm enthused about it, it seems like an interesting thing to try and do.
We live in a small house. Its a mess at the moment due to lack of storage so I'm combating that with wardrobes. I also built a tall bed with mild steel that I'm going to put storage drawers into as well, but that's after the wardrobes.
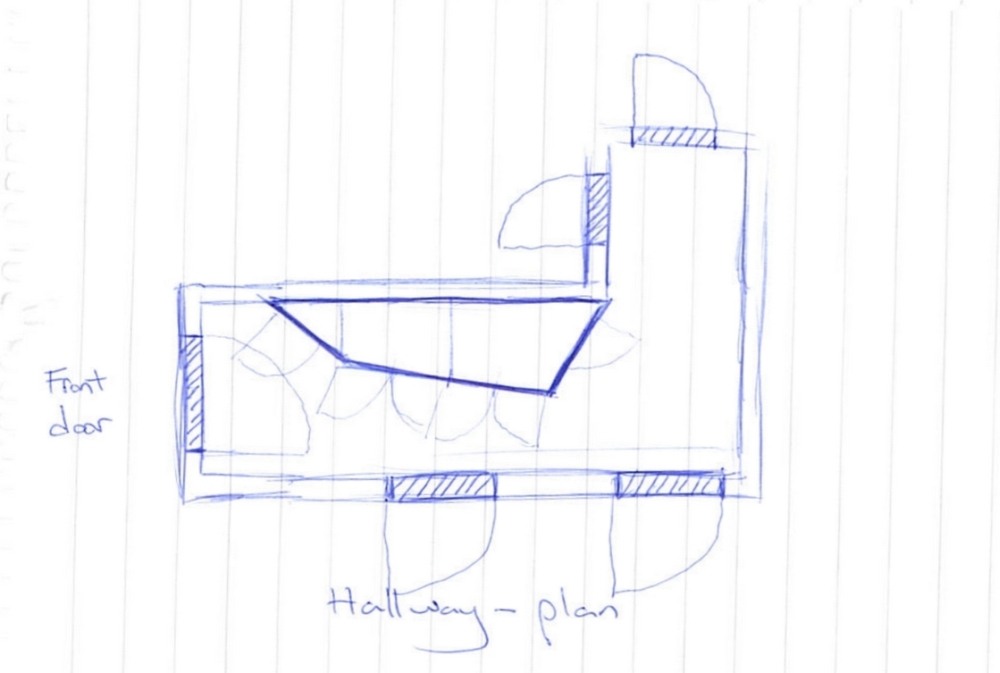
Below is the plan of my hallway. Sorry its not cad, I've no notion how to use cad or sketchup. The wardrobe is in heavy blue.

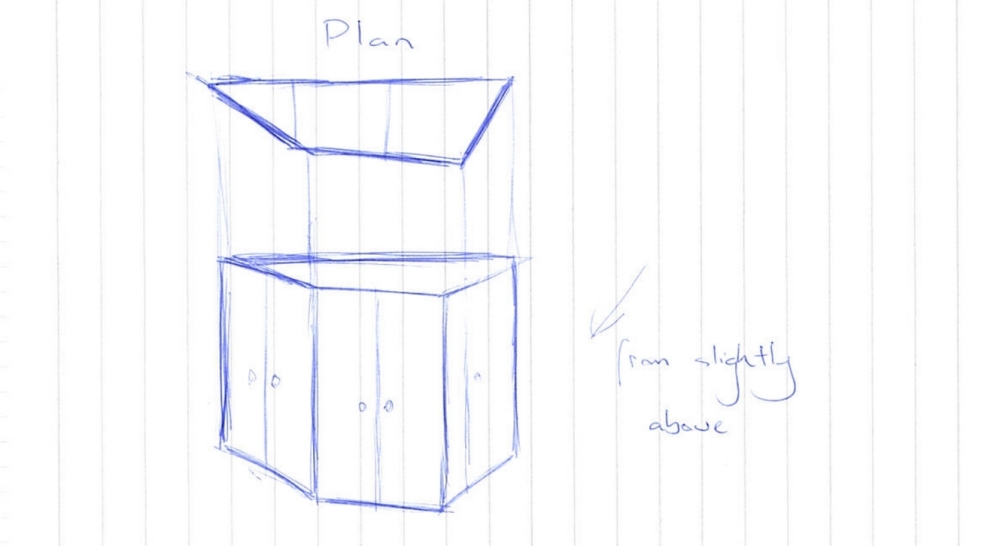
This is a rough outline. I don't know yet how many doors and where, that will be decided when i get an 8x4 sheet on the ground and mark out the shape, and then see the lengths of the various surfaces. The back wall will be 8 foot long and the wardrobe will be 8 foot high as well.

What I have:
• 5 sheets of 18mm MDF
• 8 sheets of 12mm MDF
• A festool track saw
• A brand new second hand hitachi circular saw.
• No experience in woodwork
_______________________________________________________________
I hope you don't mind if I ask for advice please?
The first thing I don't know is how to join it all together. I dont think I can afford a biscuit Joiner setup this month, and Im about to start building it (the house needs more storage immediately). So I'm thinking screws.
I know how to start; by cutting several of the horizontal shapes. It will be ceiling high so Ill need at least 4 of them. I was going to try and get away with not using a back panel, and to keep it rigid using several triangular shapes at the 4 back corners... you might think different though, in that case im all ears.
Alls i have is an idea ) Putting it all together is another thing.
it seems this is the place i could put this so here goes. I'm about to build an irregularly shaped wardrobe. I have not done this before and I'm not sure how successful I will be, but I'm enthused about it, it seems like an interesting thing to try and do.
We live in a small house. Its a mess at the moment due to lack of storage so I'm combating that with wardrobes. I also built a tall bed with mild steel that I'm going to put storage drawers into as well, but that's after the wardrobes.
Below is the plan of my hallway. Sorry its not cad, I've no notion how to use cad or sketchup. The wardrobe is in heavy blue.

This is a rough outline. I don't know yet how many doors and where, that will be decided when i get an 8x4 sheet on the ground and mark out the shape, and then see the lengths of the various surfaces. The back wall will be 8 foot long and the wardrobe will be 8 foot high as well.

What I have:
• 5 sheets of 18mm MDF
• 8 sheets of 12mm MDF
• A festool track saw
• A brand new second hand hitachi circular saw.
• No experience in woodwork
_______________________________________________________________
I hope you don't mind if I ask for advice please?
The first thing I don't know is how to join it all together. I dont think I can afford a biscuit Joiner setup this month, and Im about to start building it (the house needs more storage immediately). So I'm thinking screws.
I know how to start; by cutting several of the horizontal shapes. It will be ceiling high so Ill need at least 4 of them. I was going to try and get away with not using a back panel, and to keep it rigid using several triangular shapes at the 4 back corners... you might think different though, in that case im all ears.
Alls i have is an idea ) Putting it all together is another thing.


