Having trouble levelling these floorboards...

UKworkshop.co.uk

Help Support UKworkshop.co.uk:

This site may earn a commission from merchant affiliate links, including eBay, Amazon, and others.

LFS19

Established Member
Joined
21 Oct 2015
Messages
485
Reaction score
1
Location
East Yorkshire
Hi everyone,

My problem:

AU7KVV8.jpg

BpuGD4c.jpg

LtMm13r.jpg


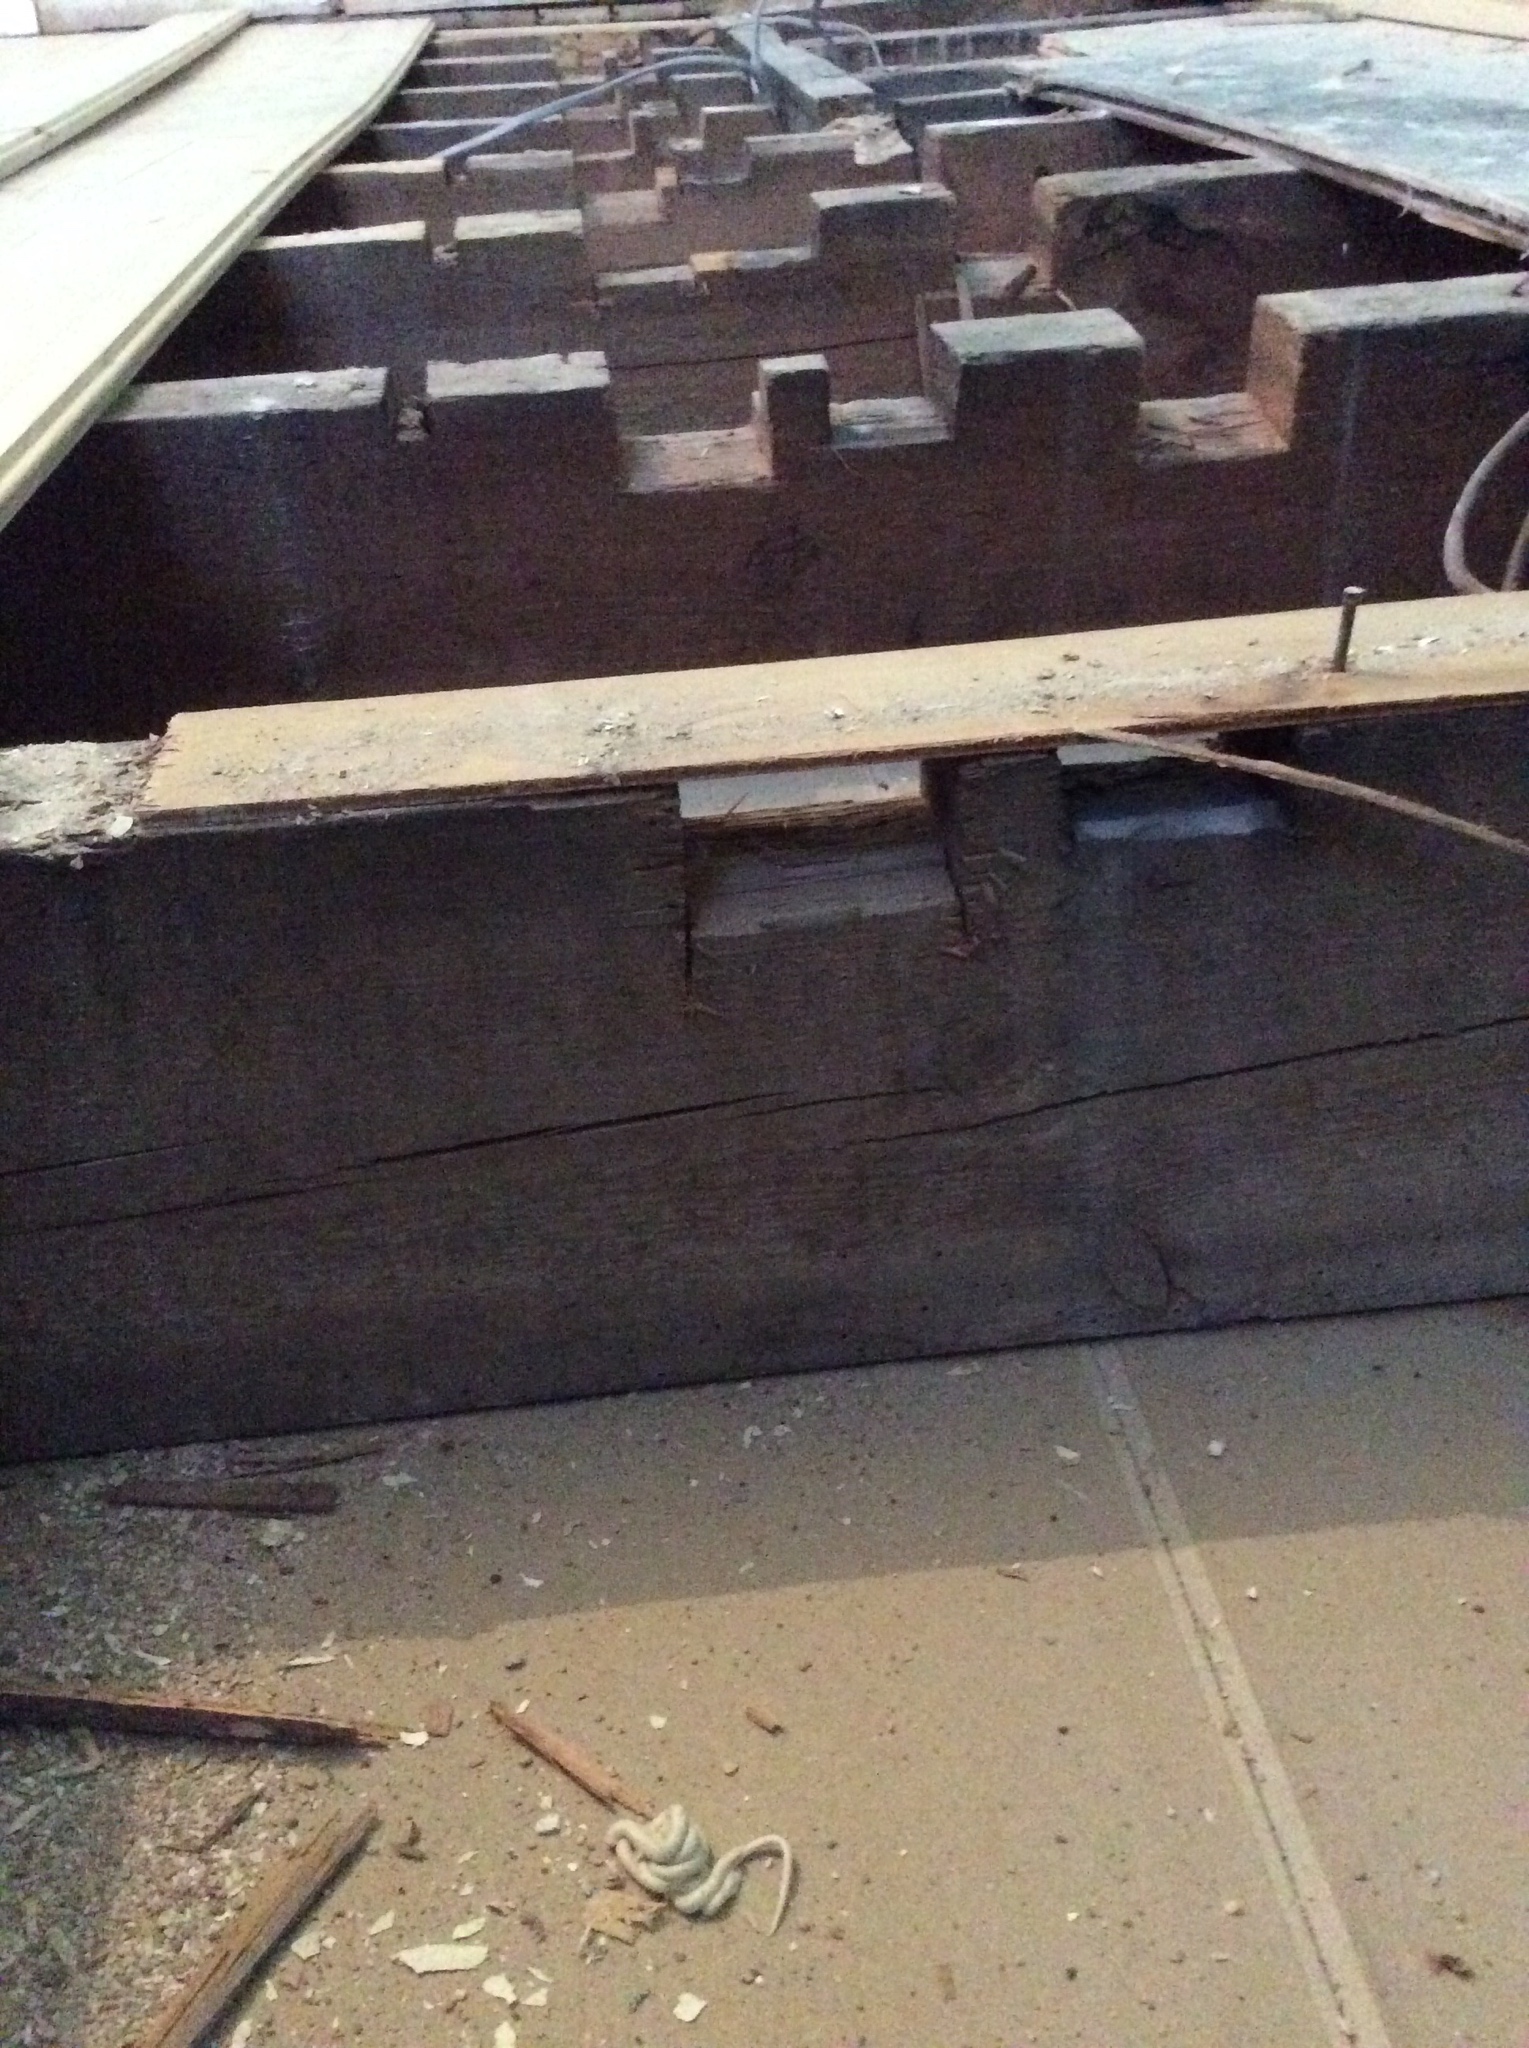
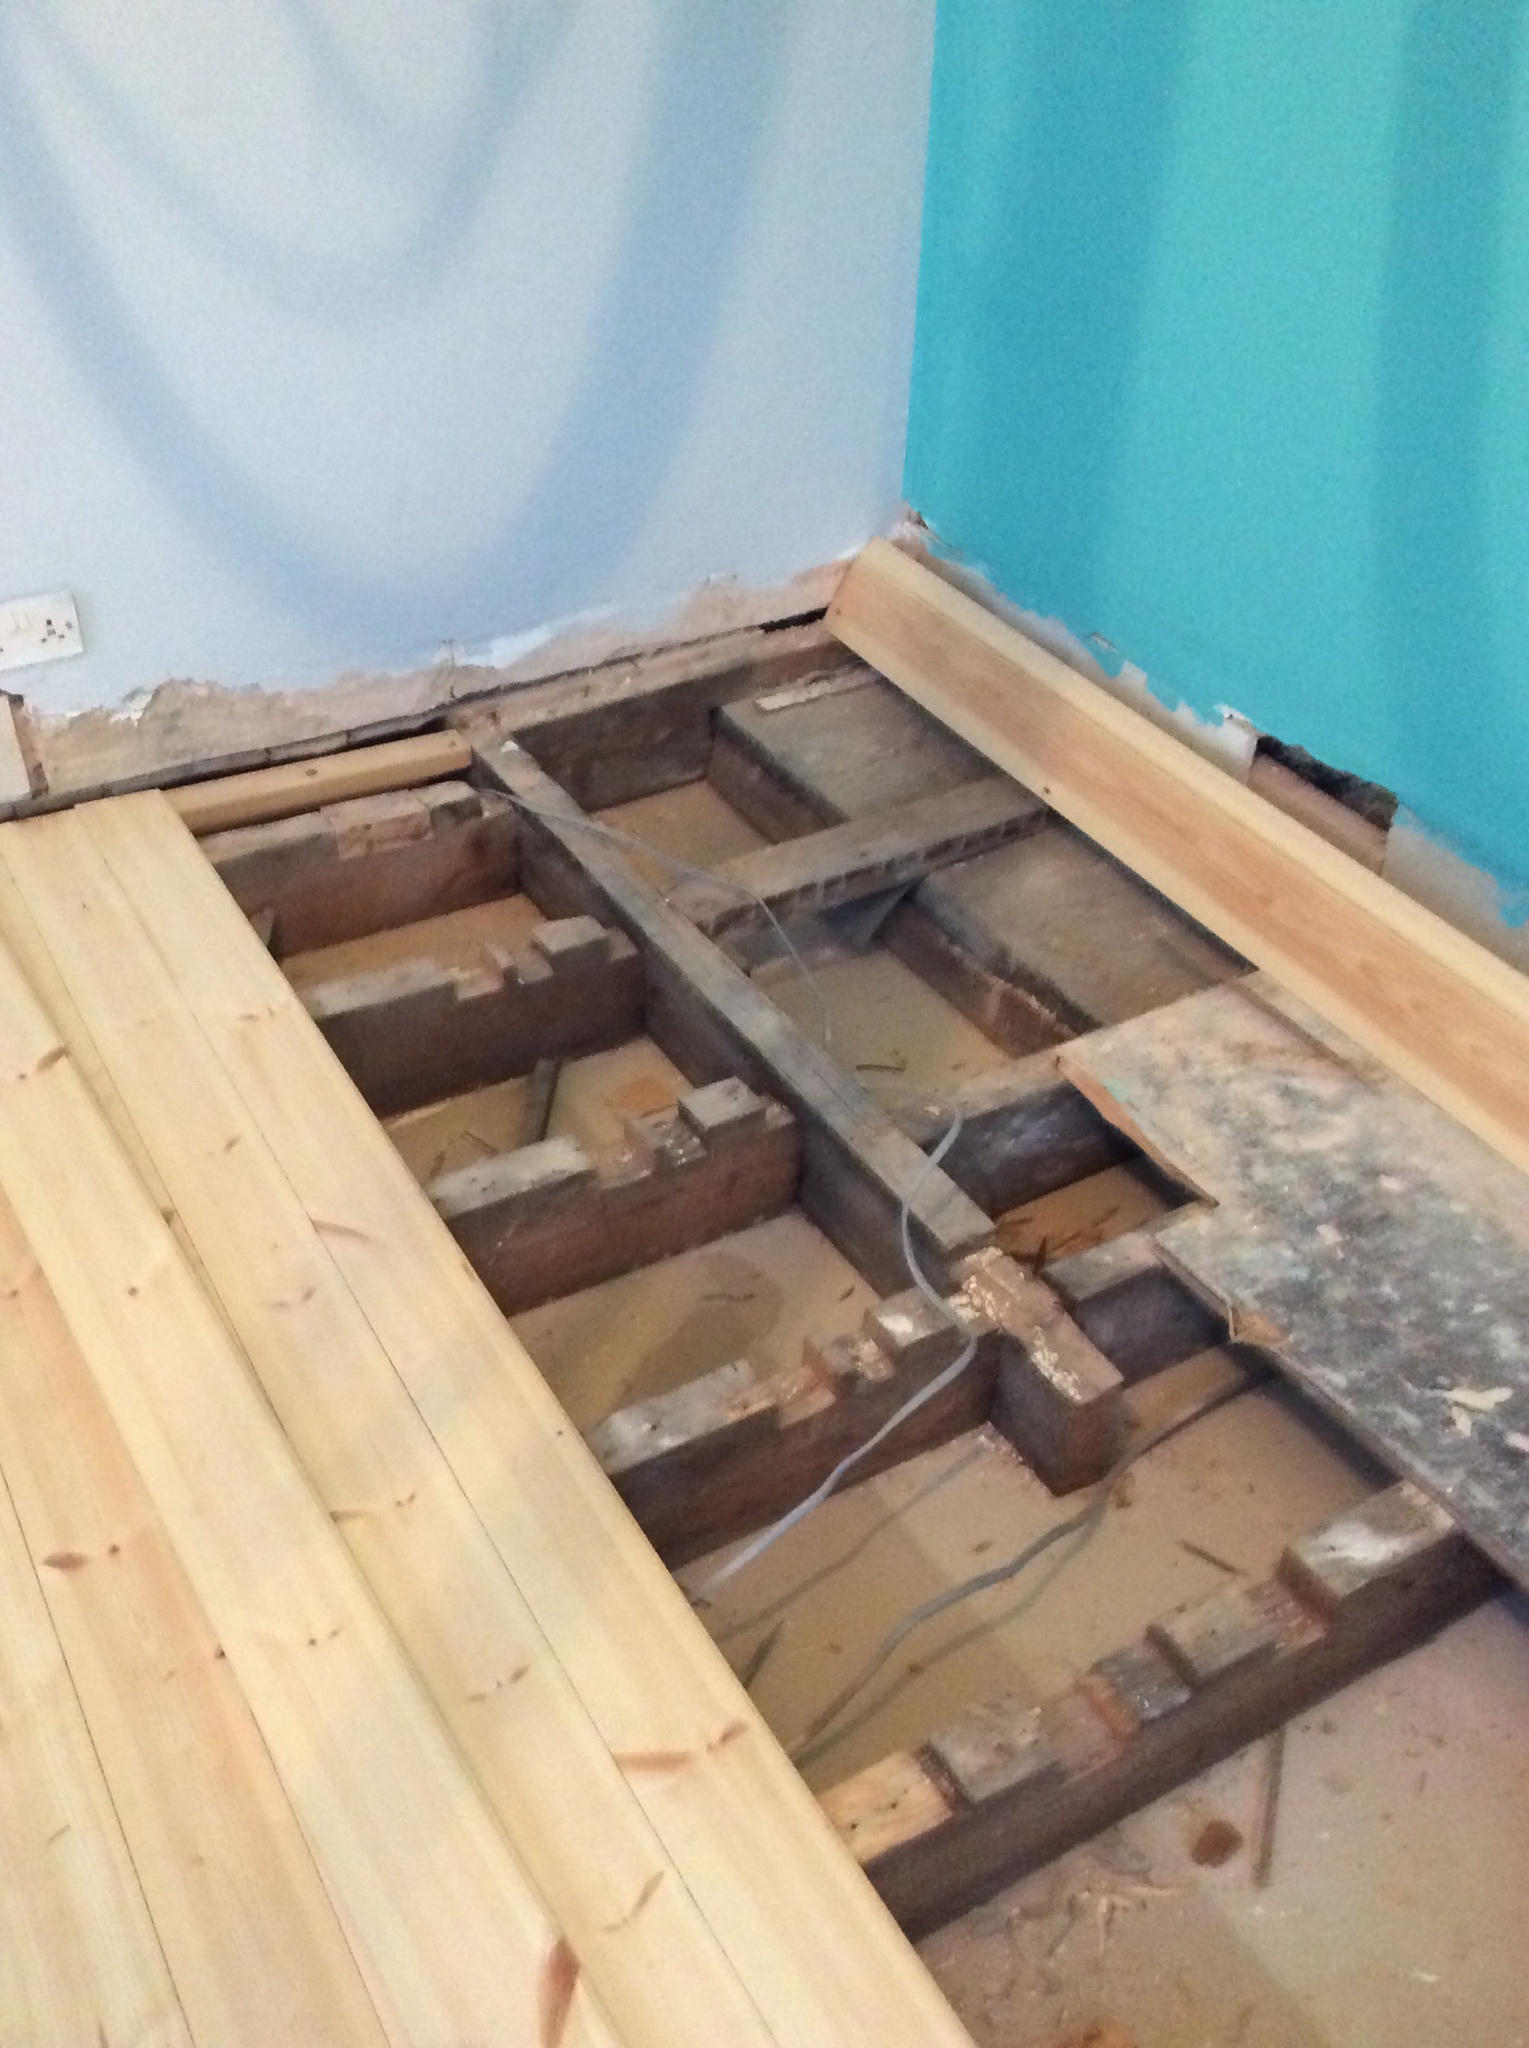
Anyway, as you can see from the pictures, there’s a significant in the area not yet boarded over. In fact, as you can also tell the last board I laid has some cupping, so that’ll need to be taken off so this issue can be sorted.
It seems to cup in a V shaped fashion from both left and right; the cup being at its worst where the joist that lays in the opposite direction to the rest is.

The concrete you see in the corner is the remnants of an old fireplace and was my first guess as to what was causing the cupping, but given the position of the cupping it doesn’t seem physically likely.
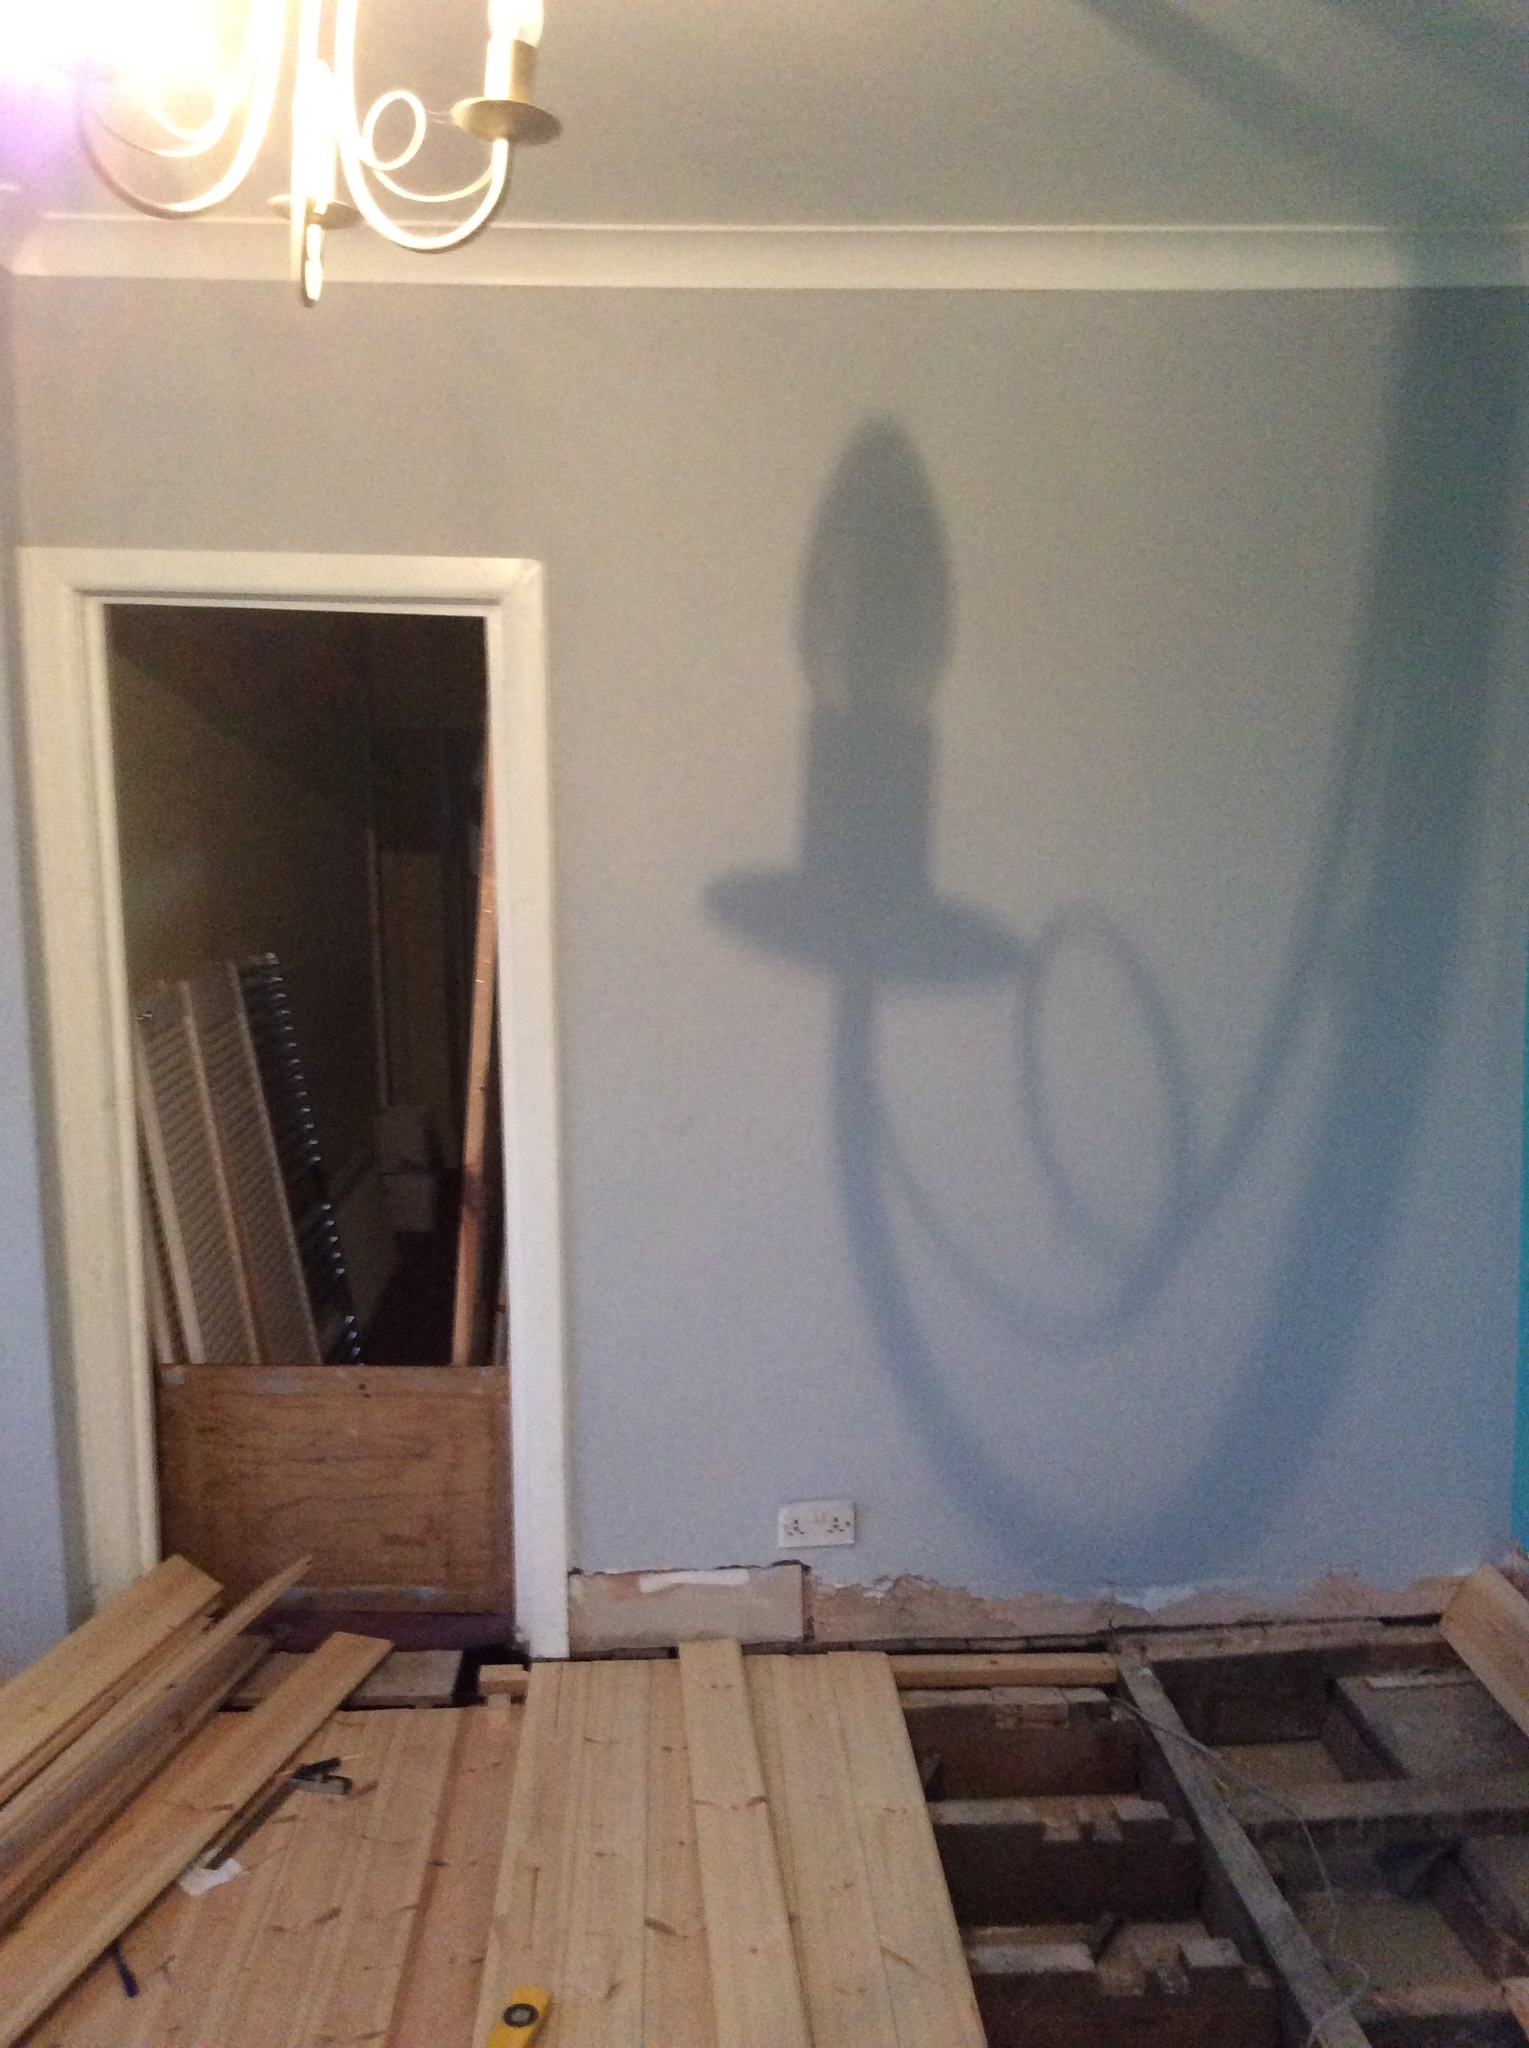
You may also notice that in the widest shot that includes the doorway, the architrave of the door frame also drops lower at the right hand side, so I’m a little worried the issue is caused by subsidence of the house.
The house is 1930s, by the way.

What’s the first thing I need to do? I’ve never actually laid a floor before, so I was really pleased a time how’s well the other two thirds had gone until now. Levelling this is certainly something I’ll need some of your expert advice for!

Thanks :p

Mod edit: tidied up your post. In Imgur once pictures have been uploaded either use share/copy option or right click "open image in new tab" (in Chrome) and copy/paste the JPG URL and then just use the Insert Image function when composing your post. HTH.
 
My initial thoughts...

Bolt supplementary joists (4"?) to the sides of the originals but level them (i.e. so they sit high where the dip is). Either notch over the centre joist and then support with spacers where the concrete is. The risk is that the new joists may drop so I'd use gripper plates between the two before tightening the bolts.
 
That's not cupping when the boards get a little dished across the board - that's a not flat floor. +1 for Matts suggestion. Sister the joists to get them flat fastening together with bolts or coach screws. Don't think you'd need grippers if you use coach screws. (but you do need a powerful impact driver to drive them) When you lay the boards you do need to clamp them together when you screw them down using either flooring clamps or a DIY method using expanding clamps and g clamps etc. The boards need to be clamped together tight then fixed before the clamps are removed. Always use flooring screws which are part threaded and never fully threaded screws. I also inhabit the screwfix forums where you will find builders and joiners, and not just woodworkers.

BTW, yes somethings shifted in the last 90 years, but unless there are cracks everywhere I would worry not. Old houses are not square!

And in any case, you can't really lay boards over all those notches nicely. Sistering will overcome that! When you buy your joists, eye them for straightness - not all wood is nice and straight!
 
Is there anything carrying the end of the joist? Looks like they are carried by a trimmer but there is no trimming joist carrying the trimmer? If there is a wall or something underneath will be okay but if not it needs checking out, it would explain why the floor has dropped.
 
I’d agree to sister the joists if that’s the only issue but best to investigate further as Doug suggests
 
matt":2uxgwlnf said:
My initial thoughts...

Bolt supplementary joists (4"?) to the sides of the originals but level them (i.e. so they sit high where the dip is). Either notch over the centre joist and then support with spacers where the concrete is. The risk is that the new joists may drop so I'd use gripper plates between the two before tightening the bolts.

I did think of doing this but didn’t know how best to implement it, so thanks for the tips!
 
mr rusty":2faz117x said:
That's not cupping when the boards get a little dished across the board - that's a not flat floor. +1 for Matts suggestion. Sister the joists to get them flat fastening together with bolts or coach screws. Don't think you'd need grippers if you use coach screws. (but you do need a powerful impact driver to drive them) When you lay the boards you do need to clamp them together when you screw them down using either flooring clamps or a DIY method using expanding clamps and g clamps etc. The boards need to be clamped together tight then fixed before the clamps are removed. Always use flooring screws which are part threaded and never fully threaded screws. I also inhabit the screwfix forums where you will find builders and joiners, and not just woodworkers.

BTW, yes somethings shifted in the last 90 years, but unless there are cracks everywhere I would worry not. Old houses are not square!

And in any case, you can't really lay boards over all those notches nicely. Sistering will overcome that! When you buy your joists, eye them for straightness - not all wood is nice and straight!

Thanks for the suggestions, I’ll certainly do it that way, then.
Cheers for the tips with clamping the boards too, as I hadn’t been doing that.
 
Doug71":1nlmmjtq said:
Is there anything carrying the end of the joist? Looks like they are carried by a trimmer but there is no trimming joist carrying the trimmer? If there is a wall or something underneath will be okay but if not it needs checking out, it would explain why the floor has dropped.

Not sure what you mean I’m afraid. As I say this is my first time laying a floor, so I’m not familiar with the concept of trimming joists, despite google imaging it.

To offer some background info; the wall is a stud wall that sits over the floorboards.
The original floor boards ran under the wall, so I’ve had to cut those off at the wall, and add some joist supports underneath the wall so the new boards have something to nail at the end.

Cheers
 
Just out of interest and perhaps to explain the unusual arrangement of joists, the dip, etc...

Was the house originally a 1930s Chalet style; subsequently converted to a "regular" style house? I only ask because the volume of cut-outs in the joists, all in close proximity, look like those you find in what would have been a loft room in the eaves to the side of the 1st floor bedrooms (in a chalet style house). An easy place to run services front to back of the house. Alternatively, was it an upstairs hallway?
 
Adam9453":1khihj7l said:
I’d agree to sister the joists if that’s the only issue but best to investigate further as Doug suggests

I showed this to my builder friend who's got a lot of experience dealing with older houses and he said all of the above, with the emphasis on the investigation part - then sister the joists, making sure you use the gripper rings between as suggested with BOLTS, don't be tempted to just use a few screws, making sure you split the difference between the centreline of the new wood and not too close to the top edge for the old joists and not near a cutout notch either,

You might even want to consider adding rockwoll in the voids to help heat stay downstairs if this is a whole house and not a flat, although if it's a flat rockwool will help with sound reduction too.

Hth
 
matt":3d61xzxs said:
Just out of interest and perhaps to explain the unusual arrangement of joists, the dip, etc...

Was the house originally a 1930s Chalet style; subsequently converted to a "regular" style house? I only ask because the volume of cut-outs in the joists, all in close proximity, look like those you find in what would have been a loft room in the eaves to the side of the 1st floor bedrooms (in a chalet style house). An easy place to run services front to back of the house. Alternatively, was it an upstairs hallway?

Okay, so I had a look for the very extensive documentation we have on the house but couldn’t put my hand where they’re filed. I’ll have a look again a bit later, but the gist of it is the house became an old people’s home in the 1970s sometime and then was changed to a private dwelling in 1995. Its always been a house, never flats as far as I know, and as I said before it’s 1930s era and a semi.

The room in question is a second floor bedroom; the one furthest along with hallway (the documentation would help here as I have full A3 plans of the layouts at different periods decades apart).
The room behind the wall you see I see is the bathroom (as I say, this is a stud wall laid over floorboards. The wall is original lath and plaster so presumably built with the house).

In the corner of the room (where the concrete is) there was a small shower room, as there was in all the upstairs bedrooms with it being an old people’s home in the past.
At first I presumed the concrete and mismatched joists were reminants of the shower room, but as you can see, they’re very old. The timbers are original and were presumably placed that way to support the concrete for the presumed fireplace(?).
Also worth mentioning is that half the rooms boards (including the Hall way, which by the way I see through the door you see in the pictures) were infected with wood worm, so half the room was hardboard and half floorboards after the treatment team sorted it.

It wasn’t chalet style house, so no idea why the notches are so numerous and placed this way (the sheer amount did strike me as odd, also).

Hope this helps, and thanks very much for taking the time to help!
 
rafezetter":2jelnqnb said:
Adam9453":2jelnqnb said:
I’d agree to sister the joists if that’s the only issue but best to investigate further as Doug suggests

I showed this to my builder friend who's got a lot of experience dealing with older houses and he said all of the above, with the emphasis on the investigation part - then sister the joists, making sure you use the gripper rings between as suggested with BOLTS, don't be tempted to just use a few screws, making sure you split the difference between the centreline of the new wood and not too close to the top edge for the old joists and not near a cutout notch either,

You might even want to consider adding rockwoll in the voids to help heat stay downstairs if this is a whole house and not a flat, although if it's a flat rockwool will help with sound reduction too.

Hth

Thanks for showing your builder friend; I’ll certainly be going that route once I’ve investigated and I’ll use bolts for sure.

I also had the Rockwool idea but I’ve already boarded two thirds of the floor before I realised. I could probably push the rockwool through underneath, but between some joists are criss-crossed timber braced between the two, so I’m not sure that’s possible.

Cheers :D
 
I'm not a builder or professional carpenter, but I did once successfully level a floor which was sloping about 2" along the room. I found that a laser level was really useful. I managed to clamp it in position in one corner, projecting a level line across towards the far side. Working back from that side of the room, I added long wedge shaped firring pieces on top of the existing joists. You'll be bolting extra joists on, to compensate for all those big notches, but the principle is the same - lift each one until its upper edge touches the line, then clamp it and bolt it in place. Work your way away from the wall towards the laser.

I bought a basic laser for the job - they are cheaper and cleverer nowadays.
 
When I suggested coach screws earlier I was referring to https://www.ironmongerydirect.co.uk/pro ... lsrc=aw.ds

not just a "few screws". Coach screws are designed to fix large timbers together and are immensely strong. They create a tight fixture which is perfectly in shear. A bolt in an oversize hole relies on mainly clamping pressure and hence needs grippers. If you think about how a bolt sits in an oversize hole you will realise there are pressure points around the edge of the hole. Also the potential drop is 2x the clearance - i.e. a 10mm bolt in an 11mm hole can drop 2mm.

when sistering, all the forces you want to resist are shear on the fixing, so all the benefit of high tension forces, like you get with a bolt fixing are lost. Personally, for sistering it's coach screws every time for me, combined with PU glue.
 
LFS19":1nxtlmw3 said:
Doug71":1nxtlmw3 said:
Is there anything carrying the end of the joist? Looks like they are carried by a trimmer but there is no trimming joist carrying the trimmer? If there is a wall or something underneath will be okay but if not it needs checking out, it would explain why the floor has dropped.

Not sure what you mean I’m afraid. As I say this is my first time laying a floor, so I’m not familiar with the concept of trimming joists, despite google imaging it.

To offer some background info; the wall is a stud wall that sits over the floorboards.
The original floor boards ran under the wall, so I’ve had to cut those off at the wall, and add some joist supports underneath the wall so the new boards have something to nail at the end.

Cheers

Basically I am concerned that those first four joist that you are fixing the floorboards to do not seem to be carried by anything? The end of them butts up to another joist (trimmer) that is parallel to your floorboards, they may be fixed to this I can't tell from the photo but the thing is even if they are fixed to it there looks to be nothing supporting the trimmer unless there is something underneath. This would explain the floor dropping at that point and needs attention.
 
Wholly agree with Doug.

I've been there. My wife once went to Sainsbury's one Saturday morning and returned to find the living room floor held up by three Acrow props and a building board (in our bedroom below)! I had opened it up and discovered three or four joists with the ends rotted away by damp.

Work out the structural issues first - they are by far the most important thing. It looks like the floor was modified at some stage and badly compromised around the fireplace - I can't see a joist carrying the right-hand end of the cross (bearer) joist and all the weight that is taking (my terminology might be a bit muddled but YSWIM).

If the floor was at all bouncy before you opened it up, you had your early warning back then!

E.
 
Back
Top