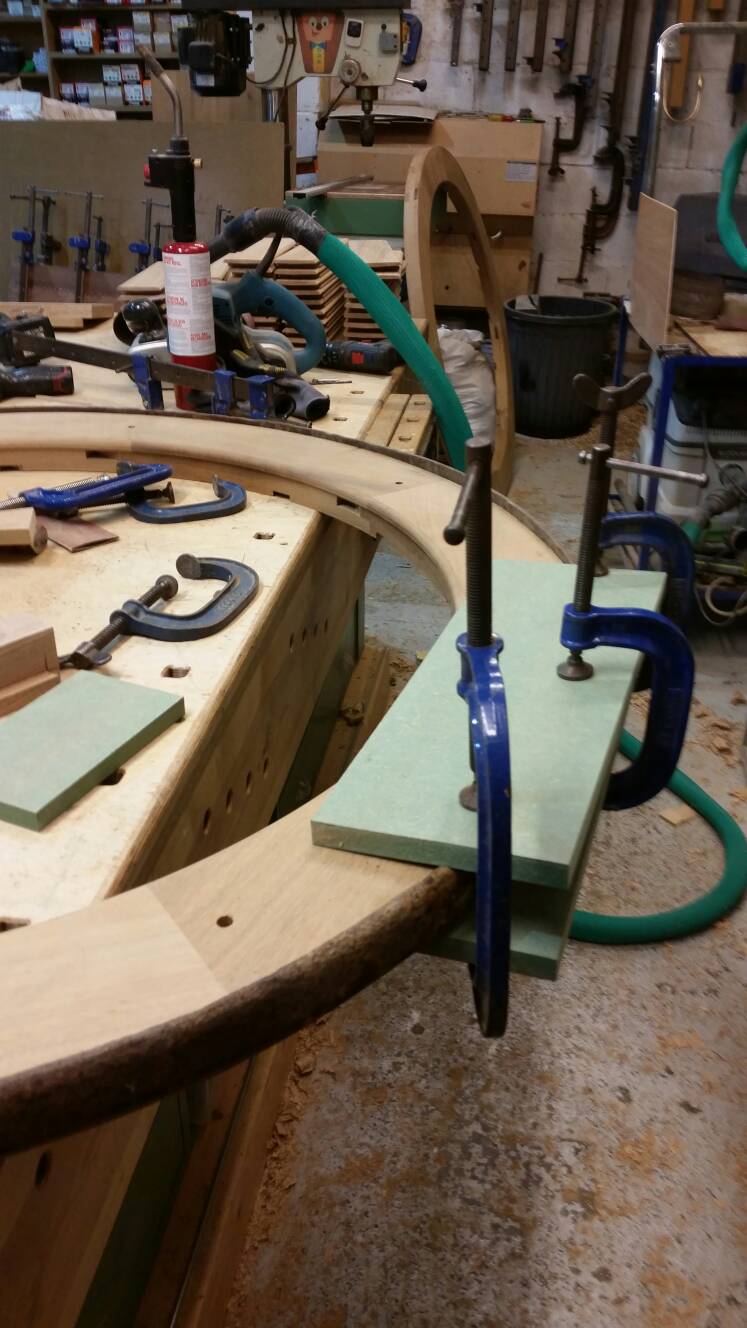
Garden waterwheel

UKworkshop.co.uk

Help Support UKworkshop.co.uk:

This site may earn a commission from merchant affiliate links, including eBay, Amazon, and others.
Hi Coley
Sorry to say my promise to post pics has come to nothing, the old computer that I understand sufficiently to compress photos and send them is on the fritz. The laptop is OK for access but I am clueless about sending photos with it. I will give it some effort!
Mike.
 
Bm101":2p0yvuwe said:
(Yay!) =D> And the whole interest in the boat varnishey stuff becomes clear. :D
:lol: it's a bit like searching for the holy grail ! I'm thinking I must have decided to let this weather naturally-I've found a box with bzp bolts, but strangely stainless steel dome head nuts.
n0legs":2p0yvuwe said:
'Bout time you got back to this :lol:
I'm dreadful for starting projects and leaving them unfinished :lol:
I'm gonna try and keep plodding away at it now ;)
Tackled the brake discs this afternoon
838b7330604f9cbf803976078eb020e7.jpg

Couldn't figure out how to accurately mark the position of the holes directly on it, so made an mdf jig
9824de578abd63682d41429b4dc1977a.jpg

Small pilot hole to start with
73c749fdde1dde13f4141318d51db5f4.jpg

Followed by an 11mm hole to allow a bit of wiggle room.
f7573257dda1762e9832427bf902eb84.jpg

That's a job I was dreading, but it drilled quite easily. The discs have tiny blobs holding each side together. I managed to catch a few of the blobs, which caused major wibble wobbles on a few holes. Hopefully there will be enough slop that it won't matter.
c692f76665b8b62b48d727e845586e10.jpg

Next job is to make the shaft- see you again in 6 months :lol:
Cheers
Coley
 
Mike Jordan":2d1ddxq0 said:
Hi Coley
Sorry to say my promise to post pics has come to nothing, the old computer that I understand sufficiently to compress photos and send them is on the fritz. The laptop is OK for access but I am clueless about sending photos with it. I will give it some effort!
Mike.
O.k Mike, I'm sure you'll master it.
Coley
 
Hi Coley
I'm hoping this is of some use, if the photos appear I will follow up tomorrow with details of what they are.
Mike.
Watermill No 2 004.jpg
Watermill No 2 005.jpg
Watermill No 2 006.jpg
Watermill No 2 008.jpg
Watermill No 2 011.jpg
 

Attachments

  • Watermill No 2 004.jpg
    Watermill No 2 004.jpg
    43.5 KB · Views: 681
  • Watermill No 2 005.jpg
    Watermill No 2 005.jpg
    26.2 KB · Views: 681
  • Watermill No 2 006.jpg
    Watermill No 2 006.jpg
    25.6 KB · Views: 681
  • Watermill No 2 008.jpg
    Watermill No 2 008.jpg
    38.2 KB · Views: 681
  • Watermill No 2 011.jpg
    Watermill No 2 011.jpg
    34.5 KB · Views: 681
Well I've doubled up on some and missed this one , I'm off to the local pub to celebrate a partial victory.
Mike. attachment=0]Watermill No 2 009.jpg[/attachment]
 

Attachments

  • Watermill No 2 009.jpg
    Watermill No 2 009.jpg
    39.6 KB · Views: 675
Wow wow and wow some more Mike !!!! The bloke on the rocking chair looks amazing! How on earth do you come up with the ideas ? I'm afraid I'm gonna have to pester you for a video next please. Can't wait to see it in action. Absolutely awesome !!
That bloke on the rocking chair looks really comical.
Thanks for posting the pics ;)
Coley
 
Hi Coley
The figures are 1-12 scale figures intended for use in dolls houses, made by a company called Leylin and sold on the internet. you get 7 fully dressed figures for about £11.00 They look much better than the wooden figures I made last time. The photos show the front and back (with the back panel removed) On the top floor there is a figure ironing and a cat, kitten, and hedgehog moving round in a circle, they move about 25mm for each rotation of the wheel. On the bottom floor the rocking chair rocks while the small child figure just moves forwards and back. The magnets that show how things are operated can be seen in the last photo. The magnets run on sheets of 5mm white Perspex.
I may have to send the video to your email address the same as last time. Feel free to post it if you think its worth it, there seems to be some interest in waterwheels!
My last effort has been given to a neighbour who is not concerned about moving figures and just wants to run the wheel as a decorative feature in its own right.
Mike.
 
Mike, I'm gobsmacked ! Words can't describe [SMILING FACE WITH OPEN MOUTH] I laughed out loud when I first saw the rocking chair start rocking with the old boy sat in the chair. It's just brilliant ! I love everything about it.
Thanks for getting the videos up. So do all those figures move about from just that one cam that's creating a forward and back motion ?
I'm not sure anybody could better that, ever.
Cheers
Coley

Sent from my SM-G900F using Tapatalk
 
Thanks for the kind remarks lads. In answer to your question coley yes it's just the excentric wheel that operates the figures. The animals going round in a circle have magnets on a toothed wheel that gets a push with each stroke. As you can see there is very little water needed, if more is used it tends to get thrown about as it comes off the wheel but everything moves faster.
 
It's certainly a masterpiece Mike. The only obvious difference from mine to your is the length of the spindle shaft. I'm guessing your goes right through with the cam on the end ? Mine just ends pretty much flush to the bearing - the only way to increase it would be to weld a bit on, which doesn't sound easy. I'm not gonna dwell on that too much just yet. I'll concentrate on getting a spinning wheel, then look at adding movement to it afterwards.
Coley
 
Thanks again! There are a lot of wheels on the net who's only job is to look good, so that's a good starting point. With a wheel the size of yours you might think of a full size rocking chair or swinging garden seat when time allows. I think the saw shaft will mean that the bearings are a suitable distance apart to ensure that the wheel is well supported.
Mike.
 
Mike Jordan":zl3xmty4 said:
Thanks again! There are a lot of wheels on the net who's only job is to look good, so that's a good starting point. With a wheel the size of yours you might think of a full size rocking chair or swinging garden seat when time allows. I think the saw shaft will mean that the bearings are a suitable distance apart to ensure that the wheel is well supported.
Mike.
Ha, I've actually got a rocking chair I rescued from the tip. I repaired it and painted it up so it's weatherproof for outside, the only thing is, its so bloody uncomfortable ! Should have left it at the tip :lol: Are you settled on your waterwheel now, or have you got other ideas floating around ?

Coley

Sent from my SM-G900F using Tapatalk
 
I'm pleased with the overall result and I'm hoping that it will keep going through the summer. Unless I can think of any minor additions I will be taking it back into the workshop before winter to see if the moving parts have worn or need any improvements. It's been enjoyable to make and a welcome change from boat building jobs. I'll be interested to see how you go on with the larger model, the sound and sight of the water is enough to make an attractive garden feature on its own.
Mike.
 
I did a tiny bit more to the wheel this morning.
9a7e530e67f854548be0a49cc66607ba.jpg

Planed up the wood for the shaft.
c6a15c2a2a177b4b2dcf53225c84e6e3.jpg

Drilled lots of holes for threaded inserts- its got 22 overall. 16 that clamp onto the shaft, and 6 that bolt the two halves together
e6da9411f083854f615880371845537e.jpg

Cut the larger bits with a 45 degree bevel
01bdee546a9bffb578e484756f81de2f.jpg

Glued the small bits to a bigger bit.
4802f186624a9d740083ae254843d025.jpg

37022ba78be4bfba39e41f9d865f45c9.jpg

Bolted the two halves together.
2776f88b4b1d482f6d0b77eec9241570.jpg

Then morticed the ends for the spokes.
29e9bbf9998389dbee520eac69710501.jpg

I need to make caps for each end to hold the spokes in place.
85b3ac77668870e2f0403524cd5ccc8e.jpg

Went to do a 10 minute job and dinner time- ended up taking the rest of the afternoon :lol:
It's slow progress !
Tenons on the spokes next.
Coley
 
Wood of life":dgv8168r said:
I have no experience of this - but will be following with interest.

Good luck
Thanks pal.
I managed an hour in the workshop on Sunday and tenoned the ends of the spokes.
0a39d88aaad43ece30856648ce7454d7.jpg

40f8204db5150660343f7ec22b5a8fe4.jpg

I need the tenoner set for a few days so was fairly important I got in first with this.
Yesterday was alot more productive....and enjoyable.
949fb68661335f3826a573efbceaff18.jpg

7e3f50071e0717541ab9de6b6c8b83c3.jpg

Squared up the sides of the tenons.
c89ff5a8d24d5d8356712e0baa63c2e2.jpg

Marked the position of the notches to fit against the rings
9a987182396e0209b251e913c2646a8b.jpg

Trench cut on the chopsaw for the notch.
039c987084903c69bcdd07c54f4bbd9f.jpg

Made a quick jig for the bandsaw to prevent the round bit from turning as it's cut.


Sent from my SM-G900F using Tapatalk
 
828b6b69053e04962d3efb1a5798859a.jpg

Cut some angles on the ends while I was over on the chopsaw. I'd have prefered round ends, this was just quicker.
8d6164064ab452e02ed4cc3b3ccebd13.jpg

902a74c42aea923810c8fe083e26840e.jpg

There's a bit of a gap on the notch. I did consider drilling a hole to match the round, but didn't think it was worth the headache of it tbh.
5d082c4ce5024c91fe620415c3e6f9f7.jpg

Drilling some holes to accept washers.
fd2de91c2f64b0c8c12aa1bb40ed7c06.jpg

58042fb5045996a05f876dcae86907c7.jpg

Drilled a mega sloppy 12mm hole for the 10mm bolts.
14834c0f01123e0ebfd591a33ef66423.jpg

The brake disc goes on the other side. I thought it'd be worthwhile seeing if the holes lined up.
88af70c6a770c906f825a9164b448d40.jpg

I've drilled some holes in the end of the tenons to keep it pulled in tight to the shaft.
b6d842b303fcb1436c6814f4e1812489.jpg

Measured the gap which gave me the measurements for the fin lengths.
Last thing was cutting the boards which go around the inside of the ring.
I reckon I could finish the wheel if I did it today. - its tempting, very tempting !
Cheers
Coley
 
Hi Coley
It's looking very good, and huge compared to my toy version. I'm looking forward to the video of the wheel spinning while you take a well earned rest in a deck chair listening to the soothing sound of the water!
Mike.
 
Mike Jordan":22kan3ii said:
Hi Coley
It's looking very good, and huge compared to my toy version. I'm looking forward to the video of the wheel spinning while you take a well earned rest in a deck chair listening to the soothing sound of the water!
Mike.
Thanks Mike. I've came to a full stop now as I'm having a rethink. The wheel is made though.
7a09a9bd9d6e199d43f32e9a95799b71.jpg

Slats and boards cut to length.
3796ba261a620c855914cdafff652c16.jpg

Trench cut the boards to form the rebate.
98299f5d9a4246056ad9c0068c452cf9.jpg

d7f14e069bb66ab0d9230d0787478514.jpg

The ends of the boards needed am angled cut to fit better against the inner circle.
bc0da28f49947532c783c849f4a4a8d7.jpg

The metal rings should have gone on fairly easy- one needed a few gentle taps, the other..
3744d7ae11b3dd91adf84755106d8642.jpg

dd6de81193dde83b1b45c1cbb33a1f7b.jpg

It was truly horrific ! I nearly caught one of the wheels on fire trying to heat the ring :lol: it's still not fully on, my only hope is the summer heat shrinks it loads and I can have another go. I must have taken over 2 hours trying to get that bloody thing on.
e0a3594b65e27b31e6ca4e4040d84607.jpg

Started fitting the boards and the slats. Each slat needed individually fitting cause the angle changed, depending on where it landed on the board.
5d505c075a9ca59a6da6f6738a56c0ad.jpg

Once the slat was in place I drilled as far as I could with a normal lip and spur, then joined the two up with a long twist bit. On the 8th and final slat the drill bit came straight out the side :lol: luckily I had a few spare.
23b9f0c1eaceb4b872502d59a9dd633e.jpg

The boards tgv boards were left over from a job. I boarded half way, then tried working out how much I needed to lose to make them meet. I planed 1mm off per board after that hoping they fit together at the end.The last board is 10mm narrower- not sure what happened there :lol:
b370bb3914a9330f07bac2f1fb5f0ed7.jpg

2a25a8c021cf511c35885e0ab604ab88.jpg

The other side dropped on remarkably easily.
f858fd8e36f03ac3845d983bb63d2ce8.jpg

I put a couple threaded bars right through, and then moved it onto the floor to work on - its quite heavy!
18b2c7cd7a25e91f3112b06897dda1e7.jpg
 
Back
Top