Female portion of sliding dovetail.

UKworkshop.co.uk

Help Support UKworkshop.co.uk:

This site may earn a commission from merchant affiliate links, including eBay, Amazon, and others.

woodbrains

Established Member
Joined
9 Aug 2010
Messages
2,129
Reaction score
13
Location
Liverpool
Hello,

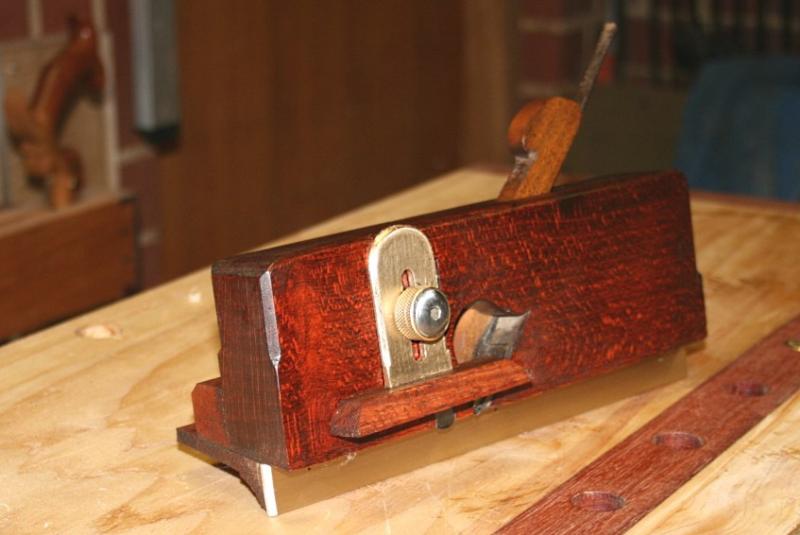
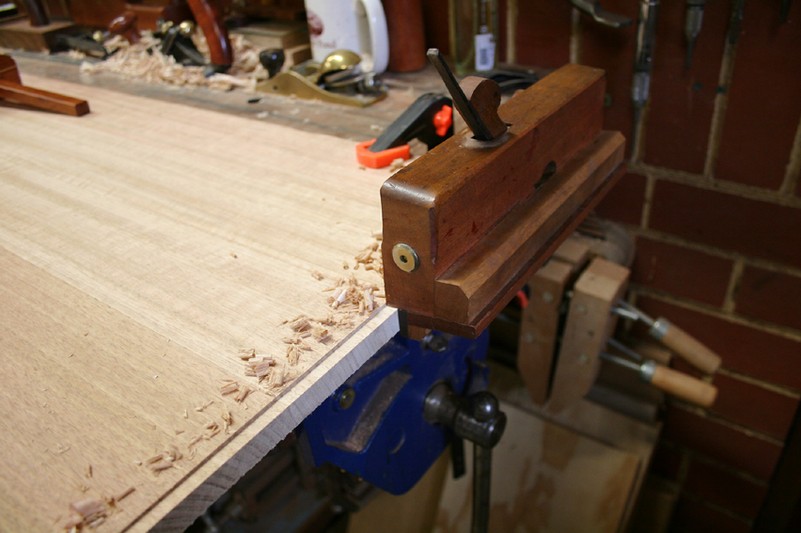
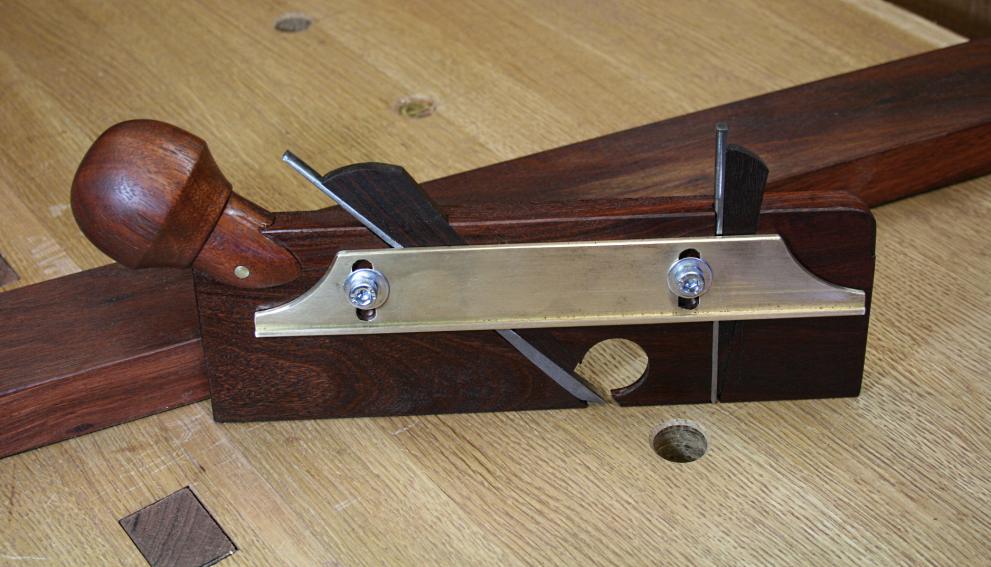
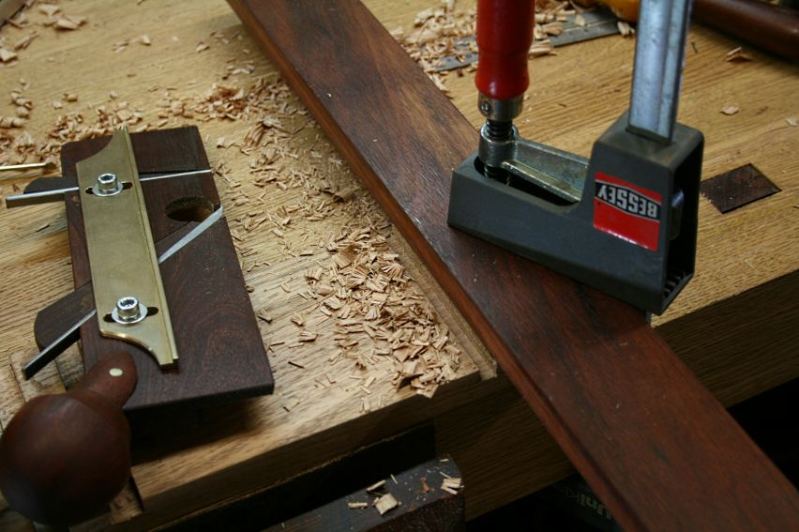
Planes exist for running the male portion of a sliding dovetail. In fact there are still some being manufactured in Europe as well as by specialist plane makers; Philly springs to mind. The only planes I know of, and I'm talking from a limited knowledge, for cutting the female portion, are japanese.

How do people here deal with the female part of this joint? It can be done with saws against an angled fence, router plane, snipes bill, side rebate plane, paring chisels......anyone have an ideal method, preferably one that is 'fine' looking on the show edge? Does anyone have a female dovetail plane? Commercial, vintage of user made.

Mike.
 
I used a saw, chisels and a router plane to level the bottom. Cut it a bit tight and do all the adjustments on the male part with a simple dovetail plane.
 
The show-off options for planing these would be a Howkins plane or a Stanley 444. Both are complicated, rare, valuable and generally described as too fiddly by anyone who has tried to use one, afaik.
I've done a few sliding dovetails on bookcases. I can't remember them all but for the last one I planed a block of wood to the desired angle, cramped it to the work and ran the saw along it. I used the same guide block and a wide chisel for easing the fit, cutting down rather than trying to plane along. I didn't take many photos but there are a few here hand-tooled-bookcase-in-ash-t51016.html.
The ends of the joint were stopped, which I prefer, though I still did my best to cut them accurately.

There's more of a tradition of using sliding dovetails in Germany and I'm pretty sure they do have special planes for it. I'll have a look for more information later. It was also commonly used to make up panels for oil paintings, with dovetailed cross members to keep the boards flat.
 
I suspect this is one of not many instances when a long, thin paring chisel could be very useful, for trimming after removing the bulk with saw, bench chisels and hand router.
 
Years since i did one but I seem to recall knifing lines, knifing out a V groove, using a freshly sharpened tenon saw freehand at 15º near as poss (looking at marks), taking out waste with a chisel and/or a little routing plane.. Any old narrow chisel will do, bevel down.
It's only the visible end which needs very careful attention as the rest of the joint is out of sight.
 
Jacob":5axij6ym said:
Years since i did one but I seem to recall knifing lines, knifing out a V groove, using a freshly sharpened tenon saw freehand at 15º near as poss (looking at marks), taking out waste with a chisel and/or a little routing plane.. Any old narrow chisel will do, bevel down.
It's only the visible end which needs very careful attention as the rest of the joint is out of sight.

I suspect that tightness of fit is not that critical in (for example) bookcase shelves, but it could be more important in some instances. One that springs to mind is the fitting between legs and turned central upstand of the type of tripod table base used in some high quality expandable dining tables and side tables - central stout pillar with (usually) three legs attached by sliding dovetails, and ending in brass castors.
 
The back board of our grandfather clock (1795-1810) has three sliding dovetails. IIRC it's made of three panels of wood that run the full height. The dovetails are also cut on a long taper across the three boards, so that the inserted battens lock everything together. It's all hand cut, obviously, but I can't see if the female parts are saw cut or chiselled (and I'm not taking the clock off the wall to have another look!).

I'm not quite sure why this approach was chosen. The "long" angle is probably only one or two degrees at most. Since the wood inevitably has to move a bit, you'd think it was pointless, as the dovetails would open and close too (the angles would change). It's not very structurally important either, as the weight carried (mainly the Clock itself and its weights) runs down (along) the three boards, so within reason it shouldn't matter that the boards gap or otherwise. I'm pretty certain it's deal of some sort, and too dirty to really see what exactly - doesn't feel dense enough to be elm.

It's possible the case is a lot later than the actual clock, but probably not by much, if at all. It certainly pre-dates any late-Victorian mechanisation in the woodworking shop.

So my extra question is not just how you might cut them, but why you would make them to wedge that way. It looks as though the battens grip across all three boards (and IIRC there are three battens and three boards), and the long wedges all seem to run the same way.

E.
 
Hello,

I've only ever done them with an electric router. I wonder if the common use of them these days is solely down to that, because the female portion seems too long winded to do if speed of production is important. The sliding dovetail in tripod tables, as CC mentions must be especially awkward to do. Almost all chiseling, as they usually have a turned element that is wider than the cylindrical part the sockets are in, limiting cutting with a saw and precluding any sort of plane. Shakers seemed to do this joint on everything!

The dovetail planes made by ECE Emmerich and Ulmia seem to have a market, so presumably there must be a lot if people making these joints by hand. I guess sawing along an angled block and chiseling, followed by a router plane is the way to go.

Mike.
 
Ok, more info as promised.

The article on use of sliding dovetails is in the TATHS Journal No 2. Go to this page http://www.taths.org.uk/reading/downloads and scroll down to download it as a pdf.
The author describes the use of a special pull-saw to cut the angled grooves. I guess there would be more benefit from a special tool if you were working across wide panels - I found an ordinary backsaw was fine.

There's a second article in the Journal about commercial offerings and a British tool that might have been used in this connection - the shouldering plane. Here it is as shown in the Mathieson catalogue of 1899

shouldering1.jpg


and here's my one - no maker's name on it - that I spotted on eBay for not a lot, and bought thinking I might never see another one. I bought it after I made the bookcase, so can't comment on how useful it might have been.


shouldering2.jpg


shouldering3.jpg


shouldering4.jpg


And for the tricky dovetails in a tripod table, watch Roy Underhill make them here - http://www.pbs.org/video/woodwrights-sh ... d-table-2/ from about 5 minutes in - it's all saw and chisel work.
 
Cheshirechappie":3twjp14o said:
Jacob":3twjp14o said:
Years since i did one but I seem to recall knifing lines, knifing out a V groove, using a freshly sharpened tenon saw freehand at 15º near as poss (looking at marks), taking out waste with a chisel and/or a little routing plane.. Any old narrow chisel will do, bevel down.
It's only the visible end which needs very careful attention as the rest of the joint is out of sight.

I suspect that tightness of fit is not that critical in (for example) bookcase shelves, but it could be more important in some instances. One that springs to mind is the fitting between legs and turned central upstand of the type of tripod table base used in some high quality expandable dining tables and side tables - central stout pillar with (usually) three legs attached by sliding dovetails, and ending in brass castors.
I'd see that as more of a dovetailed mortice and tenon with not much need for any sort of plane (except a little router?) due to short length.
 
I remember watching a youtube vid from the cabinetmakers shop at Colonial williamsburg. In it they were demonstrating the making of a stopped sliding dovetail joint, they were using what was described as Hessian/German tools and techniques. There was indeed a plane to make the male portion of the joint but the female was made using 2 saws (if i remember righlty) that looked a bit like what we would call Kerfing planes/Saws, They had tilted saw blades and they cut each side of the female part, being run backwards initially along a guide to create the inital kerf and then just run back and forth. The stopped end had a hole drilled to allow the saw to do its thing. The waste was removed with dovetail chisel and an old hag router. Was a good few years ago I watched it but the saws have always been at the back of my mind to make.

Stavros Gakos also has a vid of his matched pair of M/F dovetail planes that he made (He's Bulgarian so no voiceover):
https://www.youtube.com/watch?v=CguFhVj-OEY

Vid of the Stanley 444 here:
https://www.youtube.com/watch?v=35ErH4WSK_k


Here is a vid using the german tools, couldn't find the williamsburg one though - yet:
https://www.youtube.com/watch?v=_GzfKY_bc6g
edit ti add links
 
Thanks for those Droogs, they do confirm what was in the article about it being favoured in Germany. I thought it was interesting in the third video to see the design conflict in the saw. You want fine teeth for a smooth cut but they soon clog up with sawdust over a long cut. I couldn't follow the commentary but presumably he switched to the Japanese saw to get deeper gullets and less tendency to clog up.

Interesting too to see which way round he had his bevelled batten to guide the saw. The way he had it, any drift away from the guide would bring the cut the wrong side of the line.

I know I experimented, with a guide that way round, and also the other way, so any drift would bring the cut into the waste, giving me a chance to correct it afterwards. Unfortunately I can't remember which way I preferred, so next time round will be a fresh chance to learn from scratch again :).
 
I've made one that cuts the male (this is the tarted up version) ...

EvolvingADovetailPlane2_html_m666ace45.jpg


EvolvingADovetailPlane2_html_m56ddd883.jpg


Link: http://www.inthewoodshop.com/ShopMadeTo ... lane2.html

I've made a female plane ....

PlaningTheSlidingDovetail_html_68e32bb9.jpg


PlaningTheSlidingDovetail_html_m78070689.jpg


Link: http://www.inthewoodshop.com/ShopMadeTo ... etail.html

I've modified the Veritas Small Plow to cut male dovetails ...

SlidingDovetailsWithTheSmallPlow_html_427a18aa.jpg


Link: http://www.inthewoodshop.com/ShopMadeTo ... lPlow.html

And I've modified the Stanley #79 to cut both male and female dovetails!

SlidingDovetailsWithTheStanley79_html_680e7f25.jpg


SlidingDovetailsWithTheStanley79_html_99d553c.jpg


SlidingDovetailsWithTheStanley79_html_bcb2049.jpg


Link: http://www.inthewoodshop.com/ShopMadeTo ... ley79.html

Regards from Perth

Derek
 
AndyT":1gjkh67k said:
Ok, more info as promised.

The article on use of sliding dovetails is in the TATHS Journal No 2. Go to this page http://www.taths.org.uk/reading/downloads and scroll down to download it as a pdf.
The author describes the use of a special pull-saw to cut the angled grooves. I guess there would be more benefit from a special tool if you were working across wide panels - I found an ordinary backsaw was fine.

There's a second article in the Journal about commercial offerings and a British tool that might have been used in this connection - the shouldering plane. Here it is as shown in the Mathieson catalogue of 1899

shouldering1.jpg


and here's my one - no maker's name on it - that I spotted on eBay for not a lot, and bought thinking I might never see another one. I bought it after I made the bookcase, so can't comment on how useful it might have been.


shouldering2.jpg


shouldering3.jpg


shouldering4.jpg


And for the tricky dovetails in a tripod table, watch Roy Underhill make them here - http://www.pbs.org/video/woodwrights-sh ... d-table-2/ from about 5 minutes in - it's all saw and chisel work.

Hello,

The shouldering plane looks wider than I would have expected. This looks ideal for the female part for dovetailed batons, such as you might find in the wide lid of a chest, or boarded and batoned cabinet backs. But for bookcase shelves into cabinet sides, I should think it too wide for most applications. Did the plane come in different (narrower) widths? I suppose one could be easily enough made. I'm surprised the makers of the dovetail plane don't make them, they look to be a mirror image of the dovetail plane, all be it without bottom fence. I wonder if a metal combination plane could be used, with a suitably ground plough iron and only one skate?

Mike.
 
I had a go at long sliding dovetails for a bookcase - I think I posted it here somewhere. My first idea was to make a pair of planes, but I wanted to get on with it so ...

I first tried cutting the female part with two angled saw cuts using a guide block as described already, removing the waste between with a chisel and router plane. As mentioned, the saw clogging was an issue, I found it easier to cut a dado without the guide block, then undercut the sides with an angled side rebate plane. I wonder if an azebiki might be useful.

The male part I cut with a cutting gauge, then a plain woodie skewed rebate plane, first upright, then tilted to the dovetail angle. The bit of waste you can't plane out of the corner is easily removed with knife and chisel.
 
Hello Derek,

Are you a Leftie, Derek. Both your male and female planes are mirror images of what I would think a right handed person would use, and indeed suggested by the vintage ones shown. And if you are left handed, why don't you have the left hand version of the Veritas rebate plane? Is it something to do with you being down under, I'm confused?

Mike.
 
Hi Mike

I'm right-handed. :) Some planes are inter-changeable.

I have both left- and right Veritas rebate planes, but rarely use the left. The right does both sides.

Regards from Perth

Derek
 

Latest posts

Back
Top