Competition Entry - Toybox WIP - IT'S FINISHED!!!!!

UKworkshop.co.uk

Help Support UKworkshop.co.uk:

This site may earn a commission from merchant affiliate links, including eBay, Amazon, and others.

TheTiddles

Established Member
Joined
14 Oct 2007
Messages
3,023
Reaction score
837
Location
Wiltshire
Right then, time to start on this one whilst the copy-lathe is in work...

Just to remind you all...

Entry Level: Beginner, unless otherwise advised...

Design Brief: A toybox for my goddaughter designed such that it can double as an occasional table in the lounge where toys can be quickly thrown in to tidy up.

There is a design but that's on another computer, I'll add it during the week.

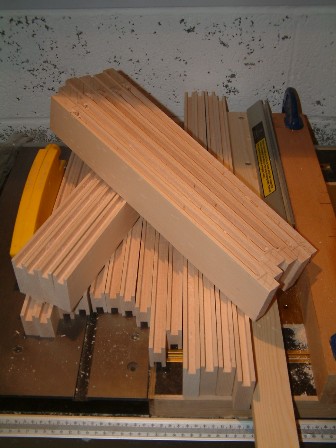
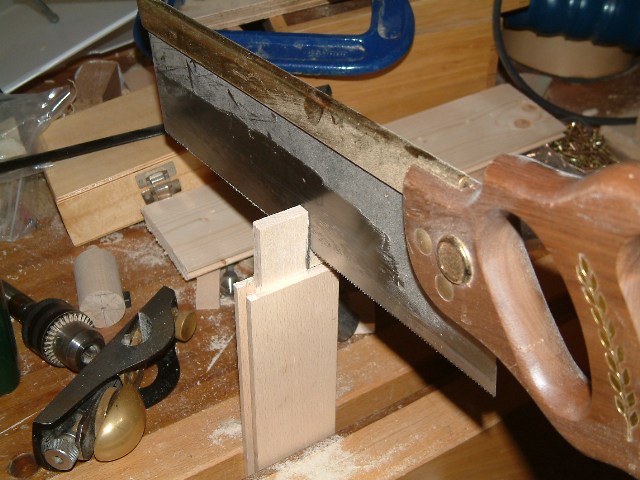
I started by getting some wood, I know I'm in the beginner category but I think this is definitely one of the best ways to start a woodwork project. The beech for the top and frame was purchased with the intention of ripping it up and leaving it indoors sticked up to dry for a couple of weeks, a couple of months later, here it is

3733446952_3e4b939956.jpg


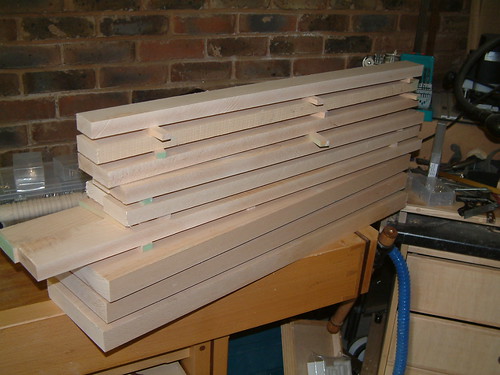
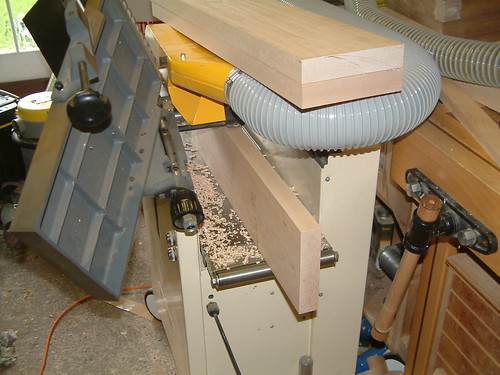
It's very clean looking as the boards from that supplier are sanded smooth so you can see exactly what you are buying, but don't be fooled that they are straight and square you still need to do the usual work, so we did...

3732647665_f62839ae9c.jpg


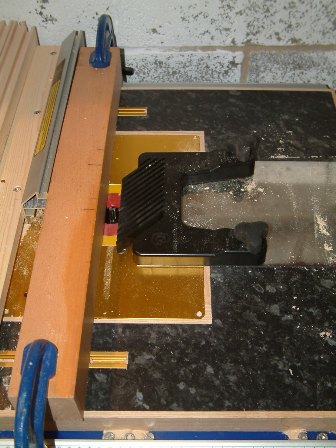
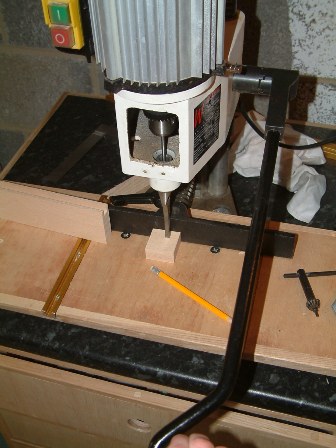
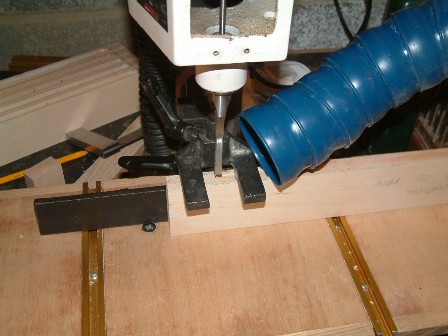
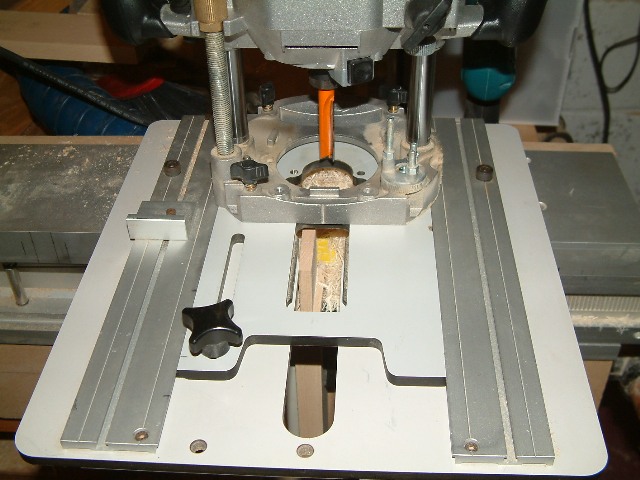
With that all done I started with the easiest bit, the top, which is just three boards joined together, I've used some biscuits for alignment which are cut with a router, this cutter is ages old, cost about a fiver and it really crappy, I need a new one as I just don't use them enough to get a machine specifically for it.

3732648073_2ee97293a9.jpg


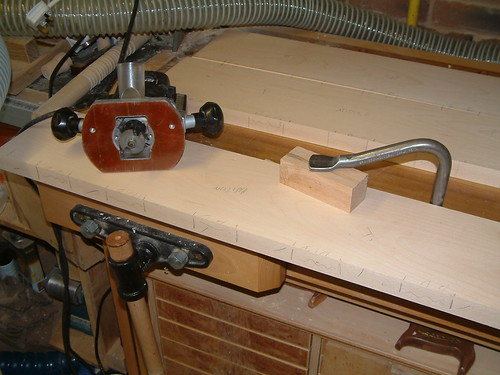
The piece is easily held secure with the iron hold-down from last year's Secret Santa, it's amazingly good for something so simple, must get a couple more one day. Please avert your eyes from the unfinished tool cabinet below, still awaiting knobs...

3733448376_552d0ac498.jpg


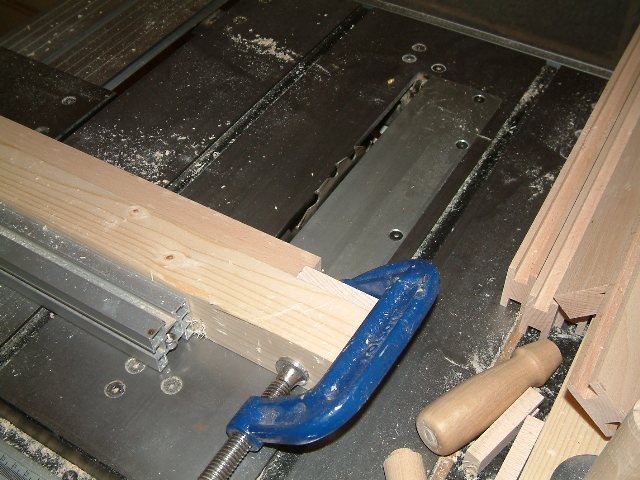
Using fizzy glue which on a warm day like today was going off rather faster than I would ideally like the parts are clamped with panel clamps first and then the extras just to squeeze it tight. I would like to add a note of appreciation to the local journalists, who do a fantastic job of supplying an easily located pack of thin glue protective membranes, though you really don't have to go to the effort of printing on them all, nobody's ever going to read it and take the staples out they just get in the way when separating them.

I haven't bought the wood for the panels yet, I was thinking spalted beech but given how light the framework will be maybe something darker like zebrano would be more striking, anyway, plenty of time for that now I've finally started...

Aidan
 
Always good to see someone making a start on their competition entry. :)

If you're interested, I've got a cheap Charnwood set for biscuit-jointing with a a router (I think it's one cutter and arbour with bearings that vary in width). I bought it last year but I know I'm never going to use it... I doubt it's even up to Trend quality so, could have it for £10 or something?
 
Facing reality, there's no way this project will be done as I've been without a workshop for a few months and I'm only just getting the new one up and running.

I'm out :cry:

Aidan
 
Bigger and better one?

Last night i was watching a bit of Johnathon Creek and the army had a huge aircraft hanger and i went oooowww aaahhh and i got a "that's not a workshop its an aircraft hanger" speech. She can't believe i'm outgrowing 750 square feet.
 
Right, time to get on with this again or I'll never win that prize...

Here's my rather incapable router setup for putting the dados in, a great cutter in a great router with a featherboard that is only facing the right way 50% of the time
4320202362_3b0bf81ffa_o.jpg

This router table is scheduled for termination very soon, I've used it twice and it's totally rubbish, still, with a lot of holding on tight and three hours of Radio 4 podcasts there all done, the reason I didn't use a large diameter cutter on the side was the stop on the verticals, in hindsight I should have cut right through with the table saw and filled it later, nobody would notice.
4319468999_5c096856f9_o.jpg

Next stop is the mortices, not used these small chisels before, normally I use the large chisels on softwoods so I was going to clear them mostly with a drill bit first but after setting the depth
4320202474_0fee6008a9_o.jpg

The chisel cut very nicely through the beech, I suppose the pressure on a chisel 20% the size of the largest should have that effect. The extractor having only one speed was guzzling air through the elephant's trunk which with the temperature just above zero today was enough to freeze my fingers
4320202604_9f72c983e2_o.jpg

So all done except the mortices for the outside stiles of the front and back frames, I want to make absolutely sure the spacing is right so I'll probably cut the tenons on the rails before measuring the positions for the mortices.
4319469481_3228f70553_o.jpg

So that's got you pros all aquiver now you've seen another helping of my fantastic entry, it's a winner for sure.

Aidan
 
You're nearly as slow as me....

Nice hold down.
 
TheTiddles":niwo5h32 said:
No surrender, VICTORY WILL BE MINE!
Having seen Aiden's project in person last night, I can assure all that it's in the bag...a re-run of the comp will have to be held 8-[ - Rob
 
Some small progress this week, I'm being very cautious as although unusually I have a full plan to work to I don't want to cockup one joint of a minimum of 4 and have to remake an entire frame. So I'm setting the rails into the stiles first, then cutting the vertical panel divider mortices then the panel dividers to make sure they fit.
4337762660_61d6e7794b_o.jpg

Here's a simple setup to scribe the shoulders for the tennons without breakout, the stop is set at 40mm and the blade guards are removed for clarity... :lol:

The cleaning back of the shoulders is done on the woodrat, I was going to do this on a tennoning jig on the table saw but then I'd have to shift the stops for the scribing so creating a loophole for innacuracy to creep in. This is the first time I've used my T11 on the woodrat and what a difference from the T5, the 40mm stock removal was done in 3 passes instead of 20.
4337762750_4d1b7447ea_o.jpg


With the majority of material removed such that the tennon is a slightly too close a fit in the dado and socket I'm doing the fun bit by hand and fitting each one the old fashioned way.
4337762922_bec671f376_o.jpg


Once I've got all the parts cut there's going to be a stack of these to do but that's a much more pleasant job that can have as much or as little time spent on it as and when I get to it.

By leaving the saw, router and mortiser all set up I should be able to get very repeatable results on these joints, although I have a mess in the workshop...
4337763046_452ee51364_o.jpg


That's all for this week

Aidan
 
Hmmm, one year on...
Rosa's Toy Box - Sunday 6th March 2011 - 001 (640x427).jpg


I've just fitted the front panel rails together and joined the side panels to the back (just dry). I was going to fork out on a new giant mitre-lock router bit, but in the end I just added a rebate and a step.

Next, panels to be veneered and inside faces finished, I'm going to practive on some scrap beech first.

I laid the top on to see how it goes, over the last couple of years it's warped a bit and it doesn't sit well on top, it needs making smaller and maybe a chamfer underneath, we will see...

Aidan
 

Attachments

  • Rosa's Toy Box - Sunday 6th March 2011 - 001 (640x427).jpg
    Rosa's Toy Box - Sunday 6th March 2011 - 001 (640x427).jpg
    80.8 KB · Views: 1,566
A bit more progress this week.

I've hastily rebuilt my vacuum press for this, I've added three aluminium water bottles to act as an accumulator and switched the one big pump for two smaller, twin-head versions, the additional vacuum gauge isn't essential but it shows that I'm getting 12-13psi which is plenty
Rosa's Toy Box - Saturday 19th March 2011- 001 (463x640).jpg

There are only two panels that are bookmatched, the centre front and centre back, just as well as I hate shooting veneers together, it never seems to go right, I ended up sanding these to get a hard edge. The substrate is 8mm exterior ply, I'm only intending to use a veneer on one side.
Rosa's Toy Box - Saturday 19th March 2011- 002 (640x427).jpg

That said, even a thin veneer has made the panels bow so I'm going to have to put a balancing veneer on the inside where it will never be seen! Pity, as I only have some walnut left or break into a complete bundle of cherry, so lovely black walnut for the invisible insides. Here you can see the panels so far for the back, left and right, the final front panels are in the press left of the shot. They have been sanded back and sealed with shellac sealer and I'll give them a few more thin coats before a final finish.
Rosa's Toy Box - Saturday 19th March 2011- 003 (640x427).jpg

The rails will be skimmed with a sharp plane and sanded prior to the finish being applied on the internal faces, I'm going to varnish this piece as it's going to get a rough ride for a few years. Will acrylic varnish go over shellac sealer on the panels too?

Aidan
 

Attachments

  • Rosa's Toy Box - Saturday 19th March 2011- 001 (463x640).jpg
    Rosa's Toy Box - Saturday 19th March 2011- 001 (463x640).jpg
    104.5 KB · Views: 1,358
  • Rosa's Toy Box - Saturday 19th March 2011- 002 (640x427).jpg
    Rosa's Toy Box - Saturday 19th March 2011- 002 (640x427).jpg
    74.5 KB · Views: 1,358
  • Rosa's Toy Box - Saturday 19th March 2011- 003 (640x427).jpg
    Rosa's Toy Box - Saturday 19th March 2011- 003 (640x427).jpg
    90.1 KB · Views: 1,358
Tramping along now...
Rosa's Toy Box - Monday 21st March 2011 - 001 (640x427).jpg

I've dry-fitted the panels into the frames, there's just shellac sealer on the panels for the moment but I've ordered some Fiddes hard wax oil today and if that works ok on a sample area that's what's going on.
Rosa's Toy Box - Monday 21st March 2011 - 002 (640x427).jpg

The drawer front is too large to to fit (thankfully) so is just presented to the front. Here showing the front matched panels. The top rail that sits just behind the drawer front has been dovetailed in on both sides and you can see in the background
Rosa's Toy Box - Monday 21st March 2011 - 003 (640x427).jpg

and here the walnut backing veneer on the panels. It's flattened the panels nicely so they don't have a small gap at the midde from the bow. I don't really know how to fix the bottom rail in, I could put in a sliding dovetail from the rail side of the sides but then I can't assemble the frames separately and there isn't too much material there to work with. A very small tennon could be made but as I'm probably going to reinforce it with glue blocks anyway I'm leaning towards something crude like dowels. Thoughts?
Rosa's Toy Box - Monday 21st March 2011 - 004 (640x427).jpg

This final shot is the back of the piece, I didn't have 12 leaves of the qilted maple, just 10 so the centre panel is the offcuts from the centre panel of the front, which is large enough by just a few mm, it's not ideal but it doesn't scream "odd" like using a different timber would have
Rosa's Toy Box - Monday 21st March 2011 - 005 (640x427).jpg
 

Attachments

  • Rosa's Toy Box - Monday 21st March 2011 - 001 (640x427).jpg
    Rosa's Toy Box - Monday 21st March 2011 - 001 (640x427).jpg
    71.4 KB · Views: 1,248
  • Rosa's Toy Box - Monday 21st March 2011 - 002 (640x427).jpg
    Rosa's Toy Box - Monday 21st March 2011 - 002 (640x427).jpg
    68.4 KB · Views: 1,248
  • Rosa's Toy Box - Monday 21st March 2011 - 003 (640x427).jpg
    Rosa's Toy Box - Monday 21st March 2011 - 003 (640x427).jpg
    63.9 KB · Views: 1,248
  • Rosa's Toy Box - Monday 21st March 2011 - 004 (640x427).jpg
    Rosa's Toy Box - Monday 21st March 2011 - 004 (640x427).jpg
    72.6 KB · Views: 1,248
  • Rosa's Toy Box - Monday 21st March 2011 - 005 (640x427).jpg
    Rosa's Toy Box - Monday 21st March 2011 - 005 (640x427).jpg
    68 KB · Views: 1,248
Those panels look amazing, I don't know which side is better. I really like the walnut but the maple looks amazing as well.
 
The contrast of beech and walnut has convinced me to do that on the showerroom cabinet next on the list, thing is, I also have a bathroom and cloakroom needing cabinets... why can't anything be simple??
 
Right, a quite impressive 2 years from the start and closing on 3 years from conception... it's finished!
Rosa's Toy Box - 20110710 - 001 (640x453).jpg
Rosa's Toy Box - 20110710 - 003 (640x454).jpg
Rosa's Toy Box - 20110710 - 004 (640x451).jpg
Rosa's Toy Box - 20110710 - 005 (640x453).jpg
Rosa's Toy Box - 20110710 - 006 (640x453).jpg
Rosa's Toy Box - 20110710 - 007 (640x406).jpg
Rosa's Toy Box - 20110710 - 009 (640x453).jpg
Rosa's Toy Box - 20110710 - 010 (640x427).jpg
 

Attachments

  • Rosa's Toy Box - 20110710 - 001 (640x453).jpg
    Rosa's Toy Box - 20110710 - 001 (640x453).jpg
    71.8 KB · Views: 680
  • Rosa's Toy Box - 20110710 - 003 (640x454).jpg
    Rosa's Toy Box - 20110710 - 003 (640x454).jpg
    82.4 KB · Views: 679
  • Rosa's Toy Box - 20110710 - 004 (640x451).jpg
    Rosa's Toy Box - 20110710 - 004 (640x451).jpg
    74.2 KB · Views: 680
  • Rosa's Toy Box - 20110710 - 005 (640x453).jpg
    Rosa's Toy Box - 20110710 - 005 (640x453).jpg
    70.8 KB · Views: 680
  • Rosa's Toy Box - 20110710 - 006 (640x453).jpg
    Rosa's Toy Box - 20110710 - 006 (640x453).jpg
    76.1 KB · Views: 680
  • Rosa's Toy Box - 20110710 - 007 (640x406).jpg
    Rosa's Toy Box - 20110710 - 007 (640x406).jpg
    69 KB · Views: 680
  • Rosa's Toy Box - 20110710 - 008 (640x425).jpg
    Rosa's Toy Box - 20110710 - 008 (640x425).jpg
    57.5 KB · Views: 677
  • Rosa's Toy Box - 20110710 - 009 (640x453).jpg
    Rosa's Toy Box - 20110710 - 009 (640x453).jpg
    75 KB · Views: 680
  • Rosa's Toy Box - 20110710 - 010 (640x427).jpg
    Rosa's Toy Box - 20110710 - 010 (640x427).jpg
    78.1 KB · Views: 679
That is a cracking piece of work. The detail looks outstanding very jealous of your skills to make it. I love the idea of a pull out draw as opposed to a lid. Please email me the design drawings if you done any.
 
Well worth the wait, lovely piece! Really like that wood and its finish overall is excellent.
 
Good looking piece Aiden and your veneering has come out very well, nice job. Two comments/queries from me, the knob doesn't look quite right to me, it needs something bigger (handle rather than knob) which then leads to a query about how it works and its placement. What runners do you have in there and have you tried it fully loaded up? If it's a wood on wood runner with a small handle at the top it may jam or stick, might work better with a bigger handle in the middle

Good job though

Cheers Damian
 
Back
Top