bugbear":1osozvp9 said:
Peter's video must be excellent - watching it has not only improved your chisel - it's improved your photography!
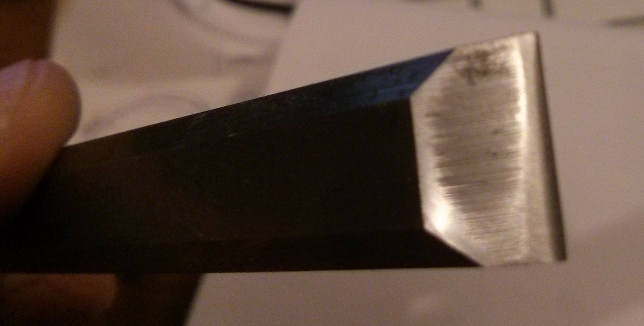
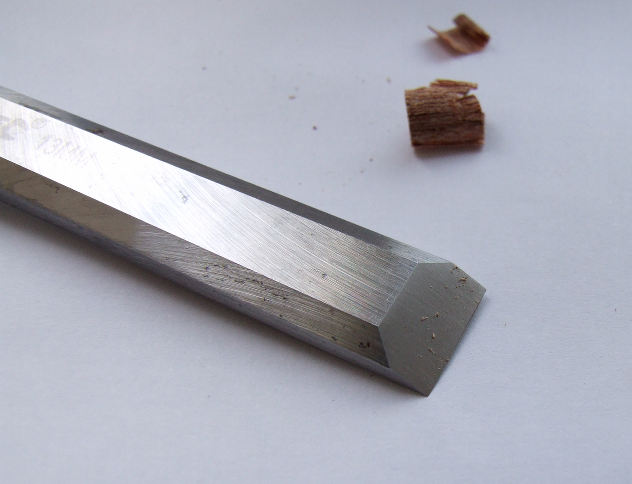
The sun was out today and you can probably see I did it all by a window, but I also managed to borrow a half decent camera for these shots. That plus a few hours taking and retaking the pictures until I'd worked out how to focus it properly :lol:
Peter Sefton":1osozvp9 said:
That's looking better ScaredyCat, I am very pleased you have found the video useful

Very much so.
I'll try not to be too gushing in my write up
Peter Sefton":1osozvp9 said:
What equipment have you used to improve the edge or which method did you use?
Before my post I'd got hold of some sharpening stones from Amazon, a company called Bearmoo. They do double sided whetstones like the one in your video, but I suspect not quite the same quality. I have two of them 250/800 and 400/1000. I'm already in trouble for using one of the best towels to lay everything on, it's not in a good state.
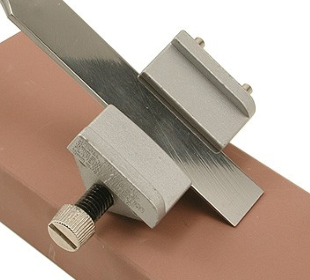
I'd also ordered one of those Dakota (I think it's the same as the elipse one you refer to) honing guides like this:
To be honest it's quite a bit of trouble to use. The instructions on it were pretty dire, especially if you've never done any honing before. At first I had the chisel resting on the silver rods that hold the side plates on. Then I realised that perhaps the chisel needed to rest in the groves (1:30:41 in your video helped
) and then of course the gripping mechanism is really quite fiddly. Trying to keep 30mm/40mm of the chisel sticking out while tightening the knob on the side isn't easy when there's no support underneath and the side groves are dodgy at best. Of course when you've done that and started honing the chisel you look at the end and you think, that's not right, it looks slanted. So you check and it's not square in the holder and you have to start again. I swear it took me nearly 30 minutes to get it sorted out.
To add insult to injury, you sell the same device on your site for less than half of what I paid from Rutlands
. At least I'm now aware of your site
I'll keep going with the stones for now, but I think I'll move to the 'scary sharp' film method at some point. It seems a lot cleaner, with less mess. I'd be interested to know if the Veritas system has similar issues. You made it look easy in the video and I see that it has the slide on part to act as a stop for the length but it did still look like you had to do a little finger gymnastics to get the chisel seated.
p.s. I only do my woodworking in a Mankini, no string vests. :wink: