


Bluekingfisher
Established Member
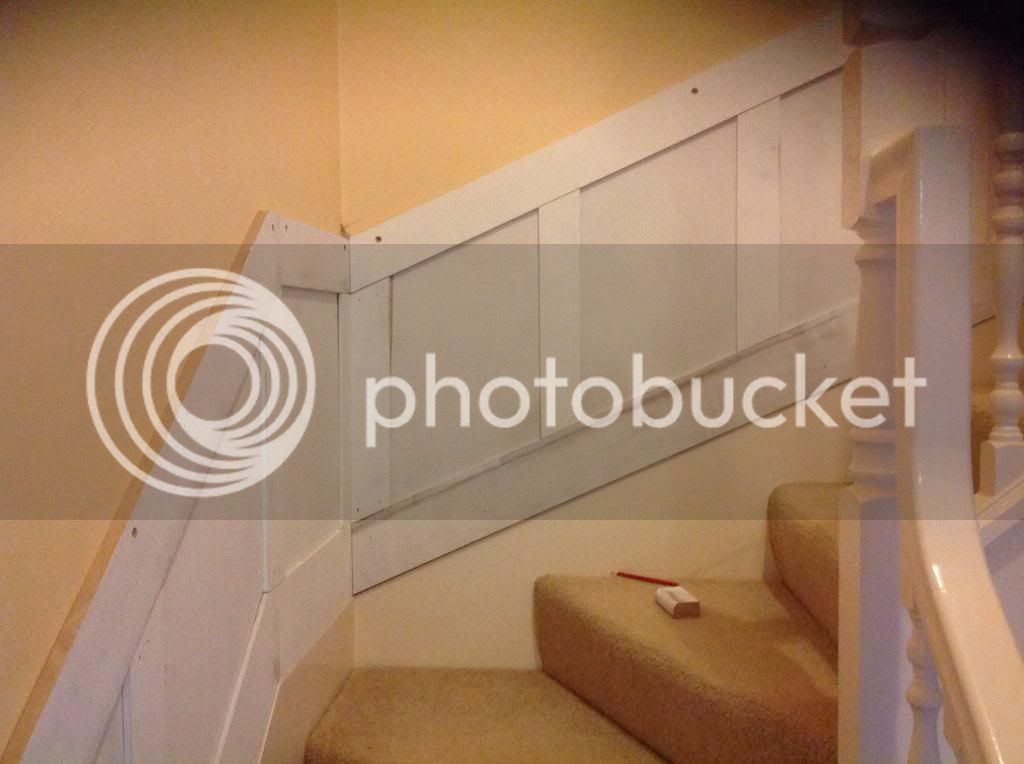
Gents/ladies I am currently installing wainscoting panelling on the stairs. Our stair is not a traditional straight affair, instead the stairs turn 180 degrees on themselves at the top from the bottom. This means that where the stairs turn 90 degrees from the level. However as the stair turns it raise 35 degrees from the horizontal.
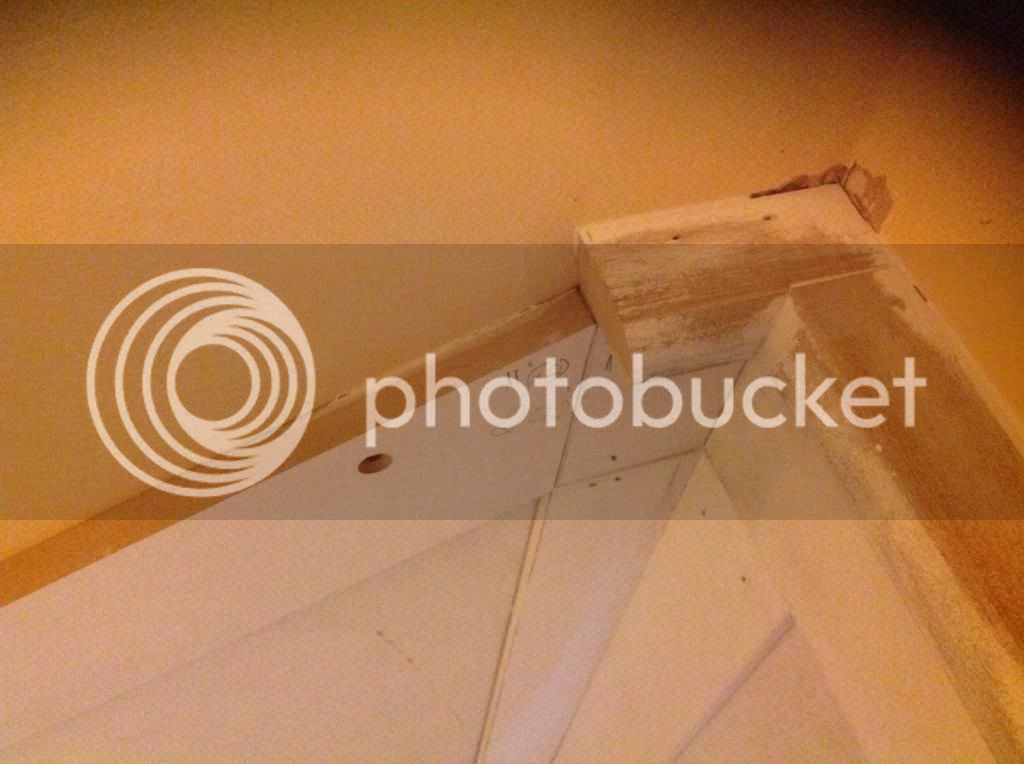
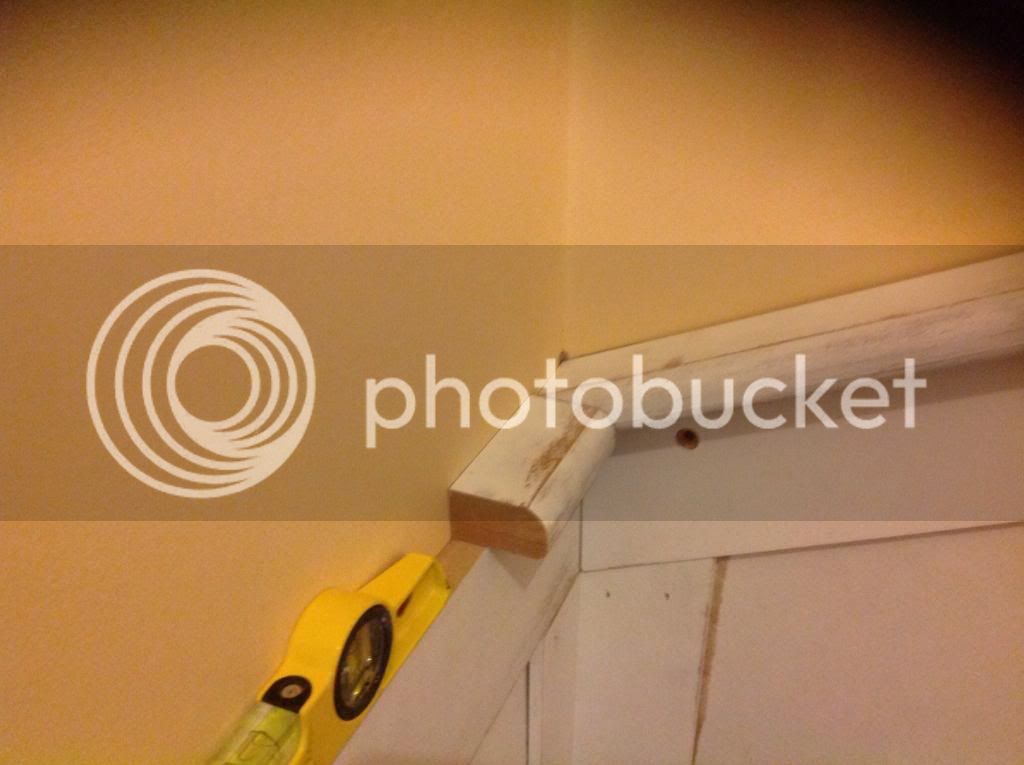
I am installing a 50mm chair rail/cap to the top of the panels. This is where I cannot for the life of me work out how to calculate the angles for the mating scribed joint.
I need to scribe the right angle joint where as mentioned one side of the joint raises 35 degrees from the horizontal plane.
I am not even sure I have described it correctly so will try to up load some photos
The last picture shows where my problem is. Hope the photos make more sense?
Any advice much appreciated
 http://www.amazon.com/dp/B000P4JP66/


")


