You are using an out of date browser. It may not display this or other websites correctly.
You should upgrade or use an alternative browser.
You should upgrade or use an alternative browser.
Building windows
- Thread starter John Smith
- Start date


Help Support UKworkshop.co.uk:
This site may earn a commission from merchant affiliate
links, including eBay, Amazon, and others.
joiner_sim
Established Member
About 22mm for the stiles would be about right. I'd go for 32mm thick stiles on a spiral balance sash. You want to cut a slit in the head for the wag tails. Then slip the wag tail in loose, with a nail half way thru the wag tail, then it just hangs off the head. As its just been said, you need a loose wag tail to install the weights. On a double box sash, the stile cover can be trenched in between the head and cill, but the two wag tails still need to be loose.
John Smith
Established Member
Thanks Agbagb and Joiner_Sim what you say makes perfect sense and that is what I will do.
Because the lead weights are going to be big due to the weight of the glazing units I had thought about having just one large pocket on each stile to access both weights each side, would that be normal practice?
John
Because the lead weights are going to be big due to the weight of the glazing units I had thought about having just one large pocket on each stile to access both weights each side, would that be normal practice?
John
joiner_sim
Established Member
Yes you only need one pocket per stile.
One pocket per side is the norm, in the bottom sash side of the pulley stile, only way I've ever seen.
Top sash goes in first, pull the wagtail over and fit the weight, then let the wagtail hang for fitting the bottom sash weight.
Check out the geometory of the pocket length to ensure the weights can be fitted in. If your lead weights have a through hole you can cut them in half so they are articulated when threaded on the cord. By doing this you can have a smaller pocket.
You can see the pocket size I ended up with here http://slidingsash.blogspot.com/2009/01/fitting-sashes.html
Mr Ed
Established Member
Very tidy work. Personally I'd just buy the windows, but I'm sure you'll end up with a better end product this way.
Ed
Ed
John Smith
Established Member
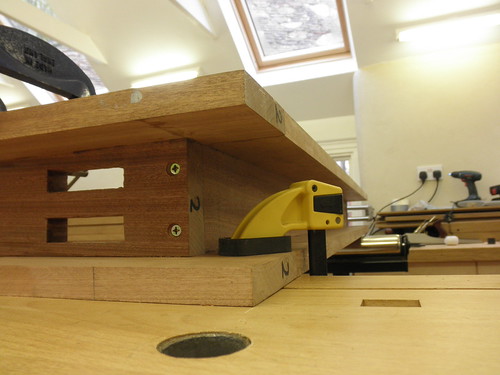
I decided to cut large pockets in each pulley stile so access to the weights will not be a problem.
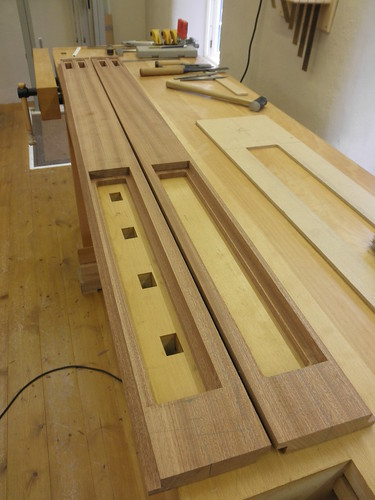
The pocket covers were cut to be a snug fit and planed flush
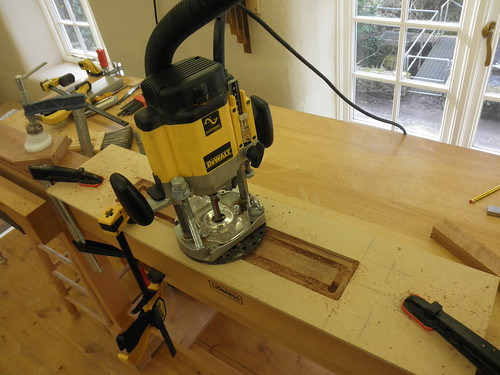
The rebate for the parting bead channel was routed out. Because the pocket hole is cut wider than normal the parting bead will help to hold it in place and I am able to insert two screws which will be concealed behind the channel
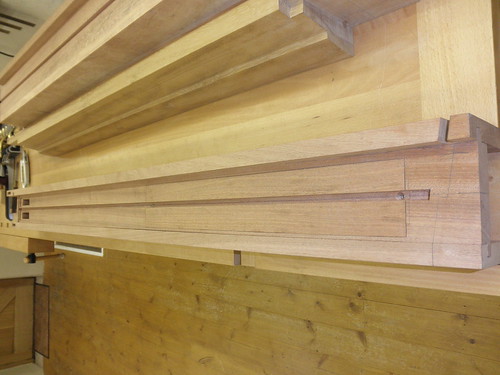
I have also cut the mortises for the pulleys
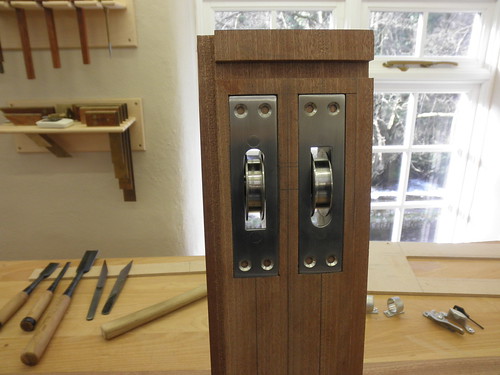
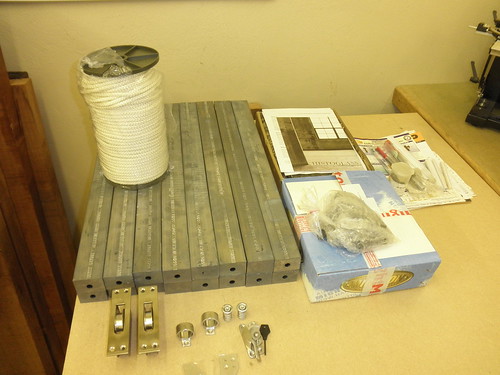
The hardware and weights have also been delivered this week from Mighton Products (thanks for the tip)
John
The pocket covers were cut to be a snug fit and planed flush
The rebate for the parting bead channel was routed out. Because the pocket hole is cut wider than normal the parting bead will help to hold it in place and I am able to insert two screws which will be concealed behind the channel
I have also cut the mortises for the pulleys
The hardware and weights have also been delivered this week from Mighton Products (thanks for the tip)
John
John Smith
Established Member
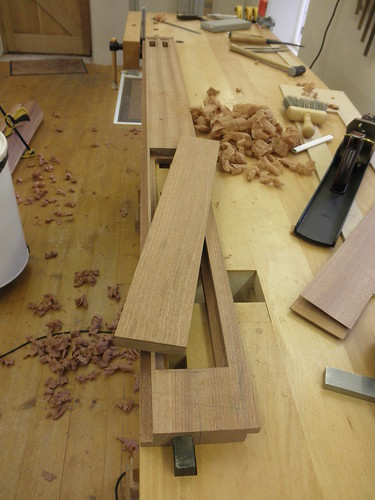
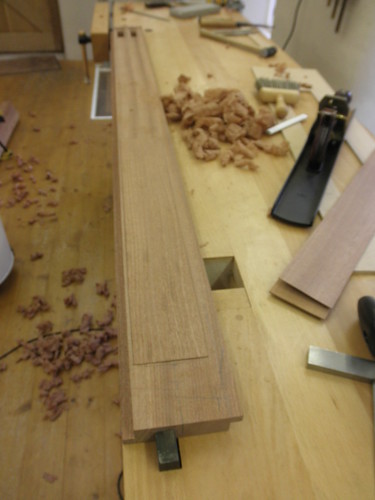
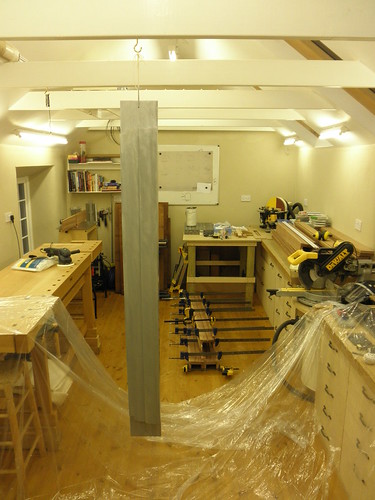
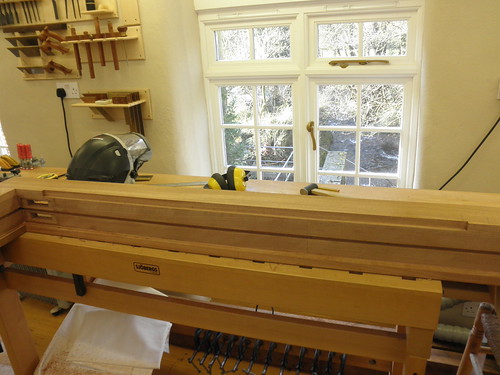
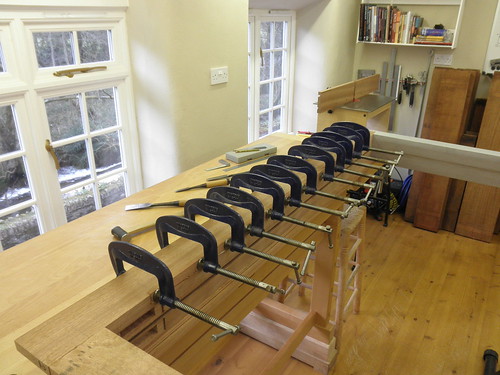
I got to spend a bit of time in the workshop today and started to assemble the first of four sash boxes. I also primed the first cill with aluminium oxide primer.
Painting is my least favourite job, Im thinking of one coat of primer (maybe two on the cills), two under coats and one top coat. Any comments/advice would be welcome.
Painting is my least favourite job, Im thinking of one coat of primer (maybe two on the cills), two under coats and one top coat. Any comments/advice would be welcome.
joiner_sim
Established Member
I like the way you have cut the pocket and concealed the screws. I just hope that such a large pocket does not weaken the stile.
Am I right in thinking that you are painting all the lovely hardwood!?!?! It will last for ages, but if I was doing it as a painted finished, I really wouldn't have bothered with some of the things you have done. i.e. mortice and tennoning fascia boards...
Am I right in thinking that you are painting all the lovely hardwood!?!?! It will last for ages, but if I was doing it as a painted finished, I really wouldn't have bothered with some of the things you have done. i.e. mortice and tennoning fascia boards...
John Smith
Established Member
Hello Joiner_Sim, The pockets look a bit bigger on that picture than they are because of the angle I took the picture at but the stiles are, as commented on before, thicker than would be considered normal. That coupled with the haunched joint to the outer and inner linings make for a very strong frame.
The boxes and sashes will have a paint finish. The choice of timber and construction method is an effort to make them long lasting, I also enjoy the process of hand jointing. I understand in a commercial shop this would not be appropriate but if I was trying to make a living from my workshop Ive no doubt I would be very hungry by now :lol:
John
John Smith
Established Member
Its a good point Agbagb and one which I did consider. I will have to fit the parting bead once both sashes are hung but I think with the staff bead yet to be installed I will be able to swing the lower sash inwards slightly to give me access to the parting bead channel.
I notice from your blog that you fixed the frame in with just four screws, one in each corner, did that work out ok?
Joiner_Sim can I ask how you normally fix your frames in?
Thanks John
I notice from your blog that you fixed the frame in with just four screws, one in each corner, did that work out ok?
Joiner_Sim can I ask how you normally fix your frames in?
Thanks John
I'm interested to know how others fix the frames in as well.
The four screw have worked on mine but it wasn't exactly slick (more of bodge). It's something I didn't put much thought to. By the time I'd ripped the old window out there wasn't much time left for thinking.
Glad you got the final assembly thought through.
The four screw have worked on mine but it wasn't exactly slick (more of bodge). It's something I didn't put much thought to. By the time I'd ripped the old window out there wasn't much time left for thinking.
Glad you got the final assembly thought through.
scholar
Established Member
I have been following this with interest. I like the substantial design of the box.
It is not clear to me how you are fitting the parting slip/wagtail. Given the wide pocket you have cut, could you have a fixed parting slip which would seem superior to the usual flappy one that in my experience can cause some problems (thinking that square weights might be more prone to fouling)?
cheers
John Smith
Established Member
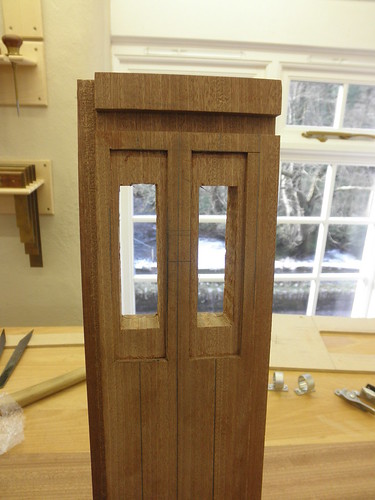
Hello Scholar, My intension originally was to have a fixed parting slip/wagtail. Following advice on here I have decided to have a loose wagtail as even with a wide pocket it will be usefull to be able to push to wagtail to one side. As has been pointed out it is normal to slot the frame head and hang the wagtail with a nail or pin but I will have to use a different method as I cut short the frame head, as can be seen here...
I will make up something to hang the wagtail from.
I will make up something to hang the wagtail from.
John Smith
Established Member
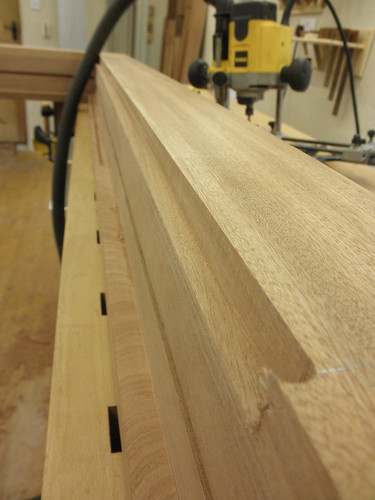
I spent some time today correcting a mistake I made yesterday. I decided as Im building so many windows that I should invest in some more tools... so I bought one of these
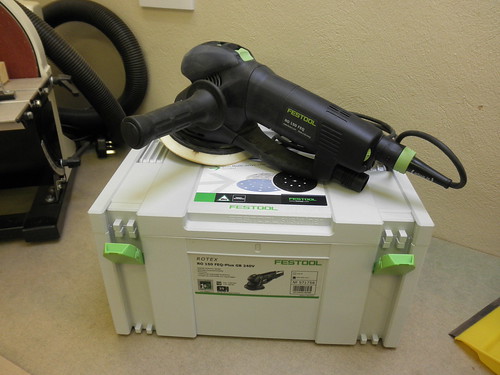
Normally I build furniture and generally sand by hand so I have never owned a power sander. Keen to try it out I decided to sand the first assembled frame prior to priming. In a matter of seconds I managed to ruin one of the frame edges by being careless and much to aggressive, so this morning has been spent routing a rebate along the edge and scribing in a new piece
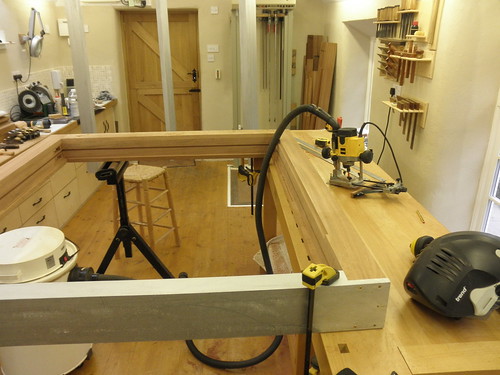
The new piece glued and clamped. Normally I would use clamping blocks but the clamps were just big enough to span the frame
John
Normally I build furniture and generally sand by hand so I have never owned a power sander. Keen to try it out I decided to sand the first assembled frame prior to priming. In a matter of seconds I managed to ruin one of the frame edges by being careless and much to aggressive, so this morning has been spent routing a rebate along the edge and scribing in a new piece
The new piece glued and clamped. Normally I would use clamping blocks but the clamps were just big enough to span the frame
John
Steve Maskery
Established Member
I do wish I knew what you guys were all on about. This is a side of woodworking about which I know absolutely nothing. I've made casement windows before now, but never a box sash. Can you point to a good primer on the subject, please?
Thanks
Steve
Thanks
Steve
John Smith
Established Member
Hello Steve, Im not sure I can, Im learning as I go. The only reference I have used apart from advice on here is a book called Carpentry and Joinery by Brian Porter, which bit has confused you?
Hello Jake, yes it is a very effective tool and one which Im going to have to practice a bit with I think
John
Hello Jake, yes it is a very effective tool and one which Im going to have to practice a bit with I think
John
Steve Maskery
Established Member
Well I don't know what a wagtail is, for a start.
But also I don't understand how you make box sash windows draught-proof. We had them in our Victorian semi when we were kids and all I remember is them being blooming draughty and being sealed up with sellotape.
I suppose I just need to do some trad reading.
Cheers
Steve
But also I don't understand how you make box sash windows draught-proof. We had them in our Victorian semi when we were kids and all I remember is them being blooming draughty and being sealed up with sellotape.
I suppose I just need to do some trad reading.
Cheers
Steve
Similar threads
- Replies
- 2
- Views
- 487
- Replies
- 56
- Views
- 5K