Box Joint Jigs again

UKworkshop.co.uk

Help Support UKworkshop.co.uk:

This site may earn a commission from merchant affiliate links, including eBay, Amazon, and others.

Smudger

Established Member
Joined
15 Feb 2007
Messages
2,779
Reaction score
0
Location
Surrey & Normandy
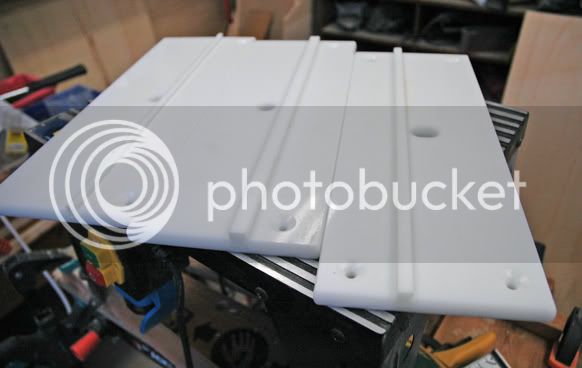
The jigs arrived today from Oak Park in Canada. Good service, only about 2 weeks from ordering.

I was seriously hacked off by Parcelfarce - charged me £8 to collect £9 duty, made me call an expensive phone line and gave me none of the information I wanted, tried to charge me £12 for a Saturday delivery (I live 2 miles from their depot) and took my credit card OUT OF THE ROOM to do the transaction. When I complained the 'employee' turned his back on me! Incredible level of service...

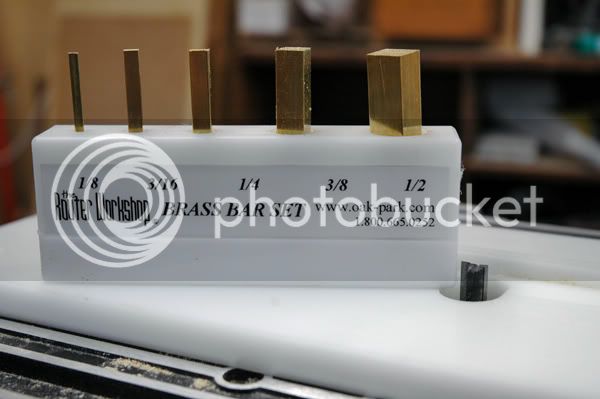
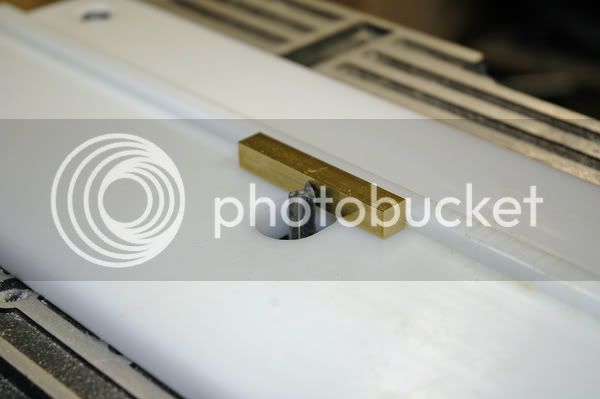
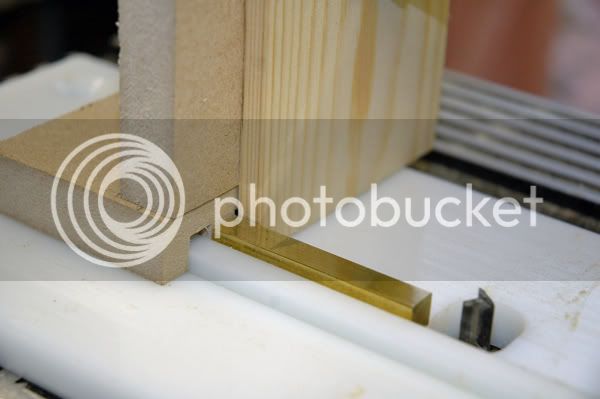
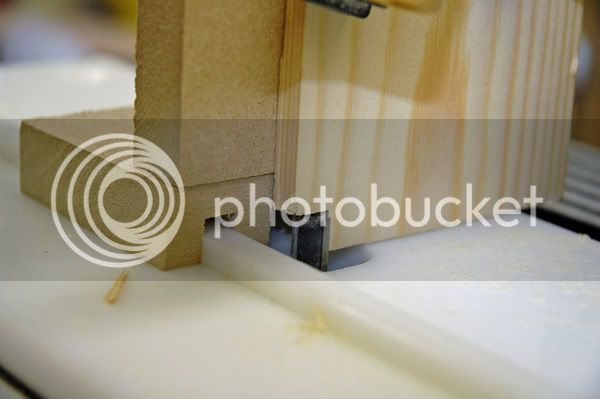
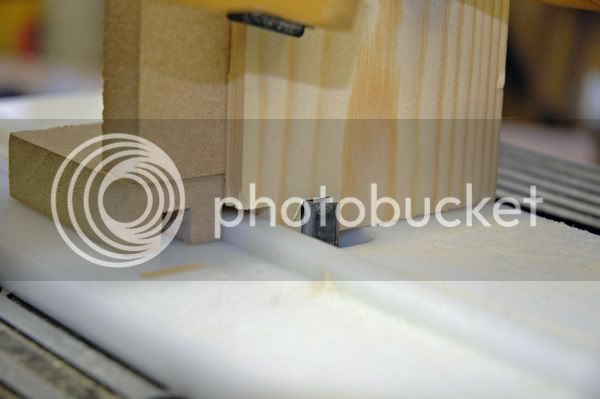
Anyway - the jigs are lovely, simple things. You have to set them up by clamping one to the router table and running some test pieces, then drilling the table and bolting it down. The others then use the same holes, though I have only used the 3/8" one so far. Worked fine first time. I then made up a sled for guiding the work through. The first run had got a bit closer to my fingers than I preferred!

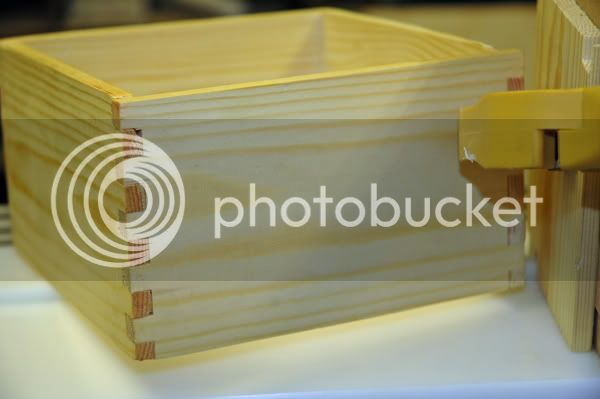
I made a test joint, wasn't bad, then made up a small box (6" square) out of some rough timber scrap. As I want it for making drawers that seemed appropriate. I wasted one piece - hadn't clamped the work well enough and it moved when offered up to the cutter. Otherwise - fine, and the first box carcase glued up inside an hour and a half of opening the box. A bit rough (some tear out due to the quality of the softwood - I think it may be balsa!) but accurate enough for a first go, and the joints fit very well indeed.

Knackered a router cutter - I moved the sled over by mistake, and the cutter found the fixing screw inside... But that's the learning curve, I suppose.

A happy bunny.
 
Hi Smudger,

I'd be interested to know how you get on with those jigs. I've often watched Bob and Rick on The Woodworking Channel demonstrating them and thought how delightfully simple and foolproof they are.

Cheers :wink:

Paul
 
So far, so good, but the next step is producing something worthy of display, which I don't see as being a problem.
I need to make up a set of sleds (accurate ones!) and try out some better timber than cheap pine.

I think that spiral cutters are probably going to be essential, to prevent breakout, which will double the cost!
 
Smudger

I have a set of those jigs that I bought in Canada back in the 90's, they do work very well and I have made numerous boxes using these jigs.

I haven't used them now for about 8 years, but like all things still hang on to them.

Let us know how you get on with them and WIP's are a must.
 
I watched a recent episode that featured that jig and thought it was quite good, but am I wrong in thinking that it's something that is extremely easy to make? Or are there super-fine tolerances involved?
 
BB
Trust me, if you have the jig you'll be amazed at how easy it is to make the joints they are talking about. The initial set up of the first template may take you 10 minutes or so, but after that it remains constant and all the other jigs use the same holes.
 
Hi

I am with Byron here that jig does look deceptively easy to make are we missing something?
 
Sorry but I had to chip in here. I too saw the video of the jig in action and was so impressed I made my own out of some laminate and it works a treat. As has been stated it takes a few minutes to set up but once set will turn out joint after joint perfect every time. :D
 
Mailee, when you made the jig, how did you work out the distance the little bar has to be from the hole - thats the only thing I can see being tricky, would be great if you could put together a little how-to if you get time.
 
The bar is the same distance from the cutter (outer edge) as the diameter of the cutter - it is set up using a spacing bar of the same size as the cutter and the fence bar.

I'll do some photos, honest!
 
The only problem I have with this method is you have to make each pass at full depth eg the thickness of the material. I understand there is a limit for the depth of cut on router bits often refered to to being about half the cutters diameter. Am I talking rubbish
 
Newt it's never rubbish, I think due to the distance the bit has to cut for a box joint is going to be rarely over an inch at a time so has little time to overheat and little time to try and bind etc. I would have thought it would be fine if you think about a dovetail bit it has to do all it's work in one pass...
 
newt":2y6f7kbl said:
you have to make each pass at full depth eg the thickness of the material.

I don't think that's necessarily the case, Newt, at least in the case of box joints (it would be for dovetails). I've never used one of these jigs, but it seems to me that each time you cut a slot, you move the wood and place the slot over the side fence, then cut the next slot. The minimum depth of cut therefore depends on the height of the side fence. If you made your own jig, you could make the height of the side fence whatever you want - it's only a spacer, in effect, to ensure the spacing between the slots is correct and the height of it doesn't matter as long as it's low enough for the slot to fit over it. So if you are worried about the cuts being too deep for the cutter, make the side fence low and do the cut in two or more passes, raising the cutter for each set of passes.

If I've got that wrong, no doubt someone who has used one will put me right :roll:

Cheers :wink:

Paul
 
Not quite - the cutter depth is decided by the thickness of the stock (plus a bit as I now realise) not the fence. The fence is actually quite low, so the cut will always be deeper and the cuts will clear the fence. My test pieces used a 3/8" cutter on 9.5mm stock, so the cut was about 1:1 to the cutter diameter, deeper than the fence. I can foresee using a 1/4" cutter on the same stock, but would have to cut to a depth slightly more than 1/4".

I've just been and measured up, and the 1/4" fence is about 3/16", the 3/8" is about 1/4" and the 1/2" is 3/8", so there shouldn't be a problem.
 
newt":1p5h5mg9 said:
The only problem I have with this method is you have to make each pass at full depth eg the thickness of the material. I understand there is a limit for the depth of cut on router bits often refered to to being about half the cutters diameter. Am I talking rubbish
With larger cutters (i.e. 10mm and above) on a 1/2in router you can generally take a square bite without incident, I've done it quite often with worktops, etc. On the smaller sizes a 2-flute spiral will generally remove more waste than a 2-flute straight so you'd probably achieve a square cut down to 6mm in a hand-moved jig.

Scrit
 
OK - some pictures (no comments on the mess or the tear-out - I can explain that...)

The jigs as they arrive - each about 16" long, fence fixed, hole drilled.

Jig01.jpg


Pretty much essential to the whole business are the set of measuring rods (about $25)

Jig04.jpg


In order to set up I had to accurately position the 3/8" jig and drill fixing holes. As my router table is Nutool and made of jam this was not too hard. The distance is set using the appropriate measuring bar.

Jig06.jpg


This is the rubbish temporary sled I made - the next one will be better. It won't have a hidden screw where the router bit can find it if I stupidly move the whole sled over instead of just the work. That's the 3rd slot on the right...

Jig08.jpg


Then it's a case of setting the cutting depth - just slightly more than the thickness of the work.

Jig07.jpg


Then clamp up the work for the first cut. In this case I wanted to start with a cutout rather than a finger, so I used the measuring rod to set the distance of the work from the fence. This is where it will go wrong if it can, as the work wants to climb the bit. I was using a straight 2-flute cutter (which had had a big bite out of a woodscrew) - a spiral cutter would be OK I think.

Jig10.jpg


Then run the work through, unclamp and move so that the cutout is over the fence and repeat. Don't move the whole sled...

Jig12.jpg


Jig13.jpg


Keep on going, repeat until all ends are notchy and you have something like this (well, hopefully a lot better than this, because you won't be using a piece of old pine rescued from the rejects bin).

Jig17.jpg


So to sum up I need - a better sled (thinking about that), a spiral cutter, better wood, set the cutter height properly. But - this is my first ever 'proper' wood joint! Last week housings, this week box joints - I'm having fun, at least.
 

Latest posts

Back
Top