You are using an out of date browser. It may not display this or other websites correctly.
You should upgrade or use an alternative browser.
You should upgrade or use an alternative browser.
Bog oak coffee table (Finished.....photo heavy).
- Thread starter MikeG.
- Start date


Help Support UKworkshop.co.uk:
This site may earn a commission from merchant affiliate
links, including eBay, Amazon, and others.
MikeG.
Established Member
Thank you, Lestynd.
MikeG.
Established Member
I'm flat to the boards with work for the next few days, so there'll be little progress for a while.
MikeG.
Established Member
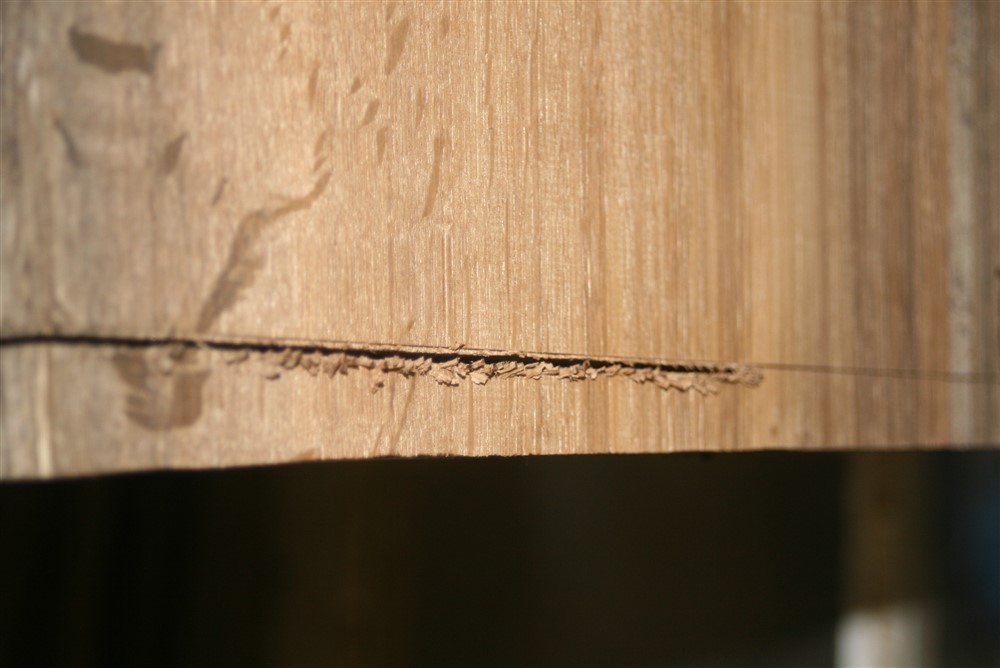
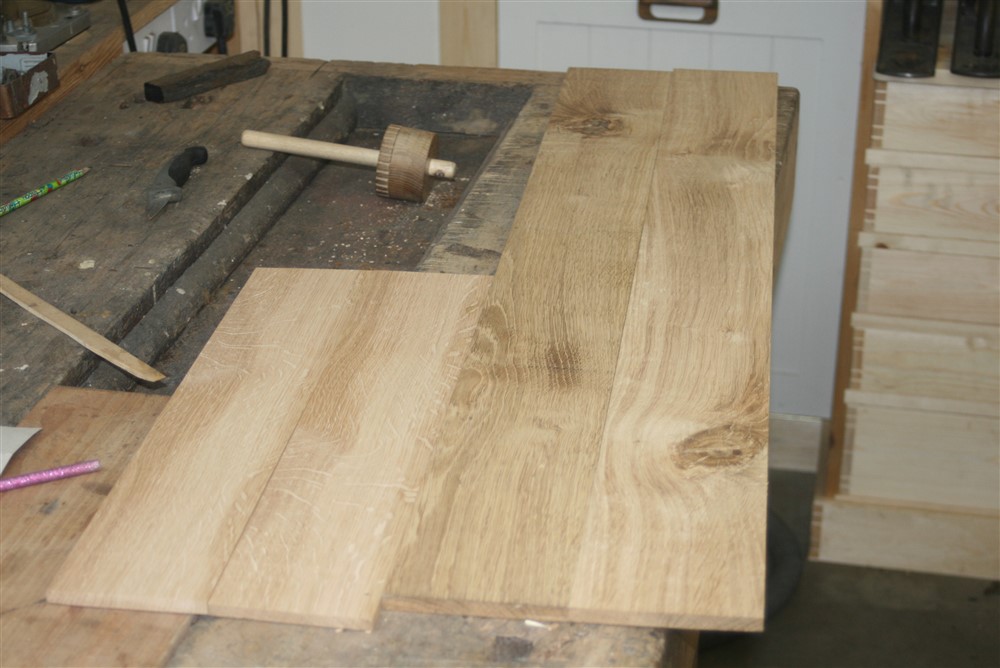
I've not had a lot of time in the workshop recently. Anyway, I planed and thicknessed the table tops at a friend's workshop, where he has a huge P/T. Back home, I cut the tops to length using a cross-cut saw, but knowing how vulnerable this wood is to breakout, I pre-scored the underside with a knife:
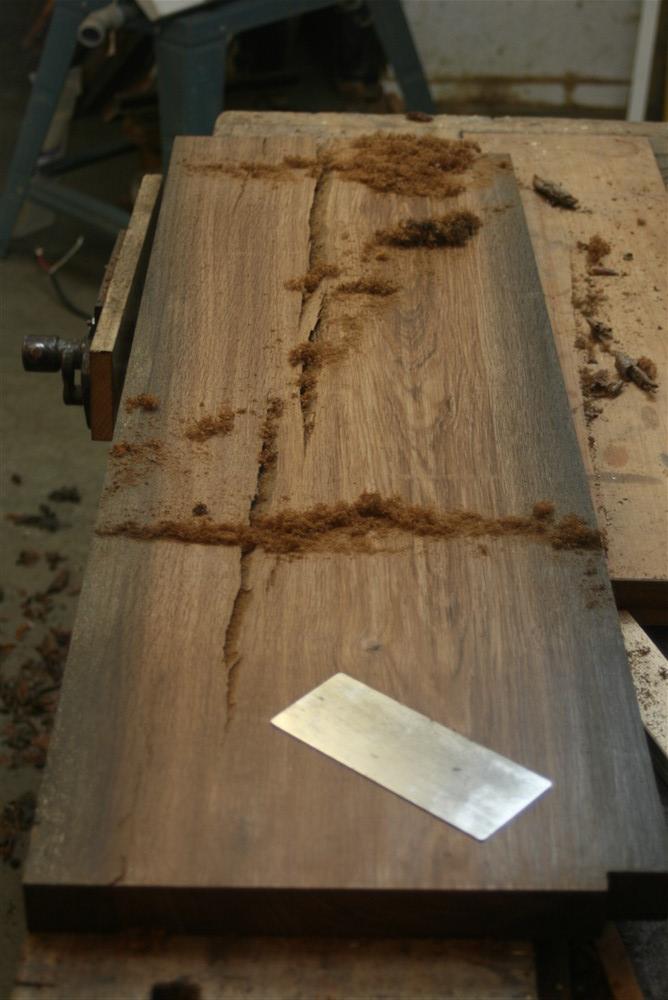
I spend rather a lot of time cleaning up the cracks with a chisel, and then used a card scraper to clean up the marks left by the planer:
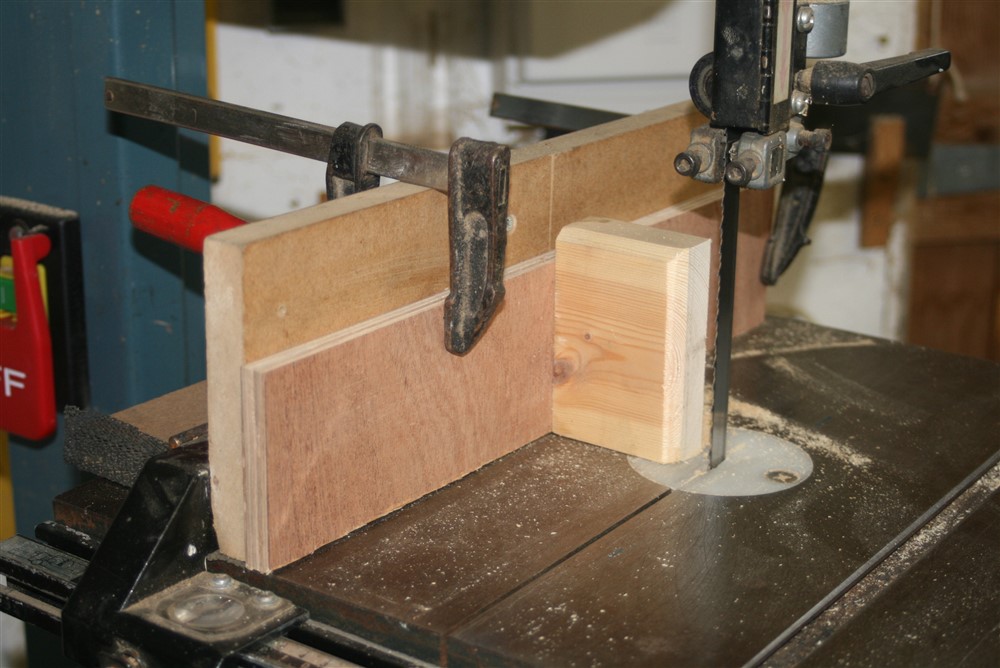
Not being brave enough to start with epoxy etc, I decided to detour onto the drawers, which are going to be of oak (possibly with a sycamore base....we'll see). I needed to re-saw some 25mm stuff to make the sides, so I set up my re-saw fence:
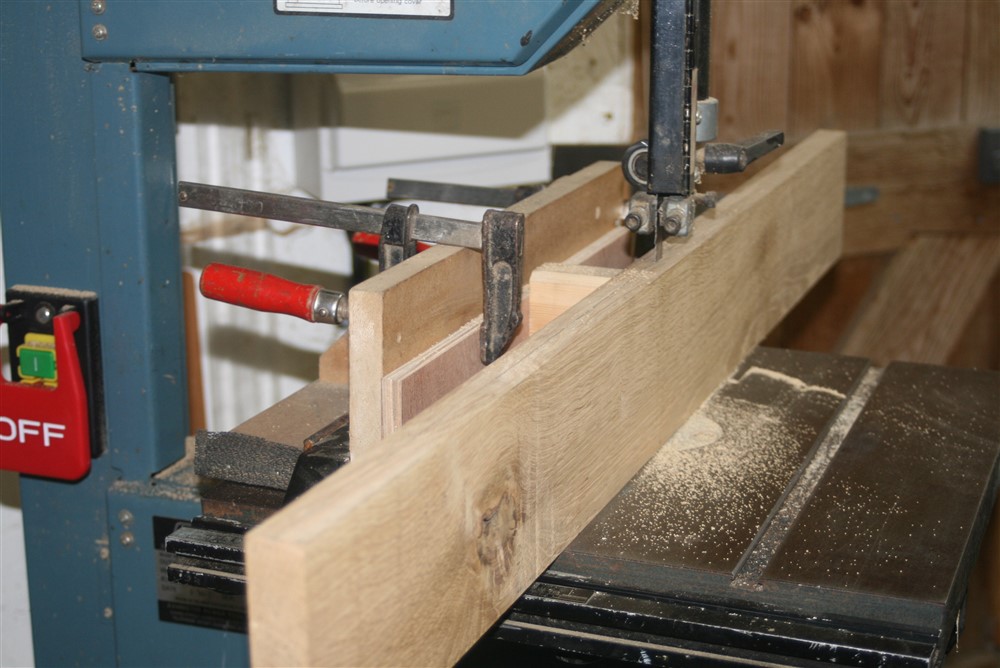
.....and ripped the stock up the middle:
I then fitted the drawer fronts tightly into the holes in the frame:
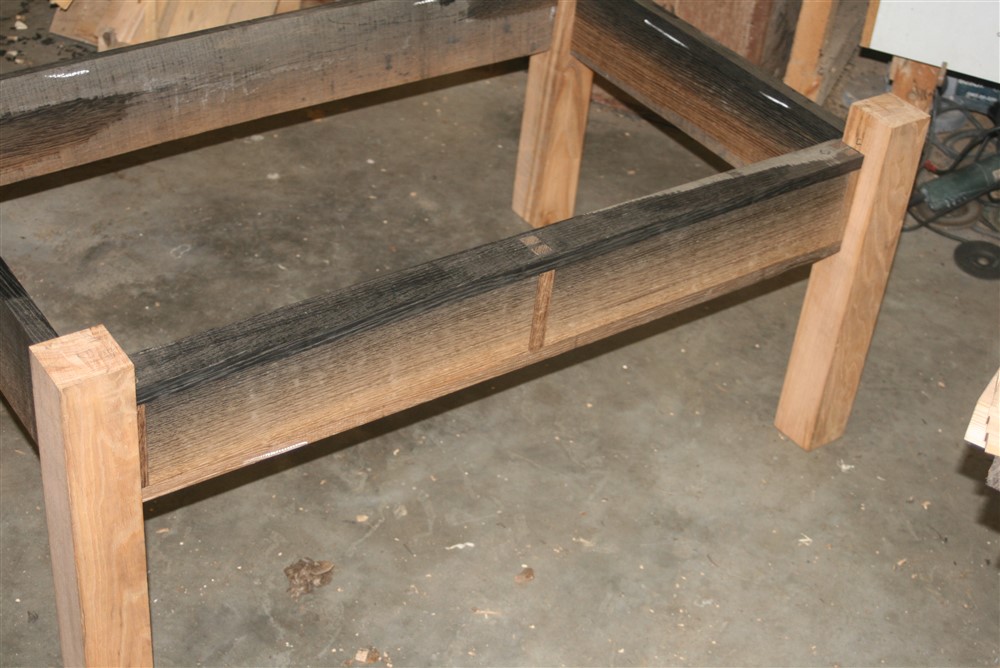
They're much blacker than that in real life. I think the flash is playing tricks with us.
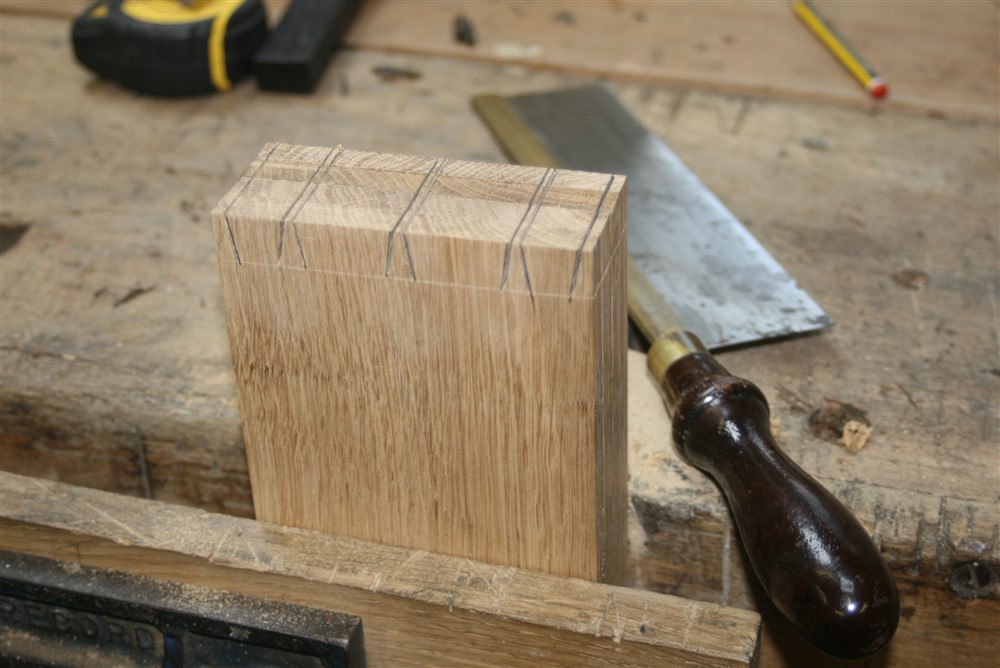
After planing the drawer sides to the same height as the drawer fronts, I marked out the tails and cut them out:
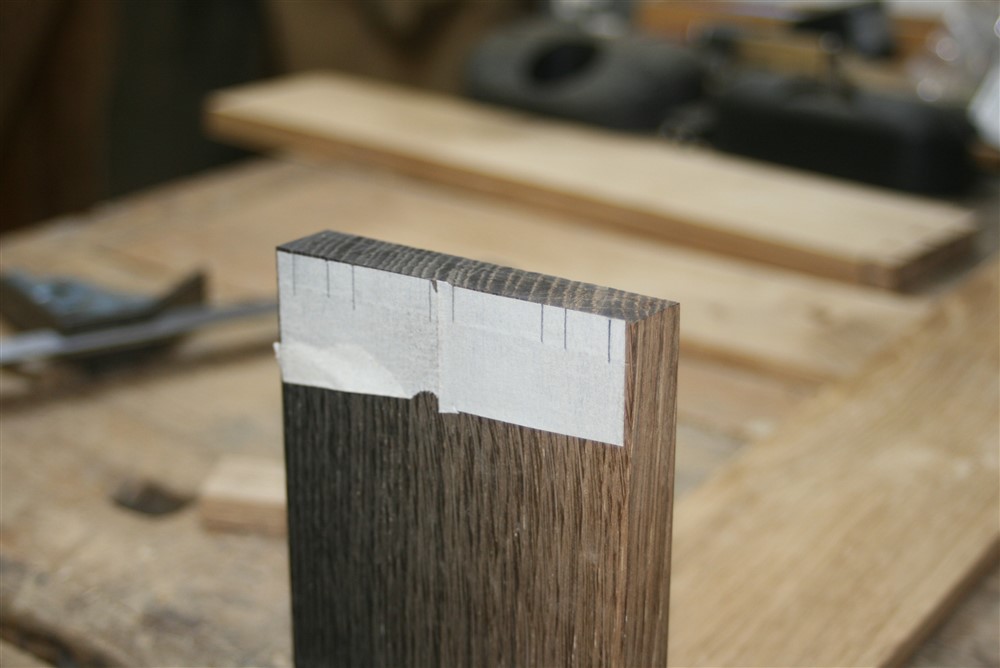
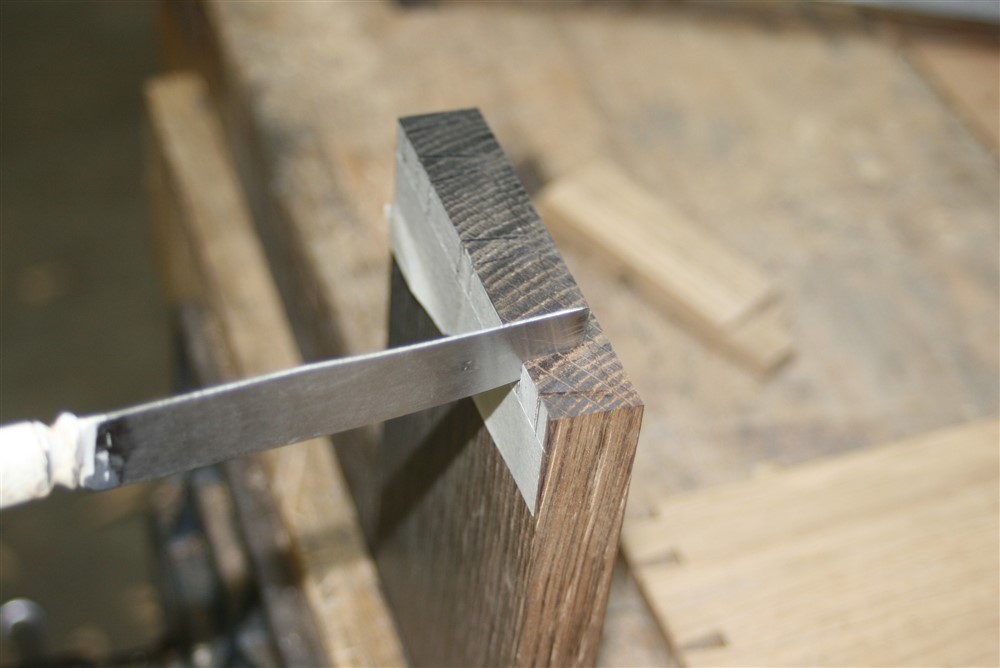
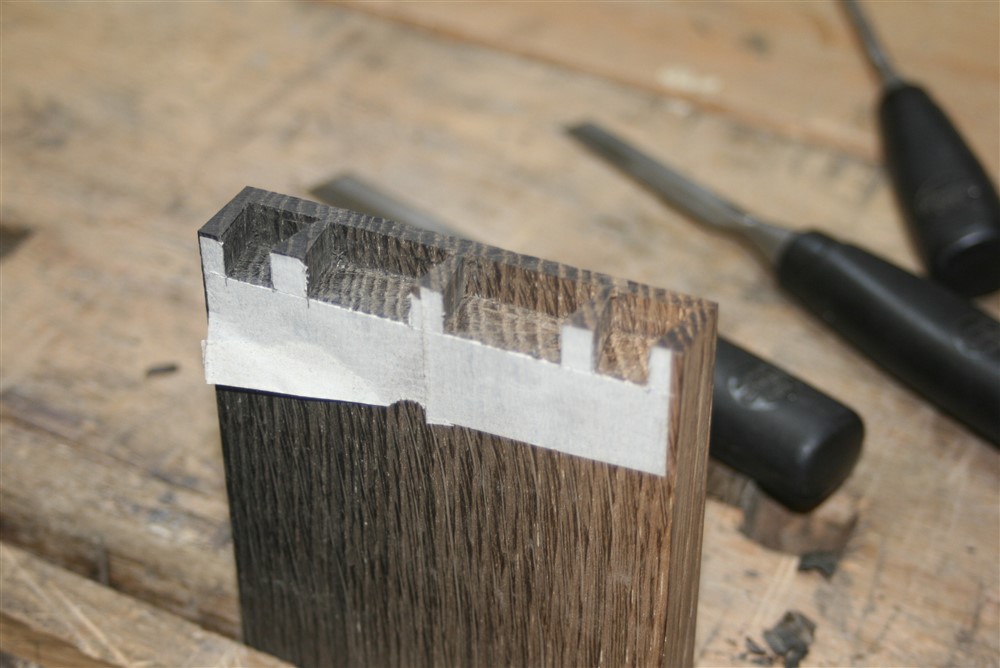
I seem to have failed to take a photo of the completed tail boards. Ho hum.... Thence to the pin boards (drawer fronts). It's an absolute pain not being able to see any marks on this dark wood, so I used tape:
I've got an old plastic handled knife from a kids cutlery set, cut off square at the end, which I use for driving down into the saw kerf in half-blind dovetails:
Then it's just more careful chiseling:
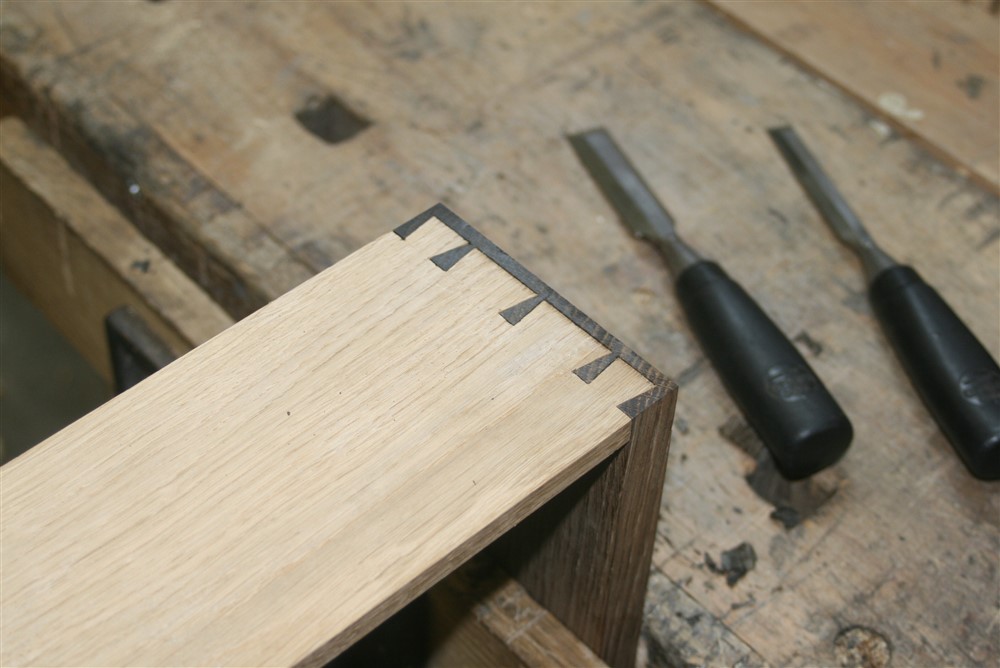
And a reasonable first joint:
I then diverted again, and mocked up a drawer-pull idea:
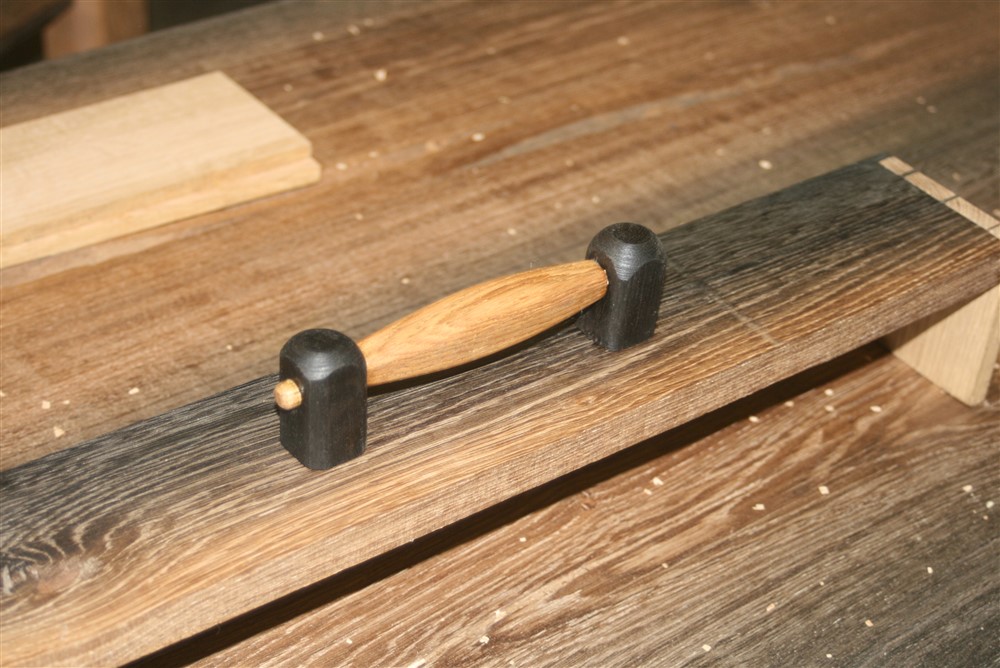
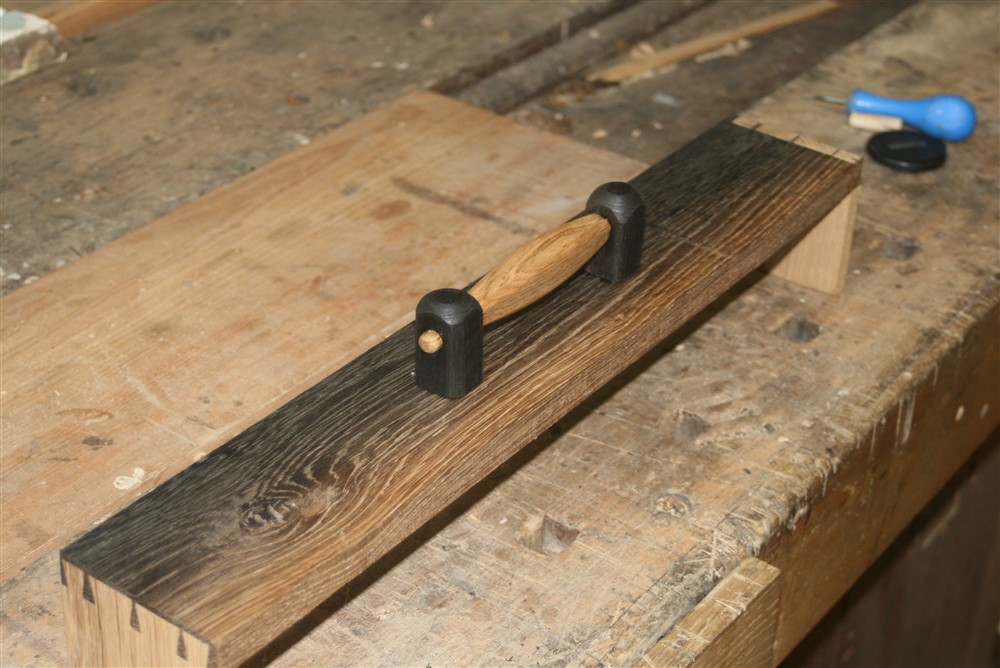
My wife's reaction was "it's a bit clompy", and she's right. I'll play with a scaled down version and see if it looks a bit better in a more refined size. If anyone has any wooden handle suggestions, please feel free to drop a photo or link in here.
I spend rather a lot of time cleaning up the cracks with a chisel, and then used a card scraper to clean up the marks left by the planer:
Not being brave enough to start with epoxy etc, I decided to detour onto the drawers, which are going to be of oak (possibly with a sycamore base....we'll see). I needed to re-saw some 25mm stuff to make the sides, so I set up my re-saw fence:
.....and ripped the stock up the middle:
I then fitted the drawer fronts tightly into the holes in the frame:
They're much blacker than that in real life. I think the flash is playing tricks with us.
After planing the drawer sides to the same height as the drawer fronts, I marked out the tails and cut them out:
I seem to have failed to take a photo of the completed tail boards. Ho hum.... Thence to the pin boards (drawer fronts). It's an absolute pain not being able to see any marks on this dark wood, so I used tape:
I've got an old plastic handled knife from a kids cutlery set, cut off square at the end, which I use for driving down into the saw kerf in half-blind dovetails:
Then it's just more careful chiseling:
And a reasonable first joint:
I then diverted again, and mocked up a drawer-pull idea:
My wife's reaction was "it's a bit clompy", and she's right. I'll play with a scaled down version and see if it looks a bit better in a more refined size. If anyone has any wooden handle suggestions, please feel free to drop a photo or link in here.
TheTiddles
Established Member
She's not wrong there... Handles are one of the hardest parts of design, I'd go subtle, very subtle, maybe using the blacker parts of a board and a minimal design so they are visually there, but not obtrusive, just enough to get your fingers under and little more.
Aidan
Aidan
Trainee neophyte
Established Member
TheTiddles":3g9nfrm0 said:She's not wrong there... Handles are one of the hardest parts of design, I'd go subtle, very subtle, maybe using the blacker parts of a board and a minimal design so they are visually there, but not obtrusive, just enough to get your fingers under and little more.
Aidan
It's either the same wood and unobtrusive, or different wood and in your face. Personal preference would be for small turned knobs out of the same oak. Perhaps two per drawer. The other problem with contrasting wood is that it ages and changes colour. I have no idea what the bog oak will do...
Big statement, or no statement? (NB I'm a trainee, not to be taken seriously!)
MikeG.
Established Member
The bog oak won't change colour. Ordinary oak will darken somewhat over time.
Handles are really difficult. I spent days on deciding the shape of one turned knob for the drawer in my walnut side table, so all I can really offer is sympathy and the observation that there are subtleties in the shaping of a detail like that which elude many of us. I think it's akin to typeface design - the differences between a letter in one face and another can be tiny and there's a very short distance between ugly and elegant.
I do agree that your current draft handle looks fussy. The rest of the piece is quite restrained - flat square surfaces to show off the beauty of the extraordinary timber.
I think if I were you I would go for something cut from small pieces of the same wood, selected for colour, and a simple one piece design screwed flat to the drawer front.
I don't mean to suggest what I used on my little chest of drawers as suitable but it's easier to show an available picture rather than write more words. This was my mock-up in softwood:

This shows the final effect (yew handles on oak drawers):

I found it really helped making something 3D to try out, on a drawer front at the right height, to make sure it was easy to get hold of and use - but I'm sure you know that too.
I do agree that your current draft handle looks fussy. The rest of the piece is quite restrained - flat square surfaces to show off the beauty of the extraordinary timber.
I think if I were you I would go for something cut from small pieces of the same wood, selected for colour, and a simple one piece design screwed flat to the drawer front.
I don't mean to suggest what I used on my little chest of drawers as suitable but it's easier to show an available picture rather than write more words. This was my mock-up in softwood:
This shows the final effect (yew handles on oak drawers):
I found it really helped making something 3D to try out, on a drawer front at the right height, to make sure it was easy to get hold of and use - but I'm sure you know that too.
MikeG.
Established Member
ColeyS1":2ip54pxe said:......
Anyone any ideas on how the dish-shaped depression in the first photo is made?
sploo
Somewhat extinguished member
A honking great router bit would do it. You could also jig up the drawer front on the lathe and scoop it out (either freehand or with a specially ground tool.MikeG.":3g4e9fbo said:Anyone any ideas on how the dish-shaped depression in the first photo is made?
A router (overhead) with a jig that holds it like a swing seat would allow an arc to be cut - then rotate the drawer front or axle of the jig and that would also create the depression.
You could also use a curved draw knife - though it'd be hard to get a perfectly round depression.
I wonder if those depressions would look more suited to the piece if they were hand carved? A bent spoon bit will 'naturally' match a depression of up to a hemisphere. On YouTube, the Pask Makes channel has a nice episode on making such a gouge and using it.
https://youtu.be/O4noFDNZ1WQ
https://youtu.be/O4noFDNZ1WQ
Sawdust=manglitter
Established Member
MikeG.":3ffxk3zq said:Anyone any ideas on how the dish-shaped depression in the first photo is made?
It may be done on the lathe. The headstock on my lathe can be turned perpendicular to the bed for larger items, but it wouldn't be for the fainthearted having a long board spinning like a propeller
But I quite like Andy's idea

sploo
Somewhat extinguished member
By using some suitable chuck jaws (https://www.axminster.co.uk/150mm-wood- ... tes-910405) you can mount a set of 4 quarter circle plates of wood. I use that method to create a cheap copy of the button jaws (https://www.axminster.co.uk/axminster-b ... 0mm-340957).Sawdust=manglitter":1mg28vqg said:MikeG.":1mg28vqg said:Anyone any ideas on how the dish-shaped depression in the first photo is made?
It may be done on the lathe. The headstock on my lathe can be turned perpendicular to the bed for larger items, but it wouldn't be for the fainthearted having a long board spinning like a propeller
But I quite like Andy's idea
If the drawer front fit inside that circle then you could hold it with a slightly reduced risk of removing a finger as it spun. Granted any drawer front over 40cm in length is going to require a big lathe.
Probably a big router dish bit on a router table would be easiest, but they ain't cheap (https://www.trenddirectuk.com/18-18x1-2 ... gJr6_D_BwE)
if it were me, I would rout out a circle with a core box bit and leave a flat in the middle for the knob. I can't find the picture that I have seen- here is something similar https://woodgears.ca/pantograph/recessed_knobs.html
I also like the sound of andy's suggestion.
https://www.finewoodworking.com/2016/03 ... ssed-pulls pretty cool too
I also like the sound of andy's suggestion.
https://www.finewoodworking.com/2016/03 ... ssed-pulls pretty cool too
That second one looks like something Mike might have made!
But in the spirit of setting harder challenges... How would it look to have something like the recess + cross bar handle, but all carved from the solid? Undercutting the bar would be tricky but achievable.
In my imagination, the bar flows seamlessly across the drawer front, while the recess has a set of sharp edged, tapered scoops, like one of Alan Peters' bowls.
But the chance of ruining a big bit of precious timber are very high - I certainly wouldn't dare to try it!
MikeG.
Established Member
Anyone think welding a shaft to a piece of 1/4" steel ground to shape, then mounting that in a pillar drill before plunging it confidently into a piece of priceless timber could be good for a giggle? The faint-hearted might consider clamping the workpiece down rather than holding it by hand....
sploo
Somewhat extinguished member
That idea did occur to me (if the lathe can't spin the workpiece, spin the toolMikeG.":1twobkyn said:Anyone think welding a shaft to a piece of 1/4" steel ground to shape, then mounting that in a pillar drill before plunging it confidently into a piece of priceless timber could be good for a giggle? The faint-hearted might consider clamping the workpiece down rather than holding it by hand....
)That said, with a very low rpm and taking a shallow cut it might work - basically scraping the material out.