At LONG Last

UKworkshop.co.uk

Help Support UKworkshop.co.uk:

This site may earn a commission from merchant affiliate links, including eBay, Amazon, and others.

ByronBlack

Established Member
Joined
4 Sep 2005
Messages
4,117
Reaction score
1
Location
Thurrock, Essex
I finally done it. Bought a Jointer plane that is. After to-ing and fro-ing for the best part of 2 years, I finally took the jump and ordered a Veritas long-angle plane - BUT there was a small problem so instead I decided to go the second hand route and purchased a record no.7 from www.oldtools.co.uk and what a beauty it is!

It's a very clean example, mouth opening is in perfect condition, the blade is good and the totes complete clean and with a good finish.

I breifly used it early today and was very impressed, now I can finally get on with the preperation of the greenhouse stock

But before I do, are there any specific fettling operations to be done other than the standard? I believe it doesn't need lapping due to the length - is that right?

Anyway's would appreciate any little details that might make jointing as easy as possible.
 
Byron, if it's working OK, other than honing and polishing the blade and ensuring that the cap iron has no gaps where it meets the blade, I would be inclined to just use it rather than look for problems.

Cheers :wink:

Paul
 
Having only started down the slope fairly recently, I'd agree.

If you do much fettling before you're used to a long plane, you may not be able to tell if you've taken it the wrong way, or indeed whether further fettling is needed or it just needs the frog or chipbreaker adjusting.

I think I had my #7 (only bench plane for a long time) for about a year before I gave it a serious fettle. It was a wondrous thing to use from the get go, but my plane technique wasn't good enough to have been able to tell whether a percieved problem was just my bad technique, sharpening, set up or fettling related.

Cheers
Steve
 
Paul Chapman":1q9jcg4g said:
I would be inclined to just use it rather than look for problems.
A sentiment that should be cast in bronze and hung above every workshop door. =D>

Sounds like you're a happy bunny, BB. Do we get to see this beauty in action?

Cheers, Alf
 
Hi Guys

I don't want to be mistaken that I want to go over it with a fine tooth comb fixing problems that don't exist, it was more of a general query into whether there were idiosyncrasies with jointer planes thats worth thinking about..

but either way I definitely feel it's ready to use almost straight away, soon as get rid of the awful bevel that is currently on the iron, it's a lovely plane, really wished I bought it earlier..

I'll be posting some pics tomorrow night of the shavings, i'm actually quite excited to use it :)

ALF - what are the benefits of a cambered blade for jointing?
 
Btw, here is a pic of the tool, some action shots will be posted tomorrow night:

pl524.zoom.jpg
 
very nice BB
since getting a number 7 myself, I seem to use it for most things now.
even on smaller stuff
 
MooreToolsPlease":1b2vlgl6 said:
very nice BB
since getting a number 7 myself, I seem to use it for most things now.
even on smaller stuff

It's funny how many people tend to say that: not just on here but elsewhere on the web.
 
I use my Record 7 for everything, especially since a few on this board mentioned jointing with a shooting board. It was flat since I bought it.

So, there was no problem with the Veritas, just a problem with getting it?

-Gary
 
Keefaz":1ifttkly said:
MooreToolsPlease":1ifttkly said:
very nice BB
since getting a number 7 myself, I seem to use it for most things now.
even on smaller stuff

It's funny how many people tend to say that: not just on here but elsewhere on the web.

I do. If my #4.5 was out of action I really wouldn't notice. Its the #7 thats used for every task, no matter how small.

Adam
 
Ah, cambered blade... mainly the benefit is you're in control. Neither the plane adjustments, a fence or the workpiece dictates how you accomplish the task, so you can use the same method every time. Jointing a 3/4" thick, 2" wide piece uses the same technique as a 2" thick piece 6" wide. F'rinstance:

If you favour match planing (planing both edges as one) you have to be pretty sure you've got it right before you separate the boards or when you put them back together again, unless you can line them up perfectly as they were, you're virtually starting from scratch. Plus you're a bit stuffed if you want to joint thick stuff, such as for a bench top.

Adjusting the lateral lever is probably okay if the angle you need to correct is consistant. If you need to take off some on one side of the edge and then the other, things get fiddly I imagine. Personally I found it fiddly all round and gave up trying very early.

Jointer fences have got me out of a hole before now, but they're deep so you face the difficulty of the fence fouling on the bench on narrower stock.

Truth is you'll probably end up using all sorts of methods depending on what situation you find yourself facing, but the cambered method is a good all-rounder IMO.

Cheers, Alf

Who can't remember the last time she used a jointer...
 
ByronBlack":l85n3xuf said:
what are the benefits of a cambered blade for jointing?

Byron,

I would wholeheartedly recommend you to get David Charlesworth's DVD on planing. The cambered blade thing is quite hard to explain (I didn't get it 'till I saw it) but it all becomes clear when you see it done. It really is a good DVD and you will learn a lot from it.

DC also explains about 'stop shavings' which is useful to understand. It explains how, if you keep planing a piece of wood in its length, you will eventually plane it into a curve, and how stop shavings deal with this.

Personally, I'm still in two minds about the cambered blade when jointing. If I were jointing two boards and their combined thickness allowed it, I would plane the two boards together, using a straight blade. The reason for this is that the method (which I was taught in school in the 1950s and have used ever since) is foolproof. You don't have to worry about each edge being at 90 degrees to the face side because when you put the edges together, any discrepancy on one board is cancelled out by the other. Even if the discrepancy varied along the length of the board (which could easily happen if, say, the boards were very long and you had to walk along while planing) because at each and every point along the length of the boards the errors would cancel out.

Alf makes a good point about separating the boards and putting them together again in exactly the same place. This is simply overcome by drawing a couple of lines around the boards at each end and making sure they line up each time.

I don't think there will ever be universal agreement of the best way to joint two boards and the best solution is to try both methods and see how you get on. Personally I learnt a lot from DC's DVD and now use both methods, depending on what I'm planing.

Good luck with the plane - I'm with those who say that the #7 is his most-used plane.

Cheers :wink:

Paul
 
BB

A bit late, but I agree with Alf and others, if it works ok, why do any fettling other than hone the blade?
 
Byron,

I too recommend buying DC's DVD on planing. Meanwhile I can show you how I plane à la David Charlesworth. Intending a maximum of flatness you make a double hollow, one in width and one in length. After that a little unwinding and you should have a flat board face.

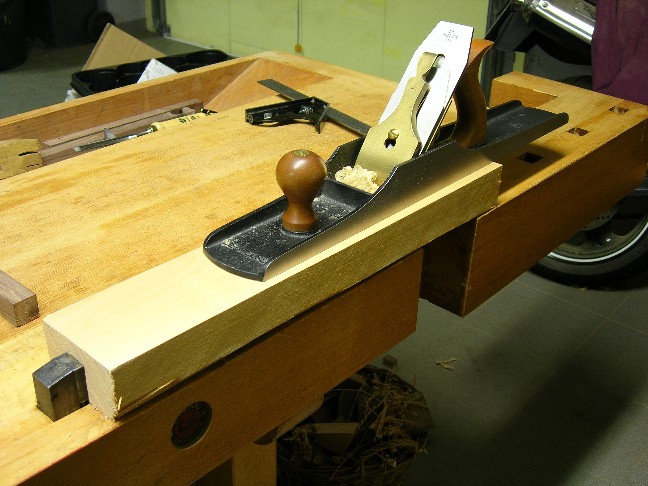
I use a #7 here, very light camber on the blade, as if it was a smoother. The piece of wood is american alder, measuing 8.5 to 50 cm.

1. Making a hollow in the width

The wood comes here from the jointer plane, a #8 with a lightly more cambered blade. You can see a belly under the straight edge. Important here, that the jointer makes through shavings from end to end.

Hohlfuge1.jpg


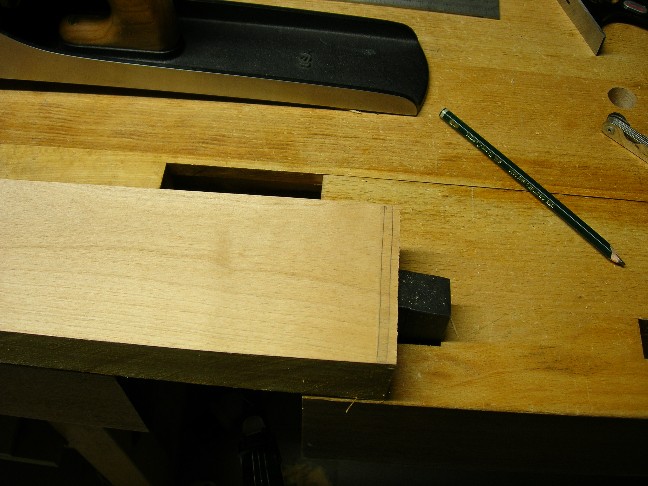
First thing to do you scribble all over the board.

Hohlfuge2.jpg


Then you establish the side edges by planing only the edge, the tip of the blade a little inside from the edge. After that your board should look a bit like this:

Hohlfuge3.jpg


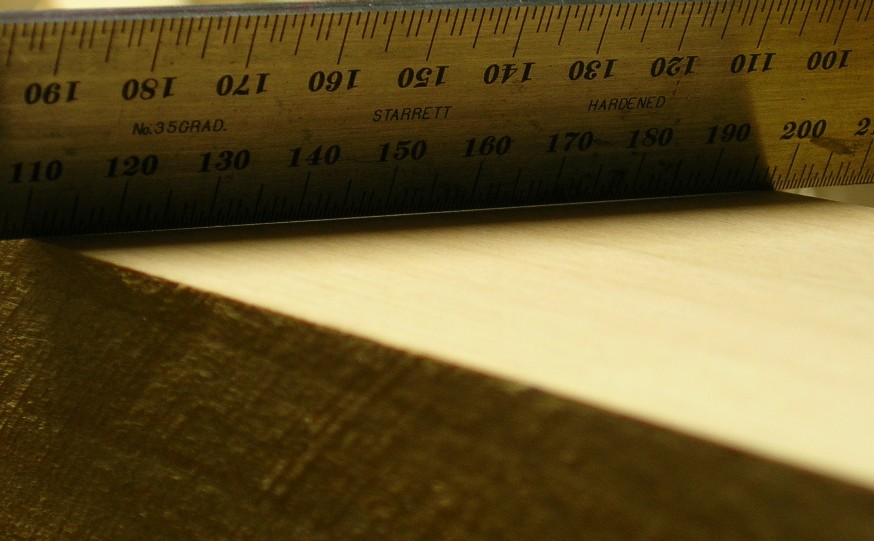
Taking a look under the straight edge you see the belly has grown in the first step. The two side edges won't ever be touched with the cambered tip of the blade.

Hohlfuge4.jpg


Now you plane off between the edges. At some point the plane will stop taking shavings and you know there aren't any bumps or bellies in the length. Only dust will come out of the plane's mouth.

Hohlfuge5.jpg


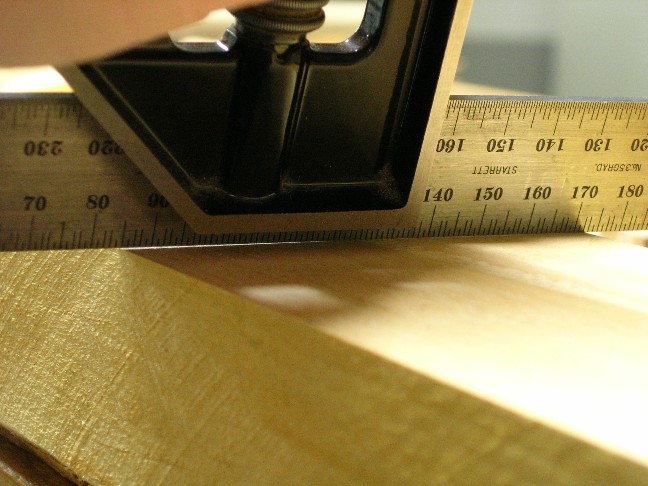
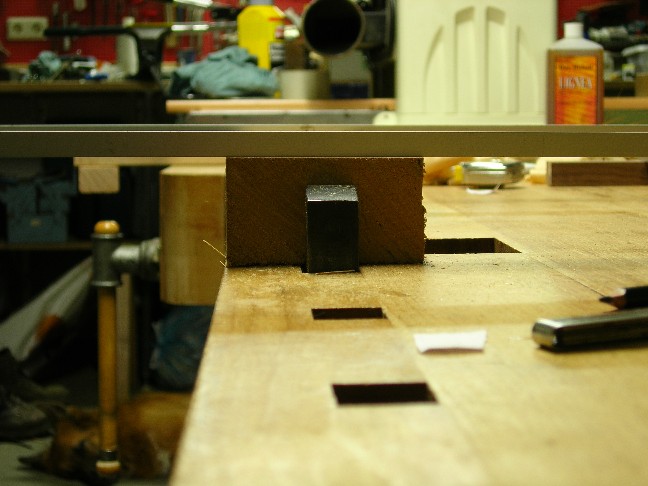
Taking a look under the straight edge, there is a neat hollow.

Hohlfuge6.jpg


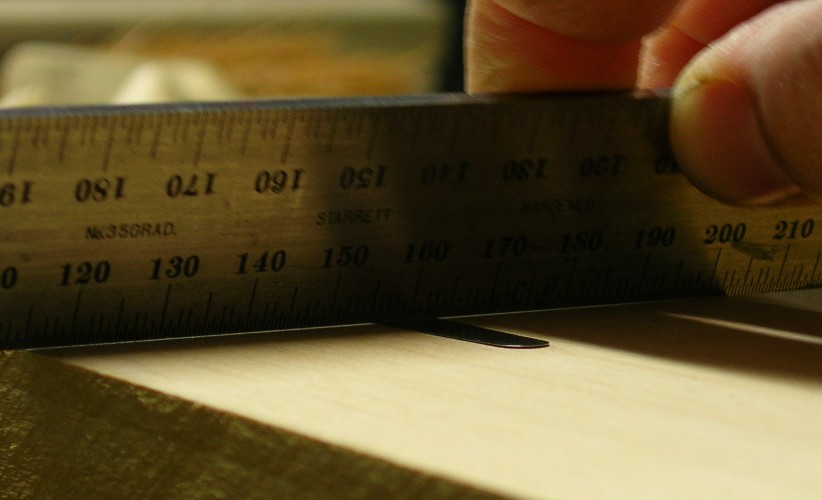
I put a feeler gauge of 0.10 mm under the straight edge and one can see it is yet too thick.

Hohlfuge7.jpg


2. Hollow in the length

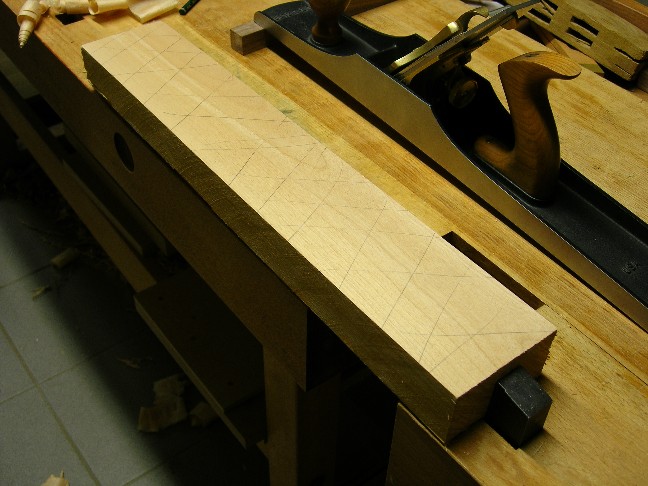
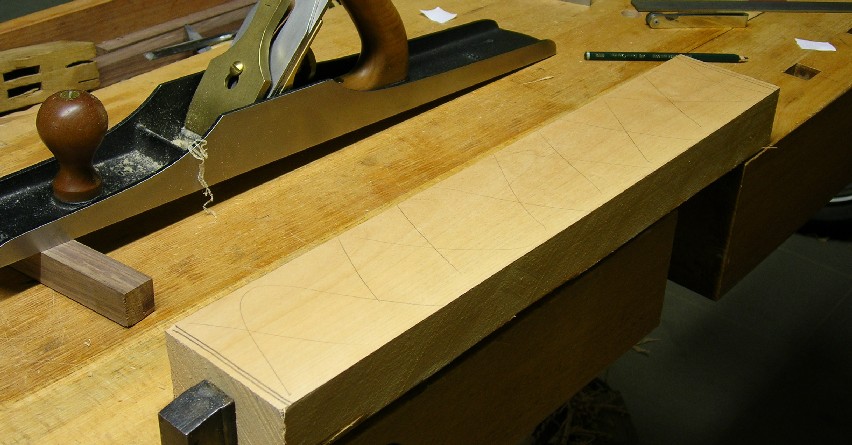
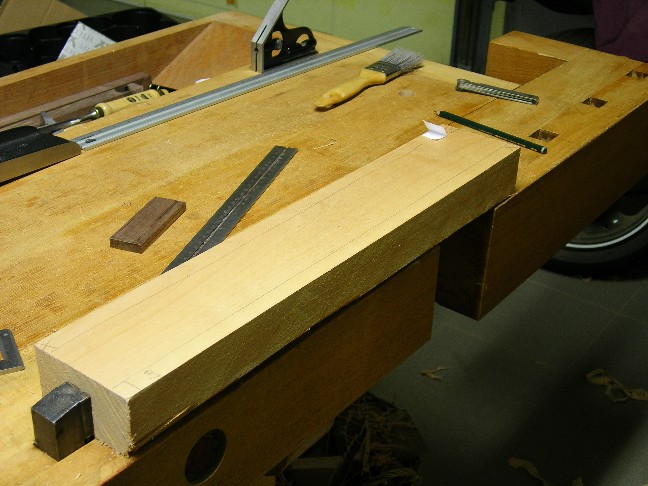
Next step you create a hollow in the length. It's where the length of the plane really matters. A shorter one would probably do, but the hollow'd bebigger I guess. You scribble the whole board as the first time and you add a serie of through lines on the two ends like on the pic. Now you do stopped shavings. I.e. you plane off the scribble lines but the lines on the ends will stay. First shavings are made on the side edges, remember not to touch the edges with the camber's tip. Then you make sets of shavings just till the plane will stop working.

Hohlfuge8.jpg


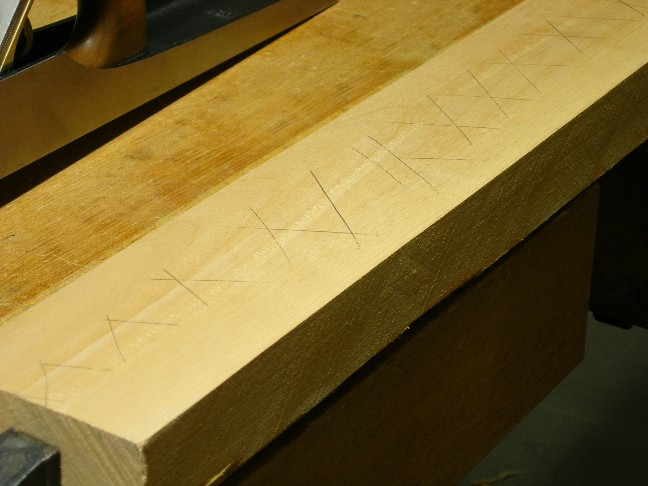
The board will look like this. After that you make a full set of shavings in order to take off the markings, first the side edges and then the centre.

Hohlfuge9.jpg


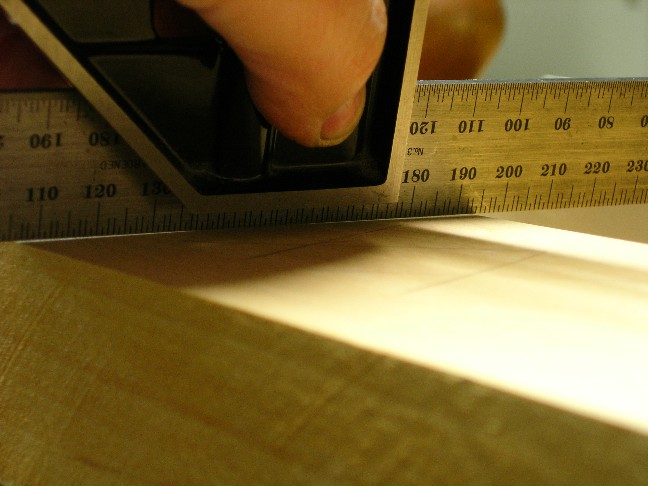
There will be a neat double hollow on the board with 0.05 mm in length, no bumps, no bellies.

Hohlfuge10.jpg


3. Unwinding

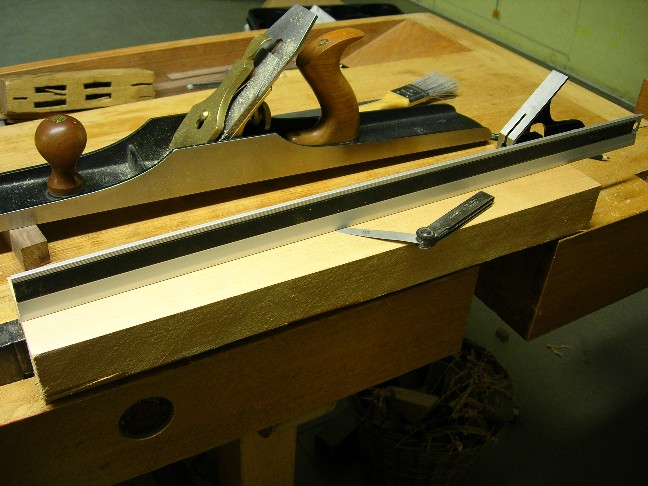
At this point the board always can be a little twisted or winded. In order to check this, I put on the winding sticks and check. I see the one in front dropping a wee bit at right. Putting a folded piece of paper under the right corner brings everything right. You now know the low points and how much they measure.

Hohlfuge11.jpg


You mark these points with "LO" and the side edges too. All the surface will be planed right now except the two low points. You remember the stopped shavings thing? Begin with the side edges again and go on to the centre then.

Hohlfuge12.jpg


The board should look like this now and be "flat" with a double hollow.

Hohlfuge13.jpg


I only pictured a small part of what David shows and tells in his DVD. It is a whole world to discover...

Regards and I hope I could help a wee bit :wink:

Marc
 

Latest posts

Back
Top