


RossJarvis
Established Member
Now that I’ve made my own toolbox I must be a craftsman, innit! So as I’ve been threatening, it’s time to get crafty. I have read a number of books on sawdust and shaving manufacturing including these;
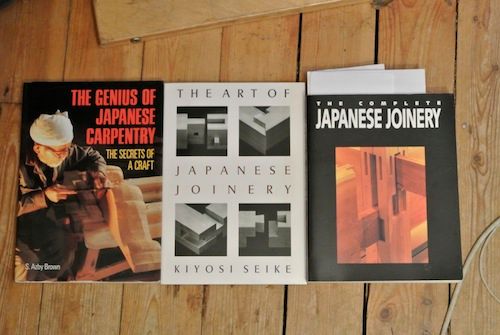
The one on the left is good on history and stuff, with some interesting bits on restoring an old temple, the one in the middle is a bit superfluous but has some nice photographs, The one on the right is very good on a lot of carpentry and joinery and includes lots of very scary joints.
So I thunked “let’s make a splicing joint, with that old oak in the outhouse” I was thinking of a “lapped gooseneck splicing joint” (Koshikake Kama Tsugi?!?), but then decided that might be a step too far, even for yours truly and the “apprentice”. So I decided on a lapped dovetail. I’ve done a couple or three of these before and almost got them right, so where’s the problem. This is called the “Koshikake Ari Tsugi”, not quite sure what the words mean but I presume it’s some relation to ‘Ari Secombe. There’s two versions of this for a splicing joint, one wot is a fair bit simpler than the other;
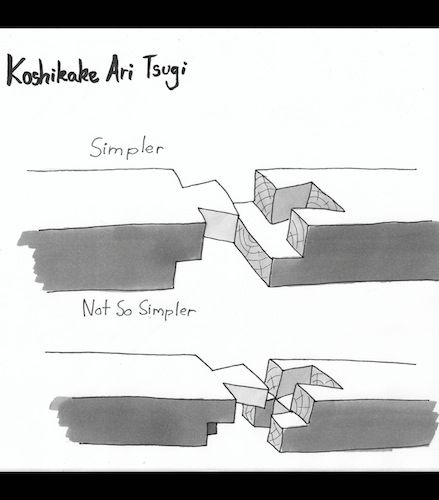
The top one is a simple lapped dovetail and the one underneath has a sort of mortice n’ tenony thing in the bottom, so I’m sort of thinking of doing that one. Hennyway, out to the outhouse and find me some wood;
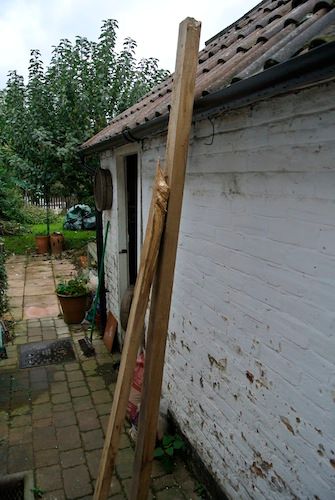
here’s a couple of bits of oak wot I got fresh cut and green at Cressington Temple, for a couple of quid about four or five years ago, for some unknown reason they were left-overs;
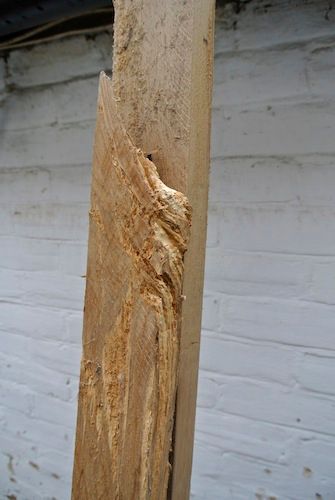
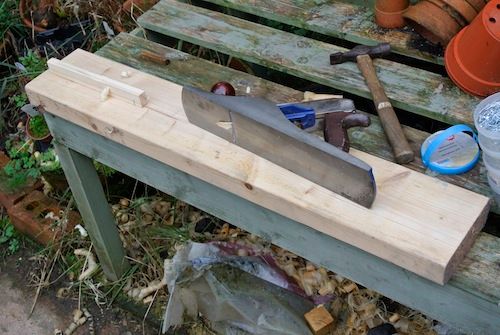
Could have something to do with the pithy bits (pith?) in them and the odd size. Anyway I took the pith and stuck it in the outhouse till I could thunk of summat to do with ‘em. That time has now arrived. Firstly I thought I might need something a little bit better than the garden staging to plane this on. Now as luck would have it I noticed a bit of 2x6 that had been hanging around in the porch, hidden behind a Big Austrian and a Little Israeli, dragged it round the back and started to plane an end stop for it;
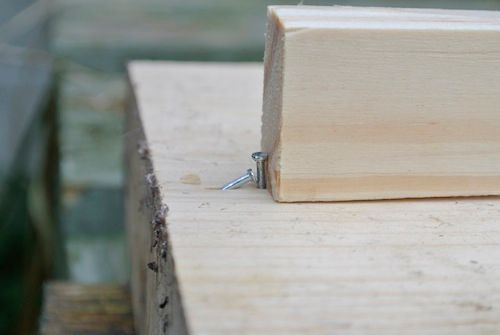
once again, I resorted to hi-tech bench dogs to hold the planed bit;
Once the stop was square and straight(ish), I thought the planing bench could do with a bit of planing too;
Bish, Bash, Ouch, Bosh, one planing bench with stop;

Nextly I cut a bit of oak off the end of the oak and bunged the rest of the oak back in the outhouse;
I wasn’t 100% sure how the ryoba saw would deal with this wood and it was a bit tricky to start, once I’d stopped using the “rip” side to crosscut and turned it round, it went fine. It was a little bit slower than cutting pine, but not by much and left a lovely finish. Next I thought that I’d better get the proper support services in place, as I’d not utilised these well last week;

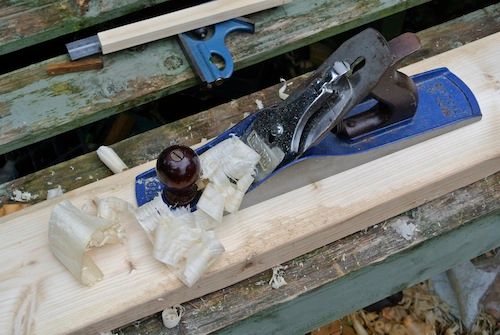
…just need to keep an eye out for the apprentice to stop him scoffing the lot! Nextly I started bashing the oak with the plane, having remembered to re-sharpen the iron (and deliberately avoided dropping the sharpening stones on the tiles this time). It took a fair bit of pushing in comparison to planing pine and there was very little between having the blade below the mouth and skating across the surface and “Oh my good groovy, that’s resisting a bit”. And the shavings were fairly different too;
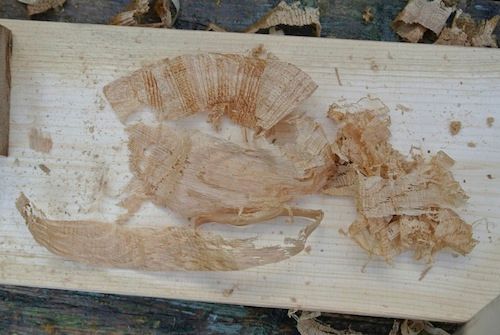
…generally quite wrinkly and harder to see through than pine! I couldn’t find any candles to rub on the plane bottom and couldn’t be ar…bothered to sharpen the no 4 or 4 ½. It’s some considerable time since I’ve planed oak, so I’m not sure if this is to be expected or not. Anyway, the surface came out reasonably smooth and almost shiny and with a good stroke of luck I got the edges square;
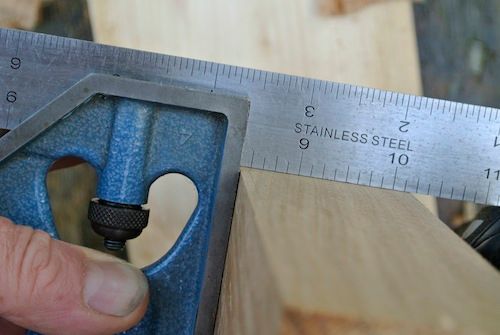
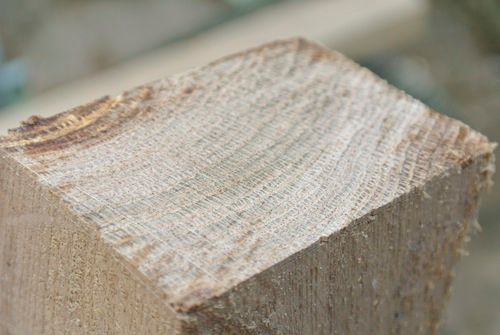
…and after a few cups of tea, inter-sperced with grunting and iron tweaking we ended up with;
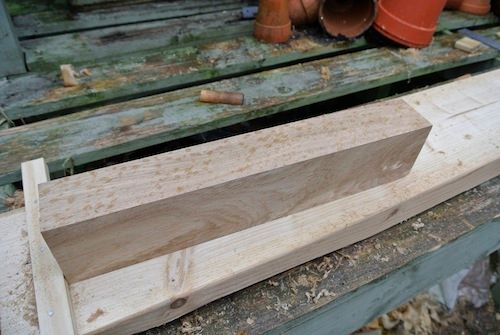
…a lump of oak. So far it’s looking pretty good, nice flat surfaces and square edges (in a rectangular fashion if you get my drift), The thin edges are parallel, but the fat ones aint. The Hampshire monsoon started again so I came back inside to gabble on to you. I want to get the whole thing parralel, cut it in half, mark out the joints and get it made, however the BBC says it’ll be sunny all day tomorrow, so I’m digging out my Sou’Wester, but if they’re actually right for once I might be able to get this job done in a day (famous words of the last variety).

The one on the left is good on history and stuff, with some interesting bits on restoring an old temple, the one in the middle is a bit superfluous but has some nice photographs, The one on the right is very good on a lot of carpentry and joinery and includes lots of very scary joints.
So I thunked “let’s make a splicing joint, with that old oak in the outhouse” I was thinking of a “lapped gooseneck splicing joint” (Koshikake Kama Tsugi?!?), but then decided that might be a step too far, even for yours truly and the “apprentice”. So I decided on a lapped dovetail. I’ve done a couple or three of these before and almost got them right, so where’s the problem. This is called the “Koshikake Ari Tsugi”, not quite sure what the words mean but I presume it’s some relation to ‘Ari Secombe. There’s two versions of this for a splicing joint, one wot is a fair bit simpler than the other;

The top one is a simple lapped dovetail and the one underneath has a sort of mortice n’ tenony thing in the bottom, so I’m sort of thinking of doing that one. Hennyway, out to the outhouse and find me some wood;

here’s a couple of bits of oak wot I got fresh cut and green at Cressington Temple, for a couple of quid about four or five years ago, for some unknown reason they were left-overs;

Could have something to do with the pithy bits (pith?) in them and the odd size. Anyway I took the pith and stuck it in the outhouse till I could thunk of summat to do with ‘em. That time has now arrived. Firstly I thought I might need something a little bit better than the garden staging to plane this on. Now as luck would have it I noticed a bit of 2x6 that had been hanging around in the porch, hidden behind a Big Austrian and a Little Israeli, dragged it round the back and started to plane an end stop for it;

once again, I resorted to hi-tech bench dogs to hold the planed bit;

Once the stop was square and straight(ish), I thought the planing bench could do with a bit of planing too;

Bish, Bash, Ouch, Bosh, one planing bench with stop;

Nextly I cut a bit of oak off the end of the oak and bunged the rest of the oak back in the outhouse;

I wasn’t 100% sure how the ryoba saw would deal with this wood and it was a bit tricky to start, once I’d stopped using the “rip” side to crosscut and turned it round, it went fine. It was a little bit slower than cutting pine, but not by much and left a lovely finish. Next I thought that I’d better get the proper support services in place, as I’d not utilised these well last week;

…just need to keep an eye out for the apprentice to stop him scoffing the lot! Nextly I started bashing the oak with the plane, having remembered to re-sharpen the iron (and deliberately avoided dropping the sharpening stones on the tiles this time). It took a fair bit of pushing in comparison to planing pine and there was very little between having the blade below the mouth and skating across the surface and “Oh my good groovy, that’s resisting a bit”. And the shavings were fairly different too;

…generally quite wrinkly and harder to see through than pine! I couldn’t find any candles to rub on the plane bottom and couldn’t be ar…bothered to sharpen the no 4 or 4 ½. It’s some considerable time since I’ve planed oak, so I’m not sure if this is to be expected or not. Anyway, the surface came out reasonably smooth and almost shiny and with a good stroke of luck I got the edges square;

…and after a few cups of tea, inter-sperced with grunting and iron tweaking we ended up with;

…a lump of oak. So far it’s looking pretty good, nice flat surfaces and square edges (in a rectangular fashion if you get my drift), The thin edges are parallel, but the fat ones aint. The Hampshire monsoon started again so I came back inside to gabble on to you. I want to get the whole thing parralel, cut it in half, mark out the joints and get it made, however the BBC says it’ll be sunny all day tomorrow, so I’m digging out my Sou’Wester, but if they’re actually right for once I might be able to get this job done in a day (famous words of the last variety).


