Advice on tackling my first lamination

UKworkshop.co.uk

Help Support UKworkshop.co.uk:

This site may earn a commission from merchant affiliate links, including eBay, Amazon, and others.

YorkshireMartin

Established Member
Joined
31 Aug 2015
Messages
790
Reaction score
1
Location
Yorkshire
Hello everyone,

Following completion of my first "cabinet making" build, it's on to my next project, which is a dining table. As part of this, I need to face laminate two sections of maple, which are approximately 150cm long by 10cm wide. The stock is currently planed to a sheen, but I was planning on sanding to 220 grit to try to open the grain for the glue (this may be pointless I'm not sure?).

My clamps are a mixture of bessey k-body and some irwin quick grips. I can try to beg/borrow/buy more if required. I'm just not really sure how many I will need.

Seamless joints aren't essential as they wont be seen, but strength is important as this will be a component of the table top. The wood is relatively dry, having been in the house for approximately 18 months.

Is there a simple method for calculating the required clamping pressure for this? I am guessing I will need far more than the 8 clamps I already have.

Oh, and the stock is flat sawn.

Thanks gents.
 
220 grit is unnecessarily high - 80 or 120 is fine :)

You should be fine with those clamps - just use cauls to help distribute the pressure across the face.

I wouldn't worry about clamping pressure calculations. Just apply an even spread of glue over the entire faces (both sides), and then clamp until you get some squeeze out around the edges.

After practise, this amount of squeeze out will lessen, but better to be heavy handed to start with
 
The thicker your cauls the fewer clamps you can get away with, as each clamp has its pressure spread over a wider area (so same force but lower pressure). As Matt says, as long as you have even squeeze-out (pay particular attention to the ends) you should be fine.
 
I wouldnt bother sanding, the glue area is huge, you wont have any adhesion issues.

Its quite a big area so even glue spreading is a key. I have a glue roller for this, Im not sure what other options would work to get an even coating quickly some form of paint roller is prob too soft,

I suppose smiley faces away from each other will reduce cupping tendency to pull at the cured joint.

The thicker the boards, the more difficult to get a tight joint.

Get clamps etc all set up to minimise time and avoid risk of pre curing.

If you have it 4 lengths of 3 x 2 on edge will spread out pressure nice and evenly.

If the boards are to width, I would leave overlength, put a couple of screws at each end in the waste to stop any sliding about as the clamps are torqued up and take out before trimming to length.
 
MattRoberts":22hgxuav said:
220 grit is unnecessarily high - 80 or 120 is fine :)

Just apply an even spread of glue over the entire faces (both sides), and then clamp until you get some squeeze out around the edges.

I'm like a dog with a bone on this one, but I'll get an answer one day. I agree totally - but why do many adhesive manufacturers specify apply to ONE SIDE ONLY? :?
 
phil.p":13xkvlke said:
MattRoberts":13xkvlke said:
220 grit is unnecessarily high - 80 or 120 is fine :)

I'm like a dog with a bone on this one, but I'll get an answer one day. I agree totally - but why do many adhesive manufacturers specify apply to ONE SIDE ONLY? :?

I suspect its so they can quote large coverage in their advertising. I dont cover both sides, but I do put a lot on the one surface and accept squeeze out and dont record how many square feet each tube covers.
 
It doesn't really matter - the point is that the more of the surface that is covered, the better the adhesion.

If the surfaces are not completely flat (on a micro level) and you only spread the glue on one side, it's possible that small areas of the unglued piece won't pick up the glue from the glued piece. That's why you often see people working the pieces back and forth after putting them together :)
 
I agree completely - but no one has ever come up with the reason they SPECIFY one side. Bob's speculation doesn't really ring true - the coverage rate would be neither here nor there if the joints then failed - the stuff wouldn't sell. Sorry, Martin, for going off tack - I just hope if I ask often enough someone will come up with a hopefully factual reason. Personally, I wouldn't dream of just doing one side.
 
I need to face laminate two sections of maple, which are approximately 150cm long by 10cm wide.

How thick are the two pieces? How will this component fit into the overall design?
 
custard":3ucu0ths said:
I need to face laminate two sections of maple, which are approximately 150cm long by 10cm wide.

How thick are the two pieces? How will this component fit into the overall design?

21mm each approx off the planer, so -2mm or so after final preparation. Once laminated together, they will be cut into two length ways. The two lengths will be part of the overall top lamination, edge jointed (slightly recessed) to 44mm walnut. I'll use 10mm domino's for alignment of the table top and intend to make it in two sections before a final jointing of the two halves. This is mostly due to weight and available working space. Final intended thickness of the table top is 40mm.
 
phil.p":27rqam1o said:
I agree completely - but no one has ever come up with the reason they SPECIFY one side. Bob's speculation doesn't really ring true - the coverage rate would be neither here nor there if the joints then failed - the stuff wouldn't sell. Sorry, Martin, for going off tack - I just hope if I ask often enough someone will come up with a hopefully factual reason. Personally, I wouldn't dream of just doing one side.

No problem. It's something I've wondered about myself actually.

There isn't a logical reason for it that I can see, because once you put them together it's on both sides anyway. However, I CAN see the benefit of applying to both sides initially, as slight surface imperfections, plus absorption, inhibit coverage if you apply to only one surface.

I think Bob might be right. I see what you're saying, but look how many utterly awful products continue to sell day in day out, so I doubt it would worry the likes of Titebond if they padded their coverage areas a little. I think for a joint to fail you'd have to basically forget to apply glue at all. The modern stuff is so stupidly strong.
 
I suspect it is so developing polymer chains which have linked on one surface get to find and absorb/link into the raw substrate rather than into a semi-curing mixture from another gluey surface.

It's not universal advice, but common with PVA and Poly. Epoxy generally advises a neat prime on one surface and the filled adhesive on the other.
 
YorkshireMartin":g09isj6h said:
custard":g09isj6h said:
I need to face laminate two sections of maple, which are approximately 150cm long by 10cm wide.

How thick are the two pieces? How will this component fit into the overall design?

21mm each approx off the planer, so -2mm or so after final preparation. Once laminated together, they will be cut into two length ways. The two lengths will be part of the overall top lamination, edge jointed (slightly recessed) to 44mm walnut. I'll use 10mm domino's for alignment of the table top and intend to make it in two sections before a final jointing of the two halves. This is mostly due to weight and available working space. Final intended thickness of the table top is 40mm.

That's straightforward then. Getting them to line up is the trickiest bit, PVA will act as a lubricant and the cramps will tend to twist them around. Robin's advice regarding screws or brads is worth thinking about. Good luck!
 
Perhaps 1 side gluing is specified as it will technically work. Whereas contact adhesive will only work with both faces coated.

Using most glues such ad pva, I dont believe gluing 1 face only is ideal, quite often the second face doesnt get fully wetted.

Gluing a mortice and tenon def requires both gluing surfaces as assembly scrapes the glue off. Edge jointing like a table top though I would only coat 1 face and rub the joint to coat the second face.

Also for big surface areas like gluing the 2 boards of maple in this post I would only glue 1 face, you would end up with too much glue otherwise.
 
I asked about the thickness because of the possibility that this job might have been closer to veneering, with a thin component being glued to a thick component. Often in veneering you only apply glue to the thicker substrate, no glue on the thinner veneer. That's to avoid the thinner component curling up and warping before it's in the press.

But in this case I'd glue both sides, however I'd use a roller or a notched scraper to ensure there's only a thin coat of glue being applied, otherwise the squeeze out can be epic. Festool once did some tests with PVA and Dominos, they concluded applying glue to both the mortice and to the Domino delivered an extra 30% joint strength. The same logic applies to any gluing job, unless there's a really good reason for only gluing one component, then glue both surfaces.

By the way, the strongest joint has only a very thin layer of glue, PVA has zero gap filling strength so having ensured both surfaces are fully wetted out you then want all the surplus glue out of the joint. To achieve this it can help to begin applying the cramp pressure first in the centre or middle, and then work outwards with the cramps. This is a notorious problem with vacuum veneering, where the pressure comes on strongest and first at the edges, so unless you're careful there's a tendency to get glue pooling in the centre of a flat panel.
 
custard":1wco8zty said:
This is a notorious problem with vacuum veneering, where the pressure comes on strongest and first at the edges, so unless you're careful there's a tendency to get glue pooling in the centre of a flat panel.
A solution I've found works well to offset this tendency is to create a pyramid like stack of boards of diminishing lengths and widths to cover the veneer and the ground underneath it, usually three to five or more pieces of 15 - 18 mm thick ply, MDF or whatever that's hanging around for a dining table size panel. The bottom board, separated from the veneer by a sheet of plastic is cut to just about the same dimension as the ground underneath.

Someone earlier in the thread touched on end grain orientation of the these thicker parts being glued together, possibly Robin. I think I may be saying something different to Robin in my advice being to arrange tangentially sawn timbers (if that's what we're talking about) with the cupping of the growth rings matching rather than mirrored. My reasoning for this being that any future cross-grain distortion caused by moisture loss or gain will most likely result in the cross-grain distortion of the multiple parts all being in the same orientation rather than fighting each other, i.e., if, for example, the growth rings of the two (or three or more parts) want to straighten because of moisture loss they'll tend to straighten with each other: in a sense all acting as if they're a single board, and the same but reversed distortion if the wood takes on moisture. Further, if the glue is a PVA or aliphatic resin this rather takes advantage of the creep characteristic common to all those glue types. That's my theory anyway, ha ha. Slainte.
 
Brilliant responses as always.

I've done a mock up tonight. I'm short a couple of clamps to even things out properly. I just need to decide on the length to buy that would be most useful to me overall.

One thing I did want to ask. I was under the impression that it's good practice to alternate the direction of the clamps. Given the very limited size of my workspace, is this absolutely necessary? If I do it, it means I cant really walk around. If they are all one direction, I can just move it onto the floor, resting on the clamp heads, which is a bit more practical.

The clamps I have are K body revo 2k.
 
I cant see how alternating clamps in this application would make a difference, so would suggest all 1 way.

Clamping a table top say 750mm wide, clamping with traditional sash clamps all one side coild result in a bowed top because the bars of the clamps will bow as pressure is applied.
 
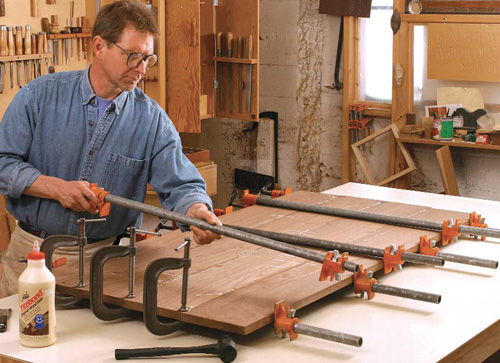
The alternating of clamps often refers to having them alternating above and below when edge joining boards, as opposed to all on one side :)

SpringJointMain-main.jpg


It's good practice, particularly for long panels, as it ensures the bars of the clamp are applying pressure above and below to help keep the boards aligned
 
Back
Top