50mm double bearing template router cutter

UKworkshop.co.uk

Help Support UKworkshop.co.uk:

This site may earn a commission from merchant affiliate links, including eBay, Amazon, and others.

woodworm2017

Established Member
Joined
26 Sep 2017
Messages
31
Reaction score
0
Location
london
hi guys,
i have a question i am making parts for chairs and using a 50mm double bearing template router cutter. what speed should i run it on and if i am using collect extension then which speed and is it safe to run since the cutter protrudes a lot on top of my router elevator.
thanks,
ahmed
 
I can't help you with this but when you come to replace the cutter, have a look at the radian 4 bladed one. It gives a very good finish indeed
 
I guess you mean the cutting edge is 50mm long, rather than the router bit is 50mm in diameter! In that case you're okay running the router at full speed, however on some templates you'll be inclined to dwell in one spot which can cause scorching at full speed, if you're experiencing scorching then drop the speed a notch or two.
 
Oops, I missed the reference to a collet extension (it was flagged to me by a far more observant and conscientious forumite!). That might change things, worth checking with the extension manufacturer to see if there's a speed limit.

By the way, I make plenty of chairs, and I've found I can copy rout all the components without using a collet extension. If you don't actually need the extension then it's always good practise not to use it.
 
thanks Custard,
yes you are correct it the length ....sorry for got to mention that. when you copy components are you using a router elevator or a router plate?
 
woodworm2017":2ul7rlt8 said:
when you copy components are you using a router elevator or a router plate?

I copy rout components in two main ways, on a router table (or a spindle moulder), and with the router hand held. On my router table I use one of the quick release auxiliary chucks (I think the one I use is called a Muscle Chuck?) I wouldn't hesitate to run that at full speed.

Here's a typical jig set up that I'll use for copy routing chair components on the router table.

Copy-Routing-Chair-Parts.jpg
 

Attachments

  • Copy-Routing-Chair-Parts.jpg
    Copy-Routing-Chair-Parts.jpg
    109.3 KB · Views: 263
custard":24hx8uiv said:
woodworm2017":24hx8uiv said:
when you copy components are you using a router elevator or a router plate?

I copy rout components in two main ways, on a router table (or a spindle moulder), and with the router hand held. On my router table I use one of the quick release auxiliary chucks (I think the one I use is called a Muscle Chuck?) I wouldn't hesitate to run that at full speed.

Here's a typical jig set up that I'll use for copy routing chair components on the router table.


hi Custard,
your jig looks very interesting. i used something similar for rocking chair back legs . since you build chairs i would like to know where do i start designing a dining table chairs.
 
As Pete said, you can pull the dimensions from a chair that you find comfortable. Alternatively go to the library and get a copy of Human Dimension & Interior Space by Panero & Zellik. That's the bible for furniture design and will give you every conceivable angle and dimension for every conceivable chair!
 
Ahmed, just a word of caution. I was trying to trim a guitar body using a big 50mm flush trim template cutter like that on a router table and the bit would grab the wood and quite literally launch the guitar at me.

I think it's too much to trim in one go, unless you have a spiral cutter.

If you do want to use this bit, I would try and remove as much excess wood, ( by bandsaw/sanding etc get close to the line) as you can so that the router is removing the minimum amount of wood.
 
Oscar makes a good point, safety when router copying needs some thought.

-You need to make sure the router bit is properly guarded. You'll see plenty of YouTube videos where there's no guarding at all, but in commercial workshops it's a must. I confess that in my own workshop it's very tempting to ignore guarding under some circumstances, but I've worked in enough commercial workshops to know that's just laziness and lack of imagination, with a bit of effort there's always a way. You need to set up the router so the minimum amount of cutter is above the table and the router bits with bearings both above and below the cutter probably have some inbuilt extra safety.

-The workpiece needs to be securely fastened to the template. Commercial workshops prefer screws or toggle cramps and frown on double stick tape because it opens the door to operator variability and error. In your own workshop double stick tape is commonly used, but if you're going to use it then err on the side of safety; good quality tape, dust free, too much rather than than too little, and well pressed down.

-The real problem is end grain cutting, that's when the router is most likely to snatch. You need to design your templates so there's both a lead-in and a lead-out for the cut. I'll always band saw to within a mill, but on end grain I'll band saw to within half a mill and absolutely ensure there's no bumps that the cutter can grab onto. Make sure you're feeding in the correct direction and always try a test pass first with the router switched off so you can be sure the manoeuvre can be completed in one movement and you know when and where you'll perform any change of grip.

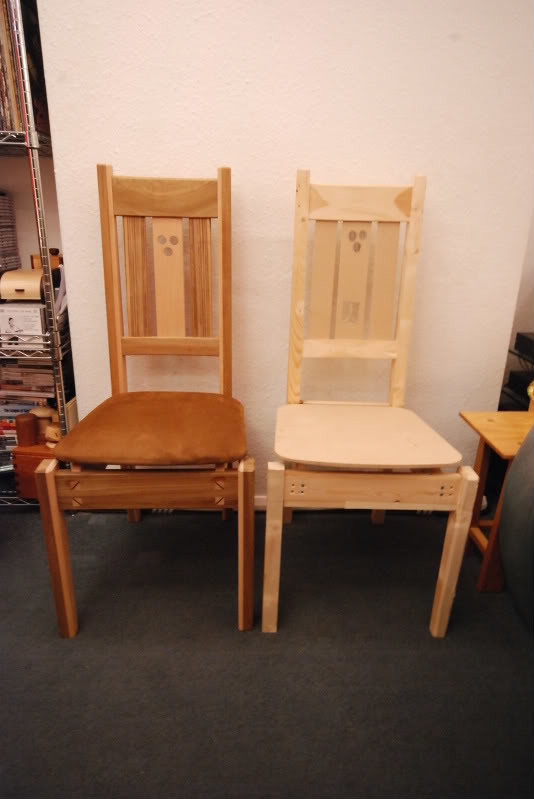
This is a piece of furniture I make fairly regularly,

Harvard-Side-Table.jpg


And this is the router copy template I use for the 32mm legs,

Router-Copy-Template.jpg


If I were making this in a shared workshop I'd break it down into two or more sub jigs in order to get a better lead-in and to avoid the need for double stick in the centre where I can't fit a toggle cramp. If you're not confident in your arrangement then don't route, instead use a bandsaw/fret saw and finish with a spokeshave. After all, that's how you make the templates in the first place, and the copy routed job will never be better than the finish you achieve on the template!
 

Attachments

  • Harvard-Side-Table.jpg
    Harvard-Side-Table.jpg
    45.8 KB · Views: 137
  • Router-Copy-Template.jpg
    Router-Copy-Template.jpg
    66.1 KB · Views: 137
Very interesting, Custard. Do you have a view on which way round to use the bearings, i.e. with the template above the work or below? If you use clamps obviously it has to be below but with double sided there is a choice. Is either way safer?
 
woodworm2017":3du0nrmk said:
hi Custard,
your jig looks very interesting. i used something similar for rocking chair back legs . since you build chairs i would like to know where do i start designing a dining table chairs.

As Pete and Custard said you can use a comfortable chair as a starting point. A few years ago I posted about a chair making project which started with making and adjusting a full size mock up https://www.ukworkshop.co.uk/forums/vm-chair-project-t87767.html

I woud agree with Custards comments about template routing safety. Cut with the band saw as close to the line as possible before routing, try to arrange it so you are not starting the cut against the grain. I find that sticking a piece of abrasive on the template at the clamping position helps give the toggle clamps a stronger hold.

Big trmpltes have more mass so are less likely to get throuwn around so it is often best to have two templates one for one side of a piece and one for the other rather than one small template exacty the size and shape of the piece. (not sure I explained that very well!)

Chris
 
....Also a top mounted bearing is safer as the cutter is shielded a bit by the bearing, so sometimes a double bearing cutter is good just because it provides protection even thought you are using the bottom bearing. With the proviso that you should also have other guarding.

Chris
 
I don't want to hi-jack someone else's thread but I'm curious about grain direction. I read somewhere with these 2 double bearing bits you can choose to place to the template either above or below the workpiece in order to move the workpiece's grain in the ideal direction against the cutters.

That's as much as I understand it!

I've never seen a practical example/answer of this. I tried youtube vids about reading the grain etc but they use handheld routers so everything was upside down and my poor little brain couldn't handle it!

Can you look at this piece of wood and examples below and tell me which way you'd orientate the board in order to achieve the best/safest cut on that top edge, a) or b).

This is the wood...
2v1kri9.jpg


Would you pass it through router like a)
2el6zc9.jpg


or place the template on other side, to turn board upside down and reverse the grain... b)
mm7kf6.jpg


Hope this makes sense, sorry for possibly hi-jacking OP's thread, just thought I'd take the opportunity to finally get this answered.

So A or B?
 
B, if you were using a chisel (L to R) instead of the router you can see how you would dig into the grain at A (tear the grain with the router), but not in B.
 
OscarG":27cveom6 said:
Can you look at this piece of wood and examples below and tell me which way you'd orientate the board in order to achieve the best/safest cut on that top edge, a) or b).

This is the wood...
2v1kri9.jpg


Would you pass it through router like a)
2el6zc9.jpg


or place the template on other side, to turn board upside down and reverse the grain... b)
mm7kf6.jpg


So A or B?

B is the orientation that will give you the cleanest cut. On some projects you can screw the template to the workpiece (dropping the screws into areas that will subsequently be chopped out for mortices for example), or you can carefully apply good quality double sided tape. In these circumstances you have a workpiece/template assembly that can be flipped upside down if you're using a router bit with a bearing at each end of the cutter (I hesitate to call it a "double bearing bit" because there are also copy routing bits that have two bearings side by side to give an increased bearing surface). A good way of thinking it through is to imagine you're copying a perfect circle, you'd make four separate cuts, one in each quadrant, with two cuts made with the template on top, and two cuts with the template on the bottom.

Another alternative is to use spiral copy bits like these,

https://routercutter.co.uk/2-2-compress ... al-pattern

they're certainly not cheap, but because of their sheering cut they tend to produce acceptably clean results both with the grain and against the grain. In fact you can find spiral bits with a bearing at each end, Wealdens do a very good one at a slightly more affordable price. A spiral bit worked with the grain will give you the best result of all, in many cases it's virtually finish ready straight from the tool.
 
Back
Top