


sploo
Somewhat extinguished member
This is a relatively simple jig, that was created because I needed to trim the edges of an end grain chopping board. It was made quickly from bits of scrap I had; hence the hole in the top sheet (it's not an intentional feature!).
I put a length of ~44mm square timber along the front edge of my router table (trying to find the straightest piece I had), cut a sheet of 6mm MDF, and screwed it to the timber. The width of the MDF sheet was such that it would just foul a 1/2" router bit coming up from the centre of my table.
I then ran the jig, holding it against the front of the table, and used the 1/2" bit set just high enough to trim the MDF perfectly straight.
Using a framing square against the newly trimmed edge, I screwed another length of timber on the top side of the MDF, ensuring that it was perfectly square to that edge.
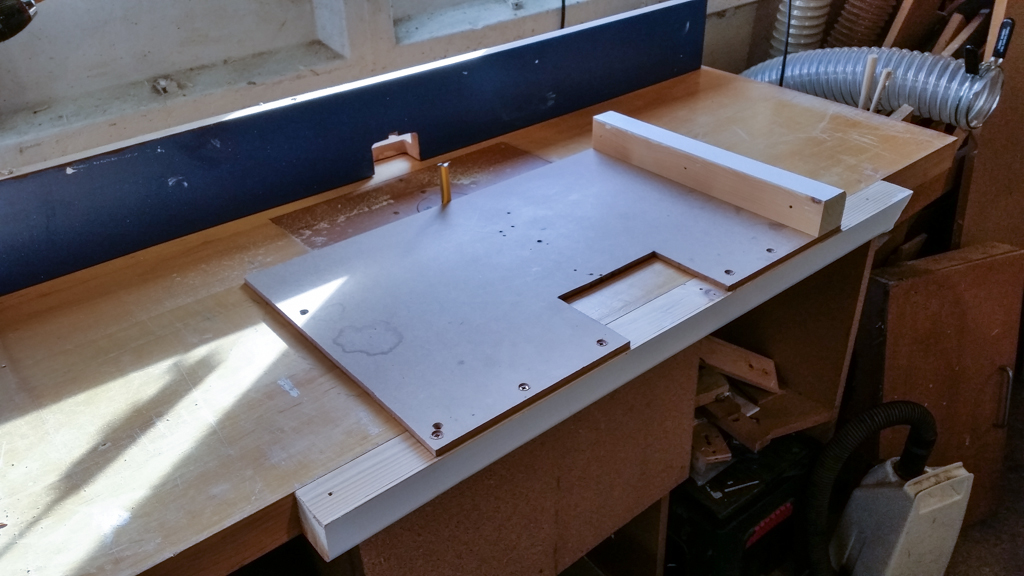
The timber on the top of the jig protruded beyond the trimmed MDF edge by less than 1mm. The jig was then run along the table again with the bit extended to its full height, to trim the end of that timber flush with the MDF. The thickness of the timber was obviously chosen such that a fully extended bit would be tall enough to trim it completely.
I then added a pair of small toggle clamps I had, and finally put a coat of shellac sanding sealer on the bottom of the MDF and table side of the bottom timber, a light sand, and then applied a coat of Liberon Lubricating Wax.
I was then able to clamp the cutting board - pushed up against the top timber (with a couple of shims to keep it held tight under the clamps). Care must be taken to ensure no part of the workpiece extends more than ~0.5mm over the edge of the MDF (otherwise it's going to give the router a hard time).
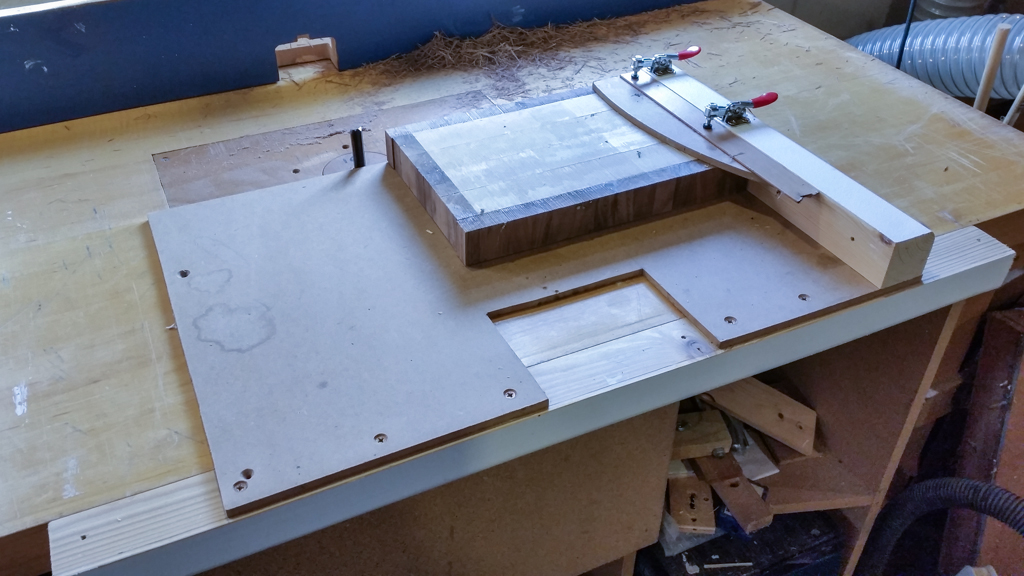
That trims the edge perfectly flat/smooth, plus it ensures it's square to the face that's pushed against the top timber beam. Then I spun the board and repeated until all sides were smooth.
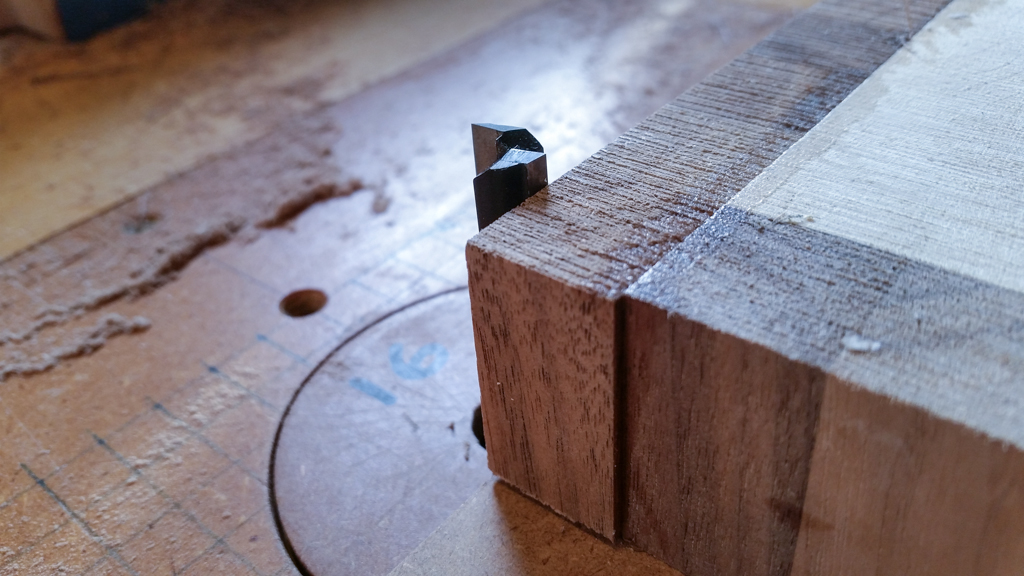
The fact that the router bit is perfectly flush to the end of the length of timber on the MDF top supports the work piece, and prevents tearout at the end of the cut.
As I was cutting across the grain in this instance the quality of the cut wasn't perfect, but with a sharp bit it was more than acceptable after a bit of sanding.
I put a length of ~44mm square timber along the front edge of my router table (trying to find the straightest piece I had), cut a sheet of 6mm MDF, and screwed it to the timber. The width of the MDF sheet was such that it would just foul a 1/2" router bit coming up from the centre of my table.
I then ran the jig, holding it against the front of the table, and used the 1/2" bit set just high enough to trim the MDF perfectly straight.
Using a framing square against the newly trimmed edge, I screwed another length of timber on the top side of the MDF, ensuring that it was perfectly square to that edge.
The timber on the top of the jig protruded beyond the trimmed MDF edge by less than 1mm. The jig was then run along the table again with the bit extended to its full height, to trim the end of that timber flush with the MDF. The thickness of the timber was obviously chosen such that a fully extended bit would be tall enough to trim it completely.
I then added a pair of small toggle clamps I had, and finally put a coat of shellac sanding sealer on the bottom of the MDF and table side of the bottom timber, a light sand, and then applied a coat of Liberon Lubricating Wax.
I was then able to clamp the cutting board - pushed up against the top timber (with a couple of shims to keep it held tight under the clamps). Care must be taken to ensure no part of the workpiece extends more than ~0.5mm over the edge of the MDF (otherwise it's going to give the router a hard time).
That trims the edge perfectly flat/smooth, plus it ensures it's square to the face that's pushed against the top timber beam. Then I spun the board and repeated until all sides were smooth.
The fact that the router bit is perfectly flush to the end of the length of timber on the MDF top supports the work piece, and prevents tearout at the end of the cut.
As I was cutting across the grain in this instance the quality of the cut wasn't perfect, but with a sharp bit it was more than acceptable after a bit of sanding.