Workbench - some assembly required.

UKworkshop.co.uk

Help Support UKworkshop.co.uk:

This site may earn a commission from merchant affiliate links, including eBay, Amazon, and others.
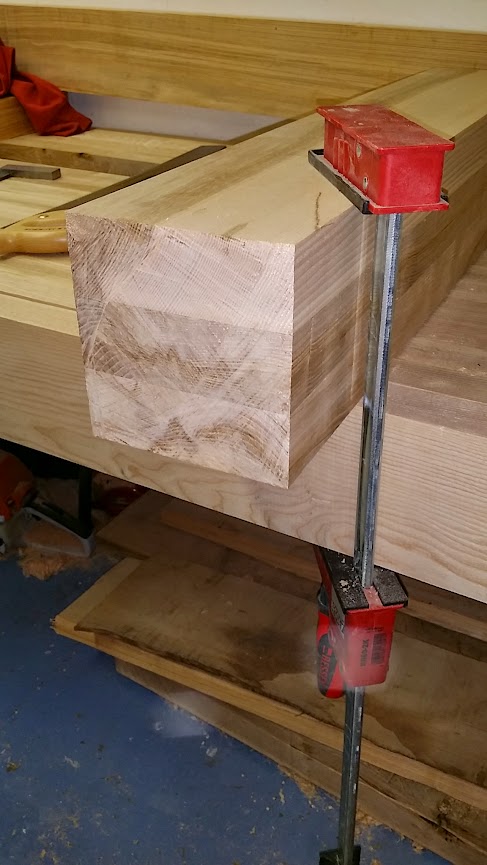
Even with the mortise and tenon you can still separate the top. The mortises help hold it very square, with no racking, however I screwed the rails to the top with carriage bolts so I can take it off. I also made the end cap with doevtails, again not glued. The idea is I can remove the end cap, take the top off, and pass the two pieces through a planer / thicknesser if I ever need to. Granted you'd need big machines, but I know some wooden house building companies here that have them. To be fair, I actually flattened the top by hand anyway at the end, as it was less trouble, however I have the option. The mortises in the legs do add a lot, even unglued in terms of preventing any racking.

Frugal, do you know why Richard no longer sells the bar? You may struggle to make one as good, as the shaft is extremely smooth with about 200 ball bearings, and has very tight tolerances indeed.

Even so I found it a struggle to get it to run smoothly like in Richard's video. I can get it smooth, however then tightening the garter on the wooden screw makes the action rather stiff. The vice does the job perfectly, just quite stiff to wind it.

If he stopped making because it was too difficult to get working, you may want to rethink. However I do enjoy not having to move a pin around.

Have you seen Mark Spagnolo's Roubo build? very detailed videos, a good 4-5 hours in total I'd say.
 
I am not sure why Rickard is no longer selling the whole leg vise any more. It might have been that he was getting too many questions about the fitting. He does seem to still fit them to the workbenches that he sells, so he must still get on with the concept. I know that he was experimenting with a St Peters Cross type arrangement according to his blog in 2013, but nothing seems to have come of it.

The kind of linear bearing I am using is one of these: http://www.ebay.co.uk/itm/121162005472? ... EBIDX%3AIT which sounds very similar to the kind you have.
 
I do enjoy a good bench build, keep it up :)

For what it's worth, I put a leg vice on my bench with the traditional pinned guide, and I don't find moving the pin an inconvenience in the slightest.
 
DTR":2sxe3tg3 said:
I do enjoy a good bench build, keep it up :)

For what it's worth, I put a leg vice on my bench with the traditional pinned guide, and I don't find moving the pin an inconvenience in the slightest.

It's a first world problem for sure ;-)

Try a bench where you don't have to though, and you quickly get used to it!

I still need to do the sliding deadman on mine, and the centre strip, however now it's usable, I am using it, kitchen build still ongoing!
 
What I will be doing this weekend is ordering some new planer blades, and sending these ones off to be sharpened. Who knew that planing 320' of kiln dried hardwood would dull a set of blades ;) I also have to take the 11 sacks of shavings to the tip (I have already taken 5 sacks).

When I was cleaning up the planks for the legs the planer started to really struggle, whereas before it would plow through the wood with ease. There was a noticeable point last night where it tipped over from sharp to blunt.

I still have my venerable old DW733 to pick up the slack in the meantime for thicknessing duties. I am also going to have to work away for a couple of days this week which will cut into my garage time severely ;(
 
Why is it always on Friday evening that you need something by mail order. Anyway, the blades are ordered, and as Axminster are still doing their £1 delivery I did not feel the need to top up the order to £50 (I know I am going to crack need to try waterstones for sharpening at some point, but not today).

Whilst I am waiting for the vise hardware to arrive so that I can finish the top, I decided to start on the undercarriage. First thing is the legs as they need laminating. I have decided to go with Option 1 above as it makes my life easier.

Each of the 12 pieces (4 legs @ 3 pieces each) had one face and one edge planed true. Then the other wide face was thicknessed to take it down to 50mm thick. On on end of the board I trued it up by scribing around with a marking knife and a square and then planing it down with a block plane. Most of the ends were only a mm or 2 out so it was not too bad. The knife line gave a crisp place to stop. For a couple of the boards that were really out, I scribed the line 1/4" down the leg and put it through the bandsaw first to get it roughly right, otherwise I was going to be there all night with a block plane ;)

Even though the bench top is not yet complete, it already makes a much better work surface and clamping surface than the workmate:
20150515_222933.jpg


I am going to break another workbench "rule" and have the bench height at 36". I am going to be doing a mixture of power and hand tools so I do not need to have the bench low to take advantage of body weight as much. Plus I have a bad back, so bending over that much will probably do me more harm than good. If I ever decide to I can always lower the bench by cutting an inch or so off the bottom of the legs.

I am never quite convinced that the bandsaw I have is not going to wander, or make a curved cut on thick pieces. So when it came to cutting the leg to the 31" length, I used this as an excuse to try the technique of sawing a joint by keeping an eye on two faces at all times and rotating the piece. It turned out pretty well for my first attempt, it is certainly good enough for something that is going to be stood on the floor. (the photo is straight off of the saw cut).

20150515_221201.jpg


I did also have to take a trip to the tip today to get rid of the next 11 bags of shavings (making it 16 in total for this project):
20150515_215213.jpg


I ran out of the clear Axminster bags, so I had to resort to bin bags ;) I am also glad that I have modded my chip extractor into the FrankenExtractor by raising it up and sticking a black bin as a pre-filter. It was supposed to be a Phein-baffle, but I didn't make it very well, and I was spending all of my time unclogging the pre-filter (which kind of invalidates having it somewhat). I removed the bottom plate from the filter and it is a lot better behaved. It does not do a graceful circular vortex to drop the shavings all around the edges, rather it dumps then straight down, but there is still very little getting into the actual extractor bag (ignore the full bag in the photo, it was almost that full when I started:

20150515_215231.jpg


The last two of the legs are now clamped up to cure overnight. Then I need to trim them to length and ensure that they are still true to the front show face. I will leave that until I get the new planer knives as it will be a lot easier to use the planer fence than it will be to get a 3' long 6" wide face exactly 90 degrees to the front face.

Next will be the long and short stretchers, which will need to be roughed out and cut to length.
 
i found the suggested heights in the books way too low too, so you are not alone.

It all depends on what works for you. On the odd occasion you do need a low bench, you can always make a step
 
+1, my last bench was 34" high, but I built the Mk2 at 36"
 
Wow, it's looking superb. I've seen ocean going ships built on smaller benches! That thing won't skitter anywhere!
 
I worked out that 105cm was an ideal height for me. I came to the by standing up and putting my hands at a comfortable working position and then measured the height.
 
Work has stopped today as we need to take down the shed before the wallers turn up next week to backfill the slope under it. And by take down I mean push gently until it falls over.

In the mean time i have been looking at the cherry that i am going to be using for breadboards and the vise chop. It was intended to provide a nice contrast to the ash, but at the moment it is very pale. I have been reading how to darken cherry. The general consensus is to leave it in the sun for a day or two, so I am trying a sample with one of the breadboards. I will compare it at the end of the day with a control board that has been kept in the garage.

20150517_135220.jpg


I just need to remember to take it in tonight ;)
 
I recently raised my bench height from 880mm to 920mm and now find it easier to work at (I'm 5' 10"). I may even raise it a bit more.

John
 
I'm 6'2" and found 105cm to be good. It did also mean txt my table saw fitted under the bench on its casters so I just wheel it out when required.
 
The cherry was out for 6 hours or so in weather that alternated between sun and clouds. When I took it back into the garage there was no noticeable difference to the control board.
 
I think it needs to be in sun for quite a while, it changes colour over months rather than a day...

I did my bench at 90cm which is perfect for me for sanding, routing etc, and still good for planing (I'm 6'2"), i tried 105 with a 1" board on top and it seemed like I would be holding tools in mid air, very high indeed. (seem to be mixing imperial and metric at will now!)

One thing to note, is the height of other tools, I was planning to make my table same height as table saw, as it's position means any board longer than 1.5m will go over the bench. In the end I decided that it was just too low, however it does mean that now I can't cut anything longer than 1.5m on table saw. I generally use track saw for large pieces anyway, however I had to do some 2m boards and it was a pain having the bench "in the way".

Final note, as you're doing your undercarriage first, make sure you assemble the rails/stretchers before you make and cut the mortises in the top, and make sure you work out whether the second leg will impact nay dog hole. The leg vice is kind of fixed position, but I ended up with the other end impacting 2 dogs that had already been cut into the laminated top, as it was being laminated. So I had to make cut outs in leg to access dog hole to pop dogs out.

Kind if thing I tend not to think about until too late, and one only builds one of these!
 
These bits of cherry are from the same board, one piece freshly planed and the other has been sat in the workshop for a couple of months
14321321593830.jpg
 

Attachments

  • 14321321593830.jpg
    14321321593830.jpg
    106.8 KB · Views: 1,212
a week or two and cherry will change considerably, I found out by leaning half a veneered sheet against a full sheet. pipper
 
Not much progress this week. The new planer knives arrived, so I fitted them last night, and then spent ages getting the out feed table at the right height. Obviously the jig they give you with the planer to set the knife height is different to the one they use in the factory, so the knife height was slightly different than before. But all is good now.

I did spend some time this afternoon cleaning up and truing the legs. So now I have 4 identical legs which are actually square and true, so I must be getting better at this woodwork lark...

I also planned and thicknessed the stretchers for the base. Unfortunately the 3" thick ash for the long stretcher had a horrible distortion around a branch mark. So once I cleaned them up, one of them was down to just over 2". I shall put that one at the back and keep the 3" thick one for the front where it will need to act as a support for the deadman and the shelf, whereas the back one only needs to support the shelf.

I did decided to stop and have a think before starting to cut mortices in the legs. I need to double check the plans to see just how the front stretcher needs to he shaped to act as both shelf and deadman support. I would hate to try to figure that out after I have put it all together.

I also got an email on Thursday saying that my vises were going to be posted "by the end of the week" which i presume means that they will get taken to the post office today and hopefully means that I should have them by the end of the week. Then I can get the benchtop finished.
 
Back
Top