


memzey
Established Member
Hi gang, smee again.
Like a number of fellow forumites I recently finished a workshop build at the back of my garden. I have, for the past couple of months, been trying to commission it while steadily moving my tools, materials and equipment from the old shed into the new (aka the workshop). I had a pretty poor bench setup in my old shed and promised myself I'd build a proper bench once my shop was up and running. Little did I know quite how frustrating having no bench at all would be - it even made me miss my old contraption - a 9' length of old kitchen work top on spur shelving with metal tube legs. It wasn't straight and wracked if you so much as looked at it with a plane in your hand. Anyway I've become frustrated with this situation and decided to build the bench before I do anything else. This serves a dual purpose as it also utilises the wood I have squirrelled away for this purpose but keep on tripping over in the meantime.
So onto the design; I really like the classic English bench as recently repopularised by Paul Sellers but think it's probably a bit ambitious for someone with my currently meagre level of woodworking competence. Having looked at most of the books on this topic I've settled on a fairly basic design that has a bit of Roubo about it (laminated slab, flush legs and stretchers) but none of the fancy sliding through dovetails or a leg vice. I'm also going to make the top in two sections with a 2" gap between them (just big enough for a cramp head to fit through). I'll maybe post a pic of my plan a bit later if anyone is interested but it's back of a *** packet stuff so nothing to write home about. In any case, if I find it's not fit for purpose I suppose having a bench should at least make building my next bench easier.
Onto the progress:
Over the past week or so I have sorted and rough cut all the stock (45 minutes)
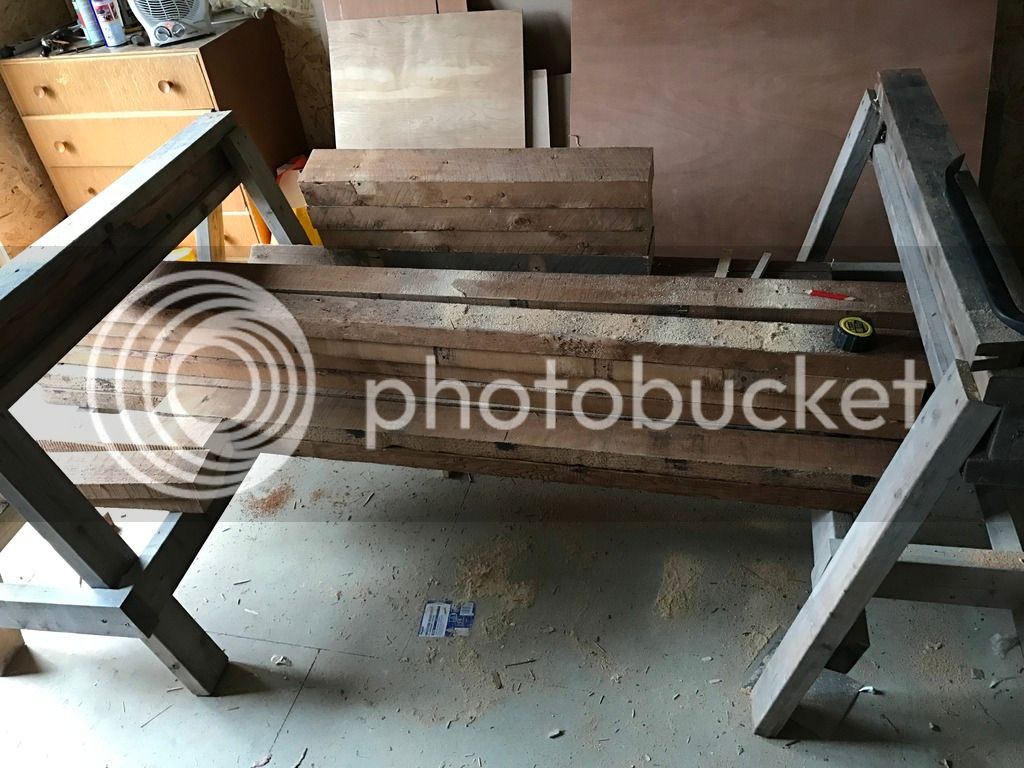
Jointed, planed and thicknessed it all to final dimension (3 hours)

After the planing up I also sawed the wood for the top to final length + 1 inch (45 minutes).
With all the stock ready and today a day off from work and kids I braved the cramps and went for it as regards the glue up of the top sections. I'd previously built some sturdy and straight trestles upon which I attempted this. Before starting I did cover the tops with packing tape to prevent accidentally gluing them to the laminations. Glue was applied using a 4" roller (I'm using titebond extend as I need all the help I can get). On to the evidence:
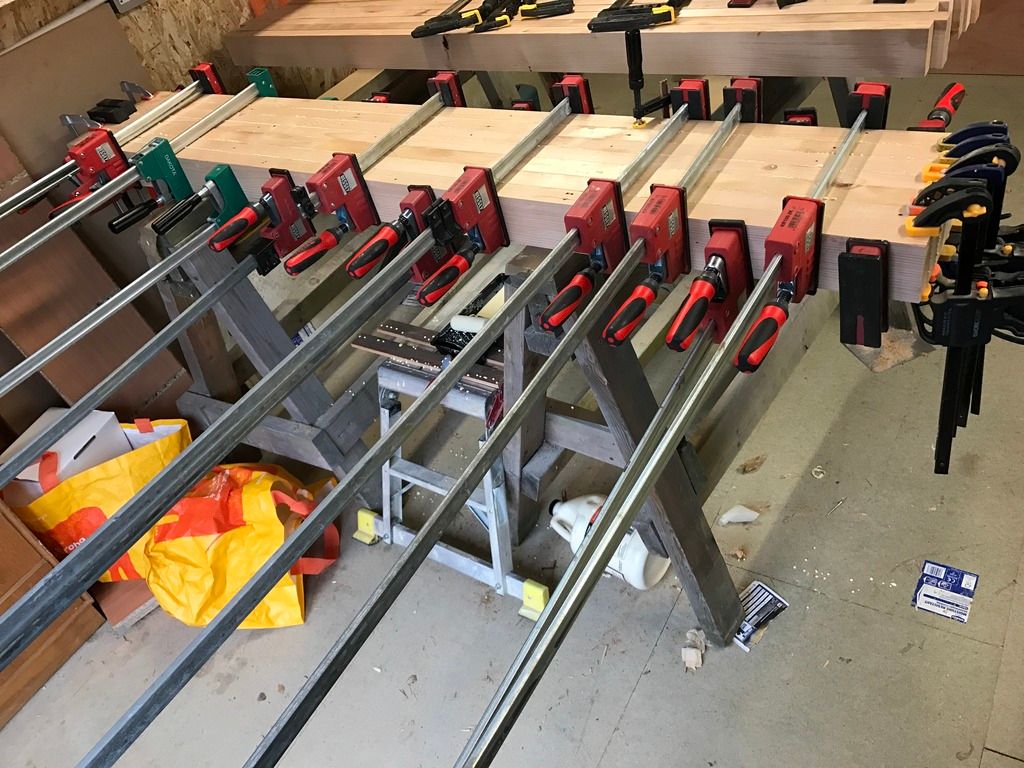
Glue up one was a panicky affair I'm not entirely convinced by as I have some small steps that will need planing out. The top is 3 1/2" thick and I really don't want to loose too much of it. Ho hum. After a smoke and cup of pop I attempted glue up two which was much more satisfactory- a good sign I suppose as it indicates my feeble mind might have learnt something useful:
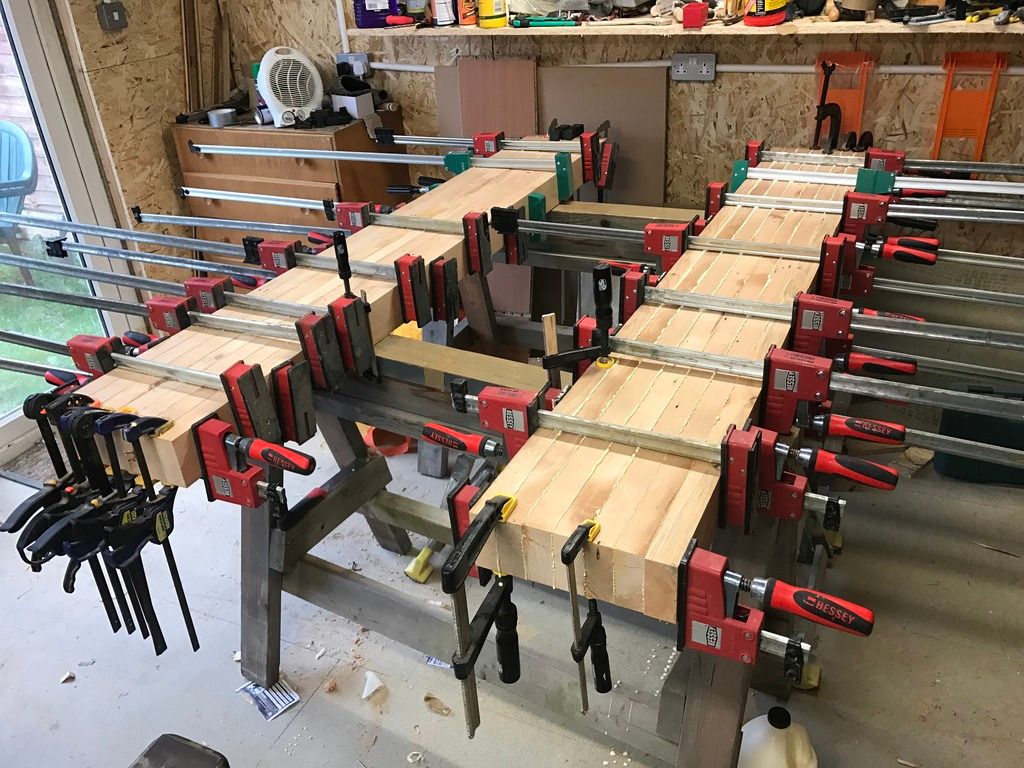
That's as far as I managed to get today. I'll leave the laminations in the cramps for a couple of days while I work on the base. Actually they might stay like that for a bit longer as I probably won't be able to work on them until Wednesday or Thursday but I feel like that's no bad thing. If you've managed to stick with it this far thank you very much and please accept my profuse apologies for all the ramblings above - yes I know I can go on a bit. I'm sharing this as I have greatly enjoyed a number of bench build threads by others on these boards and thought it would only be right to share my own mishaps for your amusement. Happy as always to receive insight and pointers (and mickey taking) from interested parties.
")


