Workbench Build - Update 10/7 - Draw fronts complete

UKworkshop.co.uk

Help Support UKworkshop.co.uk:

This site may earn a commission from merchant affiliate links, including eBay, Amazon, and others.

SVB

Established Member
Joined
2 Jul 2005
Messages
2,012
Reaction score
201
Location
Nailsworth, Glos
Well, following forum rules I have taken some photos while I have been building my bench so I thought I would share them here.

The objective was to build a very simple bench (or so I thought!) that would not break the bank but would be an improvement.

I have lost track of the early photos so a bit of narrative.....

Until now I have been using an ex-school science bench with a clamp on vice. This has been fine but I was a bit short sometimes, represented quite a lot of wasted storage space (underneath had no shelf etc) and the clamp on vice was useless.

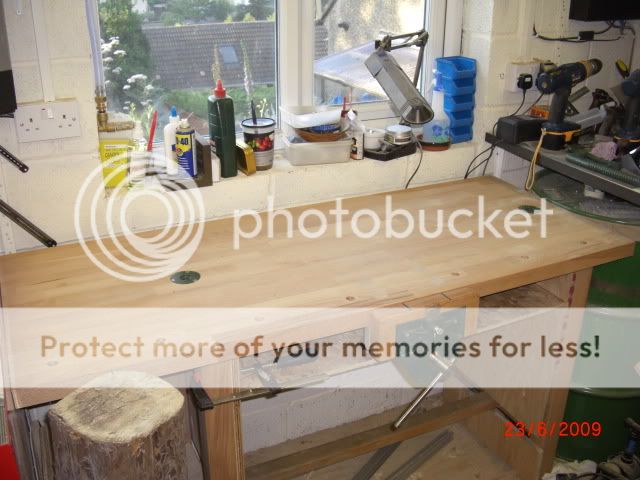
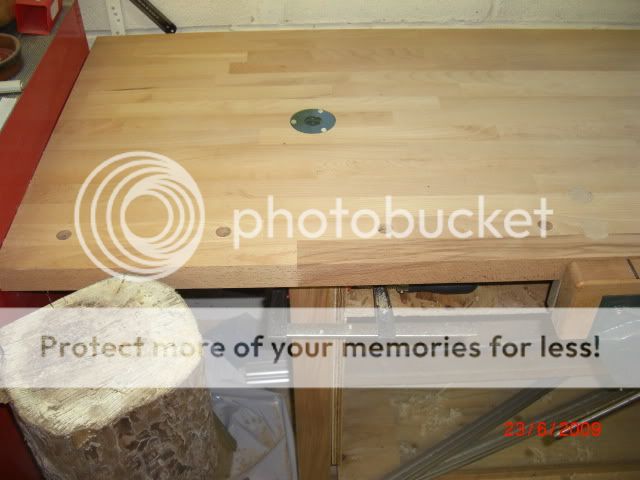
So, I got hold of a 1700mm length of 600 w x 40 deep beech worktop that I used to replace the existing 1" iroko top. I installed a couple of APTC fittings for a bench hold-down and drilled some dog holes. I also made some sides to fit in-between the legs.

I also fitted an APTC Q/R Vice with coach bolts and filled the bolt holes. I also inlayed a couple of bits of ebony in the front vice jaw so I can locate a piece against the bars and line the edge up with the inlay, this is exactly vertical (a tip from the workbench book by Landis).

I think that gets me to this point:

CIMG0416.jpg


CIMG0417.jpg


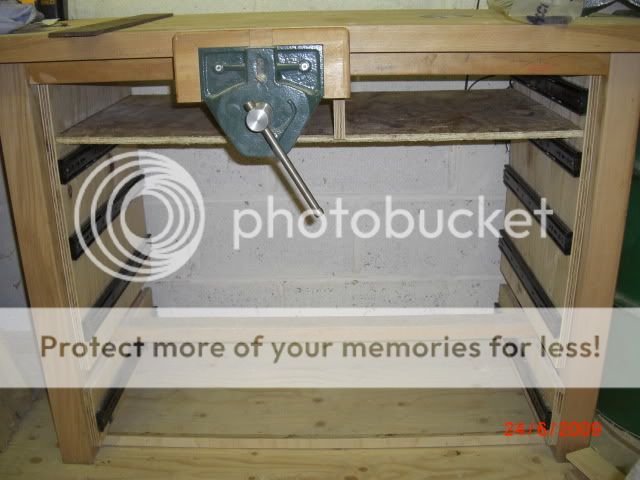
Next I fitted some sides inbetween the legs and installed some runners:

CIMG0428.jpg


CIMG0426.jpg


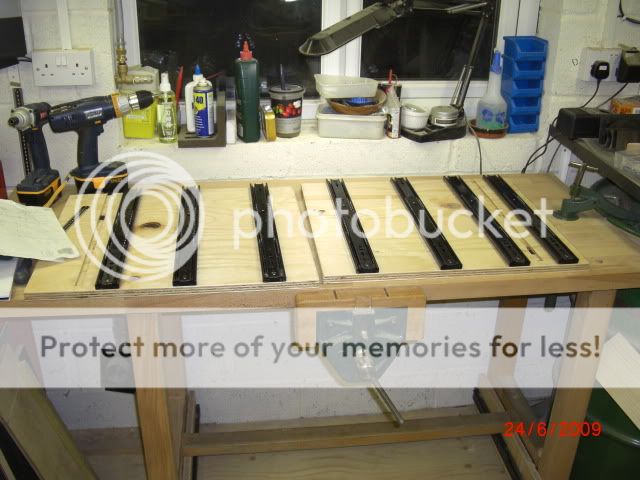
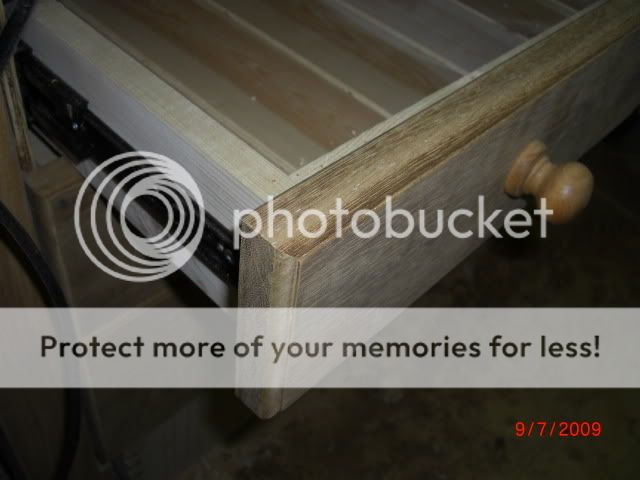
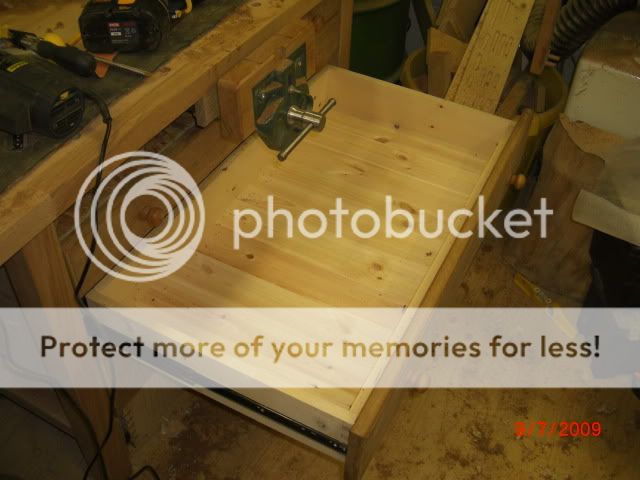
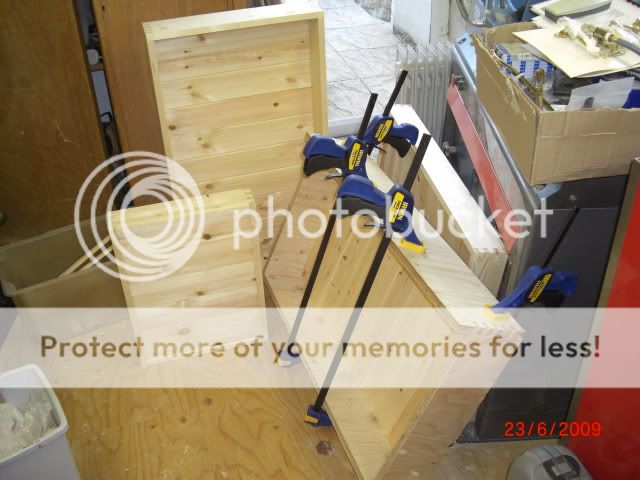
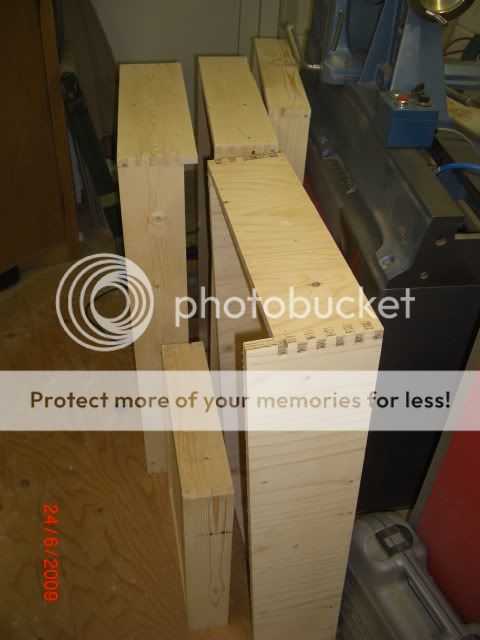
Next I got a load of timeber and built some draws. I used my woodrat to cut finger joints, very efficient. I also had a load of T&G left from building a Wendy house for my daughter so I used that for the draw bottoms. Not sure if I am going to regret this as it will obviously move more than a mdf base but I really like the look it gives.

CIMG0422.jpg


CIMG0424.jpg


CIMG0423.jpg


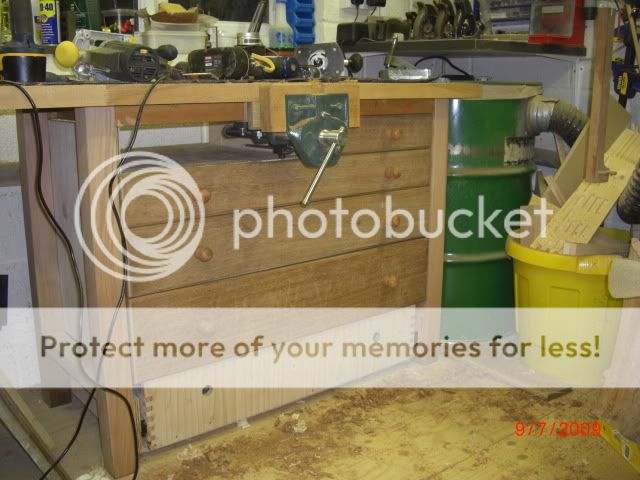
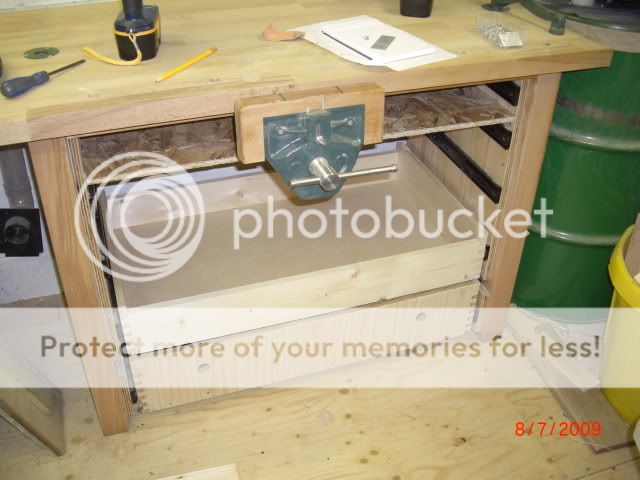
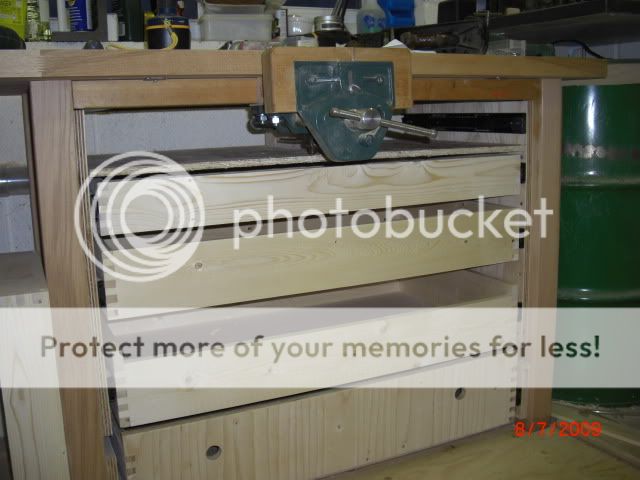
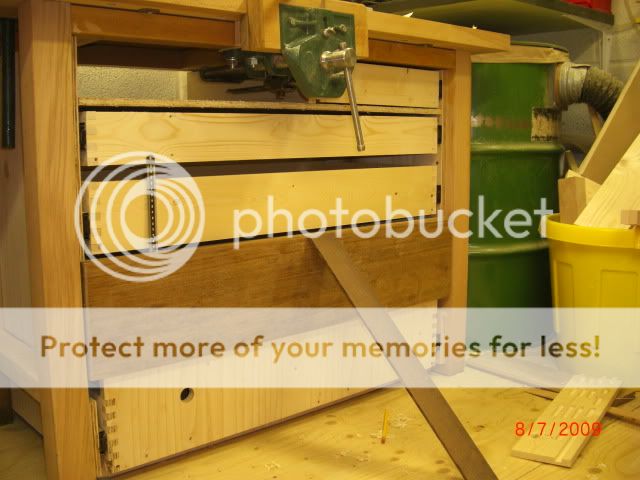
So, bring you up to date progress wise, I fitted the draws tonight:

CIMG0440.jpg


CIMG0441.jpg


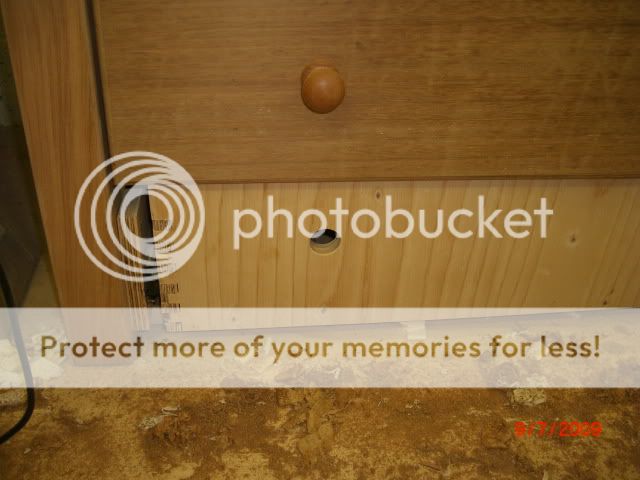
I have decided to saw the old bench top up to use as the draw fronts to hide the slide mechanisms and side framing when the draws are closed. I cut the first piece then realised it was gone 11pm, not really tablesaw / neighbour freindly so I called it a night.

CIMG0446.jpg


Well, that's it for now. I am still deciding on the draw fronts, they are 1" thick which is a bit OTT but being iroko (or similar) I don't really want to total a set of PT blades taking them all down to 3/4"- I will probably just leave them thick - extra mass for the bench anyway!
 
And I thought I had done well, very good Simon and a pleasure to see recycling, thanks for the eduation.

Rich.
 
Excellent, glad to see another workbench post so I can scan it for ideas :D. Nice job Simon!

Boz
 
This looks good, Simon. I'm intrigued to see that you have positioned your front vice central to the bench's length. It's surprising how much room them require below the top, isn't it? That almost caught me out! :oops:

Are you fitting an end vice of some kind or will you be using Veritas Wonder Dogs? Probably the Pups, look at the thickness of your top.

I'm also interested in your Axminster Bench Clamp, as I have an old Record without the collar and I'm wondering whether the Axminster collars might be suitable? Could you give me the inside diameter of the holes please? I think the shaft on my cramp is about 7/8"/22mm.
 
Olly,

Yes, the vice is deep. That is why I have a little half width draw to one side and am going to build some narrow shelves to the left to store abrasives.

I spent ages moving the vice up n down with a G clamp holding it in position. I settled for this position in the end as I was the best compromise. This is largely because I have my roll-cab with all my turning stuff one end of the bench and my D/X the other so a vice mounted at the end would be awkward. I mainly work on small items (boxes etc) so the full length is rarely required.

The vice is not really in the centre as the legs and draws are not central to the worktop. There is only 3" overhang at the right hand end but there is 18" overhang at the left end. This is so I still have a 'knee hole' to be able to sit at the bench when doing inlay / detailed flat work rather than having to do it all 'side saddle' because of the draws.

For the reasons above regarding the bench being pinned in at both ends I have not fitted an end vice as it would rob a lot of bench length to be usable (I am a lefty so it would have to be on the left of the bench pushing my roll-cab into the lathe so I could not open the draws or requiring a much shorter bench. I have got a V Wonder-pup to use instead.

Regarding the hold-down I will have a measure tonight and let you know. It is definitely too big to go into the dog holes (3/4") so could be the size of yours - it is a cast item so I don't expect APTC have cast their own?!?!
The replacement mounts are only £4ish complete with all fittings (very reasonable I thought). If it is compatable, I have the hole saw and a mdf jig for fitting that I could lend to you if it is helpful.

By the way, have I broken any major rule of draw making in using false fronts on a finger jointed construction? I wanted to have an overhang at each end to cover up the slides and could not think how to do that jointing directly onto the front as I was not sure simple dowels or biscuits would be strong enough. How would you approach this, I am not precious over my approach as I have only done what I could think of to solve the problem - as you can probably see, I am no cabinet maker!

BRgds

Simon
 
SVB":3erk8ex4 said:
Olly,

By the way, have I broken any major rule of draw making in using false fronts on a finger jointed construction? I wanted to have an overhang at each end to cover up the slides and could not think how to do that jointing directly onto the front as I was not sure simple dowels or biscuits would be strong enough. How would you approach this, I am not precious over my approach as I have only done what I could think of to solve the problem - as you can probably see, I am no cabinet maker!

BRgds

Simon

Nice bench!

I am about to have a similar problem with a set of bedroom doors. My best guess answer, so far, is a lapped dovetail with lap extended.

Any better suggestions?

xy.
 
xy,

If I understand correctly, you are suggesting cutting the tails in the normal way, and then cutting extra deep sockets so the tails slide in as far as they need to go leaving the overhang on the draw front. I suppose one could cut some more, deeper tails and then push in after the draw side and trim flush.

It could look really posh - nice idea.

My sockets would have been circa 2" deep, so probably router would be the way to go, bit tricky squaring up the end of the socket but no-one would see it I suppose.

Simon
 
Roughly right.

I was thinking more along the lines of a 'standard' drawer side to front dovetail. But with the lap extended to cover the unsightly mechanisms.

Perhaps a rebate on the edges of the front, for the hiding bit, and then the dovetail sockets. The curved end to a routed socket? Either clean up with chisel, shape pins to suit or leave. I have seen all of those options used.

Of course your fronts are in the region of 25mm thick so you might get away with it. Any thinner and there could be strength problems.

xy
 
Well, back out to the workshop this evening to fit the draw fronts. Here is the finished job:

CIMG0447.jpg


CIMG0453.jpg


I fitted the fronts as sawn but decided to profile the front and back - looks better to my eye and also cases a bit of a shadow between the draws so hides any mis-alignment!

CIMG0448.jpg


I really like the full depth runners - no play now everything is installed.

CIMG0451.jpg


As Olly said (and I should of listened more carefully) it is amazing how deep the vice hardware is! :oops:

CIMG0449.jpg


I am just not sure about the bottom draw. This is made from 3/4 ply and was designed to be left unfinished with simple hole for finger pulls. It is set 2" back from the other draws and 6" back from the edge of the bench top to give some toe space. However, now all the others have their trims it looks a bit naff!

CIMG0450.jpg


I think I will live with it and use it for a while - it is only a bench after all :wink:

Last job still to be done is to make the dividers for abrasives to the left of the vice and to make a rack fixed to the side of the legs to hold my shooting board, abrasive board, glass plate for sharpening etc etc!

BRgds all,

Simon
 
Simon,

I wouldn't worry about using false fronts on the drawers, but I would be tempted to run a dowel through the top and bottom corners of the joints. Especially as you have used natural timber for the drawer bottoms. Any movement in that T&G will soon open the joints. (Unless of course you've left room for expansion. Which I'm sure you have.)

Regards

John :)
 
Back
Top