WIP - Beech and Meranti kitchen cabinate (updated new pics)

UKworkshop.co.uk

Help Support UKworkshop.co.uk:

This site may earn a commission from merchant affiliate links, including eBay, Amazon, and others.

Out int shed

Established Member
Joined
18 Dec 2008
Messages
79
Reaction score
0
Location
Hull
Hello all.

I hope you like this little project. Its the first one in my new workshed and on my new workbench (see bench build here: https://www.ukworkshop.co.uk/forums/view ... 2&start=15 )

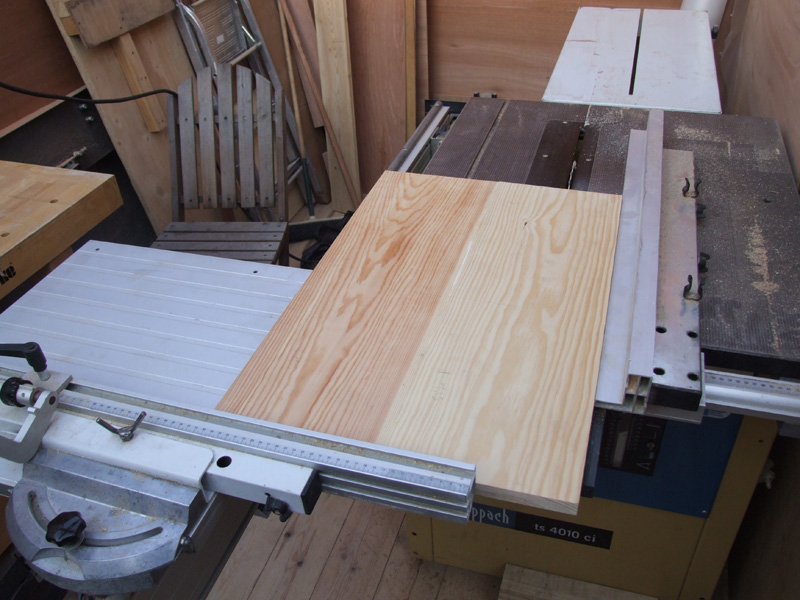
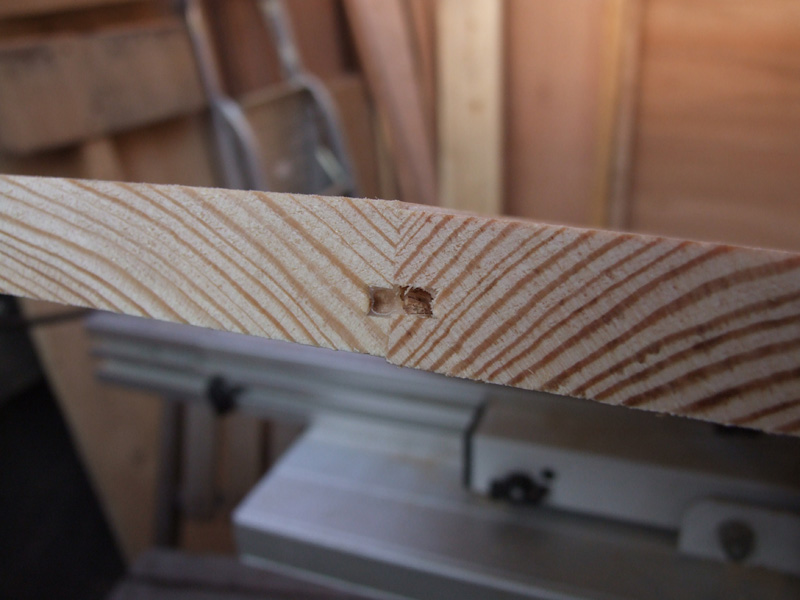
I picked up a nice piece of straight cut steamed beach still with wane. Lots of planing to do by hand!:
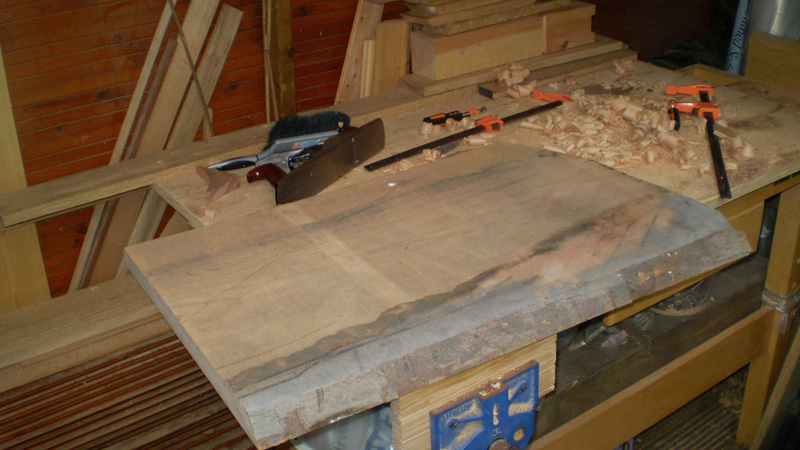
Beech%20Cabinate%201.JPG


and hey presto....

Beech%20Cabinate%202.JPG


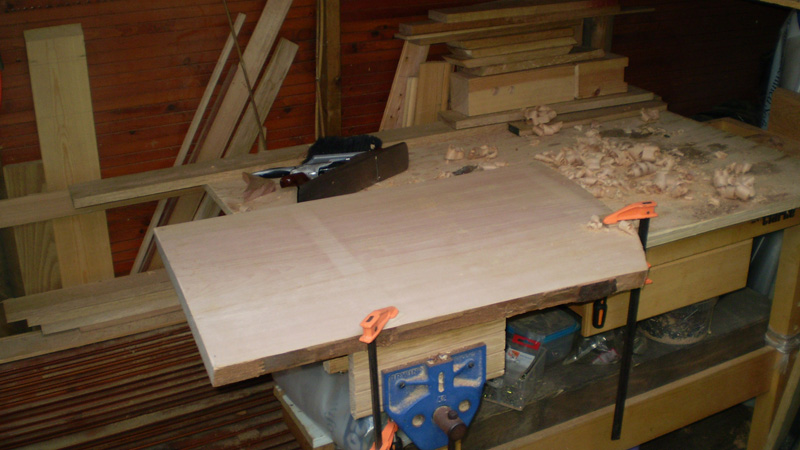
Thats the top started.

Then I measured and cut the meranti into the sections needed for the frame. Sorry, no picks of this bit.

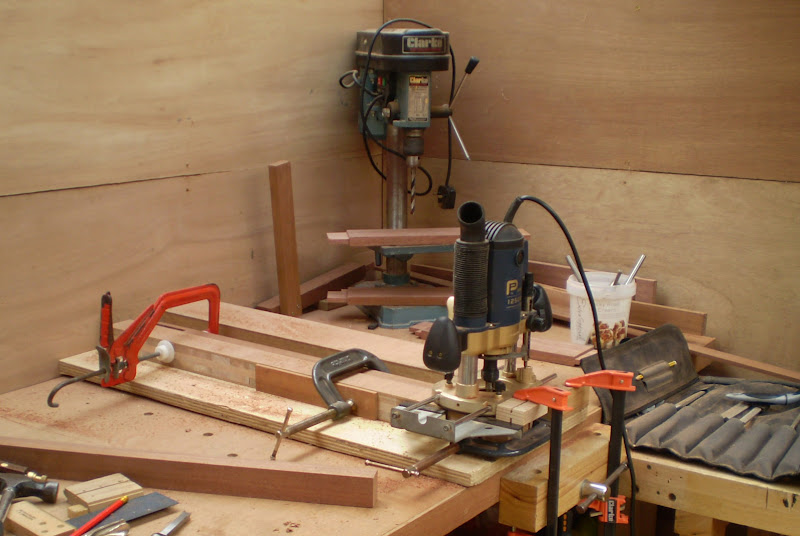
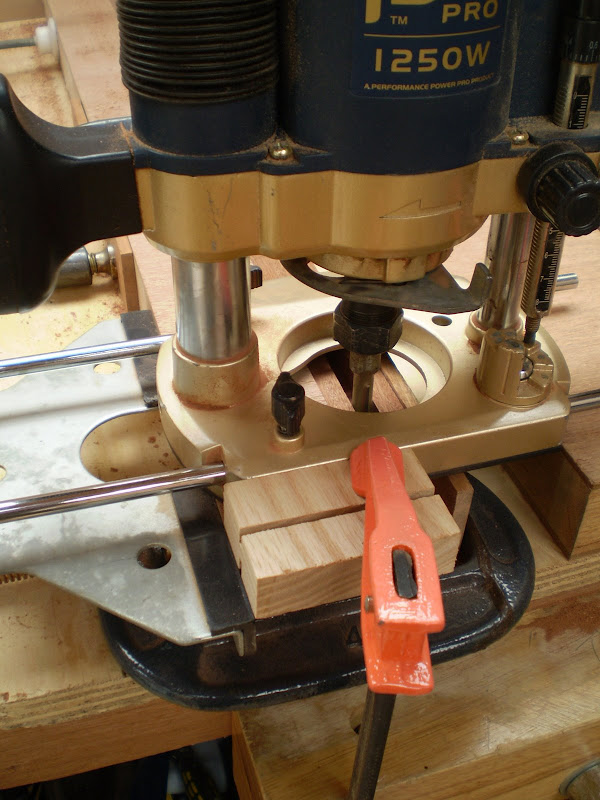
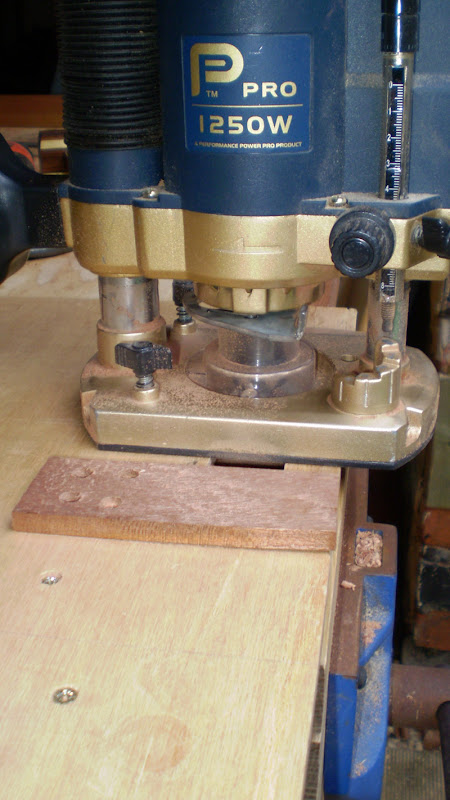
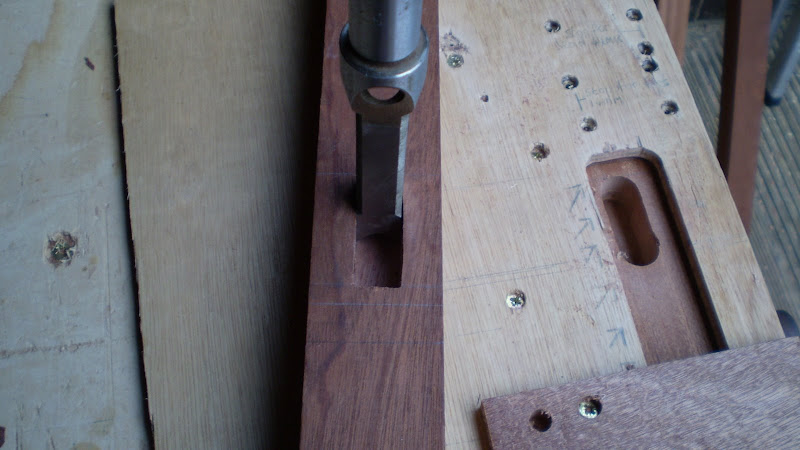
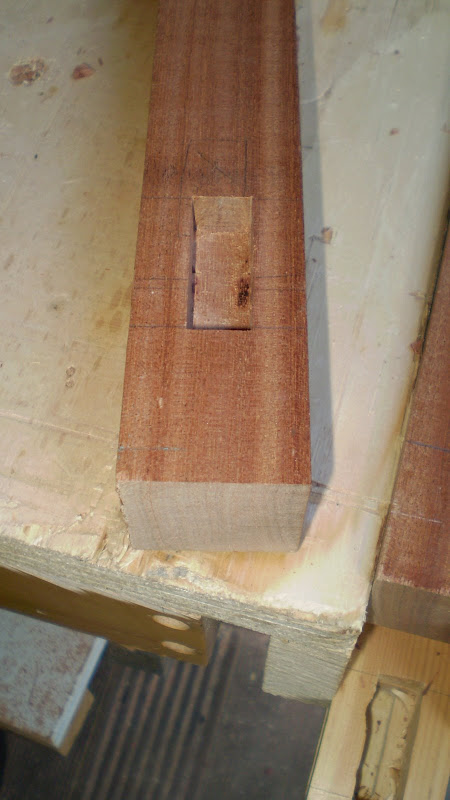
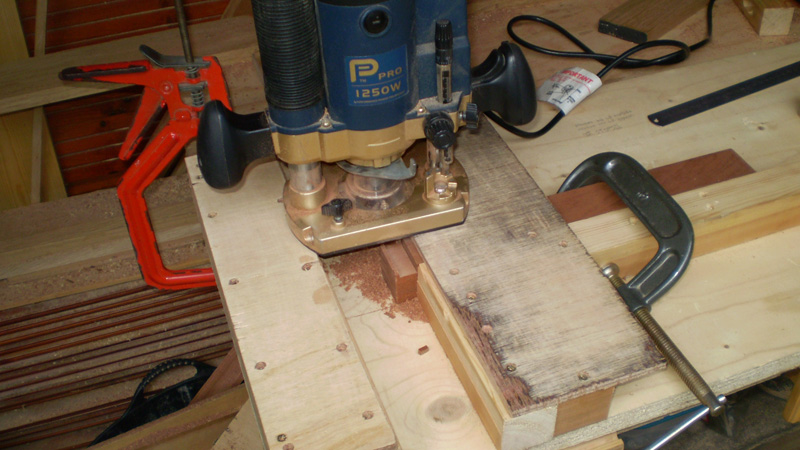
Made a simple jig for making the mortice with a router. These are stopped tenons so only needed to remove a little stock:

Beech%20Cabinate%203.JPG


Beech%20Cabinate%204.JPG


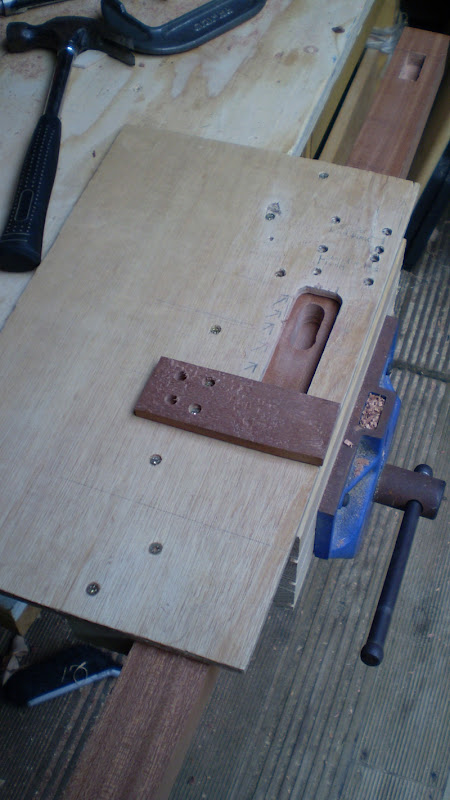
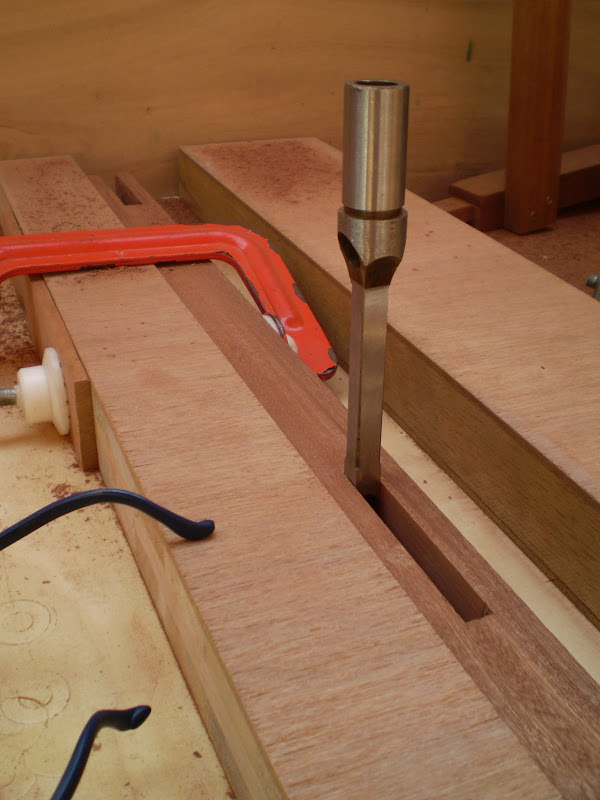
Chisel to square off corners. I like to use a mortice chisel with a mallet so as to square off 3 faces at once.

Beech%20Cabinate%205.JPG


Beech%20Cabinate%206.JPG


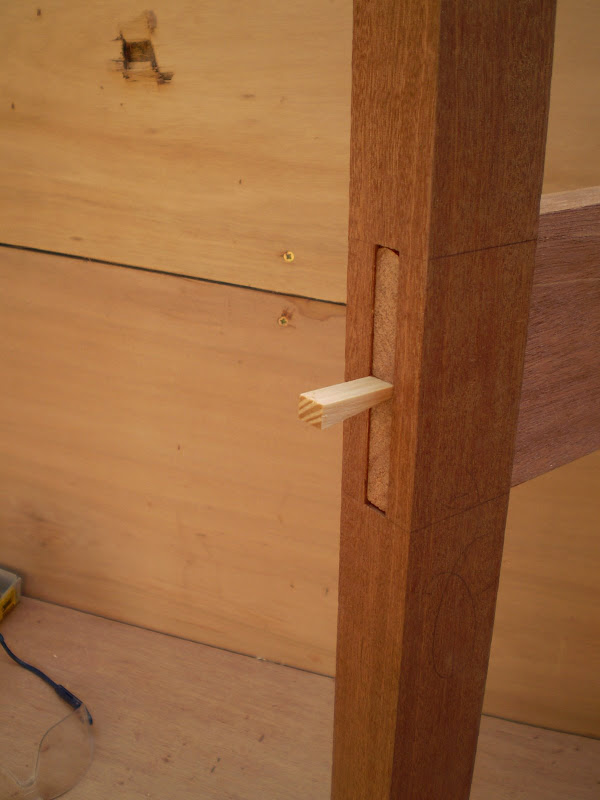
Another simple jig comes out for cutting the tenons.

Beech%20Cabinate%207.JPG


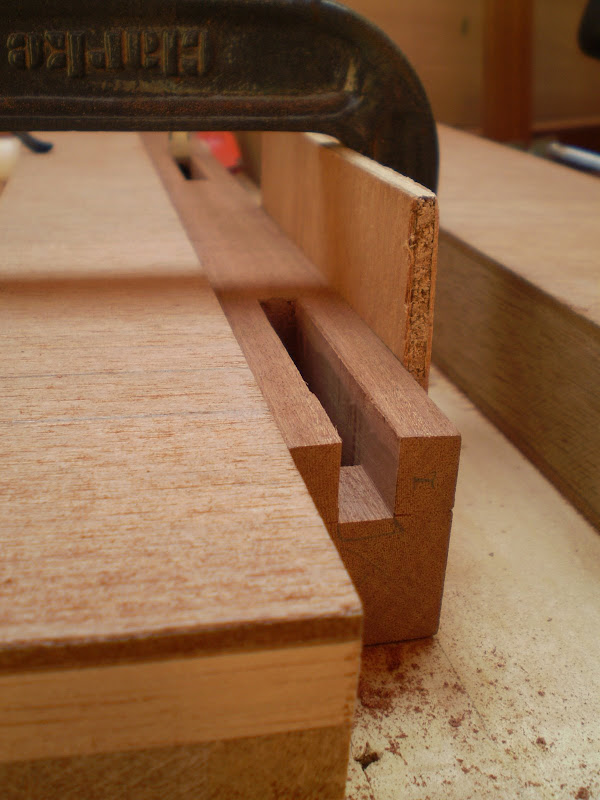
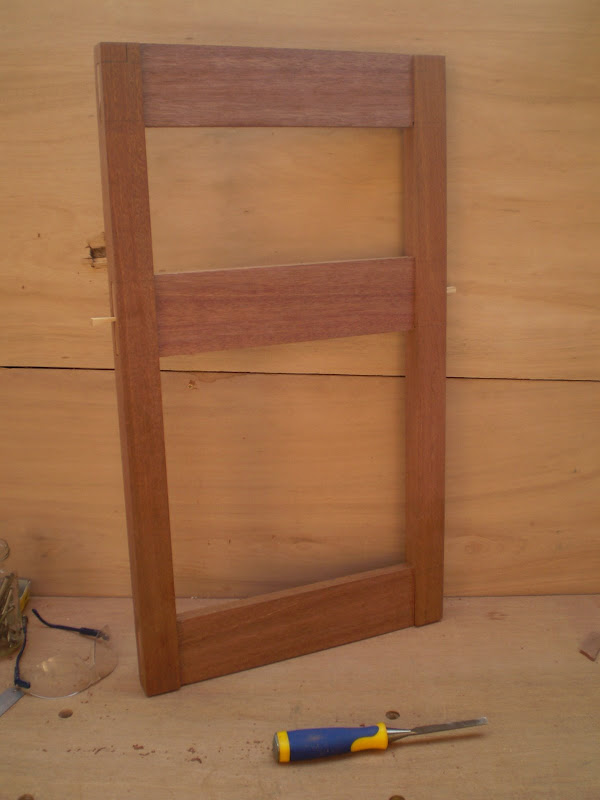
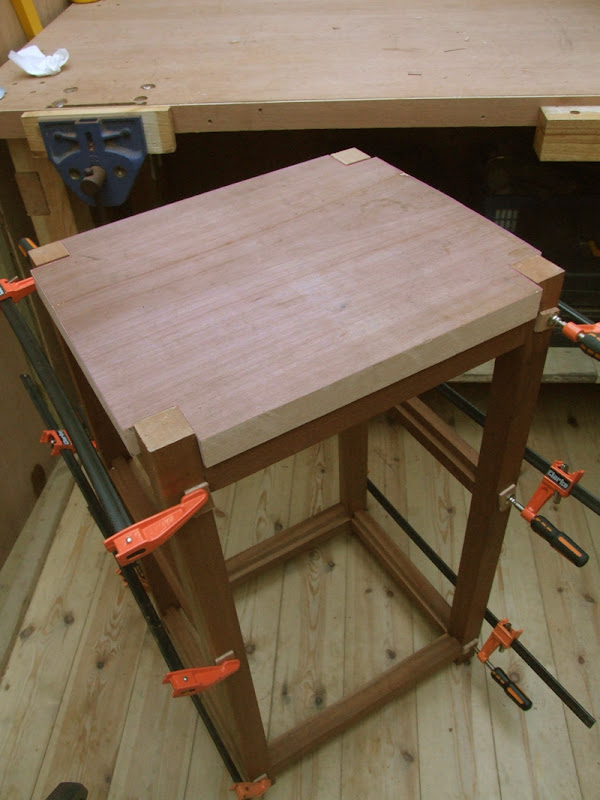
After all the bits have been cut and cleaned I can dry fit:

9.JPG


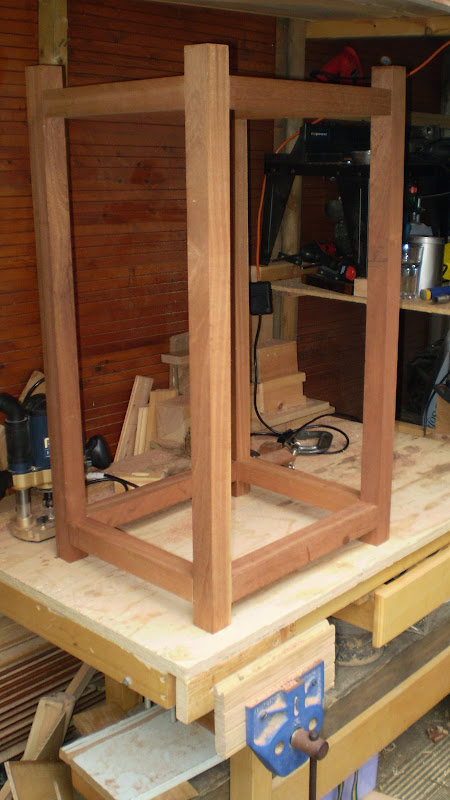
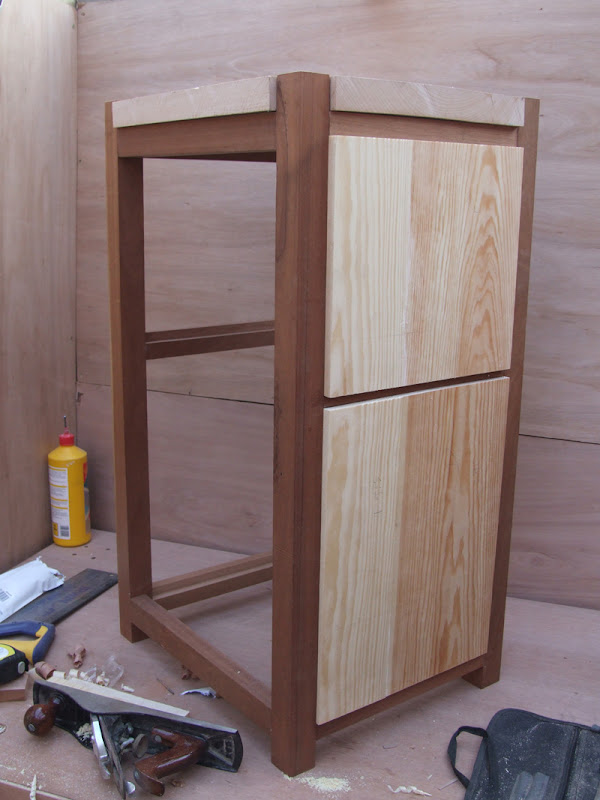
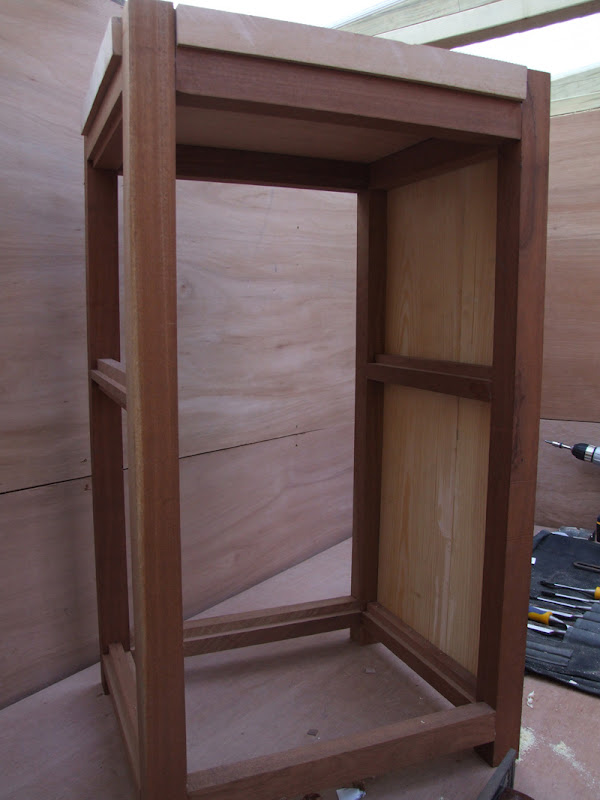
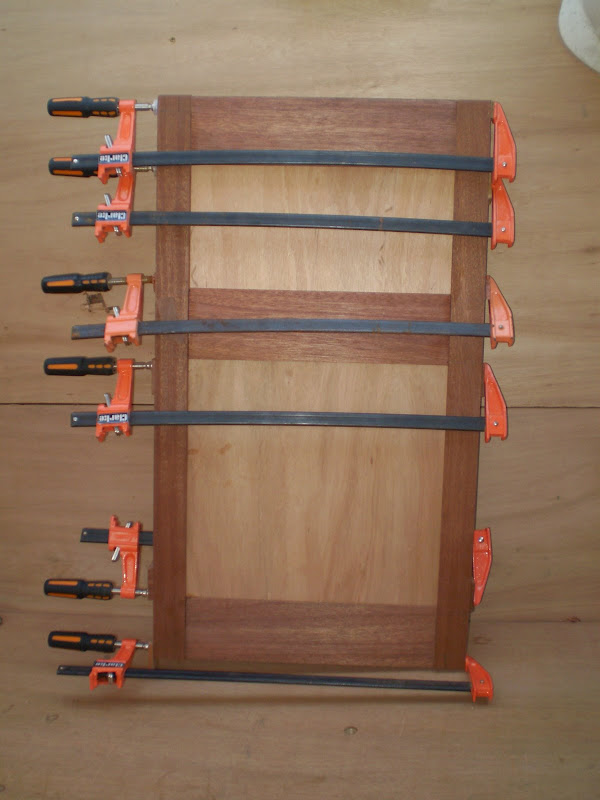
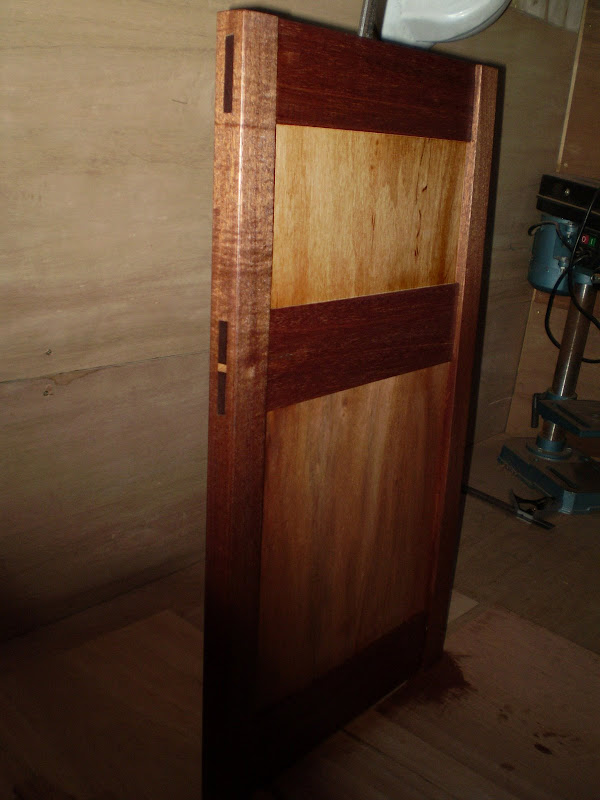
Then the frame was glued and checked for square. I couldn't resist fitting the top to see the effect.

Beech%20Cabinate%208.JPG


Beech%20Cabinate%2010.JPG


Beech%20Cabinate%209.JPG


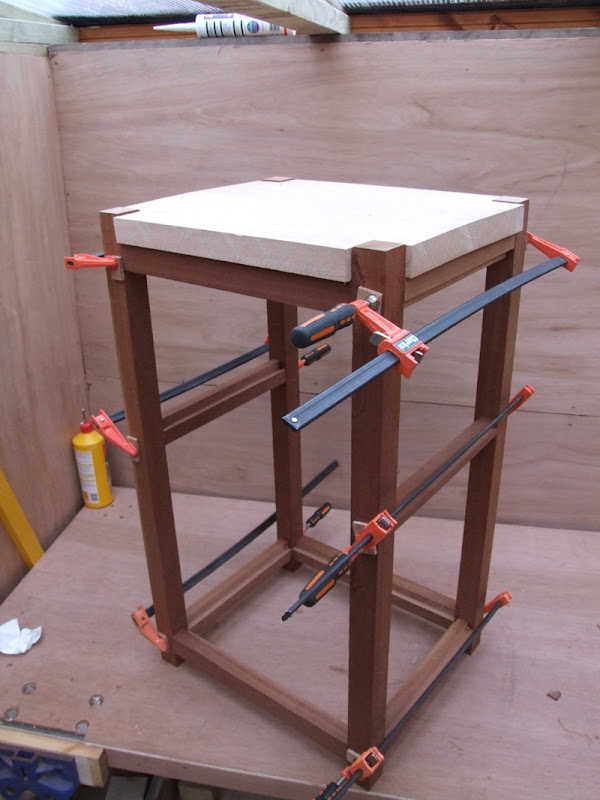
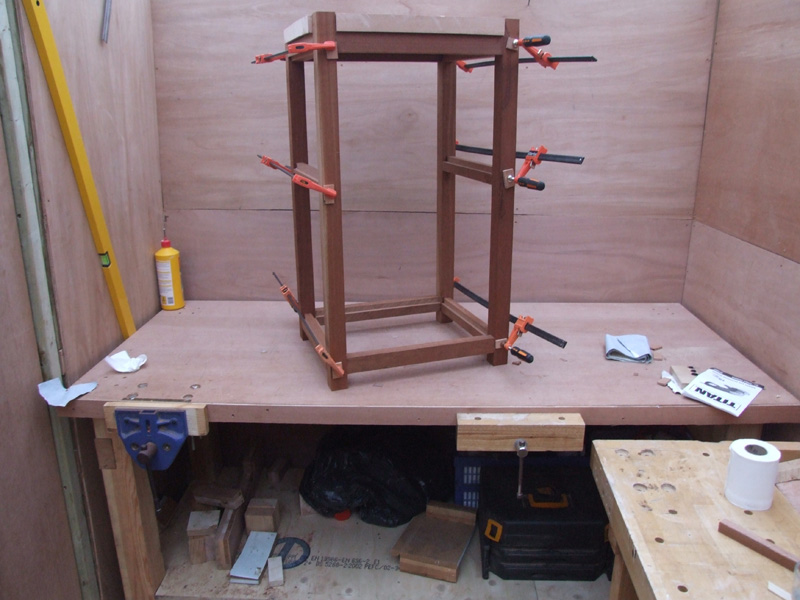
Still have the beech top to trim and have a final plane. The frame will need a clean up and panels and shelving fitted.

Not got a spare weekend in May so may be a while to the finish line yet.
 
Excellent, good design and good timber contrast, also good work with hand flattening the top. My only comment would be watch out for that sticker mark on the top, they can go quite deep and you may yet have a bit of planing to do to get rid of it.

Cheers

Damian
 
Thanks ib.

You're not wrong, ive already taken about 5mm off the underside and still the sticker mark is visable. luckily the piece i got was from the top so only have 2 marks to remove!
 
Looks good, let's keep those photos coming, please. :wink:

Will you be chamfering the top ends of the legs? Something else you may want to consider - I've seen others trim the top slightly so that there's a deliberate and equal 1mm 'shadow gap' around the legs. This also looks good, as does your current design. But, with a solid top, it also allows for some expansion... :)
 
Cheers Olly

And yes, I do intend on putting a chamfer around the top of the legs but I also want to put the same chamfer all around the beech top. My thinking being that the eye will natually follow this 'shadow gap' all along the outside edge of the top. This may detract from the not so neat saw lines!!

Anyone have any ideas for finishing the beech top. I was going to go for a Danish oild on the meranti followed by a laquer which will give it a nice gloss, not sure I want gloss on the beech top though?

The panels and front door for the cabinate will be made from top quality joinery grade 5ths Redwood and I would prefer to have these panels the same finish as the beech top.
 
Had a little time tonight to cut 2 of the panels for the cabinate. Cut to size on the ts - but I obviously put a biscuit in just a little too close to the saw line, measure twice, measure twice, measure twice damn it.

Beech%20Cabinate%2012.JPG


Beech%20Cabinate%2011.JPG


Offered the panels and they are nice and tight. I intend on routering the inside edges of each panel so that they sit back from where they are now, leaving them flush with the frame faces.

Beech%20Cabinate%2013.JPG


Beech%20Cabinate%2014.JPG


Hope you like it so far.
 
Out int shed":2s1k2lfu said:
The panels and front door for the cabinate will be made from top quality joinery grade 5ths Redwood...

Word of warning - "unsorted" or "u/s" is regarded as the best-quality redwood you can buy. It's a mix of grades one to four and is generally better than fifths, which is far from ideal for furniture! Unless you can find a supplier that sells firsts and seconds individually... Very unlikely though.

Lacquers don't have to leave a gloss finish. You should be able to dull them down a bit with some fine abrasive paper (400g minimum) or 0000 grade steel wool. It doesn't take many coats to get a good finish either. Although, multiple layers seem to help to fill in those surface dents. :wink:
 
I've never heard of a cabinate and a google shows only a couple of examples so I'm looking forward to seeing the finished item and seeing what it is used for (as distinct from a normal cabinet).

Is there any reason why you went for the redwood with its striking grain (and colour difference across the board) compared to the plainer grain of the beech and meranti? They definitely contrast with the frame but i'm on the fence at the moment as to the overall impact it will have. Also, seeing as the panels are 'nice and tight' how are you allowing for any expansion in these to avoid popping the tenons on the other joints?

Re the finish for the top, I've only used steamed beech in turning, and sealed it with normal sanding sealer that gave it a nice warm glow, so I suspect any similar clear finish will be good in bringing out the colour - but the effect on the redwood may be even more striking so tests on offcuts may be needed to get the tonal balance.

Keep the photos coming - its always good to see different designs and combinations of timber.


Dave
 
oddsocks, intentionally or otherwise you have picked up on my improper use of the word cabinate :oops:

I do of course mean cabinet - i'll never live this one down!

My choice of timbers was purely experimental. I have a kitchen to do sometime next year so thought I would try a test project first to see what the look and feel was like. After playing with coloured pencils, I came up with the colour contrast you see with the beech and Meranti. I have gone for the redwood as it is the widest board I can get cheap through the company I work for.

When I say nice and tight, they are at the moment but I will be shaving off a little before the final fit. But even so, the timber has been in situ for nearly 4 months now so should be ok.

I really like the contrast between the grain of the redwood and the relatively plain finish of the other timbers - just a matter of personnel taste I suppose.

OPJ, you are quite correct, typically u/s is a much better grade across 80% of a board but in the UK over the last 5-7 years we have been landing large amounts of eastern scandinavian or russian u/s which although is better than the 5th's - its not that much better.

The boards I have in the picture are northern scandinavian 5th which as you can see are almost clears and carry very striking grain and colour differential between heart and sapwood.

I have not tried dulling the lacquer before so will give this a go on a few test pieces, thank you for the advice
 
Unless I'm mistooken, you appear to be fitting solid pine panels into a rebate with no visible means to allow for expansion or contraction of the timber. Assuming that the pine will be glued in place into the rebates, this is a disaster waiting to happen...if the pine expands it'll split right down the middle and if it shrinks it'll make a gap appear at the edges. If it bows and also shrinks/expands :shock:
Please tell me you're not going to fit solid wood panels like this [-o< The correct way to achieve this effect btw is to use lipped and veneered mdf or ply - Rob
 
Out int shed":2dtqac5o said:
oddsocks, intentionally or otherwise you have picked up on my improper use of the word cabinate :oops:

I do of course mean cabinet - i'll never live this one down!
it wasn't intentional - seeing as google found some other examples I thought it was a specific style or function but couldnt work out what!

Do you have a specific use for yours in mind?

Dave
 
Your right Dave,having now googled the word myself I can see some obscure things on their under caninate!

I was going to use this as a cabinet :lol: for keeping the plates and glasses tidy. It will sit at the bottom of our kitchen away from the steamy end.

Rob, this is just a little experiment to practice my skills and try out working with hardwoods. The redwood has been in situ for a long time and is of well dried stock so hopefully will not move too much (fingers crossed!) And if it does move it wont be too bad, I might be up to making replacement solid hardwood ones by then. If it does go, i'll post some pics - promise.
 
very nice indeed, you are obviously talented, and thanks for tip re the mortise chisel, a cracking idea, you certainly live and learn on this forum.

Rich.
 
I'm liking how this is coming along. I have a question though: Is the top tight in against the uprights? And are the panels tight fitted also?

The reason I ask, is that have you counted for expansion? As I can't see it in the photo's?

On a pure design point of view. I think the redwood spoils it. The two hardwoods are really nice woods, and the exaggerated grain of the redwood clashes, this of course is only my opinion.

EDIT: Must learn to read all the thread, I see rob picked up the same things..
 
Honestly, where does the time go? It Doesn't seem like its been so long since my last update. That's babies, work and college for you!

Anywho, updates. I have managed to that 80/20 point in the project. The little finishing bits seem to be taking me some time to get done.

The original panels, as predicted by many on this topic, where rubbish for the job, totally unstable. I'll consider that a learnt lesson.

So..... ply panels it is for now (wisa bb/bb). Oak or veneered ply in future.

I don't have a pic of the carcass panels yet but do have some of the door.

The door is made from 2" sections of meranti for the stiles, 1x3 for the rails.

The pieces where cut to length then put in a simple mortice jig for routing. Each stile had a haunched mortice slot on either end and a through mortice a 3rd down from the top to take a wedged tenon:

Beech%20Cabinate%2016.jpg


Beech%20Cabinate%2017.jpg


After routing the mortices i squared them off with a square mortice chisel to get 3 sides at once:

Beech%20Cabinate%2018.JPG


thankfully it cleaned up quite well:

Beech%20Cabinate%2019.jpg


Tenons cut on a table saw with another jig but i cant seem to find pics, sorry guys.

Dry fit time:

Beech%20Cabinate%2020.JPG


gratuitous wedge shot (wedge is amer white ash):

Beech%20Cabinate%2021.JPG


glue up:

Beech%20Cabinate%2022.JPG


ran out of light just as the oil went on but I hope you get the idea of the colour scheme. Sometime this week I hope to get the carcass finished:

Beech%20Cabinate%2023.jpg
 
Back
Top