The Alter- finished

UKworkshop.co.uk

Help Support UKworkshop.co.uk:

This site may earn a commission from merchant affiliate links, including eBay, Amazon, and others.

Mattty

Established Member
Joined
9 Oct 2008
Messages
1,077
Reaction score
0
Location
Leeds
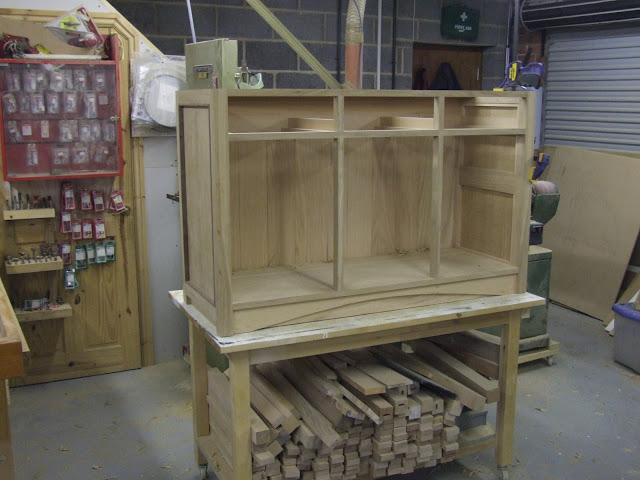
I got this commision a couple of months ago-

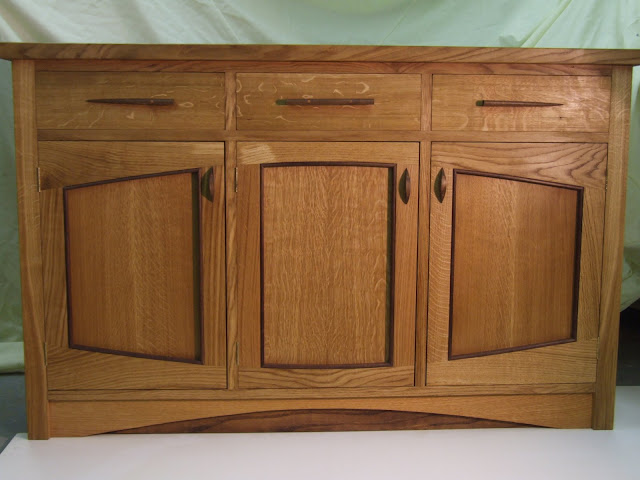
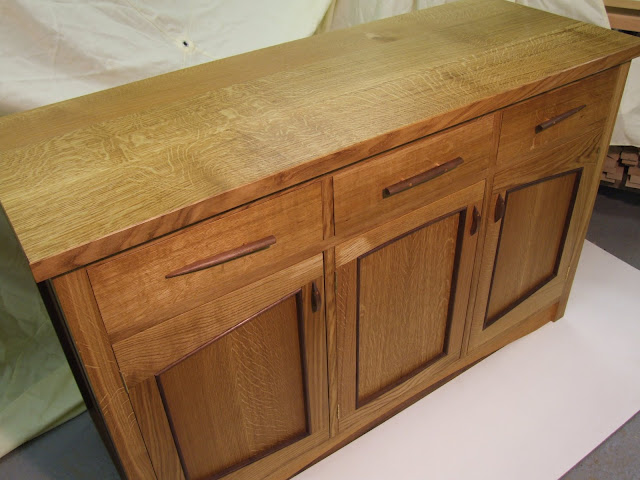
To design and build an Oak drinks cabinet/sideboard.

They have an existing one, which is made in a nasty and tatty, cheap pine, however it is much used and affectionately called 'the Alter' by my clients.

They love Oak furniture, and paticularly like Art's and Crafts style and have a real passion about supporting local crafts and skills (bonus!).

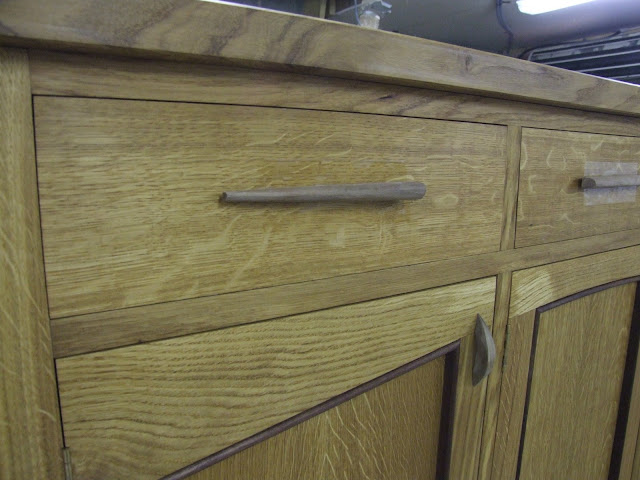
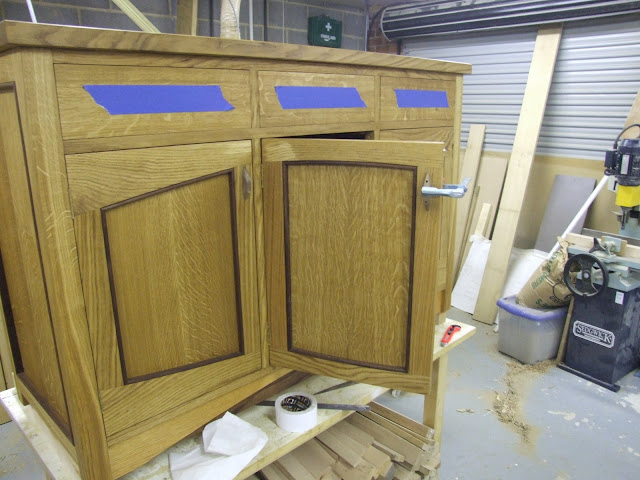
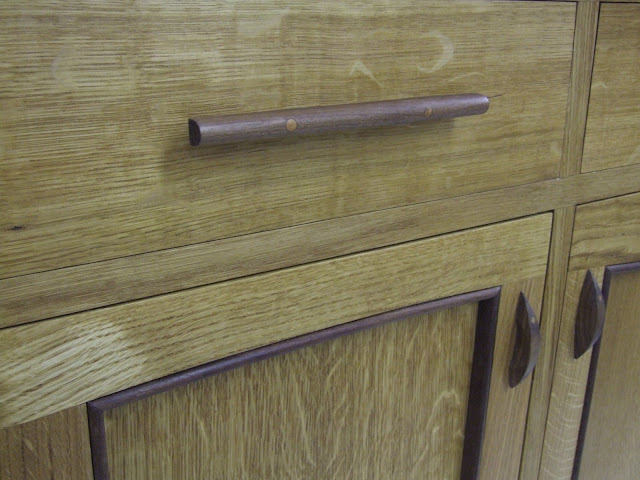
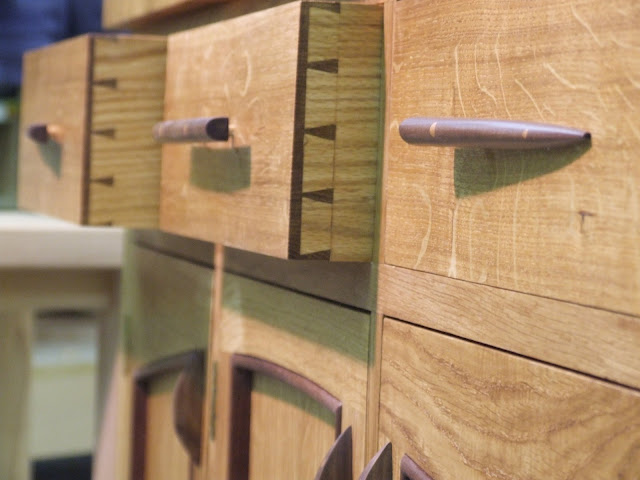
The piece is all solid European Oak, with AB Walnut details. The back and drawer sides are American Red Oak. They have an existing long case clock in Oak and Walnut with a curved door that they are paticularly proud of, this was the biggest influence on the design.

So after a couple of meetings, i finally came up with this as a design-
DSCF2502.JPG

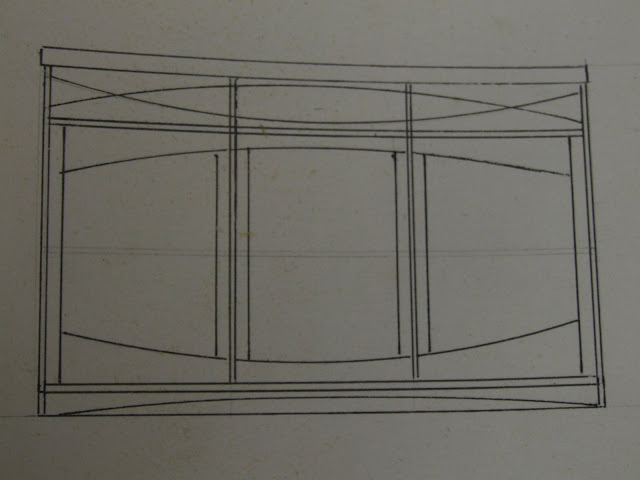
Sorry about the mucky drawings, they have the originals, these are just my working drawing's.
DSCF2503.JPG

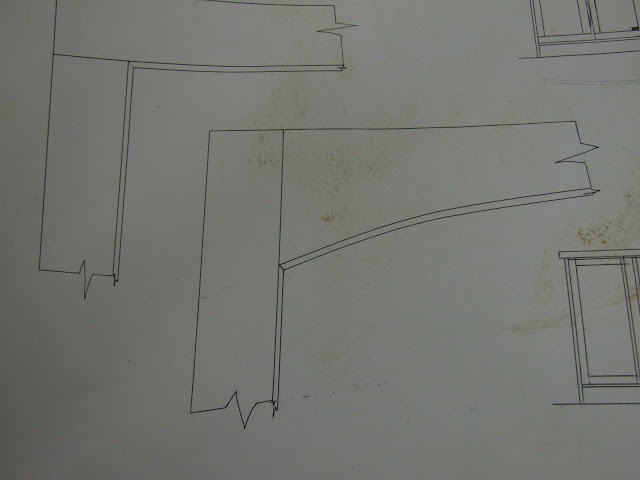
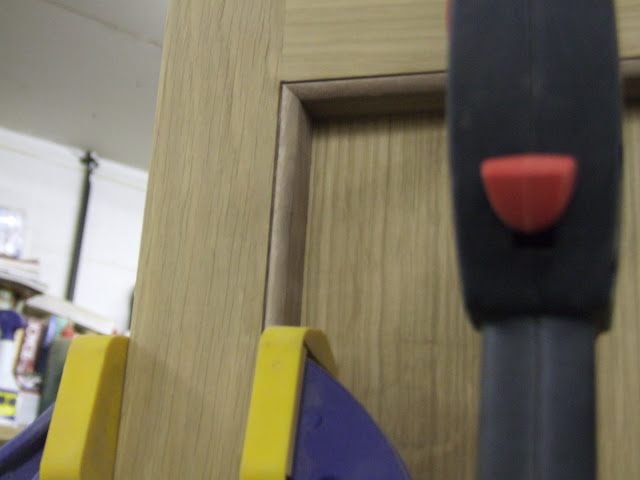
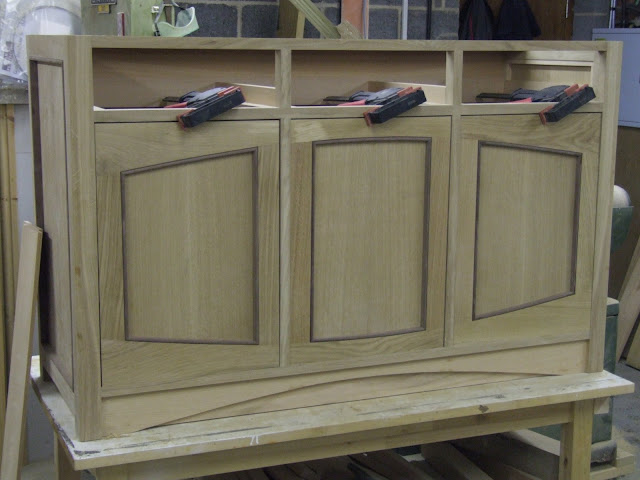
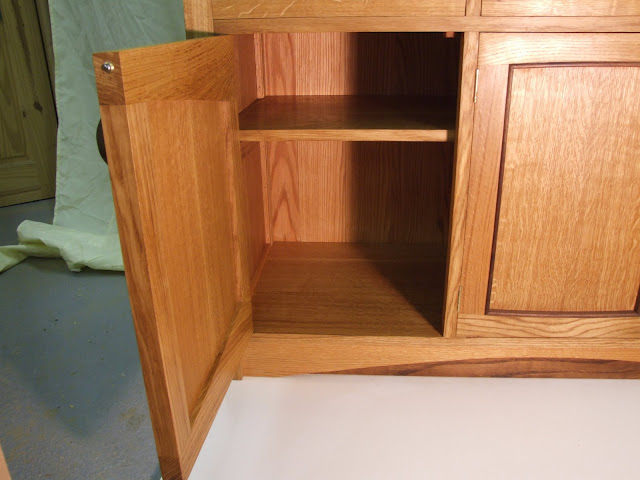
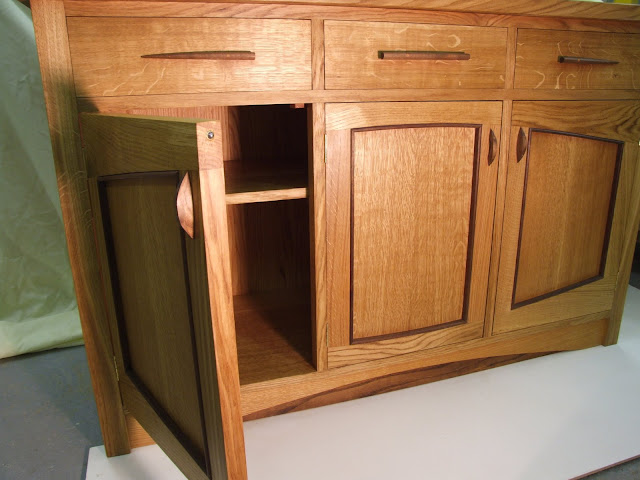
The curved door showing a cock bead detail.
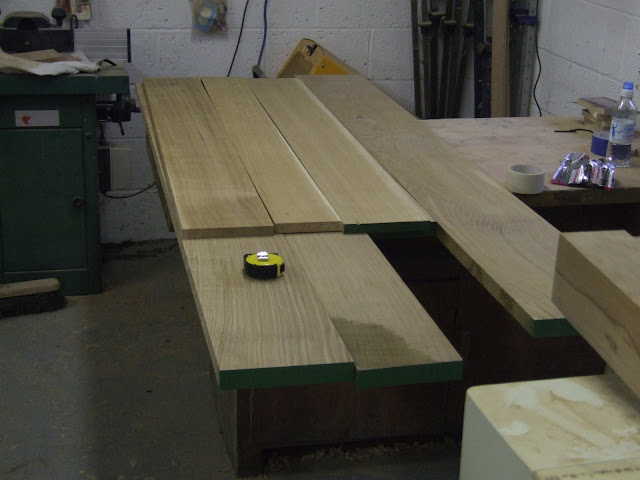
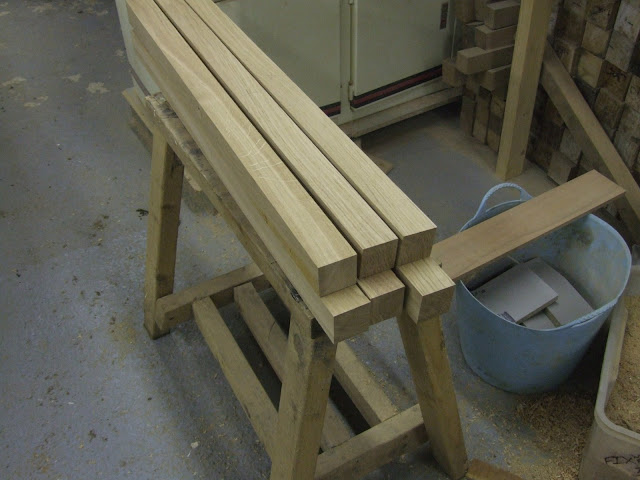
I went and selected the timber myself for this one, I wanted quarter sawn boards throughout and there is no way they would have delivered this.
DSCF2485.JPG


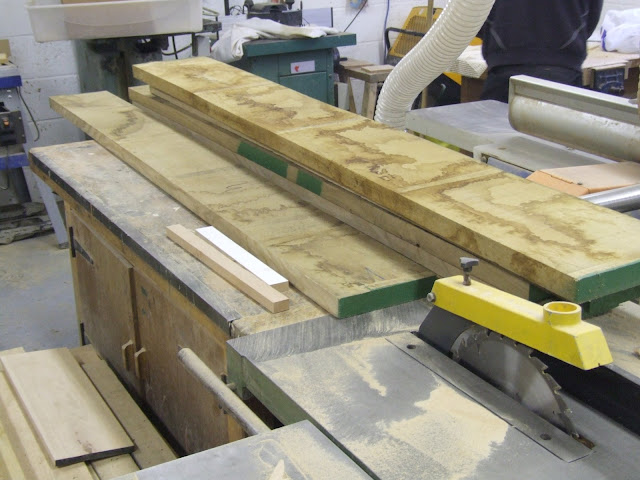
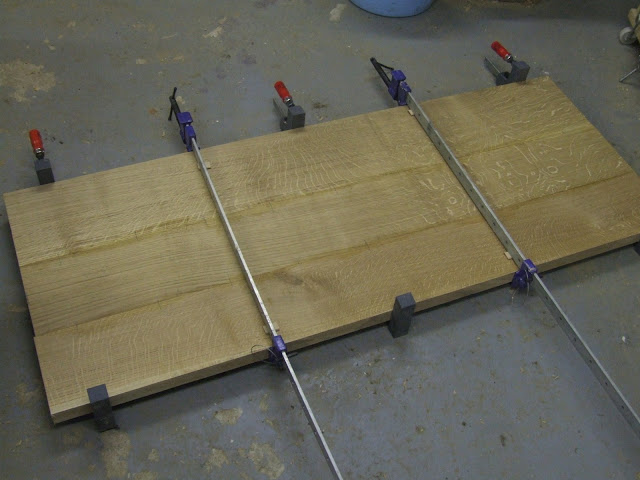
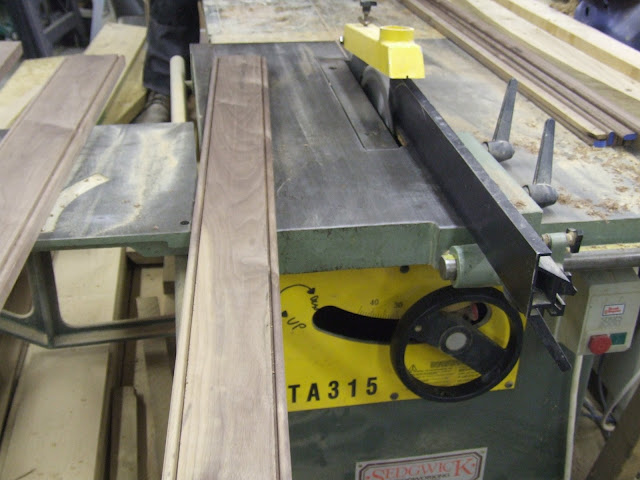
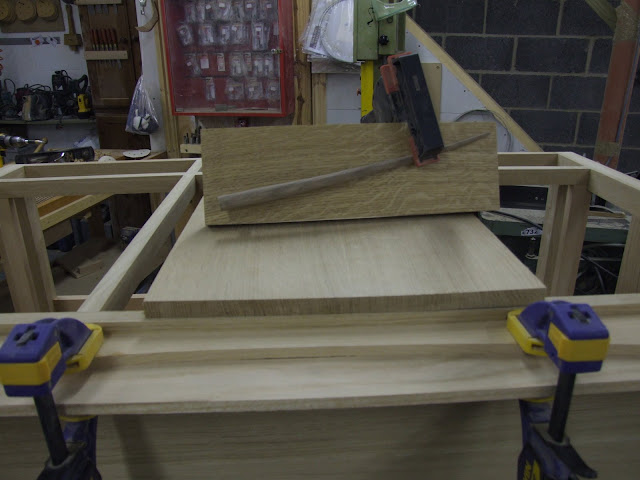
Lots of planing to get some of the bigger glue ups out the way-
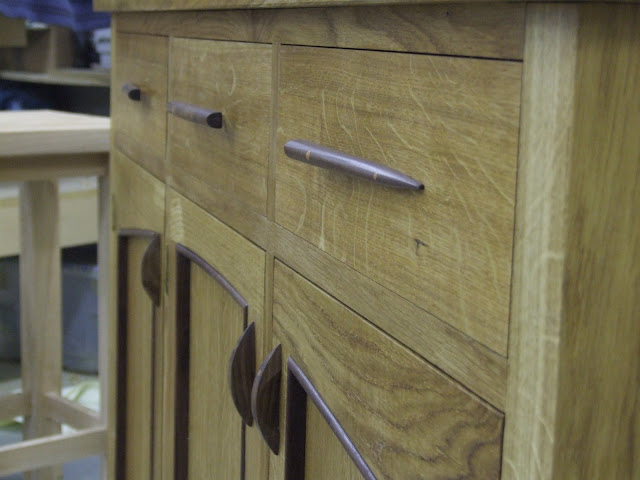
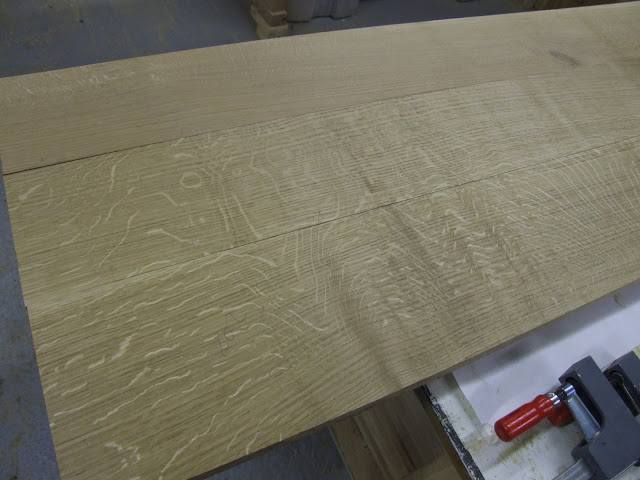
DSCF2491.JPG

DSCF2497.JPG
Nice quarter sawn
DSCF2498.JPG

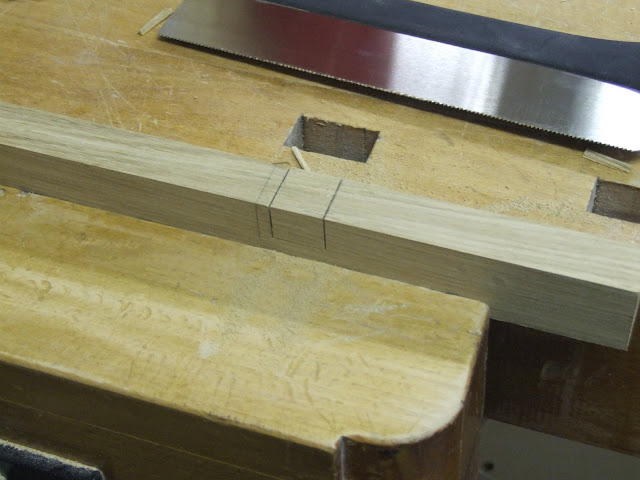
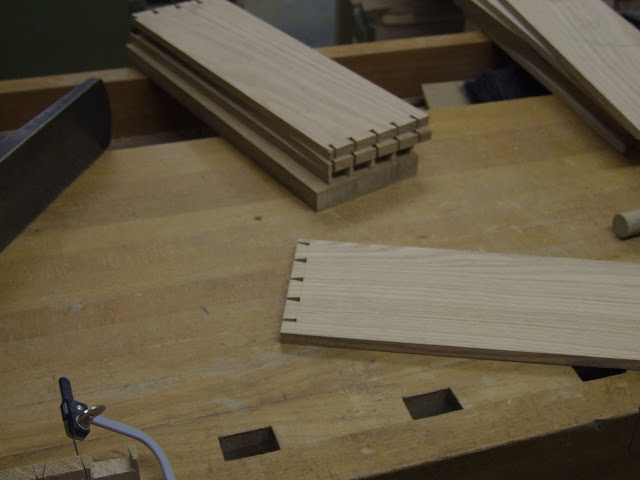
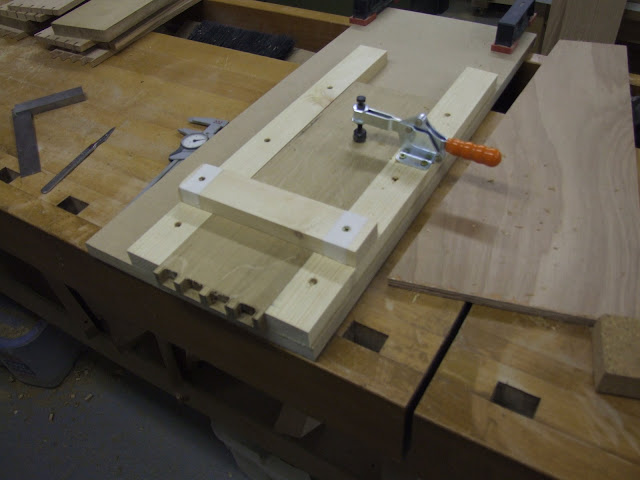
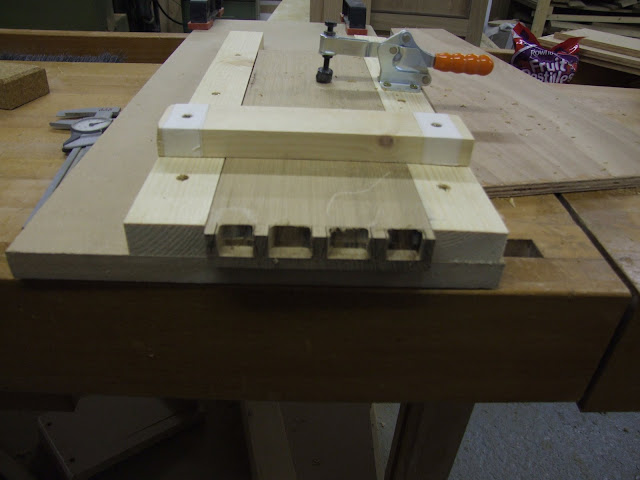
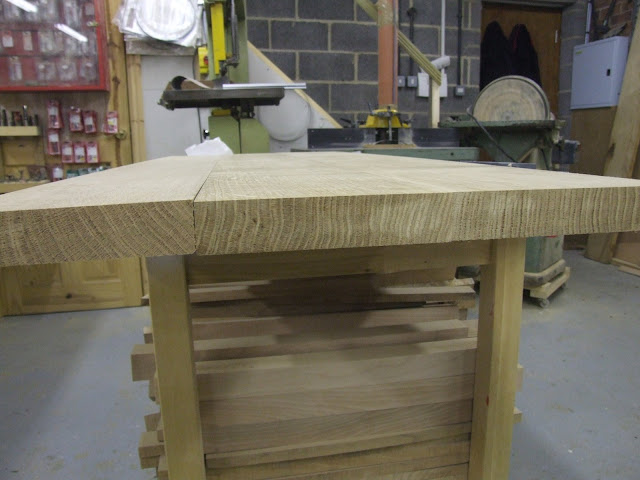
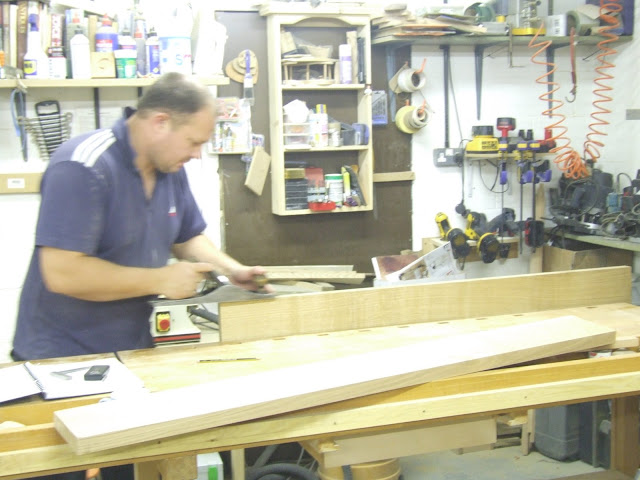
Yours truly shooting the joints on the top-
DSCF2493.JPG


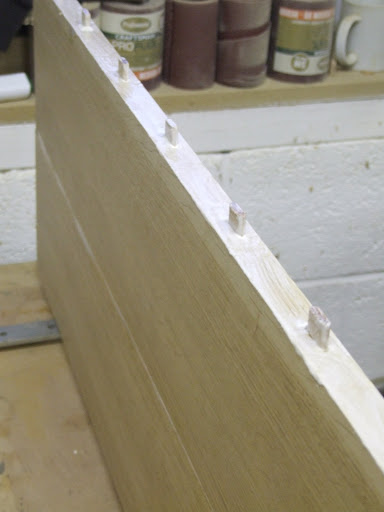
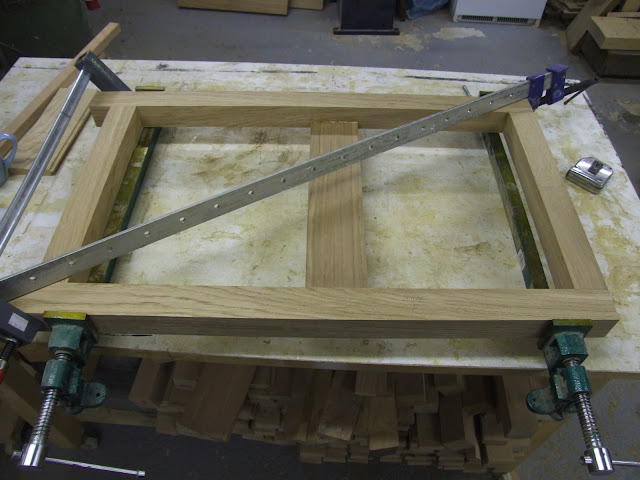
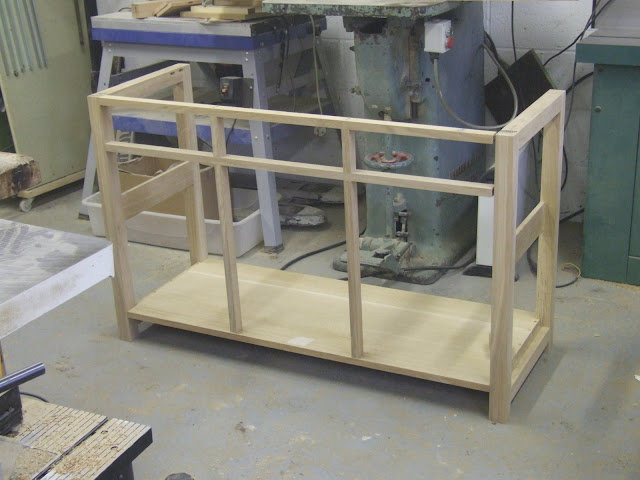
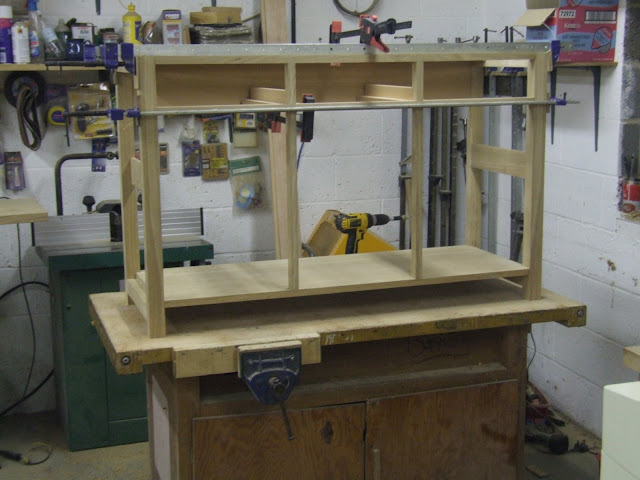
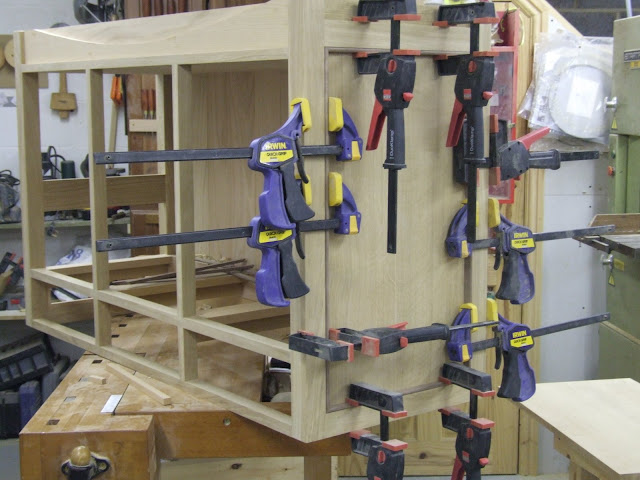
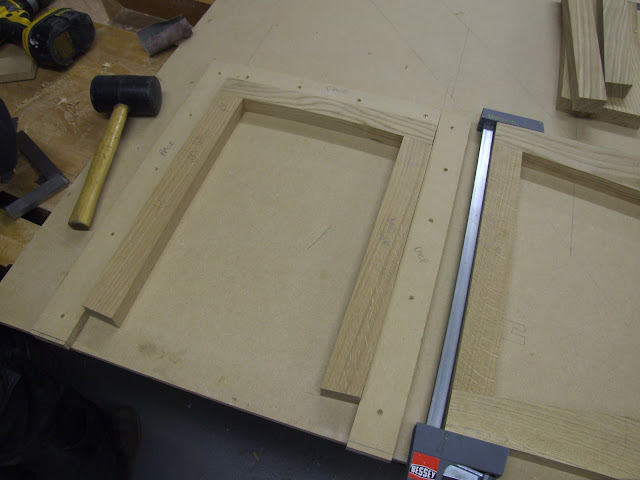
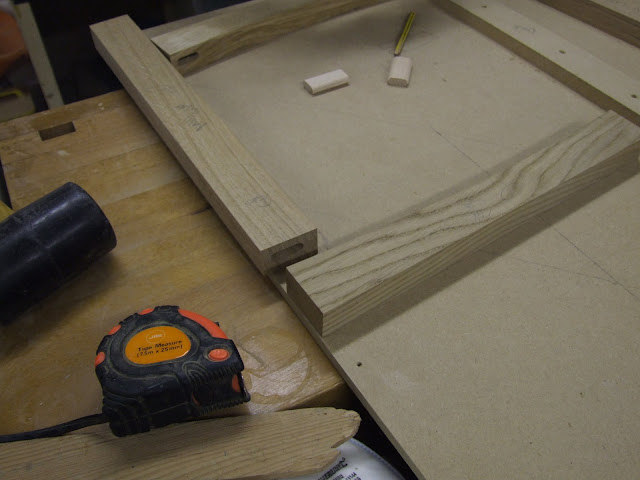
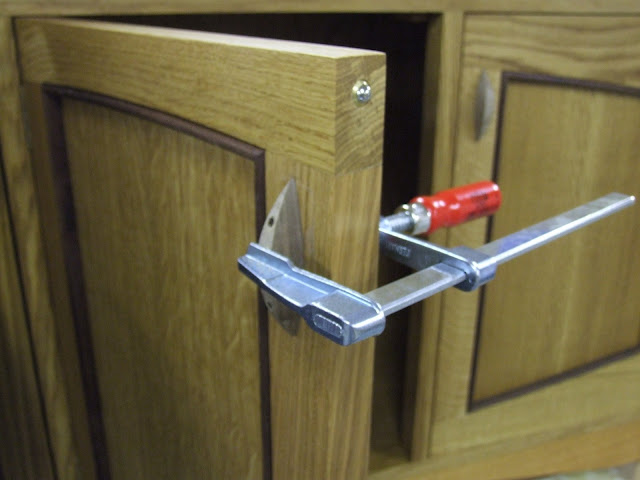
The two ends are frame and panel construction- The prepared timber
DSCF2499.JPG


Any questions or comments- fire away, i'll post more later.
 
Holy Mary Mother of God, Send Us Down a Coupla Bob ;)

Love the figuring in those boards Matty. The design looks good, love the neat hand drawings. Beyond me. ;)
 
Update-
All the bigger pieces, Top, Shelf, Base and side panels are jointed domino'ed and glued up-
DSCF2501.JPG

DSCF2500.JPG

The 2 end frames are also cut and assembled-
DSCF2504.JPG

Once dry, the panel are all wacked through the drum sander down to 21mm, the base is cut to size and notched to fit around the end frame, where it sits on the bottom rail, and is is screwed down through slotted (domino cut) holes- This should allow for any movement, though this will be minimal as it's all quarter sawn. The screws are all hidden by the side panel beading.
The front frame components are all cut and i decided to half lap the joints on this-
DSCF2517.JPG

Trial assembly-
DSCF2518.JPG


A back rail is cut and dominoed and the drawer runners are made, the frame is then glued up-
DSCF2519.JPG


I t&g'd some 14mm oak boards for the back panel and they were nailed on from the back into a rebate on the bottom shelf
DSCF2524.JPG


The front plinths were fitted and the 2 outside drawer runners-
DSCF2540.JPG


I then made loads of cock bead, i planed up some walnut to 22mm thick, and laned both edges of the planks. I then cut the beads on both edges and ripped them off on the saw- rinse repeat a few times and i have 20+ lengths of bead-
DSCF2538.JPG


The 2 side panels are cut to size and the internal beads fitted. i then ripped the cock beads so it left a nice shadow gap against the Oak and so they finished proud of the surface by about 2mm-
DSCF2543.JPG

The beads where glued in place...how mank clamps!
DSCF2545.JPG

DSCF2546.JPG


Doors time- One curved top and bottom rail was cut and using a template and router was smoothed to shape (sorry no pictures), these pieces where then cut to length- this was to keep a flow of grain running across the piece- slightly un conventional as it means the stiles fit between the top and bottom.
I then made a jig to hold the door componets whilst i cut the stiles to length and formed the curved ends on the disc sander-
DSCF2530.JPG

Dominoed-
DSCF2531.JPG


The door components are then stop grooved to take the panels. this was done on the router table using a bearing guided grooving cutter/saw.
DSCF2536.JPG


The Panels are cut to size (I split thicker boards on the band saw for this to get nice book matched panels), The doors are all assembled and once dry put through the drum sander and sanded to 180 grit with the ros.
The beads where cut to width and then mitred up-
DSCF2539.JPG


All the drawer componets were cut and machined, each piece is then shot into the opening and dovetail time-
DSCF2552.JPG

DSCF2556.JPG

I made a simple jig so i could remove most of the waste from the lapped front-
DSCF2558.JPG

DSCF2560.JPG


All cleaned up and assembled. I'll update the rest later.
 
Damn quick as usual. I like that dovetail waste removal jig for the router, much better than what I've done by using the fence on the router, yours seems much more controllable
 
Excellent progress Matt - I'd be weeks on that. I like the design too.

Plenty of Domino use as well!

Ed
 
Matt - nice job so far. I like the way you've set up the router to remove the waste, it can also be done by using the router fence rather than make a dedicated jig but the result is the same...fast removal of the waste. Good to see you've got a half decent marking knife as well :lol: being used in anger.
Doms everywhere it seems - Rob...Domino Ditherer! :lol:
 
Very impressive, so far, Matt. :)

We've seen the Domino and now, with all those Bessey clamps... I'm guessing you may have a few shiny planes hidden away somewhere? :wink:

I don't wish to start an argument or debate on your thread but, even if I had a Domino jointer, I think I'd still use my biscuit-jointer for table tops and panels, purely because biscuits are cheaper (at least, I think so?). There's nothing wrong with what you're doing, of course. Just my observation. :)
 
You give the impression that you are working single handed?

If so what glue are you using, the glue I use would be going off before I got your set up clamped up?

Thanks for showing and time taken to display your work.
 
Thanks for the replies chaps.

OPJ":3mq2fny7 said:
Very impressive, so far, Matt. :)

We've seen the Domino and now, with all those Bessey clamps... I'm guessing you may have a few shiny planes hidden away somewhere? :wink:

I don't wish to start an argument or debate on your thread but, even if I had a Domino jointer, I think I'd still use my biscuit-jointer for table tops and panels, purely because biscuits are cheaper (at least, I think so?). There's nothing wrong with what you're doing, of course. Just my observation. :)

No Shiney planes here Olly :( . I have a very well fettled no4, 5 1/2 and block plane, all standard Record or Stanleys though.

The besseys are good clamps, but i only got them as they were on offer!

The smallest Domino's are a similar price to Biscuits- around 2p each- Obviously a very negligable cost, the biggest are around 10p each. I really do think it a great tool, and it has so many uses- most importantly for me it is just so fast and accurate.
 
devonwoody":2fh0ieyl said:
You give the impression that you are working single handed?

If so what glue are you using, the glue I use would be going off before I got your set up clamped up?

Thanks for showing and time taken to display your work.

Thanks DW. Yes i work alone. I have a Lad doing work experience with me 2 days a week at the moment wwhich has been a help and i am considering taking him on as an apprentice.
Glue- i use Pink grip-
everbuild_pink_grip_woodbond_d4_adhesive-(product).jpg


It has a very quick tack time and is probably a little to fast for a complicated assembly, but it does mean the clamp time is reduced to around 2-3 hours. I have done some destructio testing and was very happy, the glue line is also non existent.
This one was an easy assembly!
 
Wow - I really like this one. Great desing, and it's going together very quickly!
 
Thanks chaps,
Sorry this may be slightly misleading.
I finished this piece yesterday and delivered it today. The updates don't reflect a day's work- more just 30 mins worth of updating. All in there is around 60 hours work in the piece, including delivery. I could have shaved 10-15 hours off this comfortably by not dovetailing and with less complicated handles.

I'll update later.
 
Final update- The clients came round to talk about the handles late last week, they wanted sculptural handles similar to another piece i'd made so i knocked up a few different ideas to show them-

DSCF2541.JPG


The doors were cleaned up to 220g, beaded, and fitted to the openings on the linisher.
DSCF2548.JPG

The whole cabinet was sanded for a final time and then It was time to get some oil on- The finish for this is Boiled Linseed Oil thinned with Pure turps, 3 good coats applied liberally and then wiped off after an hour or so. It is slow drying and so requires an early start to meet the schedule.

The drawers were finshed and shot into the openings, and then onto the handles- these proved to be a nightmare- the clients decided they would be happy with whatever i came up with, i ended up spending all day on Monday making samples and sticking them onto the doors and drawers with double sided tape..-
DSCF2569.JPG


Some of the many rejects-
DSCF2570.JPG


All was sorted in the end and i made some small 4mm&6mm doweling to attach them-
DSCF2575.JPG

DSCF2576.JPG

Clamped on for drilling.

Making the dowels (Thanks Wizer!)
DSCF2579.JPG


Gluing on-
DSCF2580.JPG

All finished-
DSCF2598.JPG


DSCF2615.JPG


There's 2 white patches on the left and middle door that really show up in the pictures but are hardly visible in reality, i've no idea what it is, it's not sap just an odd patch or grain but still annoying
DSCF2619.JPG

DSCF2620.JPG

DSCF2622.JPG

DSCF2605.JPG

DSCF2610.JPG
 
I love the way the overall design comes together with the doors on.

Did you put a chamfer on the underside of the top? It's hard to tell from the photos. Only thing I'm not sure about is the plinth. But, if it's to match an existing piece or the client's spec. then... :)

Was it English oak or European?
 
Bloody hell, that is STUNNING! I love the way the curved rails in the front-on shot make it look like the unit is D-shaped from above. The dowel detail in the handles is great.

Awesome! =D>

Out of interest, why did you go for Boiled Linseed oil over something like Dainish?
 
Back
Top