On a bit of an impulse I bought a wooden shoulder(?) plane off the 'bay. Similar in size and shape to the very nice brass shod one Philly made, only not nearly as nice. The major difference is that mine has a skew blade, about 15 degrees I think. I have a Veritas MkII honing guide but I'm not sure how to go about sharpening a skew blade. I know you can get an additional skew jig for the MkII, but as the plane only cost £2 and was bought on a bit of a whim, I don't really want to spend any more money on it. Any thoughts as to how to go about it? Indeed, any thoughts about the original function of the plane, was it intended as a shoulder plane, or did it have another use?
You are using an out of date browser. It may not display this or other websites correctly.
You should upgrade or use an alternative browser.
You should upgrade or use an alternative browser.
Skew blade sharpening
- Thread starter George_N
- Start date


Help Support UKworkshop.co.uk:
This site may earn a commission from merchant affiliate
links, including eBay, Amazon, and others.
JesseM
Established Member
Of course there are more complicated ways of doing this, but I just draw a line of the desired angle on something with a reference surface. Then you just need to find the right projection on the line. Sometimes I will experiment with this. If I get in the neighborhood of between 25-30 degrees I'm happy. Then mark the length of the projection on the angle for future reference. I have built up quite a collection of skews which all seem to have different angles.
For plane blades you want the blade hitting the surface flat so what you thought was 15 degrees might be 16 or 15.5. You may need to adjust the skew till you get it right. In some cases you can measure the plane's skew angle. The skew I have been putting on my stanley 46 blades is 68, but its not quite right, it works mind you, but its not sitting completely flat.
For plane blades you want the blade hitting the surface flat so what you thought was 15 degrees might be 16 or 15.5. You may need to adjust the skew till you get it right. In some cases you can measure the plane's skew angle. The skew I have been putting on my stanley 46 blades is 68, but its not quite right, it works mind you, but its not sitting completely flat.
MikeW
Established Member
Hi George,
Here are two links. The first is an article Derek wrote before the skew angle registration jig for the MK.II came out, the second link is to using the new skew jig, but is a good read anyway.
http://www.wkfinetools.com/contrib/dCohen/MarkII-Angles/index.asp
http://www.wkfinetools.com/contrib/dCohen/LVSkewJig/index.asp
Take care, Mike
Thanks guys, I think I will try the low tech approach and make up one of Derek's little jigs. Who knows, if I get on ok and the plane proves to be useful I might shell out for the real thing sometime. Right now though, I've just about used up all my tool buying credits :wink:
bugbear
Established Member
George_N":1mwq19sm said:On a bit of an impulse I bought a wooden shoulder(?) plane off the 'bay. Similar in size and shape to the very nice brass shod one Philly made, only not nearly as nice. The major difference is that mine has a skew blade, about 15 degrees I think. I have a Veritas MkII honing guide but I'm not sure how to go about sharpening a skew blade. I know you can get an additional skew jig for the MkII, but as the plane only cost £2 and was bought on a bit of a whim, I don't really want to spend any more money on it. Any thoughts as to how to go about it? Indeed, any thoughts about the original function of the plane, was it intended as a shoulder plane, or did it have another use?
Sounds like a wooden "skew rebate".
http://nika.frontier.iarc.uaf.edu/~cswi ... =1#message
BugBear
Thanks for the link BB, interesting reading. I haven't had a chance to play with my new toy yet but I can see from the posts on the Old Tools Archive that it is important to get the skew angle of the blade to exactly match the angle of the mouth. Mine doesn't, so some careful grinding will be in order. I assume that standard bevel angles will be ok for most work.
bugbear
Established Member
George_N":1opex25d said:Thanks for the link BB, interesting reading. I haven't had a chance to play with my new toy yet but I can see from the posts on the Old Tools Archive that it is important to get the skew angle of the blade to exactly match the angle of the mouth. Mine doesn't, so some careful grinding will be in order. I assume that standard bevel angles will be ok for most work.
The blade edge must be parallel to the sole. The blade angle/skew does NOT need to be parallel to the mouth - indeed, depending on the bed, the former may actually preclude the latter.
But be sure to check the body/sole relationship first, before precision fitting the blade to the sole.
BugBear
Ian Dalziel
Established Member
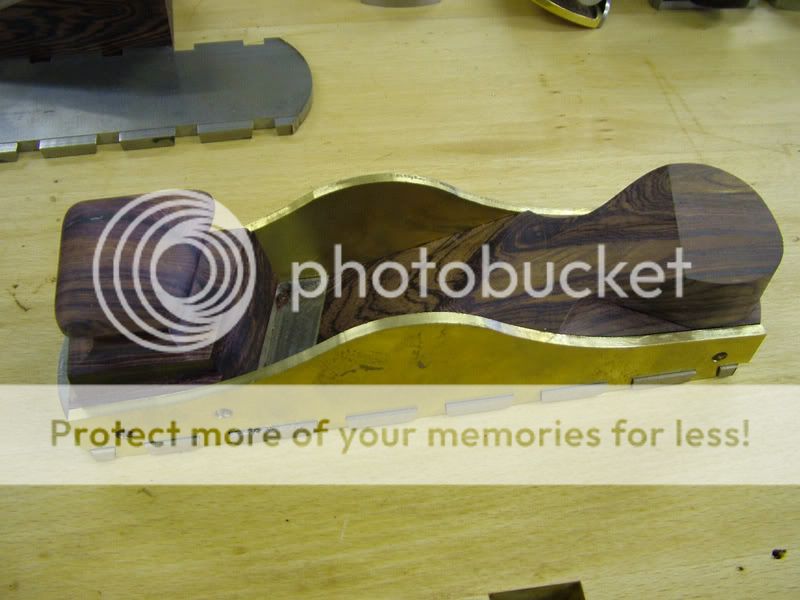
interesting thread......i am curently making a LH and RH pair of skewed improved mitre planes and they are by far the most complicated i have tackled....almost everything about it involves a mathematical calculation before i do anything to it....the lever caps are proving a challenge and i'm still not sure whether to fit an adjuster or not...still making the parts alas i have to return to work to give my brain a rest from the the calculations.
i skewed the front bun which has given a surprisingly nice grip...first time i have seen the front bun skewed as well
havent even started the blades yet but i'm sure they'll give me as much hassle as the rest of the plane has.
I have bedded it at 20 degrees with a 16 degrees skew
nightmare...but i'm winning the battle.
I
Wiley Horne
Established Member
Plenty of excellent advice already. But here's a low-tech method. Set the blade in the plane as you want it to be, and let the blade project a bit on the bottom. Take a flat-sided marking knife or chisel, register it to the sole, and scribe a mark across the blade's back. This mark will be parallel to the sole. Grind and hone to your mark by eye. If there is a large adjustment to make--meaning lots of metal to remove--grind a blunt edge on the blade, near to your scribe line but not right up to it, leaving the scribe line as a witness, and then begin bevelling and honing. The final honing will remove the scribe line.
Wiley
Wiley
bugbear
Established Member
Wiley Horne":3m78308g said:Plenty of excellent advice already. But here's a low-tech method. Set the blade in the plane as you want it to be, and let the blade project a bit on the bottom. Take a flat-sided marking knife or chisel, register it to the sole, and scribe a mark across the blade's back. This mark will be parallel to the sole. Grind and hone to your mark by eye. If there is a large adjustment to make--meaning lots of metal to remove--grind a blunt edge on the blade, near to your scribe line but not right up to it, leaving the scribe line as a witness, and then begin bevelling and honing. The final honing will remove the scribe line.
Wiley
That works for rough fitting, if the blade is waaay out, or you're adapting a replacement blade from another plane.
But (since these tools have almost no lateral adjustment) for an accurately uniform shaving, the iterative method is (IMHO) unavoidable.
More references:
http://nika.frontier.iarc.uaf.edu/~cswi ... =1#message
BugBear
Derek Cohen (Perth Oz)
Established Member
here's a low-tech method. Set the blade in the plane as you want it to be, and let the blade project a bit on the bottom. Take a flat-sided marking knife or chisel, register it to the sole, and scribe a mark across the blade's back. This mark will be parallel to the sole. Grind and hone to your mark by eye.
Here's another low-tech way ..
Insert the blade and set it so that it projects very slightly from the mouth. Now lap the plane very lightly, just to knock off the leading edge of the blade. There is your line to which you will grind.
Lastly, and by no means leastly, Ian - that is a seriously beautiful plane. My compliments.
Regards from Perth
Derek
bugbear
Established Member
Ian Dalziel":3pci5cwn said:interesting thread......i am curently making a LH and RH pair of skewed improved mitre planes and they are by far the most complicated i have tackled....almost everything about it involves a mathematical calculation before i do anything to it....the lever caps are proving a challenge and i'm still not sure whether to fit an adjuster or not...still making the parts alas i have to return to work to give my brain a rest from the the calculations.
i skewed the front bun which has given a surprisingly nice grip...first time i have seen the front bun skewed as well
This may interest you, Ian.
A much more "hands on" approach to planemaking, possibly more similar to Wayne Anderson than yourself and Karl.
http://www.petermcbride.com/planemaking/
You might care to send him your tips on accurate dovetail peining, although he managed pretty well on his own!
BugBear
Ian Dalziel
Established Member
George,
Thats the idea....for shooting.
BB,
good link, first skewed front bun i've seen as well. Peter has very skilled hands,
It would worry me though heating the brass in case the plane body twisted....heat does strange things to the body, that are only evident once its all together. His dovetails look a very acute angle on the sole, this is maybe why he heated it as drifting cold brass over at that angle can work harden it and possibly chip. makes for a very secure joint though...with him being a jeweller he obviously knows the metals limitaions.
I can see he has had fun working that one out as well. bet that one was sworn at more than once.
very nice
I
Similar threads
- Replies
- 3
- Views
- 234