Setting up a mortice guage

UKworkshop.co.uk

Help Support UKworkshop.co.uk:

This site may earn a commission from merchant affiliate links, including eBay, Amazon, and others.

Terryc

Member
Joined
18 Sep 2006
Messages
8
Reaction score
0
Location
Grimsby, North East Lincs
Hi everyone,
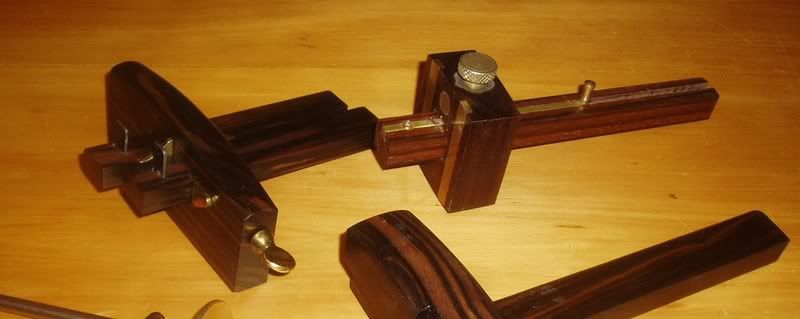
Can anyone tell how to set up a mortice guage accurately. Adjusting the spurs to the chisel width is simple, but how do you then set the stock on the gauge so that the scribed mortice is centred on the wood. I have managed in the past purely by trial and error, but I've always thought that there must be a more professional way. Any help would be appreciated.
 
Hi

I do it by:

1. Set the mortice width as you describe.
2. Estimate the distance to the centre and mark two trial points on the edge of the work from one face.
3. Now gauge from the opposite face - the points of the gauge should
coincide with the two trial marks (they probably won't)
4. Adjust the gauge to split the difference between the two sets of marks and gauge from both faces till the points coincide.

It is the same method as for finding the centre line.

Andy
 
Hi Andy
Yes, that's the way I've always done it, but as you will know sometimes it just seems to take forever to get it aligned properly. I just thought that there must be an easier way, I live in hope.

Regards
Terry
 
Hi Terry

If there is a quicker way
could someone tell us both, please.

Andy
 
Jacob

Thanks.

As you point out always using the face side is key - a fact
I often forget!

Andy
 
surely the other way to set up at the beginning it to draw a central pencil line where the mortice will be, then lay the chisel on it, and centralise,
draw on either side.

then lay your mortice gauge from the face edge, and move the guides until they are just inside the pencil lines where you will be chiselling.

i am of the belief that it is better to reduce the tenon after cutting the mortice, than widening said mortice, and you do want them quite tight.

then lay out ALL the work at the same time to ensure as jacob says it stays in the same plane. :roll:

paul :wink:
 
I ususally get the centre of the wood which is vey easy and quick (no need for a ruler) and then measure the half width of the chisel with my ruler. Lay the guage on it and voila, dead centre and dead-on chisel width.
 
Mr_Grimsdale":1i5ahqhv said:
Quicker if you don't try to centre it exactly - this is rarely necessary in any case. Just get it close. For consistent accuracy you must mark with the gauge always from the face side of the stuff, and do all mortices and tenons in one session so that you don't have to re-check, reset etc. and so that any off-centre offset will always be to the same face, so not a problem.

Your comments on the basic techniques for marking are quite correct, but are independant from a (perhaps cosmetic) desire for centralised mortises, which can be achieved as others describe.

Oh, and making all your marks in one session can be avoided by owning enough gauges that you don't reset very often. :wink:

BugBear
 
Mr_Grimsdale":135clisb said:
Nah. Too slow and inaccurate.
You set the points from a scale, 3/8", 10mm, etc depending on the chisel. You then set the gauge roughly central if that's what you want, although most M&Ts are likely to be offset to align with another feature such as a rebate or a slot for a panel.
You must make all the marks for all the mortices and all the tenons with the same setting of the gauge in one session for the whole job, working always from the face or edge, with every component previously clearly marked with the face and edge marks.
Cut mortices first, then tenons - where you may make a fine adjustment for a good fit such as moving band saw fence a gnats - but once only, no fiddling about with each one or you will be at it all day.
You cut all the cuts for all the tenons with the face marks against the fence - i.e. you adjust the fence, you don't just turn over the workpiece even if the M&T is central.

cheers
Jacob


Very sound advice, good clear explanation. Not much chance of getting the wrong end of the stick in this case eh Jacob :lol: :wink:

One thing that might be of use to someone, I saw for sale some very old mortice guages where they just used little bars of mahoggony etc with a half lap cut out one end so you had a built in fence. There was 2 spikes nailed through the cut out area, and these were filed to get even sharp point's. There was a big lot of them, all for different chisel widths and distances from the face for differnt stock thickness's. So you just grab whichever one is apropriate, or make a new one for a special job. They wont get altered during the course of a job as an adjustable might.
Its not important for the motices to be centred as to all be the exact same distance from the face as Jacob eloquently pointed out. This was particular so when cleft stock was used and they only planed up one good showing face (time = money) and set out the mortice and tennon positions from that, the interior non view faces were often left "rough from the froe".
When they set out large mortices and tennons for oak frames they use a framing square in a similar way, placing the 2 inch part along the good face side, and from it mark a 2 inch mortice 2 inches in; or use the 1 1/2 inch part to do 1 1/2 inch mortice 1 1/2 inches in from the good face. Exact same principle as Jacob described only not quite so gnats :lol: The outside faces will be consistent, the posts will have the same shoulder depth's and will drop in to the sill mortice's and create a nice flush outer nailing surface even if the inside surface varies a bit due to fluctuations in sawing or hewing size's.
 
Mr_Grimsdale":3obwv6tu said:
Nah. Too slow and inaccurate.
You set the points from a scale, 3/8", 10mm, etc depending on the chisel. You then set the gauge roughly central if that's what you want, although most M&Ts are likely to be offset to align with another feature such as a rebate or a slot for a panel.
You must make all the marks for all the mortices and all the tenons with the same setting of the gauge in one session for the whole job, working always from the face or edge, with every component previously clearly marked with the face and edge marks.
Cut mortices first, then tenons - where you may make a fine adjustment for a good fit such as moving band saw fence a gnats - but once only, no fiddling about with each one or you will be at it all day.
You cut all the cuts for all the tenons with the face marks against the fence - i.e. you adjust the fence, you don't just turn over the workpiece even if the M&T is central.

cheers
Jacob

I agree with this totally--it part of the whole reason( besides cosmetics) to mark the stock up as face side/edge in the first place,so you can keep orientation with joint positioning.

regards.
 
mr spanton":ohbvmwpb said:
One thing that might be of use to someone, I saw for sale some very old mortice guages where they just used little bars of mahoggony etc with a half lap cut out one end so you had a built in fence. There was 2 spikes nailed through the cut out area, and these were filed to get even sharp point's. There was a big lot of them, all for different chisel widths and distances from the face for differnt stock thickness's.

As a variant on this, if you have a small range of mortise chisels, it to convert marking gauges into mortise gauges, by having 2 FIXED points.

You thus have a mortise gauge which is NOT adjustable for mortise size, but IS adjustable for mortise position, and you need one per chisel.

The mortise size for the pins can be fine-tuned by either filing, or using a screw with an off centre point and rotating it, (like a trammel point).

BugBear
 
It might also be worth mentioning that the French timber framers draw out the floor plan for a truss or wall frame or whatever, and mark the face side position's only on their full scale floor drawing's (giant rod's effectively) They dont draw 2 parallel lines 8 inches apart if they are using an 8 inch beam. The second (inner face) line is of so little relevance they dont even waste time drawing it. So they align the beam having selected and marked what will become the good outside face and align that only to the drawing using a plumb bob. It wouldnt matter if the timber was a little smaller or larger, its only the face on the beam relating precisely to the face on the drawing that is important. This allows them to build a frame with precise finished dimensions, even if they have to use odds and sods of wood that may fluctuate a lot especially if it was hewn or cleft in two from a larger coppiced trunk.
 
bugbear":l6eik0wi said:
mr spanton":l6eik0wi said:
One thing that might be of use to someone, I saw for sale some very old mortice guages where they just used little bars of mahoggony etc with a half lap cut out one end so you had a built in fence. There was 2 spikes nailed through the cut out area, and these were filed to get even sharp point's. There was a big lot of them, all for different chisel widths and distances from the face for differnt stock thickness's.

As a variant on this, if you have a small range of mortise chisels, it to convert marking gauges into mortise gauges, by having 2 FIXED points.

You thus have a mortise gauge which is NOT adjustable for mortise size, but IS adjustable for mortise position, and you need one per chisel.

The mortise size for the pins can be fine-tuned by either filing, or using a screw with an off centre point and rotating it, (like a trammel point).

BugBear

Yes that would work as well. In fact I once saw a ruddy great big timber framer's mortice guage with exactly what you describe only larger scale and build strength; 2 fixed spike's 2 inches apart, then a adjustable fence I think it was wedg'd similar fashion to a plough plane wedge where it cant "escape"; the fence was about 16 inches long. Of course generally with those big frames the convention is 2inch 2inches in or 1 1/2 inch 1 1/2 inches in so the adjustable function probably wouldnt get used much.
What I liked about the bunch of fixed sizes was that they were just that, fixed. So even if you had to make a new component later for repair or whatever youd still have the same setting permanently. The ones I saw were probably about 160 year old?? But I reckon the basic idea is much older than that, didnt the scandiavian's have guages for marking boat planks and that?
 
About marking out mortices.

I have tended to use a traditional mortice gauge, and added a double cutting gauge a few years ago.

Crown and Mujingfang:
Markinggauges1a.jpg


I set out mortices by eye, just gauging (pun not intended) the distance to the face side. As Jacob noted, it is important that this is carried throughout.

A thought occurred to me a while back that a mortice gauge is unnecessary, that all one needs to do is scribe a single outer line (with a basic marking gauge or cutting gauge) and chisel/drill/rout along this. The second outer line is superfluous. Then I saw Rob Cosman doing just this in a recent DVD.

I wonder how others feel about this method, and what objections there might be?

Regards from Perth

Derek
 
Arent you in the s**t when it comes to doing the tennons though, and getting them matched precisely to your mortice? Its a clever way but only if your chopping mortises only with no tennon's to have to match up. (I always line the mortice chisel to the gugae line nearest face side anyway so I can see partly why its an attractive option) Am I missing something though :lol:
 
Back
Top