Roubo

UKworkshop.co.uk

Help Support UKworkshop.co.uk:

This site may earn a commission from merchant affiliate links, including eBay, Amazon, and others.
I am just about to embark on my own roubo build with vices from the English woodworker and am following your build with great interest.

Sent from my GT-I9100 using Tapatalk
 
I looked at the wooden screw vice and didn't fancy it to be honest. I have a wooden screw vice on the sjobergs bench and it tends to move seasonally and bind. I felt metal was the way to go. I like the wagon vice but then my handles wouldn't match so I went benchcrafted.

Can you do a work in progress on the English woodworker bench build wcndave, be nice to see it.
 
Journeyman_uk":37pnq9iu said:
Can you do a work in progress on the English woodworker bench build wcndave, be nice to see it.

Mine will be a hybrid. Based on the split top Roubo that I think benchcrafted sponsored in the Woodshisperer guild, adjusted to use the English Woodworkers vices.

I will try and do some WIP, I have started with my lumber woes, the stock I am able to get requires some serious work, and will result I think in 70% waste.

I can't get it near a machine until some hand sawing (or jigsaw work) has taken place.

There seems to be a gap here in North Italy, basically you can get wood from a box store, soft wood only, and expensive, or you go to a lumber yard and they cater for the professional shops with very large capacity to mill this stock.

Details are here: http://www.mywoodworkmatters.com/lumbering-up/
 
Wow 70% waste is horrendous! The benchcrafted plans are available for 18 euros or something, it's worth having a look at as all the dimenions are there for you leaving no ambiguity. You just have to alter the holes for wooden screws and tail vices.

I'll make sure the pictures are as comprehensive as I can make them. Good luck preparing your stock.

J
 
Wow that lumber is not good. It looks like you will have to cut into narrow strips to maximise use?

Rod
 
If that was me, I would take that lumber back after seeing the images on your blog. I would be trying to get a trade account with the professional yards and insist I sorted through the planks to get what I want. Timber isn't cheap and I would refuse to pay for waste of such a level.
 
Three problem is that I am going to a trade place and not picking boards is just how it is.

A friend came to help me lift them into a pile and he didn't know what I was complaining about and he is a professional joiner.

With my wood whisperer membership I thinki have all the plans including sketch up.

Just annoying that I can't get lumber here quite as "ready“..

Sent from my GT-I9100 using Tapatalk
 
I'm not sure it would be cheaper to import than just cut the stuff they have themselves.

There is Canadian maple however that's hard maple not soft.

I just think their target audience is trade, I don't know any other hobby woodworkers here.

The one place I have sourced roughly milled lumber was from a furniture maker, but that was just off cuts that cost me a crate of beer!

Sent from my GT-I9100 using Tapatalk
 
I guess if there isn't a furniture making community in the locality then there probably won't be a supply chain to service it. Well best of luck with it.

J
 
Oh there are lots of them.most people I know are in one trade or another, however they have the kit to deal with it, 50 cm table saws to take 5m panels.

I am getting some of the equivalent of plywood which comes in 5m x 3m panels!

Everybody has a site saw at home but that's just for firewood.

Sent from my GT-I9100 using Tapatalk
 
It's not been without issues morfa. It's getting dialled in now and every thine I use it in a different way it just gets better and better.

I am intending to cut the tenon shoulders with the table saw set up with a stop block on the fence. I am going to cut the cheeks with the bandsaw with some blocks machined to provide the offset as the tenons aren't symmetrical (chris tribes method which works exceptionally well and tight fitting tenons almost off the blade. Problem being I ordered some tuffsaw blades and when they arrived I had managed to buy the wrong size. Thankfully they are too big by 4 inches so they are shipped back down to Ian to alter for me.
Great customer service from him I must add.

I'll get the camera set up on the tripod and get some detailed shots so you can see what I'm banging on about. I just need to pick up the pace now and get some hours on this project as I have a house to refurb next.
J
 
While I was waiting for Ian at Tuffsaws to sort out my mistake I thought I would get on with the mortises. I prefer to use a router and spiral bit as you get very clean shoulders. I normally only make shallow small mortises so my cutter is only 8 mm diameter. So I would need multiple passes to get a full inch width cut. I use a secondary fence to steady the router. This has the problem of making the fine adjuster useless because the leg is that wide the bar only just reaches each sides of the fence. The secondary fence is just a piece of ash with a longer piece of ash stuck onto it with double sided tape. There are two 10 mm holes to receive the rods and then two 6mm locking holes drilled vertically into them. One of the techniques used in the hardware fixing on this bench is tapping metal screws into wood. I must admit I was a bit dubious that wood would hold a metal screw with a decent strength but it worked really well. I gently fed a M7 tap into the wood with a really slow turning drill and carefully backed it out when it had broken through into the 10mm hole. The screws hold amazingly well and did a perfect job (impressed)!

DSC01211_zps678ba9cd.jpg


I adjusted the router to the closest to the face edge and routed in multiple shallow pass with a final cleaning pass. I did this for each leg and each mortise before adjusting the position of the router relative to the face. This way I was only ever going to adjust the router two or three times as opposed to working on each mortise until completion.

DSC01218_zps9066b0b4.jpg


I made a series of vertical plunges and clear the chippings before I did a horizontal pass to square up the shoulders as seen in the pic below.

DSC01221_zps388368bd.jpg


This gives me a nice set of square sides the mortice with just the short edge to square up. Since I knifed all the boundary marks before I started I had a place to locate my chisel to pare away the waste.

DSC01224_zps847eded0.jpg


This leaves me with lovely squared up mortices.

DSC01225_zps0779fdbd.jpg


The bandsaw blades also arrived today and the saw is now set up square to the table, the drift has been corrected and I can think about making some stop and offset blocks for the tenons, which should be fun. I marked the shoulder cuts out for the tenons but I need to double check everything and get my knife marks in place.
 
Got a bit of free time this morning and had a few hours in the workshop. First job is to scribe the shoulders on the rails. This was done on the slider with the riving knife removed because for some odd reason the tip is thicker than the blade. The fence and height was set with a scrap piece and then the shoulders were scribed.

DSC01227_zpsdeca33d8.jpg


Which leaves us with something like this.

DSC01229_zps99d51e7f.jpg


The setup on the bandsaw is really simple, the spacer is the same thickness as the tenon plus the saw kerf. With the spacer in place we can adjust the bandsaw fence to make a cut just on the waste side of the line on the cut closest to the reference face.

DSC01230_zps9330890f.jpg


The spacer is removed to create the correct offset and then the other cut can be made.

DSC01231_zps5ed01ada.jpg


The result is we are left with some nice clean tenons which need very little work with the shoulder plane to get a decent fit. I left a little on the tenon to hand fit them, I thought about getting the tenon to fit off the blade but the amount of setup for 12 tenons didn't seem to justify the extra faffing.

DSC01232_zpsded5f6f4.jpg


DSC01233_zpsd1e26e56.jpg


I need to cut down the top part of the tenons which I think will be done on the bandsaw and cleaned up with a nice sharp chisel.

Any questions please ask :)
 
The dimensions are straight off the plans so all I have done is made the legs a bit taller to raise the bench top height. It does look a little weak I must admit so I am going to have to be careful when fitting the tenon.
 
Hi folks, been a while since I posted anything, not much progress has been made but I am up and running again.

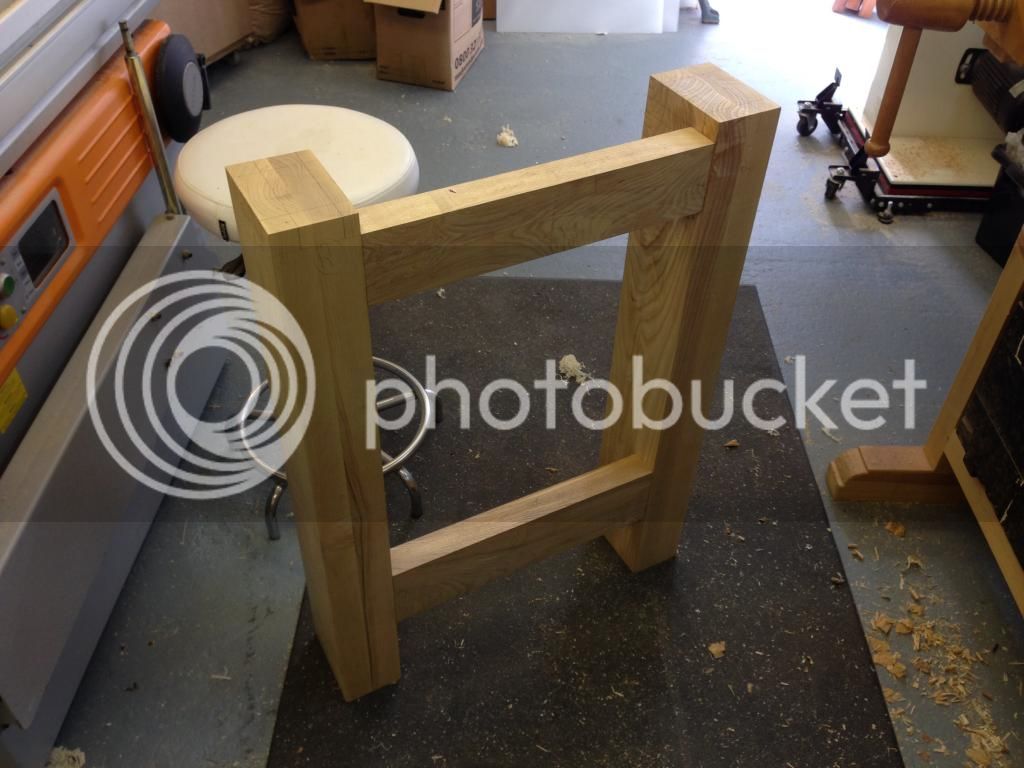
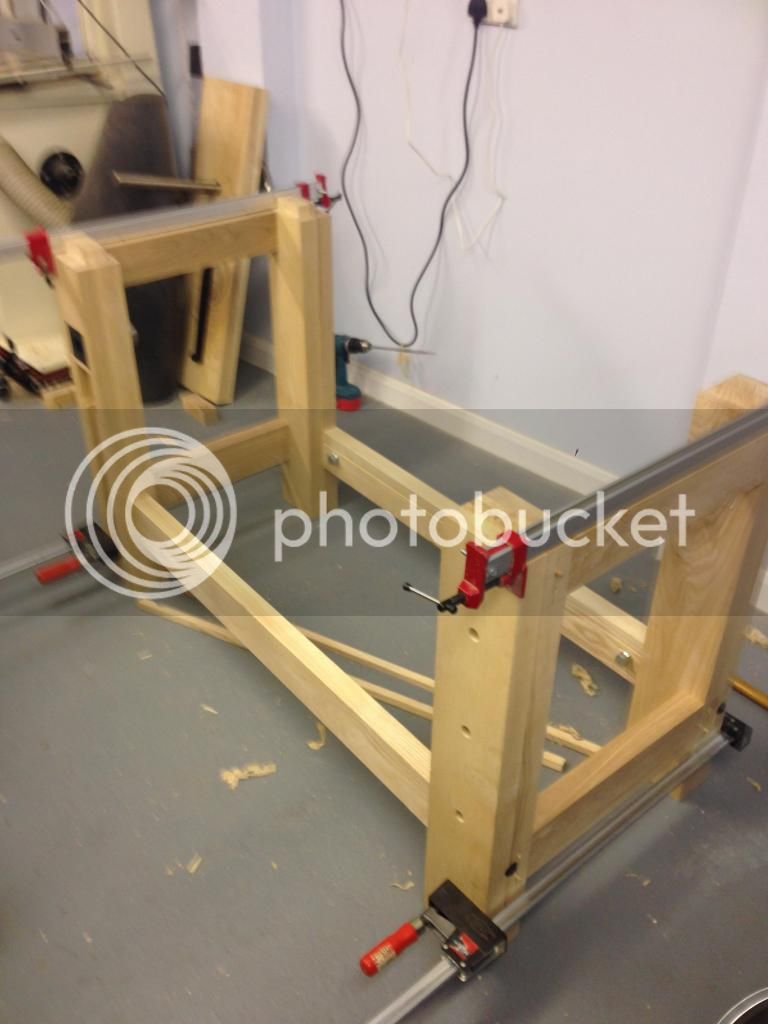
I dry assembled the left and right sides to check for fit and squareness and everything looks fine

IMG_10771_zpsb621cad1.jpg


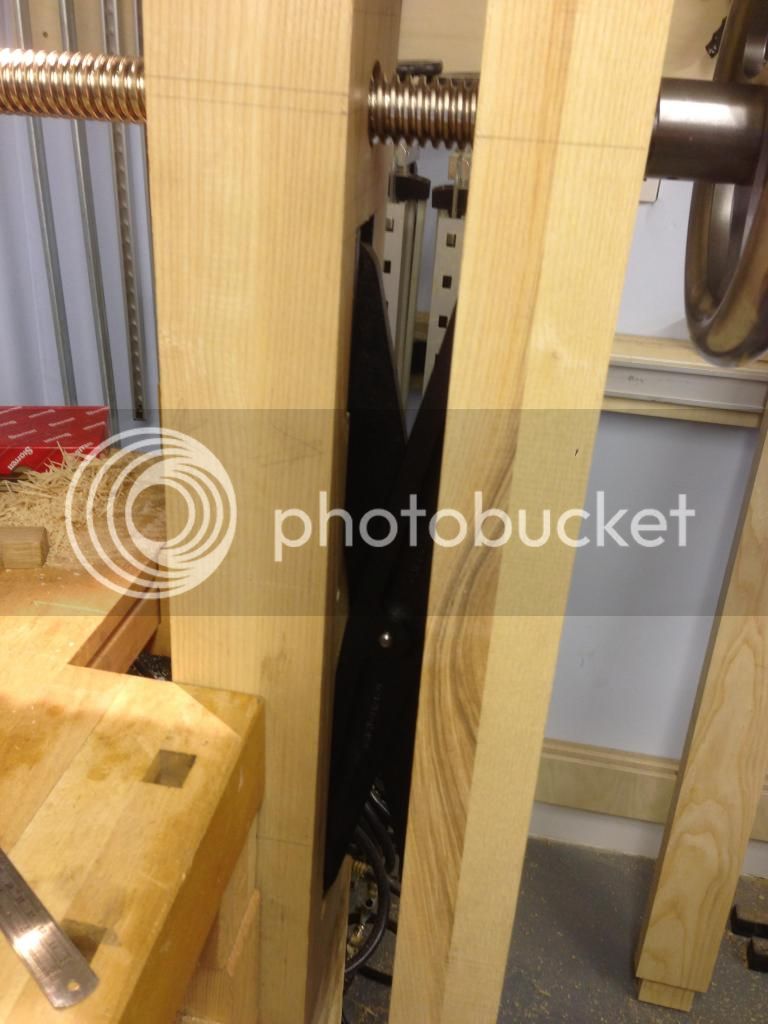
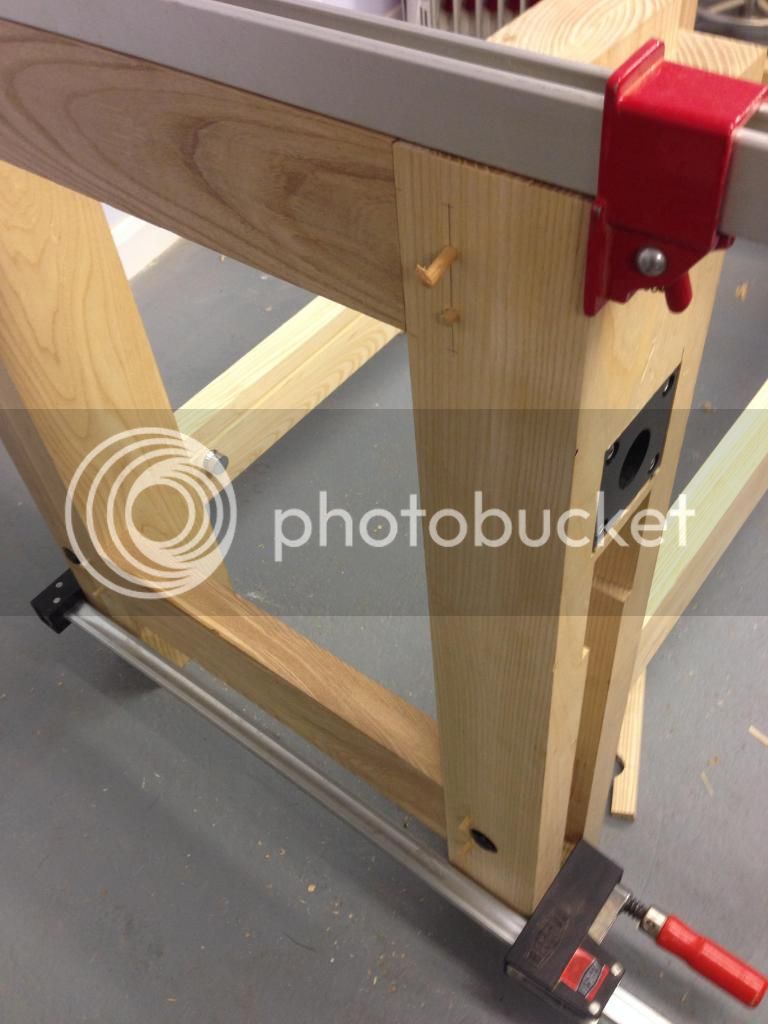
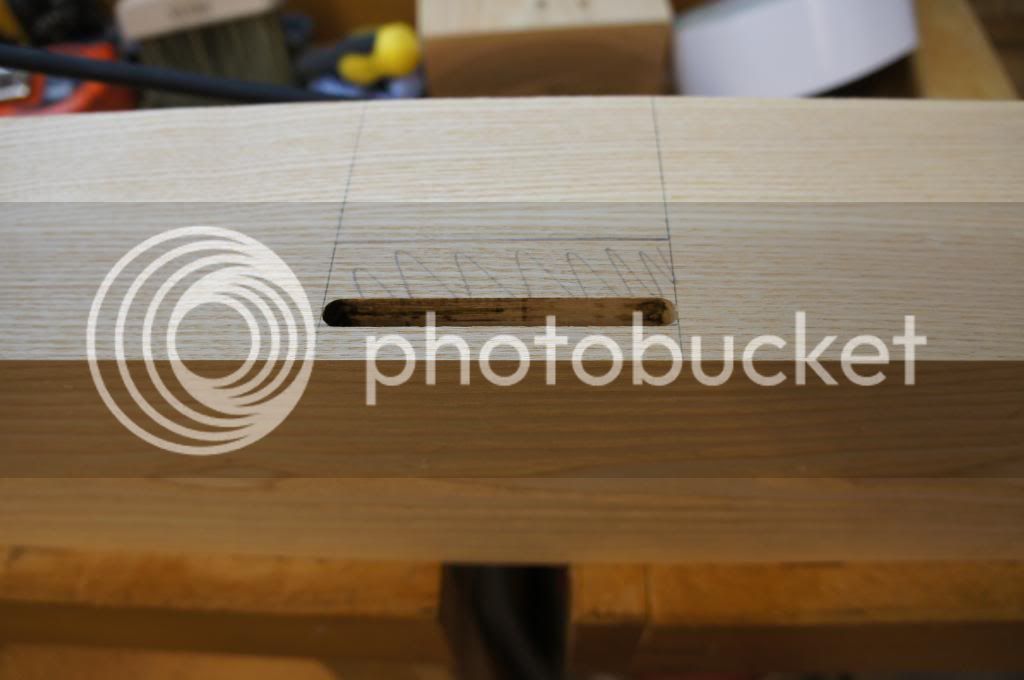
I thought I would work on the chop next and the receiving left leg to get some wood off the stack. The reason I haven't finished the frame is I noticed a problem with the position of the front long rail. The plans I have are for the original Roubo bench with a pinned vise, I have bought the retro cross vice (I looked like it was sturdier) but you need to rout a channel for the cross brace to sit in. As I am using a knock down kit the bolt would actually have fouled the movement of the vice where the plans have it. I did check the amendments for installing the vice and somehow have completely missed this even though I went over it about 5 times. The mortise has been plugged and the front rail will be moving inwards about an inch. I will take some photos so you can see what I am talking about and if your building one of these monsters yourself you can avoid this error.

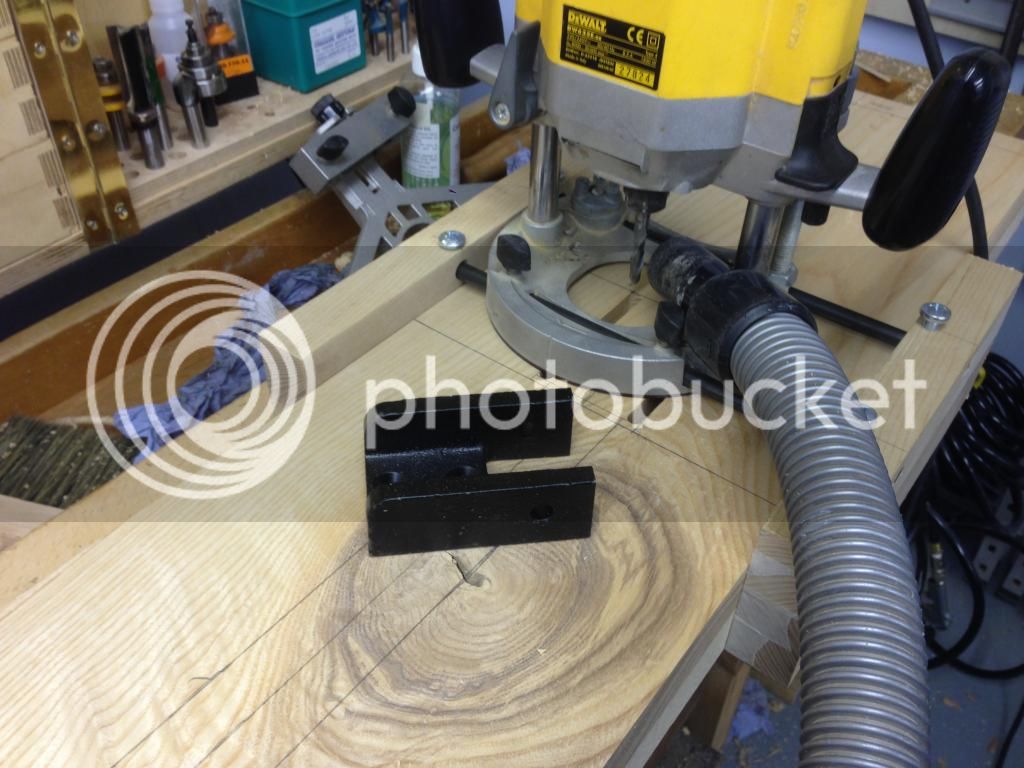
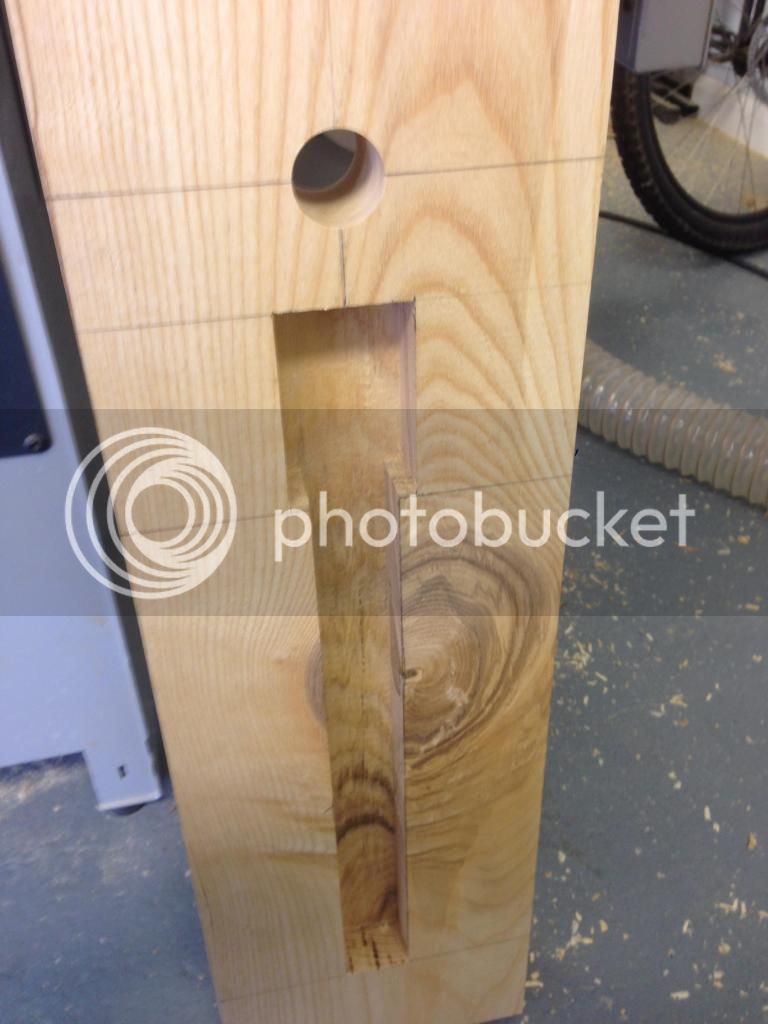
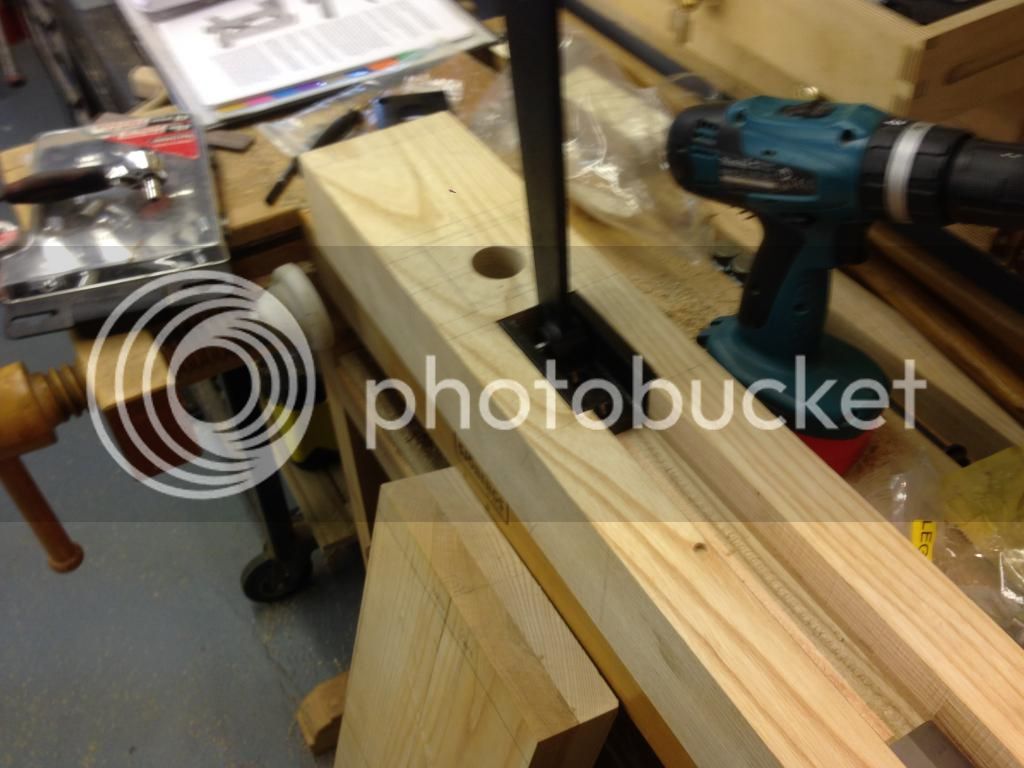
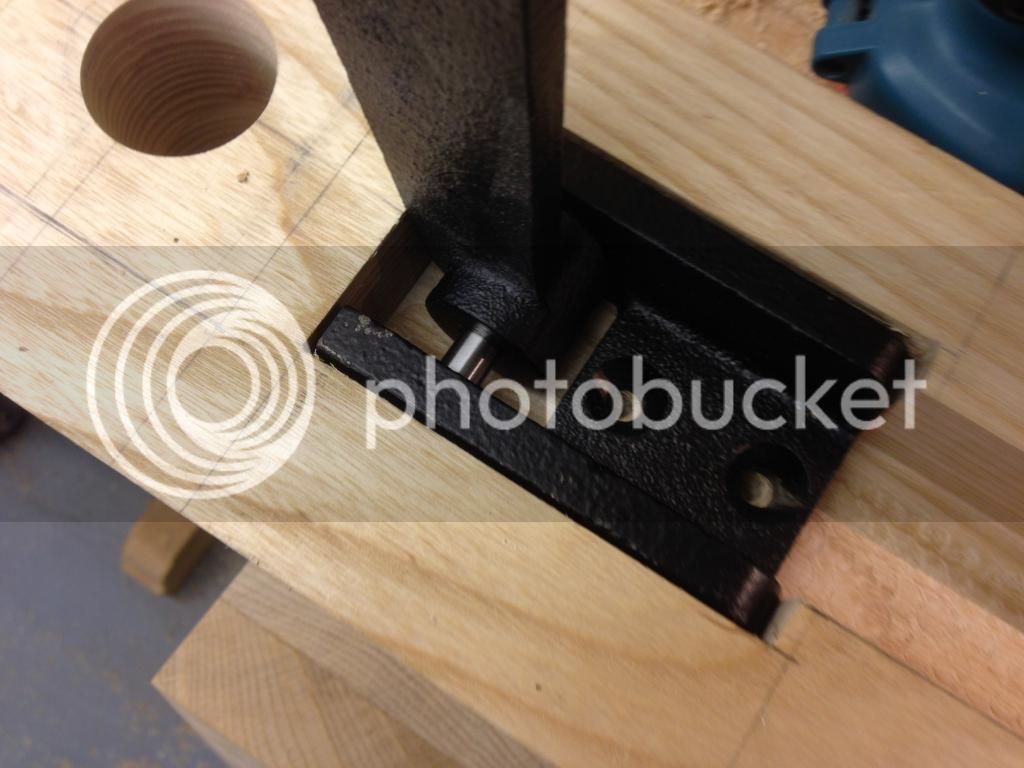
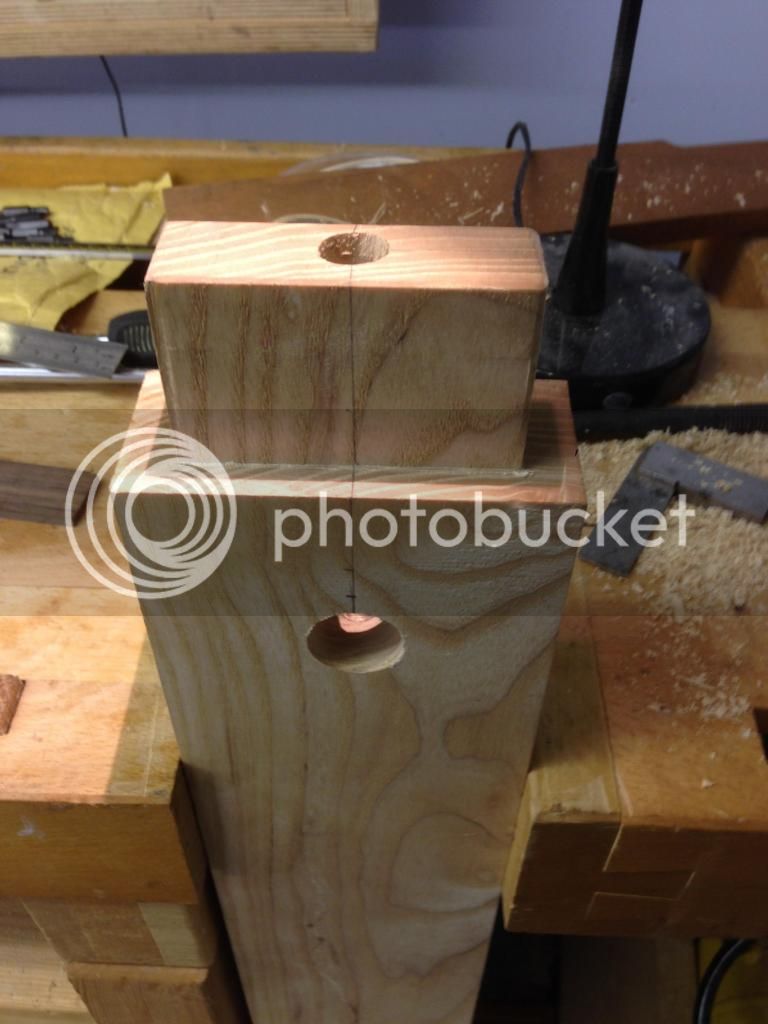
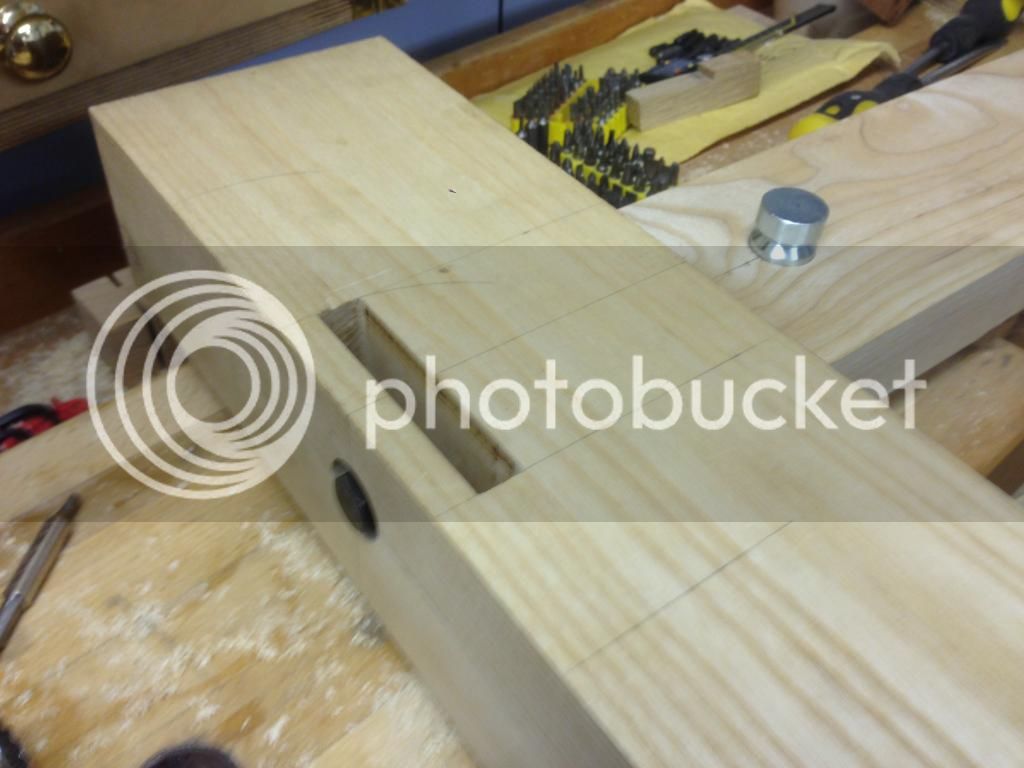
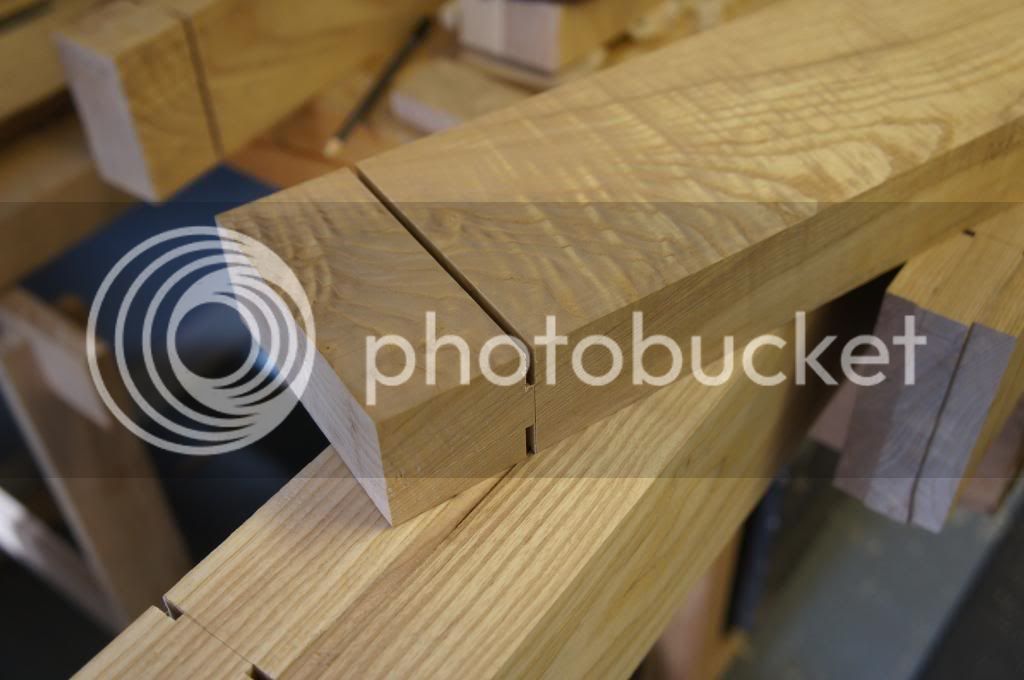
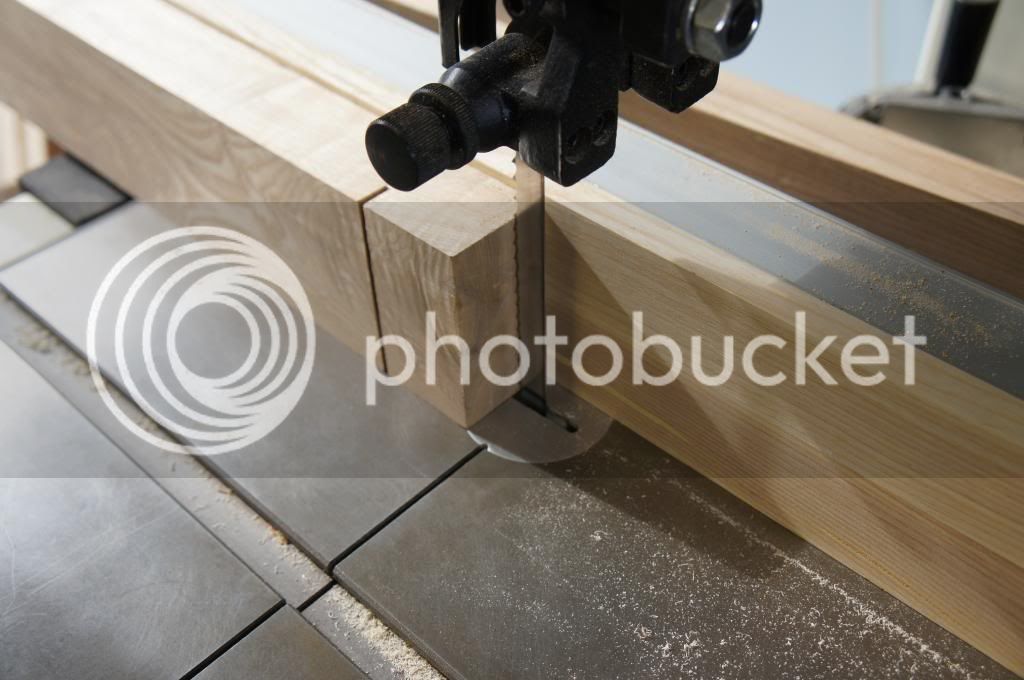
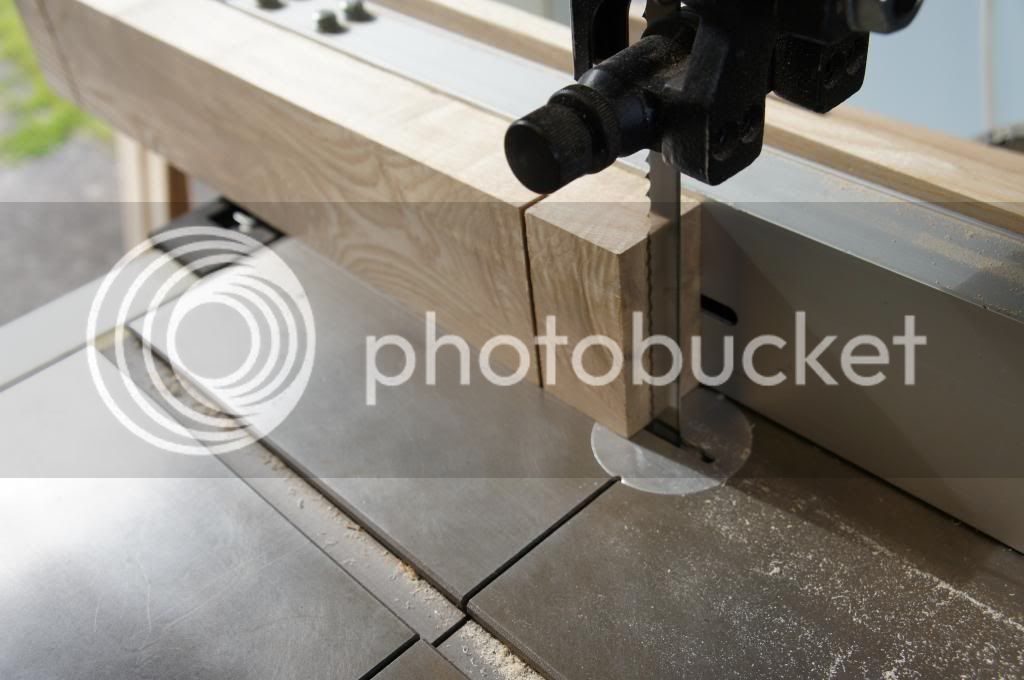
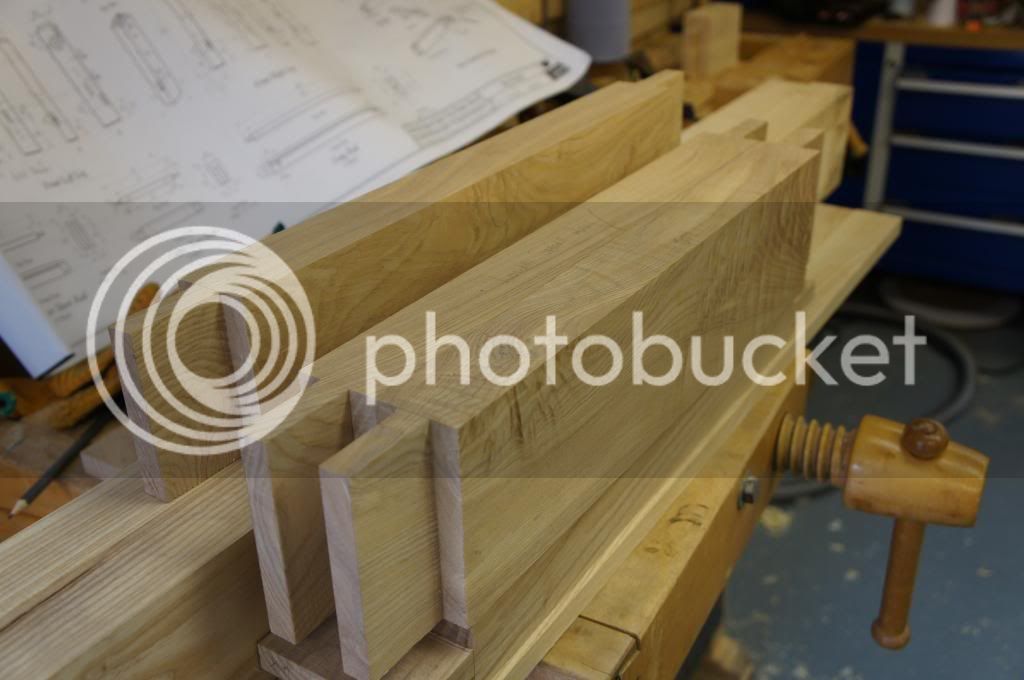
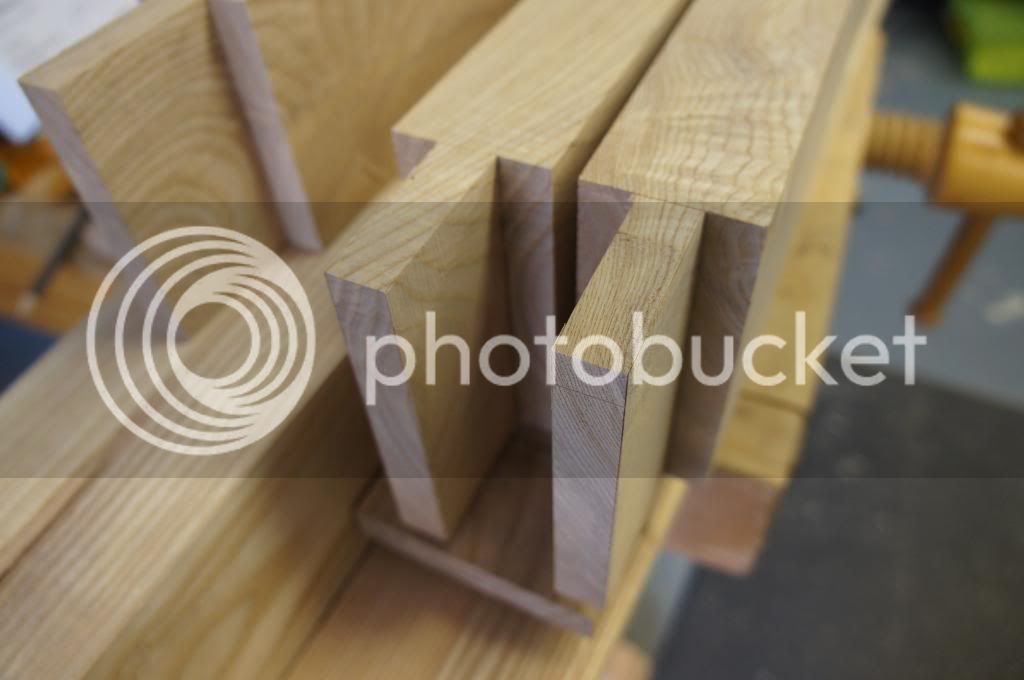
So, the chop. I took some more 10 inch wide ash, ripped it and then planed and thicknessed to about 35mm each side. Glued them together and brought the whole thickness down to 2 1/2 inches and 9 inches wide. The leg and chop were marked out as a pair as the alignment of the hole and cross vice pins are super critical. I then trenched out the housing for the back of the brace. The same operation was done on the leg for the mating part of the brace. No point posting pics of that as its exactly the same process.

IMG_12161_zpsb4112bec.jpg


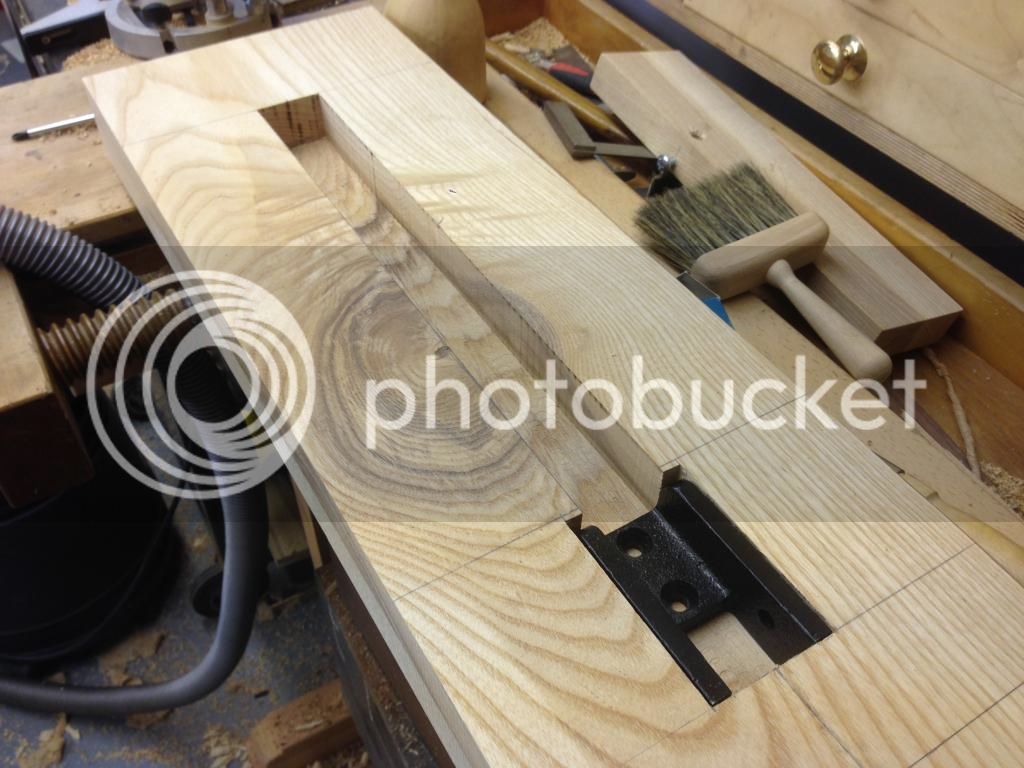
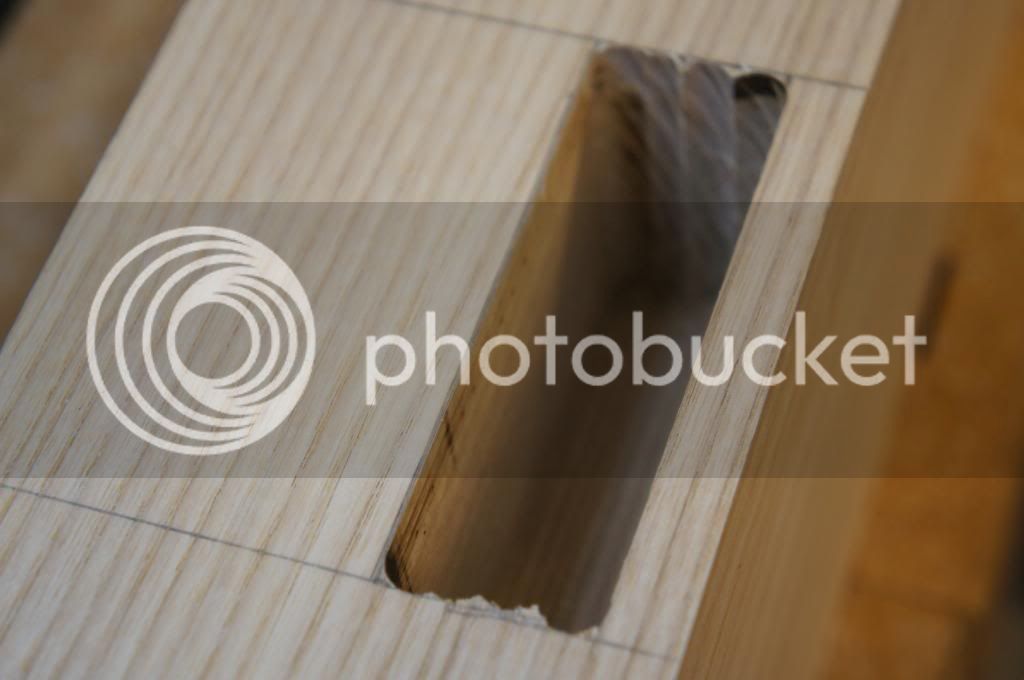
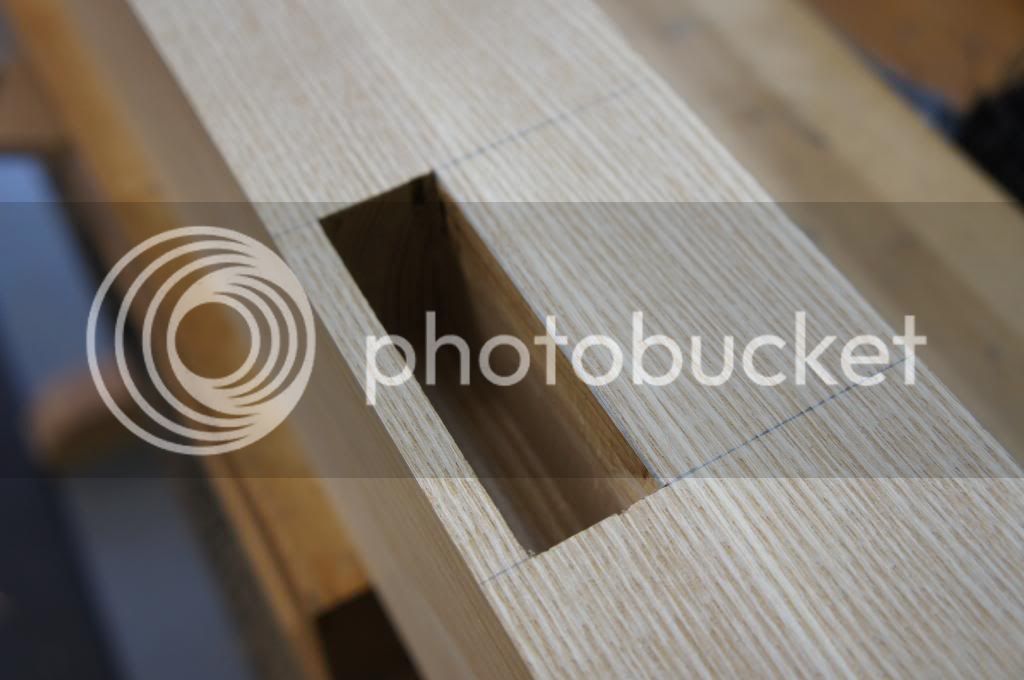
which left me with the following.

IMG_12171_zpsc74e8f2b.jpg


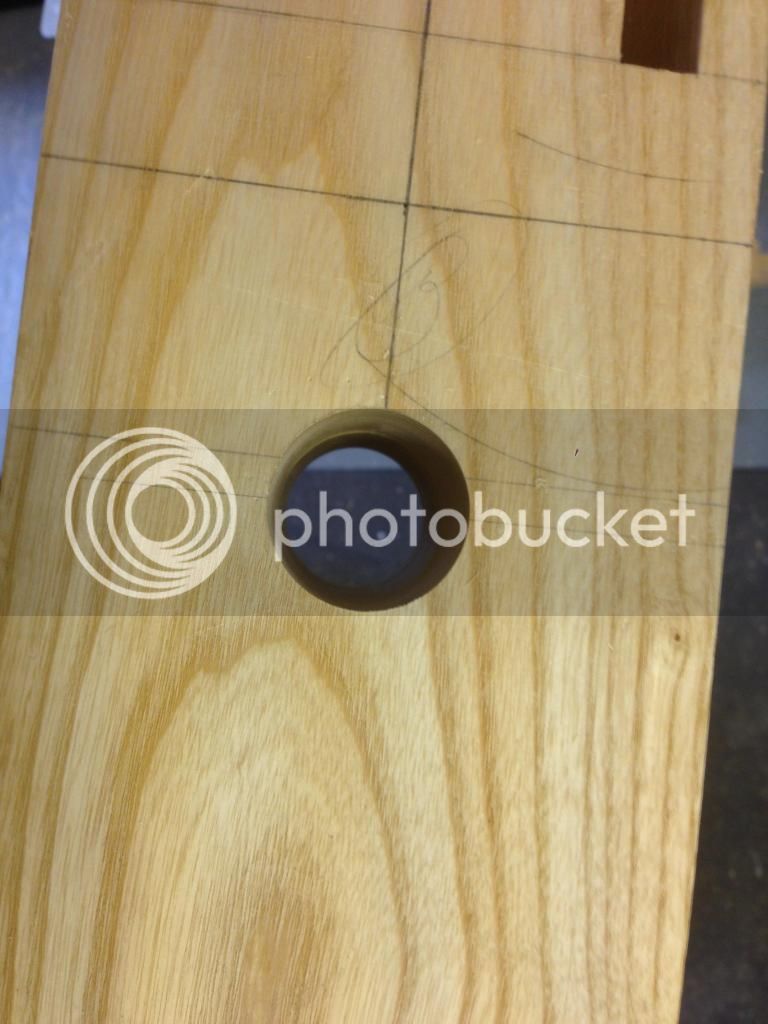
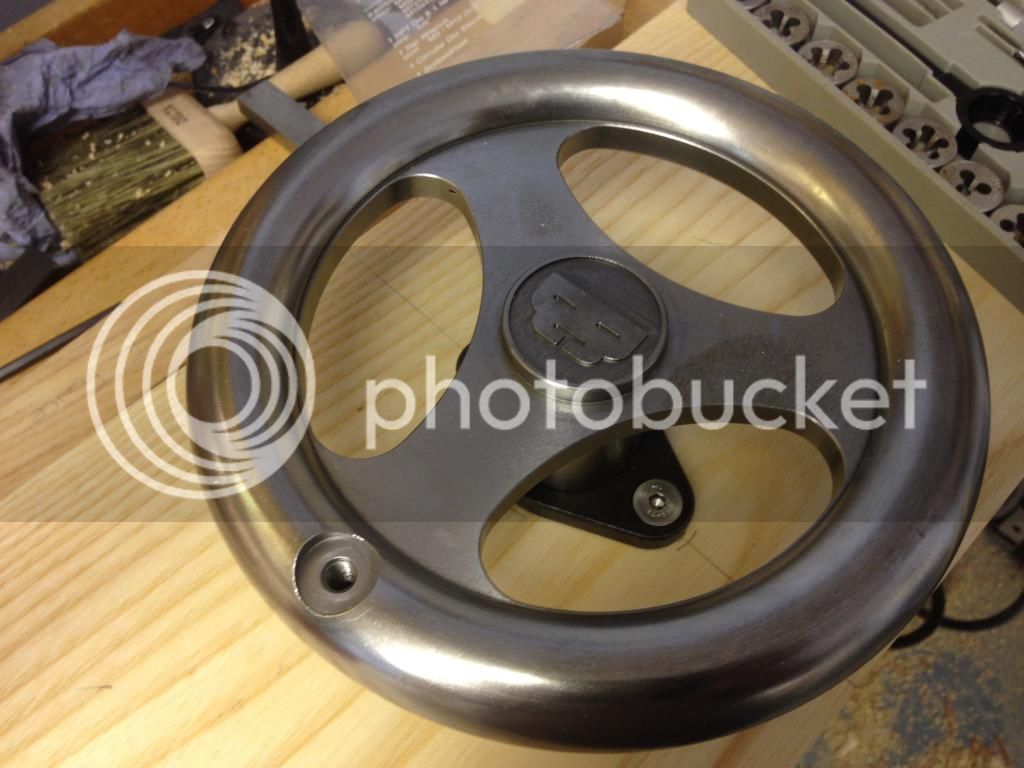
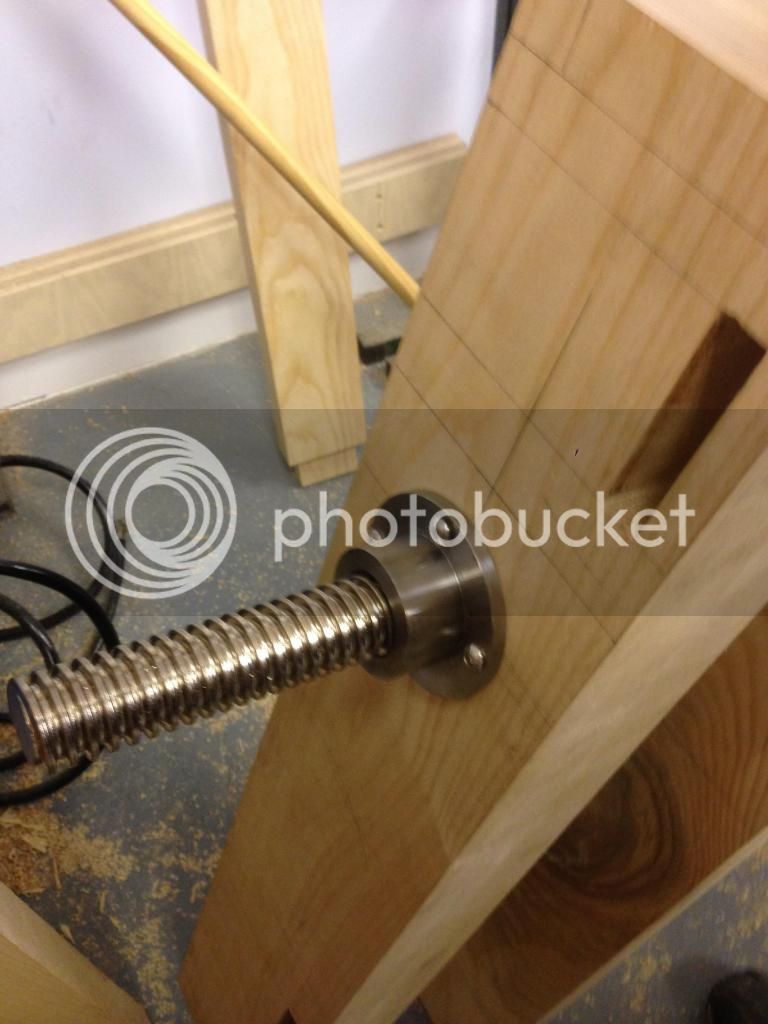
A recess was drilled on the face of the chop and then a through hole was drilled from both sides to prevent blowout. I made sure there was an awl mark on both sides to locate the center of the forstner bit. I must have been spot on (surprised face) as there wasn't a detectable step between the two holes when they met. The recess is to take a washer that sits behind the screw flange.

IMG_12201_zpsb6bd7d2b.jpg

IMG_12191_zpsf3b2682e.jpg


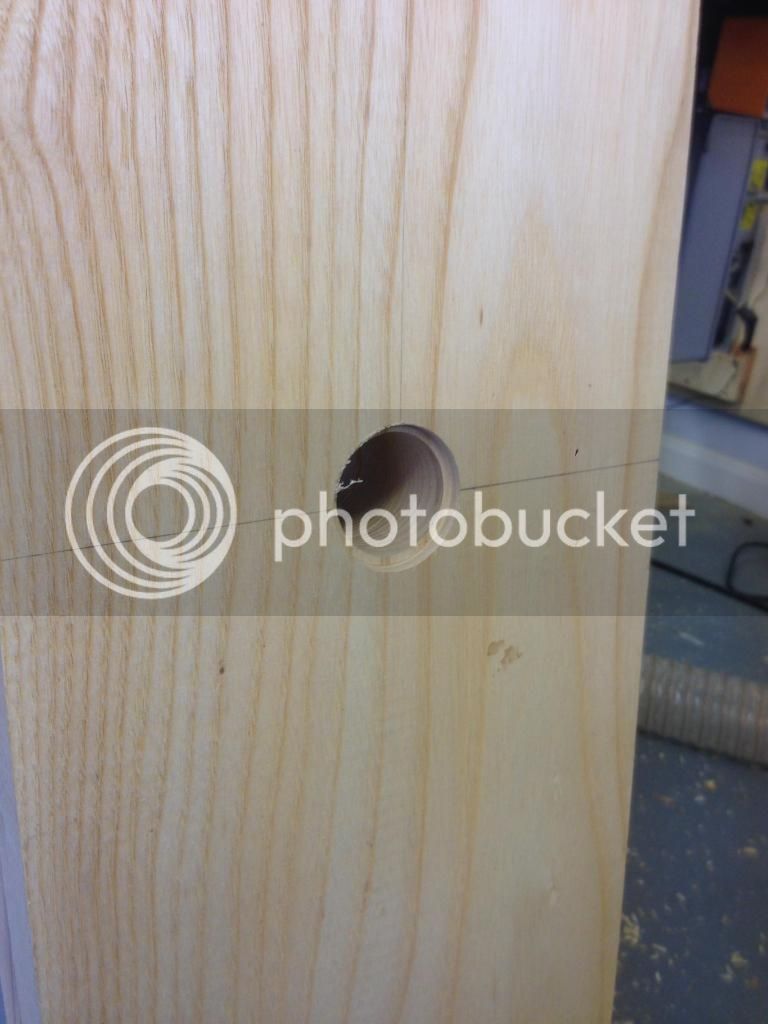
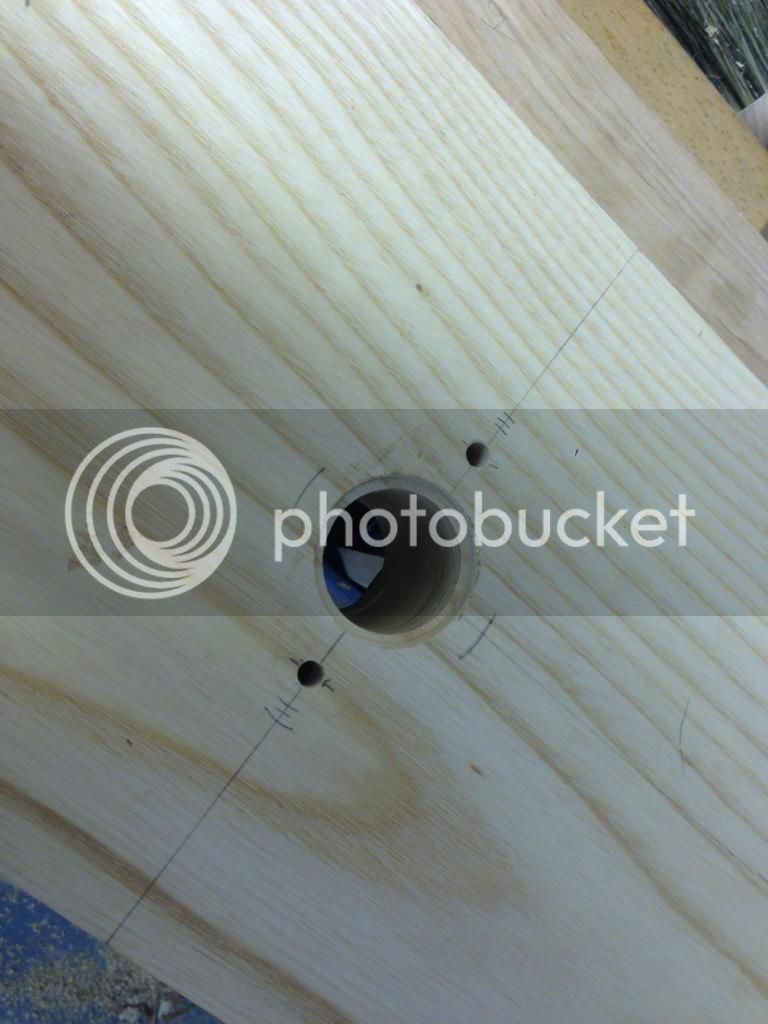
The same was done on the left leg and that left a tiny little step but it was a bigger distance to drill and my drill press objected with every plunge.

IMG_12211_zps71dd4ea4.jpg


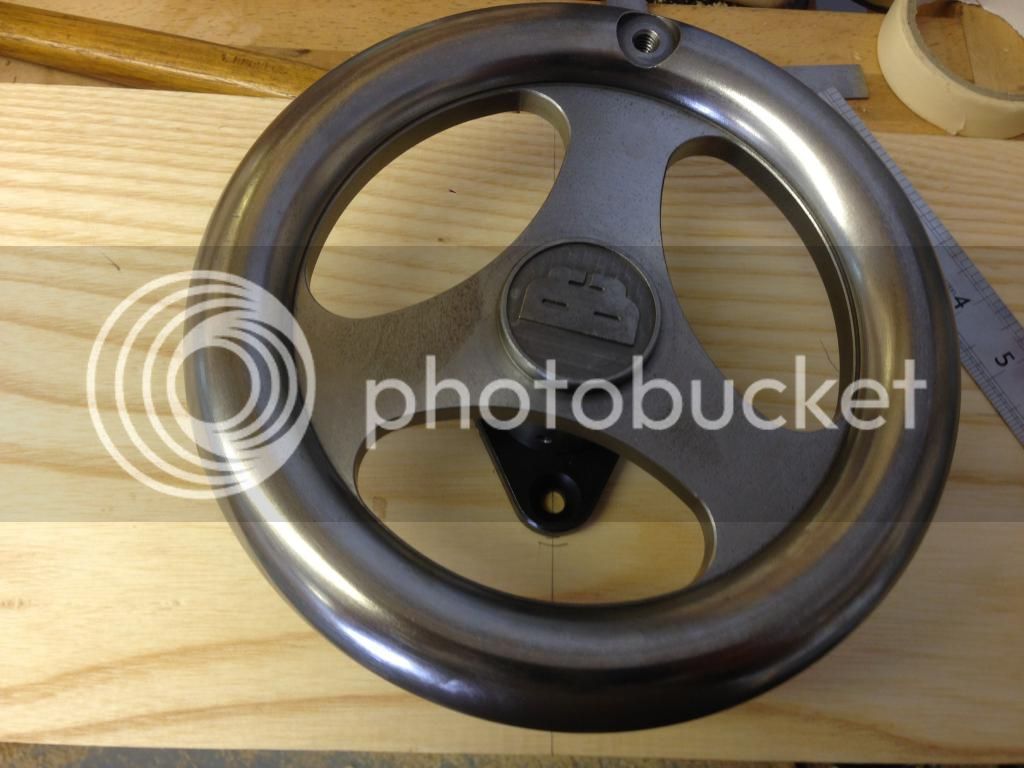
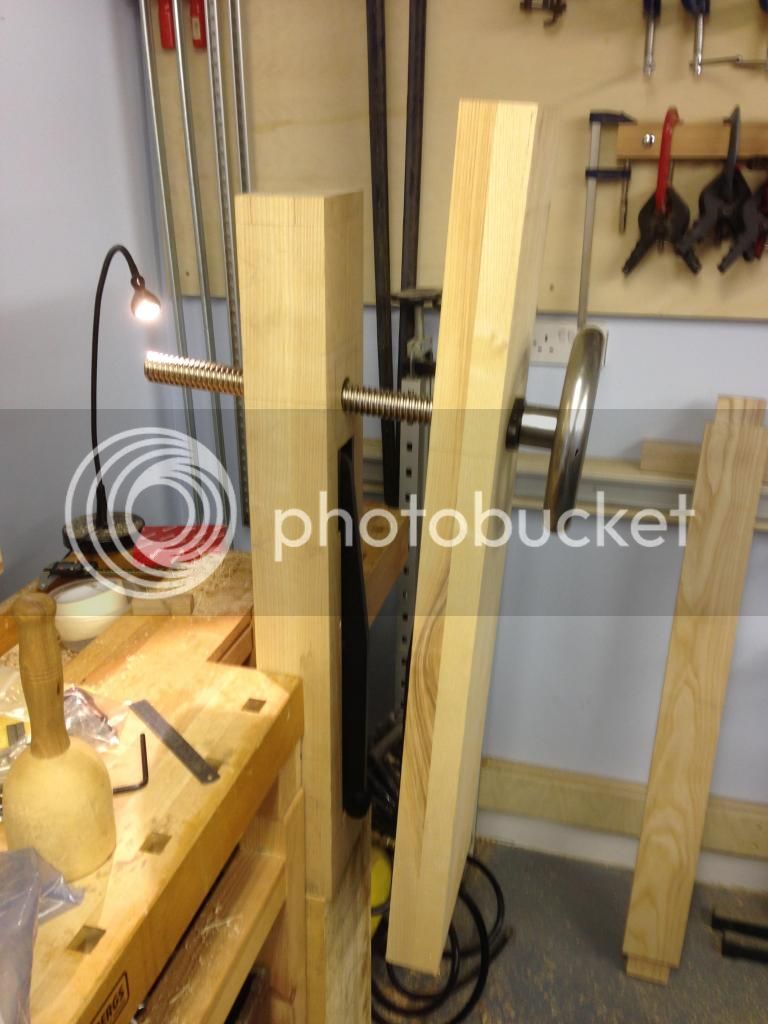
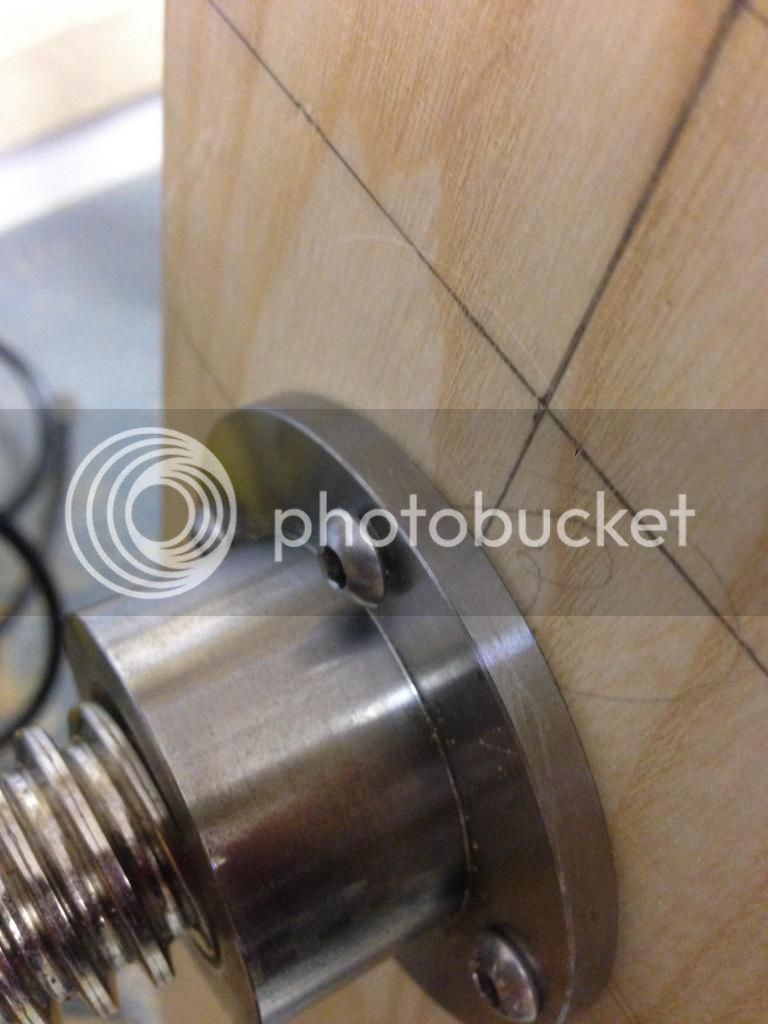
The next job was to assemble the handle, flange, washer and locking pin to prevent the wheel from spinning on the screw shaft. Once this was done I could mark out the location to drill and tap the flange screws. The chop was put on the bench horizontally and the assembly lowered in and made sure it was dead center. Once this was done I marked the position of the screws with my awl and drilled and tapped them.

IMG_12241_zps82d638fc.jpg


IMG_12261_zpsa17d7909.jpg


The next stage was to fix the machine screws in place.

IMG_12271_zps7b4dae30.jpg


Now when I bought the kit, I specified the metric screws as all I have is a metric tap and die set and metric drill bits. I managed to use the metric screws to secure the flange and also I have a set of metric screws to attach the acetal bushing and the rear thread but the cross glide is supplied with imperial!. I just ordered an imperial tap and die set and a set of imperial wood screws to do the machining of the threads so I can get on with the new mortice housing while I wait but I was on a real roll.

I am hoping to wrap up the base this weekend and get on to making the top so all being well there should be some other updates following shortly.
 
There has been progress! I just haven't posted it as I have been so busy with work and other stuff that gets in the way. The next job is to check the chop and scissor works correctly, so the brackets are put on the chop and the leg and its super critical that they are in exactly the same level or the whole thing will bind when you wind it in. The mounting holes were biased upwards to make sure it is tight against the top of the mortice.

IMG_1252_zpsfaab7cae.jpg


IMG_1253_zps8801715c.jpg


The criss cross was connected and then the screw put through the hole to check for level. once the natural position has been found, the thread is wound on and then the position marked.

IMG_1255_zpsac630260.jpg


IMG_1257_zpsf6908358.jpg


Once the position is found, the holes were drilled and tapped for the machine screws as shown below.

IMG_1282_zpsea6f8a91.jpg


IMG_1283_zps54a642c5.jpg


Now I started getting the Knock Down joinery sorted to finish up the base. I needed to drill through the leg to mark the tenon, the tenon was removed from the assembly and then that was drilled through at the drill press. The bolt hole was drilled into the lower rail to allow the access for the bolt. The whole thing was assembled to test for fit and once I was happy I repeated this for the next 3 joints.

IMG_1286_zps9412b1a1.jpg


IMG_1284_zps176ac878.jpg


The short upper rails were then marked and drilled through to allow the wood screws to connect the base to the top and the joints were assembled and marked for tenon dowels to draw the joint together. I used Chris Schwarz tips for creating offset holes in the tenon to draw the tenon closer and it seems to have worked really well. The dowels were made using a lie-nielsen dowel plate and a bloody big hammer.

The base was assembled with the knock down joinery and the sides were clamped together and then the dowels were glued and knocked home.

IMG_1326_zps0ef1871e.jpg


IMG_1327_zpsb9867790.jpg


The parts of course were planed before assembly and all the witness marks removed. I still have to arris the corners but I wanted to make sure the whole thing was assembled before I did as there are some edges that must be left intact.

The final job for this session is to glue the ledgers in place (these were made earlier which I forgot to photograph) and clamped overnight to cure. The next task is to get the chop shaped and the base chamfered. I also have to extend the front lower rail to take the sliding deadman as it had to be moved backwards so as not to foul the crisscross. Any questions? No then I will move on :)
 
Back
Top