Roller Cabs x 2 WIP ( Update 26-4-12 ) 18.00

UKworkshop.co.uk

Help Support UKworkshop.co.uk:

This site may earn a commission from merchant affiliate links, including eBay, Amazon, and others.

Blister

Established Member
UKW Supporter
Joined
10 Nov 2006
Messages
7,744
Reaction score
535
Location
Boston Lincs
After my recent visit to Norfolk and Dodge

I have made some progress on these 2 roller cabs :lol:

Sorry ( Its a PITA ) that the photo sequence comes up backwards :?

Will need to have a re think on the caster I was going to use as I don't think they will be up to the job weight wise
 

Attachments

  • IMG_1560.JPG
    IMG_1560.JPG
    78.3 KB
  • IMG_1561.JPG
    IMG_1561.JPG
    61.1 KB
  • IMG_1562.JPG
    IMG_1562.JPG
    76.3 KB
  • IMG_1563.JPG
    IMG_1563.JPG
    88.5 KB
  • IMG_1564.JPG
    IMG_1564.JPG
    110.1 KB
  • IMG_1565.JPG
    IMG_1565.JPG
    101.8 KB
Well , it stopped raining around noon and started to dry up

So I Lept into action :-" :---)

Managed to get my carpentry bench out of the garage ( had to take the door off ) workshop and into the woodworking workshop

Then managed to get the Axminster casters fitted and get both roller cab carcasses into the garage :lol: 8)

Then it started raining again :( and its now starting to get dark :(

So put everything away

and

find the bottle of scotch :p :p :lol:
 
Blister":1f4bheld said:
Managed to get my carpentry bench out of the garage ( had to take the door off )...

"... that there door is gonna have to go.
Had bad twinges taking off the hinges...

... should've got us somewhere, but no!

So...

Charley and me had another cup o' tea,
and then we went 'ome."

... find the bottle of scotch :p :p :lol:

You are Bernard Cribbins and I claim my £5!


:)

E.
 
Now that's a name from the past old Bernard :lol: :lol:

Rolled one of the units into the garden in lovely sunshine to sand the outside ready for varnish

Did one side " It got darker "

Did the other side " it got darker still "

Did the Top " and it started to RAIN :evil:

Just made it back into the garage and the heavens OPENED :roll:

And now its nice and sunny again :lol:

Typical just typical
 
Weather has been wet for our holidays in Derbyshire, didn't expect to be playing in 3 foot deep snow drifts in April!
 
Lovely and sunny

So off I go with the primer / undercoat

Tray
Roller
Paint

6 draws into the job and

THE HEAVENS OPENED :roll: :roll: :roll:

quick cover up job

hope its not ruined :twisted:
 

Attachments

  • IMG_1587.JPG
    IMG_1587.JPG
    145.9 KB
Woopey

a dry day :shock: NO RAIN YET :lol:

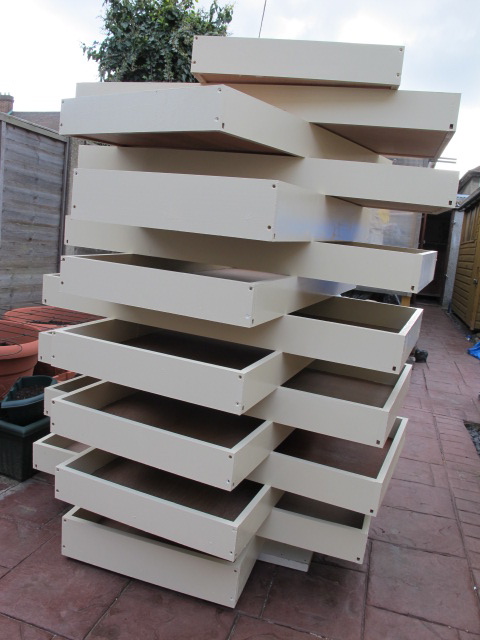
Managed to get the rest of the draw units in primer

IMG_1590.jpg


They look all white to me

Then after a drying period ( OK a sit down for me :lol: )

Put the top coat on

IMG_1592.jpg


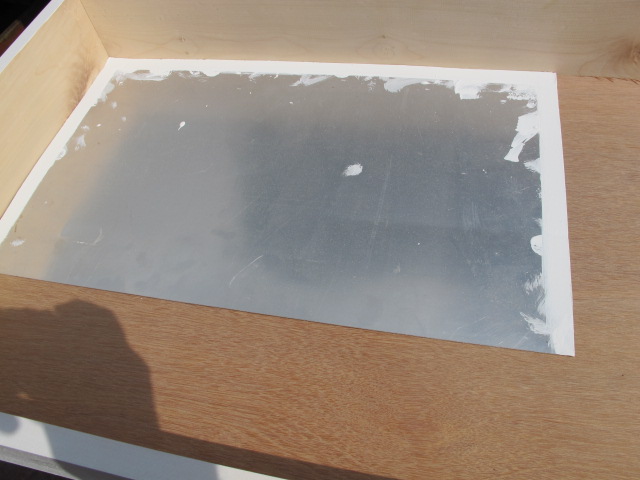
Used my sheet alloy masking tape technique for the inside :mrgreen:

IMG_1589.JPG

IMG_1588.JPG

IMG_1591.JPG

quite successful only a few drips here ant there #-o
 

Attachments

  • IMG_1590.jpg
    IMG_1590.jpg
    113.9 KB
  • IMG_1592.jpg
    IMG_1592.jpg
    114.6 KB
  • IMG_1588.JPG
    IMG_1588.JPG
    76.7 KB
  • IMG_1589.JPG
    IMG_1589.JPG
    62.4 KB
  • IMG_1591.JPG
    IMG_1591.JPG
    79.6 KB
Did we really make all those in one day??

No wonder I was knackered! (hammer) (hammer)

Looking forward to seeing the finished job Boss
 
Dodge":1379h933 said:
Did we really make all those in one day??

No wonder I was knackered! (hammer) (hammer)

Looking forward to seeing the finished job Boss


:lol: :mrgreen: :mrgreen: :lol:

O that is good news , you were Knackered as well , Makes me feel human again :p

One nearly done , just need ply for the top draw bottom , draw fronts and draw handles fitting

Then on too number 2 :D
 

Attachments

  • IMG_1593.JPG
    IMG_1593.JPG
    91.4 KB
Phew!

The drawer spacing did work out

One day to make - 3 months to finish though - :mrgreen: :mrgreen:
 
MORE PROGRESS :mrgreen:

Draw fronts now have handles fitted

I made a small jig to make sure they were all in the same place / spacing , and it worked fine :lol:

Draw fronts now fitted on one roller cab

I needed a 3mm spacer to make sure the draw fronts fitted correctly , do you think I could find anything 3mm :roll:

Then I had a :idea: :idea: moment , My planer blades are 3mm thick so used my spare set
Sat the blade on top of the lower draw front , then the next draw front on that , then used 2 bessy clamps to hold it in place and drilled 6 fixing holes on the inside of the draw

One now looks like this :lol:

Can anyone spot the mistake :oops: :oops: I think it adds caricature :mrgreen:
 

Attachments

  • IMG_1601.JPG
    IMG_1601.JPG
    100.5 KB
You've got the back of the top drawer front showing a frenchman and there's another further down?
 
Answer one - A man in a striped shirt wearing a beret with a string of onions round his neck

Answer two - an inserted plug in the face veneer of a sheet of plywood to replace a blemish or knot.

:lol: :lol:
 
Back
Top