Derek Cohen (Perth Oz)
Established Member
Renovating an Infill Shoulder Plane
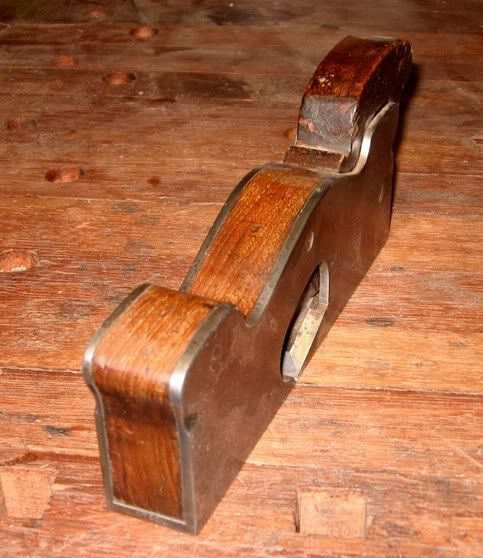
A few years ago I bought an infill shoulder plane that was advertised on an Internet site as a Norris. It certainly had the lines of a Norris, and it was cheap enough to take a chance. Well, it duly arrived, and it turned out to be shop-made.
Who ever made it – there was no manufacturers name or any identification, other than the single word “steel” printed on the front lip – certainly knew his stuff. The shoulder plane was beautifully dovetailed, the (Mahogany?) infill a perfect fit, the mouth was small and the sides were square. Someone suggested it might be a Slater. Anything is possible – Slater certainly made planes under different disguises, however there usually was some inscribed information that it was one of his. This plane had nothing, nada, zip.
There were a few negative features – such as the pitting, poorly fitted screws (as if someone had replaced them at some stage (which might suggest that the infill had been replaced as well), the wedge was quite chewed up, and the iron was short.
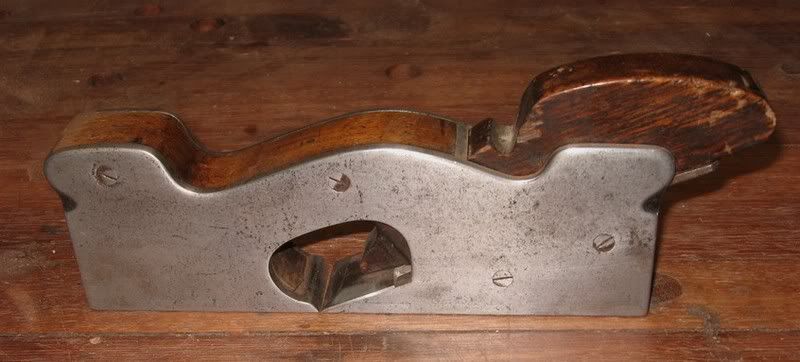
It was the short iron that bothered me the most since this made it very difficult to adjust for projection. The iron’s blade was a little over 30mm (1 ¼”), which is a reasonable length. It was a thick 3/16”. The problem lay with the stalk, which was short by about 75mm (3”).
I spent some time checking out the prices of a replacement, but this was actually more than the price I paid for the plane! So I put it off and just made do. With a sharp iron, this shoulder plane performed very well.
I also liked the size: 30mm (1 ¼”) wide, 201m (8”) long, and 65mm (2 ½”) high at the center. It had heft and authority.
So time went by, and finally I decided to do something about that iron….
Repairing the iron
The solution was simply to lengthen the stalk. Unfortunately I do not own a welder. So I decided to rivet on an extra piece. Also, while I was about it, I thought that I would create a snecked rear end.
The first step was to cut and roughly shape a length of mild steel (taken from an offcut of angle section).
A lap joint was then ground and filed and sanded onto both the stalk and the extension.
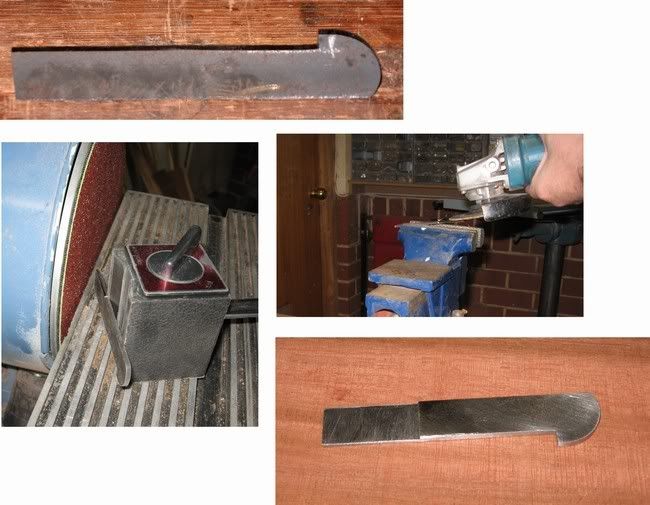
The tools I used were very basic: files, small angle grinder, disk sander and belt sander combo.
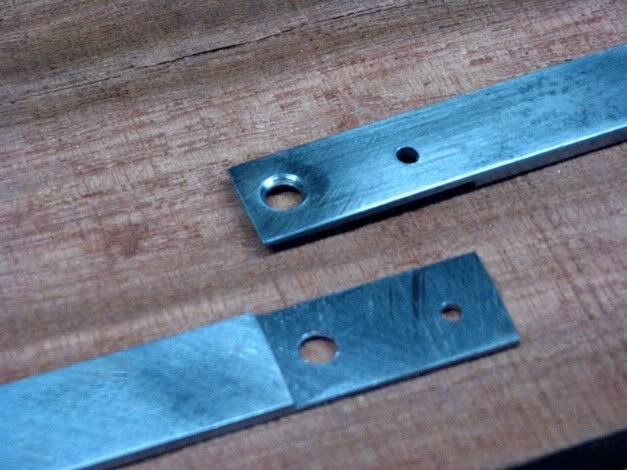
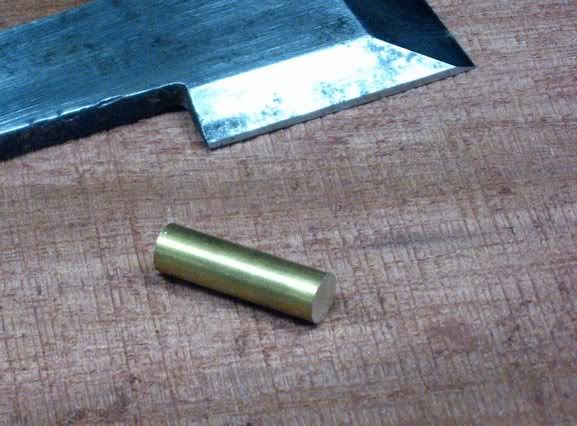
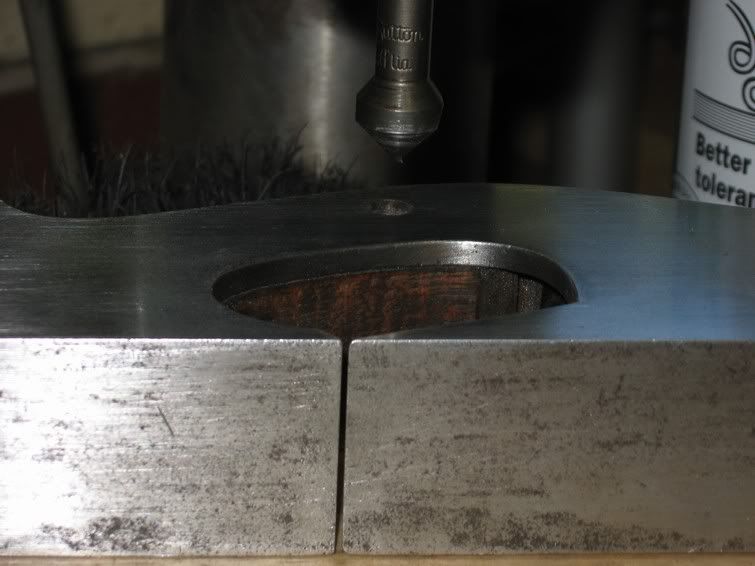
The plan now was to add to join the two pieces with rivets. I had some 5mm brass rod that should work. So the first step was to drill a 5mm hole in each piece, then chamfer the inside for the rivet.
A small piece of the brass rod was cut ….
….. and the end peined.
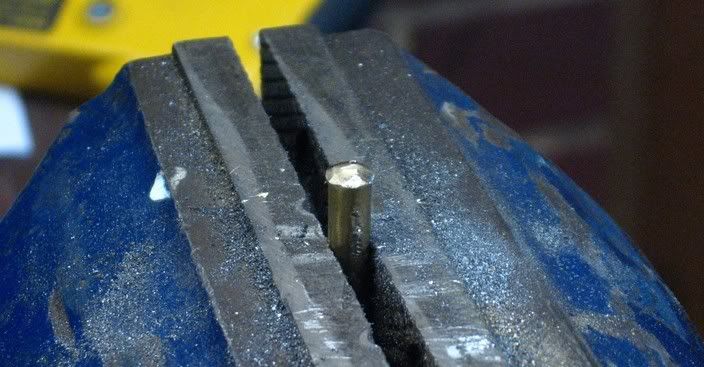
This was placed in the holes, trimmed shorted, then peined to complete the rivet at one end.
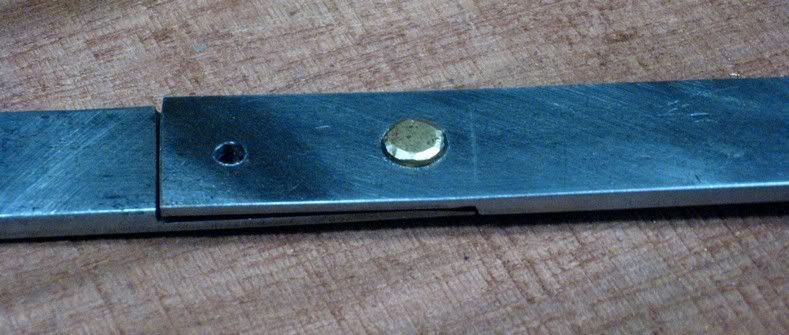
Before the other side could be done, the rivet first had to be filed flush. Then the procedure was repeated for the second hole.
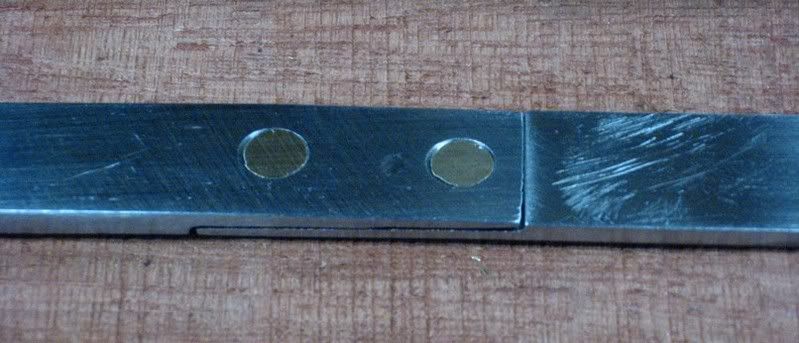
A little filing and smoothing with a deburring wheel, and it came up really well.
Cosmetics
I trust what follows does not upset anyone. The plane is an unknown make but well made. I felt that it would be respectful to the maker to try and return it to a state in which it might also be appreciated for its looks.
While the pitting of the steel body did not affect its performance, the walls were not flat – in places they curved inward very slightly. I decided to lap the sides until they were flat, which would also take care of the pitting.
The sole was left as-is as this was flat. The pitting was minimal, with the steel only discoloured.
Initially I planned to replace the screws with fresh steel screws and then file these flush with the body, thereby enabling them to disappear. However I discovered that the ones I had were too narrow and so used some brass ones that were the correct size. I had done this before with a Spiers smoother and liked the effect.
Lapping was done (less screws and less iron) on a belt sander, beginning with 80 grit and working through to 240 grit. At this point the screws were replaced, ground down flush with the body, and the lapping recommenced with 240 and then 400 grit belts.
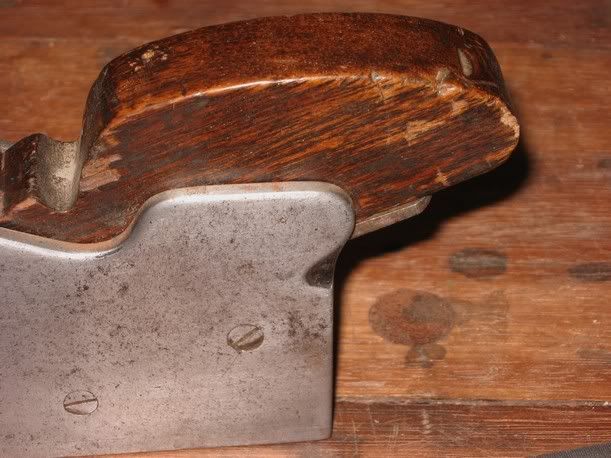
The chips on the wedge were sanded out. This did not alter the dimensions. All other wood was just cleaned as I wanted to retain as much of the patina as possible. While this was removed on the wedge, polishing with a mix of shellac and waxes created a very close colouring. I am confident that the wedge will quickly regain patina through use.
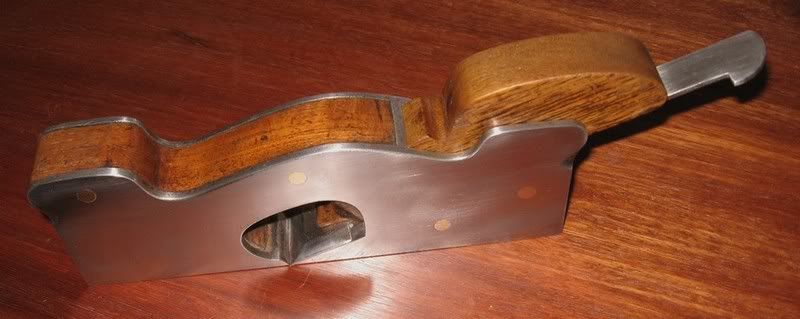
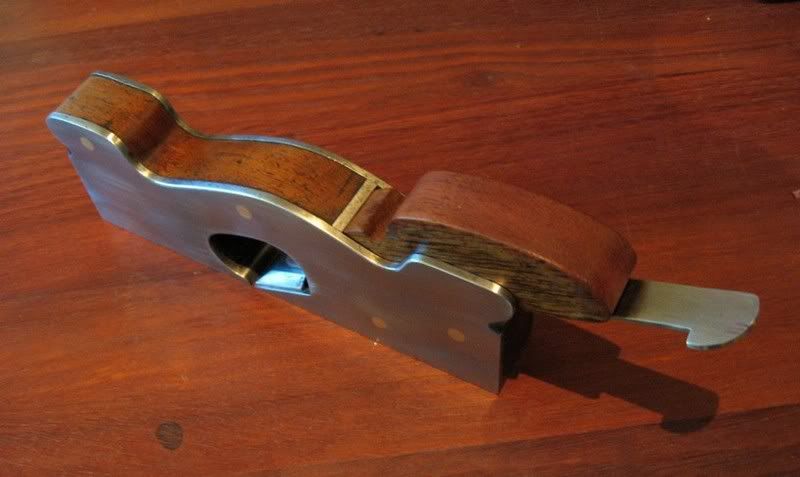
The finished plane
The end result looks like this:

Regards from Perth
Derek
A few years ago I bought an infill shoulder plane that was advertised on an Internet site as a Norris. It certainly had the lines of a Norris, and it was cheap enough to take a chance. Well, it duly arrived, and it turned out to be shop-made.
Who ever made it – there was no manufacturers name or any identification, other than the single word “steel” printed on the front lip – certainly knew his stuff. The shoulder plane was beautifully dovetailed, the (Mahogany?) infill a perfect fit, the mouth was small and the sides were square. Someone suggested it might be a Slater. Anything is possible – Slater certainly made planes under different disguises, however there usually was some inscribed information that it was one of his. This plane had nothing, nada, zip.
There were a few negative features – such as the pitting, poorly fitted screws (as if someone had replaced them at some stage (which might suggest that the infill had been replaced as well), the wedge was quite chewed up, and the iron was short.
It was the short iron that bothered me the most since this made it very difficult to adjust for projection. The iron’s blade was a little over 30mm (1 ¼”), which is a reasonable length. It was a thick 3/16”. The problem lay with the stalk, which was short by about 75mm (3”).
I spent some time checking out the prices of a replacement, but this was actually more than the price I paid for the plane! So I put it off and just made do. With a sharp iron, this shoulder plane performed very well.
I also liked the size: 30mm (1 ¼”) wide, 201m (8”) long, and 65mm (2 ½”) high at the center. It had heft and authority.
So time went by, and finally I decided to do something about that iron….
Repairing the iron
The solution was simply to lengthen the stalk. Unfortunately I do not own a welder. So I decided to rivet on an extra piece. Also, while I was about it, I thought that I would create a snecked rear end.
The first step was to cut and roughly shape a length of mild steel (taken from an offcut of angle section).
A lap joint was then ground and filed and sanded onto both the stalk and the extension.
The tools I used were very basic: files, small angle grinder, disk sander and belt sander combo.
The plan now was to add to join the two pieces with rivets. I had some 5mm brass rod that should work. So the first step was to drill a 5mm hole in each piece, then chamfer the inside for the rivet.
A small piece of the brass rod was cut ….
….. and the end peined.
This was placed in the holes, trimmed shorted, then peined to complete the rivet at one end.
Before the other side could be done, the rivet first had to be filed flush. Then the procedure was repeated for the second hole.
A little filing and smoothing with a deburring wheel, and it came up really well.
Cosmetics
I trust what follows does not upset anyone. The plane is an unknown make but well made. I felt that it would be respectful to the maker to try and return it to a state in which it might also be appreciated for its looks.
While the pitting of the steel body did not affect its performance, the walls were not flat – in places they curved inward very slightly. I decided to lap the sides until they were flat, which would also take care of the pitting.
The sole was left as-is as this was flat. The pitting was minimal, with the steel only discoloured.
Initially I planned to replace the screws with fresh steel screws and then file these flush with the body, thereby enabling them to disappear. However I discovered that the ones I had were too narrow and so used some brass ones that were the correct size. I had done this before with a Spiers smoother and liked the effect.
Lapping was done (less screws and less iron) on a belt sander, beginning with 80 grit and working through to 240 grit. At this point the screws were replaced, ground down flush with the body, and the lapping recommenced with 240 and then 400 grit belts.
The chips on the wedge were sanded out. This did not alter the dimensions. All other wood was just cleaned as I wanted to retain as much of the patina as possible. While this was removed on the wedge, polishing with a mix of shellac and waxes created a very close colouring. I am confident that the wedge will quickly regain patina through use.
The finished plane
The end result looks like this:
Regards from Perth
Derek