Plane makers floats

UKworkshop.co.uk

Help Support UKworkshop.co.uk:

This site may earn a commission from merchant affiliate links, including eBay, Amazon, and others.

Sheffield Tony

Ghost of the disenchanted
Joined
2 Aug 2012
Messages
2,078
Reaction score
91
Location
Bedfordshire
We've had a discussion about bedding plane irons, but I'm wondering what the plane makers on here use for this job.

To get started, I've bought a Liogier float, and an Iwasaki. The Liogier float, according to the website, can be used out of the box, but can be improved by sharpening with a triangular file. It did not say what you could use it for out of the box - picking your nose perhaps, bit it made absolutely no impression on wood. Sharpening produced quite a good result, but ruined a Bacho saw file in one go.

The Japanese tool felt sharp uot of the pack, worked straight off as I had hoped. But I guess it can't be sharpened, so maybe the Liogier will win in the long ru .

Any other options ?
 
Can't speak from experience, but Lie-Nielsen do a few floats. Classic Hand Tools can supply, I think. Not sure if there are any other commercial suppliers, but John M Whelan, author of 'Making Traditional Wooden Planes' suggests making your own floats. He used ground flat stock, but didn't harden his. Despite that, he reckons they last for several planes before needing refiling. Might be an option.
 
I've used Millenicut/Dreadnought files and abrasives glued to things -like 10mm thick perspex. These also work on metal planes
Matt
 
My first try was a piece of ground flat stock with abrasive paper stuck to it. Then I did actually pick up a huge Dreadnought file and considered it, but although it looked promising the one I have to hand is a bit clumsy for the job in hand.

Then I thought of making my own from the ground flat stock, and watched some youtube videos of the process. The edge float - like the Philly ones - looks OK. A bit like a saw only thicker. I think I might try to make my own rather than buy one. But the bed float (the one I wanted) looks like more skill with the file than I have might be needed, not to mention patience !

I had not looked at the Lie-Nielsen ones; the prices aren't so outrageous as I had expected. For now, I'm getting on much better with the Liogier now it's sharpened.
 
I have found the LN Plane Makers Floats very good value and high quality tools.

My personal preference is the Bed; Edge; and Side Float. All 1/8" thickness & Push.

http://www.henryeckert.com/index.php?ro ... name=float

Another tool you will find very handy to use is a Japanese Feather File. Their sharp edges are great for kerfing along the lines marked out for the wedge abutments.

I have trialled the Iwasaki Edge & Side Plane Maker Floats. They may be suitable for shallow bed Japanese Planes, but IMO they are much too short in length to be of any benefit on Western Planes that have a much deeper bed.


Stewie;
 
I have a Liogier float given to me by Emma and it's probably one of the first.

I gave it a quick tinkle with a Nicholson saw file and you can cut yourself on it now.

I will take some pictures tomorrow...off to work now.

Cheers

Jimi
 
I use ordinary chisels and the plane iron, but you could use files, sandpaper etc, as already mentioned.

Another idea I've read is to use a chisel with the cutting end ground off square although I'm not sure what difference it makes compared to a normal chisel.

I haven't used a float yet but at £50 each ,if and when I do use one it will be definitely home made! I agree the wider bed float will be harder to make than a narrow one.
 
I have both the "Bill Carter" ground flat chisels and the float from Liogier.

They are both excellent...and work well...and for different jobs...I now would not be without either.

I am looking to make some more floats for thinner work on both edges...and I will do those on the mill with ground 01 stock.

All of these are ideal for the job...but I will say once sharpened the Liogier is a fine piece of work and made on Noel's family milling machine so like all of his tools...excellent.

Jimi
 
jimi43":wfucddmv said:
I gave it a quick tinkle with a Nicholson saw file and you can cut yourself on it now.

Indeed. Having sharpened my new Liogier, you can cut indeed yourself with it. And create those multiple little parallel cuts that are slow to heal :cry: I'll be more careful from now on.

It is rather hard - the web page says HRC 60, compared to HRC 50-52 for the Lie-Nielsen ones. Presumably almost as hard as Bacho saw files, all three faces of the file are left visibly dull. Hopefully the hard steel will not need sharpening often ! I was surprised, considering that allegedly "The float can be used right out of the case", how far from true this was. As supplied it has a nice tidy dull grey finish of some sort, over the cutting surfaces too, which I suspect is half the problem.
 
Sheffield Tony":oncl6hs7 said:
jimi43":oncl6hs7 said:
I gave it a quick tinkle with a Nicholson saw file and you can cut yourself on it now.

Indeed. Having sharpened my new Liogier, you can cut indeed yourself with it. And create those multiple little parallel cuts that are slow to heal :cry: I'll be more careful from now on.

It is rather hard - the web page says HRC 60, compared to HRC 50-52 for the Lie-Nielsen ones. Presumably almost as hard as Bacho saw files, all three faces of the file are left visibly dull. Hopefully the hard steel will not need sharpening often ! I was surprised, considering that allegedly "The float can be used right out of the case", how far from true this was. As supplied it has a nice tidy dull grey finish of some sort, over the cutting surfaces too, which I suspect is half the problem.

Yes...it's almost a protective coating of some sort...I suspect that since the one I have was a prototype it might not have been of a recent generation where they ironed out the edge sharpening before dispatch...but I must admit..I shouldn't have though it would need as much sharpening as I had to give it.

The Nicholson file was not apparently affected so I can only assume they are harder than the Bahco ones...interesting! I have used Nicholson and Vallorbe files almost exclusively in the past because of outstanding reputation...can't say I have noticed anything wrong with them and they keep on giving...so I guess they were worth the money in the long run!

Jim
 
Just out of interest, have you contacted Noel regarding the lack of usability straight from the box? He has always seemed an aimiable chap when I've emailed, and would no doubt be concerned that his tools aren't as advertised.

Cheers,
Adam
 
Kalimna":34fkymm6 said:
Just out of interest, have you contacted Noel regarding the lack of usability straight from the box? He has always seemed an aimiable chap when I've emailed, and would no doubt be concerned that his tools aren't as advertised.

Cheers,
Adam

Hi Adam

I shall once I have done an adequate test on it...but to be fair..I think the one I have is one of the very first...maybe if Tony has a production model then it might be more applicable if he were to pass feedback...what do you think Tony?

Jimi
 
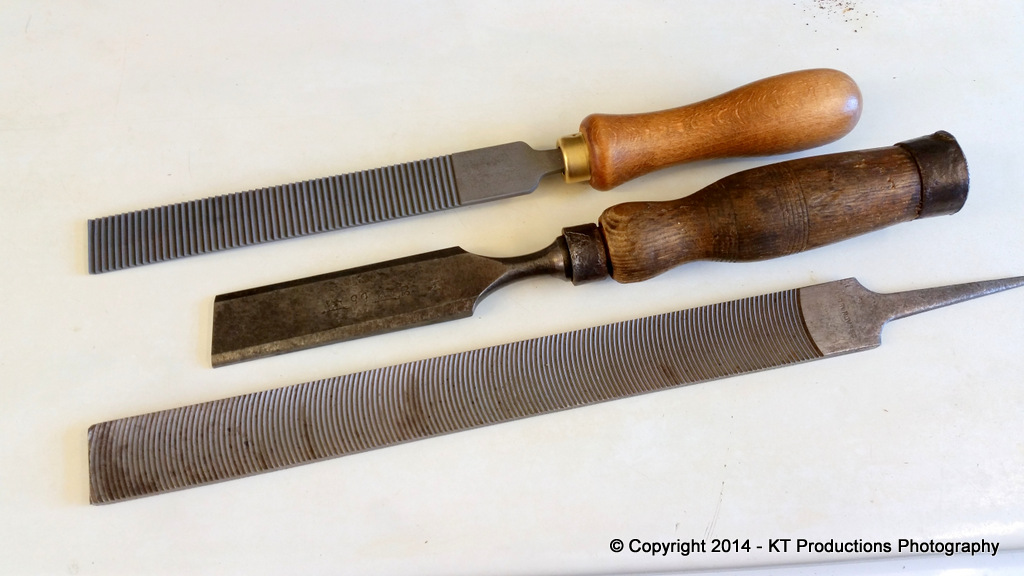
Going back to your original question Tony...I thought I would take some pictures of the gear I used on the panel plane to give you an idea of what can be used.

I find for rough stock removal in a flat fashion...the dreadnought file is the best...

20141020_125037.jpg


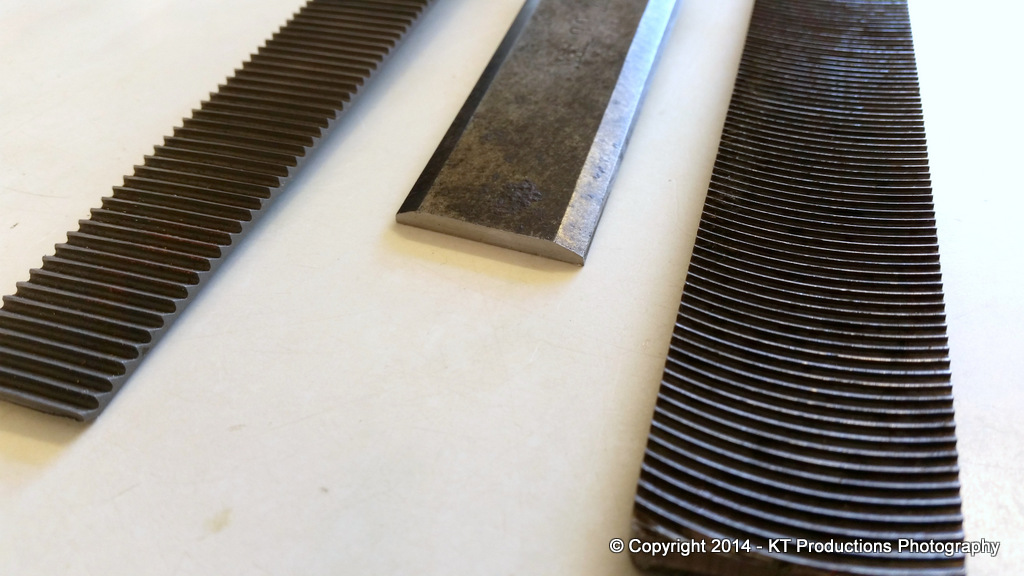
Any roughness can be removed using Bill's technique of a flattened chisel (90 degree bevel) as shown in the middle...this one is a large one but of course...you can use any size making it fit for purpose.

These two in concert work for me and make sure the ramp of the bed is perfectly flat and in line with the "frog" block.

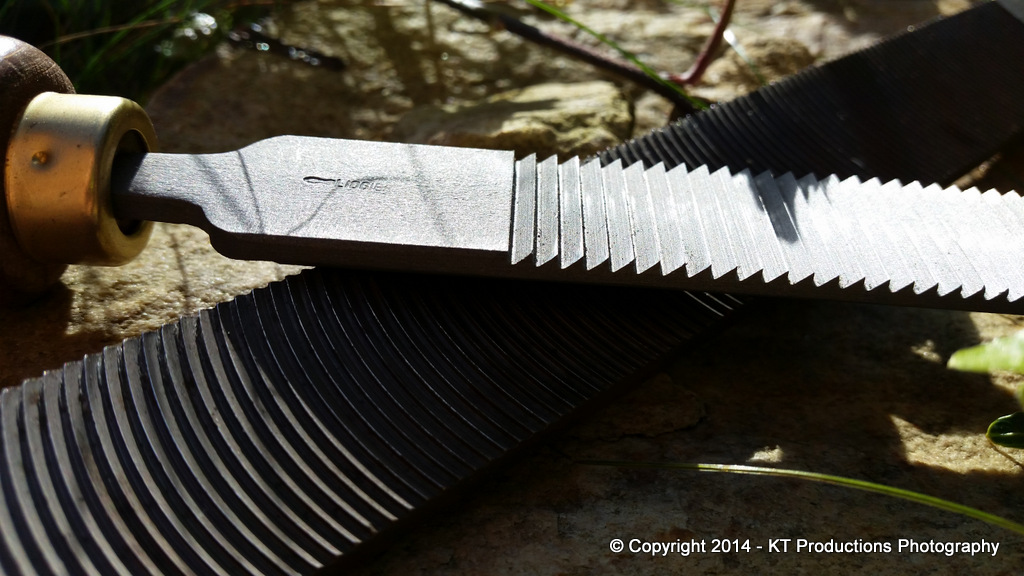
The Liogier float is yet to be tested so I can't comment yet on the use of this alone but if it performs like the handle maker's rasp...then I'm looking forward to excellent results....

20141020_125352.jpg


....now it's sharp that is!

The chisel is great to use...

20141020_125055.jpg


...BUT...you have to make sure it's square and refresh the burr often..that's what I found anyway.

Bill Carter's page on techniques is a good source of information in creating these finishing chisels and using them...

CLICK HERE FOR LINK

Hope this helps you Tony.

Jimi
 
jimi43":2456vkc3 said:
The chisel is great to use...

...BUT...you have to make sure it's square and refresh the burr often..that's what I found anyway.

Bill Carter's page on techniques is a good source of information in creating these finishing chisels and using them...

CLICK HERE FOR LINK

I'm confused - in Bill's write up (thanks for the link) he grinds the chisel upside down, so the burr is formed on the top, away
from the working edge, which is in the normal place, albeit with a steep bevel.
Bill Carter":2456vkc3 said:
After you have ground it upside down the burr is at the bottom which is the top of the chisel, you ignore this, just turn the chisel the right way up and it is now ready for use, what could be more simple?
So why does the burr need "refreshing"? It doesn't even touch anything when the chisel is in use.

I can understand the edge would need regrinding, of course.

If OTOH you're grinding the opposite way up to Bill, perhaps you've discovered a new technique.

BugBear
 
swagman":3s9gzzw1 said:
Not specifically Planemaker Floats, but I would recommend the Sapphire finish over the standard finish of Logier hand stitched rasps . The Standard finish I purchased are now badly worn after 6 months of use on hardwoods, whereas the Sapphire ones are as good as the day I purchased them.

http://www.liogier-france.fr/expertise- ... hniques-en

Stewie;

Not that I use mine as much as you Stewie but the Sapphire range certainly seem to last...my handle maker's rasp is as good as the day I bought it too.

Jimi
 
swagman":3ra76fcq said:
Not specifically Planemaker Floats, but I would recommend the Sapphire finish over the standard finish of Logier hand stitched rasps . The Standard finish I purchased are now badly worn after 6 months of use on hardwoods, whereas the Sapphire ones are as good as the day I purchased them.

http://www.liogier-france.fr/expertise- ... hniques-en

Stewie;

That's a bit of a worry; with a normal Liogier Cabinet rasp from Dieter Schmid costing
€80, I'd hope for a bit more than 6 months out of it.

However - when you say "hardwoods" do you mean normal, nice hardwoods
like we have in Europe, or those silicaceous Aussie nightmares that
provoked Stanley Aus into making and selling high speed steel plane blades?

And when you say 6 months, can you (try to) give a back-of-the-envelope
estimate as to how many shop-hours the rasps were in use?

I'm just trying to contextualise wheat you're saying.

BugBear
 
bugbear":stevr191 said:
jimi43":stevr191 said:
The chisel is great to use...

...BUT...you have to make sure it's square and refresh the burr often..that's what I found anyway.

Bill Carter's page on techniques is a good source of information in creating these finishing chisels and using them...

CLICK HERE FOR LINK

I'm confused - in Bill's write up (thanks for the link) he grinds the chisel upside down, so the burr is formed on the top, away
from the working edge, which is in the normal place, albeit with a steep bevel.
Bill Carter":stevr191 said:
After you have ground it upside down the burr is at the bottom which is the top of the chisel, you ignore this, just turn the chisel the right way up and it is now ready for use, what could be more simple?
So why does the burr need "refreshing"? It doesn't even touch anything when the chisel is in use.

I can understand the edge would need regrinding, of course.

If OTOH you're grinding the opposite way up to Bill, perhaps you've discovered a new technique.

BugBear

It does read like Bill Carter uses a 90 degree cutting edge without a burr.
 
Back
Top