


A short time before Christmas I was asked to make a small bed. As usual life got in the way & the project didn't get underway until March this year.
The mattress size specified was 190cm by 90cm, but the bed was to fit through a passageway only 25 inches wide, and this width limit became the main design constraint.
Initially I was asked to make a single bunk bed with cupboards below, and after much head scratching decided on 3 cabinets which would bolt together to form a row, with the tops providing support for a separately produced mattress holder. I did the drawings, made the cutting lists etc. and I bought the wood.
The wood was Iroko and I kind of chose it almost by accident. I'd gone to the wood yard to look principally at some ash, but there was this other pile of interesting teak - like wood nearby, and having looked over the ash pile I found myself irresistibly drawn to the other pile with the Iroko. Cost wise the project in Iroko wasn't excessive, and despite having read all the stories about how nasty the wood is, and people's allergic reactions to it, I figured to try it out. After all, part of the fun of woodwork, is trying out new woods, to see what you can & can't do with it. I also thought if it made me sick I'd know to avoid Iroko & similar woods in the future, and could probably sell on the stock albeit at a bit of a loss. Also I have a good dust extraction set up with a clean air extractor (returns air to workshop) running a 9 inch main pipe, and determined to make up extra hoods so that there would be no unextracted machining operations. I made up extra hoods, wore a Poweshield mask when sanding, & in fact I've had no bad reaction to working with this wood.
So the wood came from the yard on the lorry, about 9 feet long (the wood, not the lorry), in 38mil and 25mil thickness. I got it all stacked in my hallway incase of rain. There seemed quite a lot of it & I wondered if I'd messed up the maths for the cutting list.

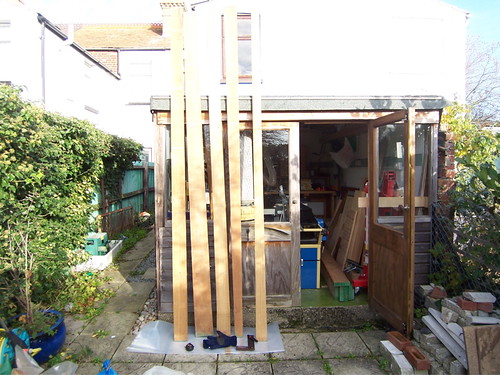
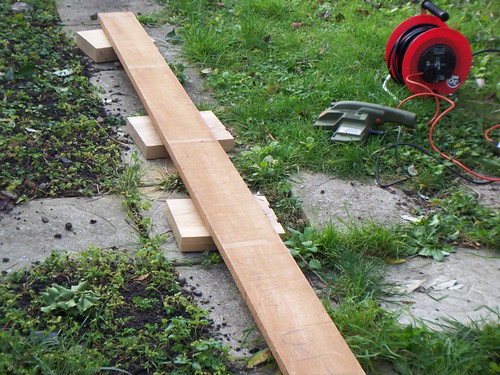
My workshop roof is too low for storing long stuff like this, so it all went out back to be cut down into manageable lengths, the design calling for nothing longer than 2metres.
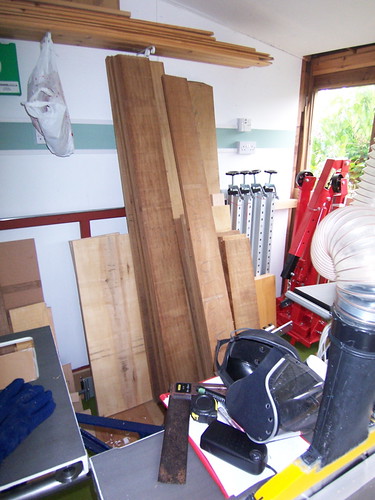
Finally it was all stacked up inside ready to acclimatize before machining.
Then it happened : SWMBO changed her mind. Now the bed was to instead be a more traditional ground - level single. Having spent about 2 weeks spare time finalizing the design I was understandably a bit grumpy. More to the point, the wood had all been cut down for storage, and for any new design the maximum lengths available would be pieces 2metres long. So now I had to re-design the bed using the available stock to produce something more traditional than a bunkbed over a cupboard.
Remembering that the passageway was only 25inches wide, the bed would still have to be made in knock-down form, to be reassembled in the bedroom. Being overly obstinate I thought I'd add to the mix by refusing to use bed-bolts or other knock-down fasteners for the frame corners. If I was to make an 'ordinary' single bed, at least I could choose some interesting joinery & have a bit of fun getting everything to fit right. So the problem was to find a joint to replace the bedbolts at the corner joints of the bed frame. These joints had to be reasonable easy to assemble, and disassemble (no permanent wedges, then); and sufficient to prevent the bed ends racking or moving once assembled.
The obvious candidate was some kind of mortice and tenon joint - a through tennon is notoriously strong, and relatively easy to assemble and take apart again if not sized too tightly.
I tried a conventional mortice and tennon (as below ). The result was disappointing. Unless it was to be glued or screwed or otherwise supported, when there was enough play for easy assembly and removal, there was also a lot of movement when assembled. With this joint the bed ends would probably rock off the tennons during use!

Next up was how to support the above joint once assembled, but without recourse to glue or screws. I tried inserting first one pin and then two pins through the side of the mortice, through the tenon, and into the other side of the mortice (see drawing below).
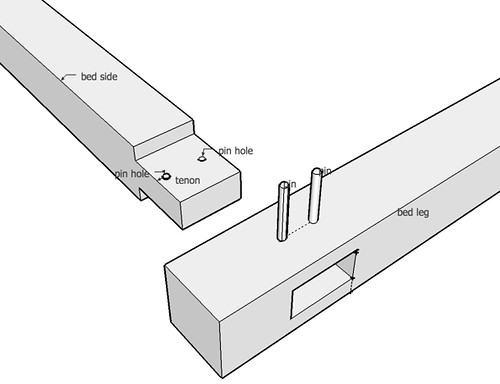
The pins were made on-size & were a tight fit, holding the joint strongly. Nevertheless, pulling on joint from 40cm away to get some leverage, it was still possible to open & close the joint a bit - to rock the mortice on the tenon tongue. This degree of movement was unacceptable. The other thing unacceptable was that a through pin, to be removable at a later date, needs access to both ends of the through hole so you can bash the pin out to disassemble the joint when you want to. Not being able to use a blind hole for the pin limits what you can choose to do with the material behind where the pin will go.
A partial solution appeared in the form of a wedged tenon joint (drawing below).
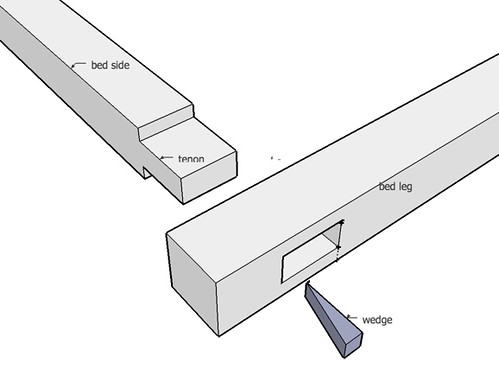
The mortice & through tenon joint was produced as normal, but an extra space allowed below the tenon tongue to bash a securing wedge into place. This produced a nice tight joint, and didn't have the problem of "how to remove a pin from a blind hole for disassembly". But still, pulling hard on the joint from about 40cm further up the wood, you could open & close the joint a bit - less than a millimetre - but that movement would be magnified & much larger at the top of a bed head some 40 or 50cm away from the joint. So I wasn't quite there yet.
Looking at the problem again it became apparent that most of the force on this joint would come from someone on the bed leaning their back on the bed-end ie. Most of the force on the joint would be pushing the tops of the bed-ends outwards away from the bed, and not in the other direction. Most users will not stand by the end of the bed & push the top of the end over the mattress. Therefore the joint, to avoid opening up in use, had to be stronger only in one direction. The solution was now clear - make the top of the tennon tongue into a dovetail( drawing below).
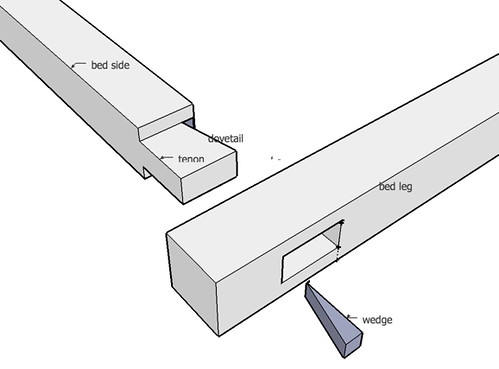
This shape will directly resist the desire of the bed-end during normal use, to be pushed away from the bed at the top. Using the wedge at the other end of the tenon as before can make the fit of the dovetail very tight, whilst the sides of the joint remain loose enough to allow the joint to be assembled & disassembled easily. A test joint was made, and pulling on the wood at a distance of 40cm from the joint produced no opening up of the joint whatsoever. I had found what I needed.
One cost of adopting this joint was that there was not much material left where the mortice walls were - certainly not enough to allow a conventional glued mortice & tenon at 90 degrees to it, to have much strength. The wall thickness here was only 10mm if a square leg was to be used.
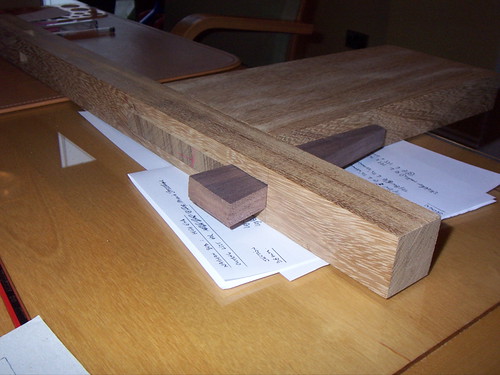
To increase the depth of material here, giving a stronger attachment for any joint sharing the wood, the wood needed to be thicker. But making the legs oblong to give more material on the insides only, looked ugly; and making the legs bigger but still square looked ugly too (20mm for a tenon joint on leg inside plus 18mm tongue on wedged tenon plus 10mm minimum on outside = a square leg 48 or 50mm square - too big). This problem was resolved by making the legs wedge shaped (in one plane only), with more material at the bottom of the leg than the top. This provided enough material to joint the material next to the wedged tenon, and did not produce an overly large or ugly looking leg:
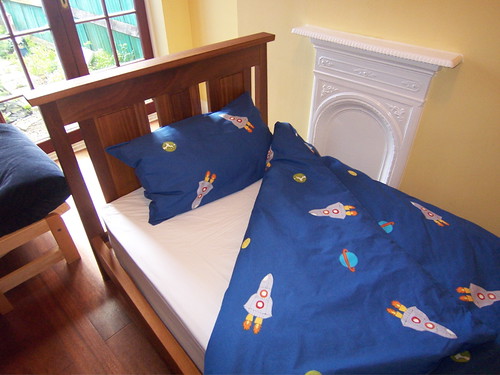
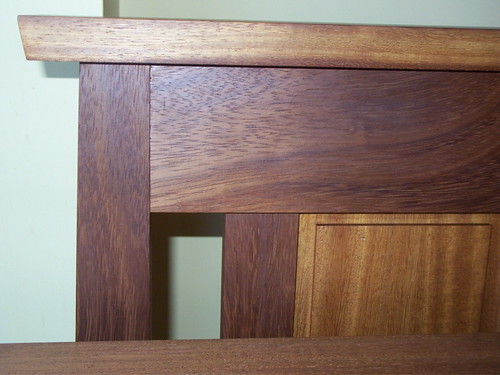
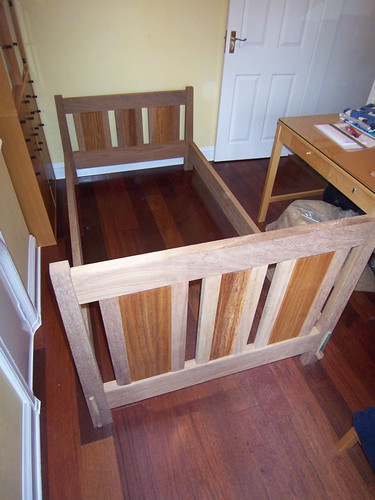
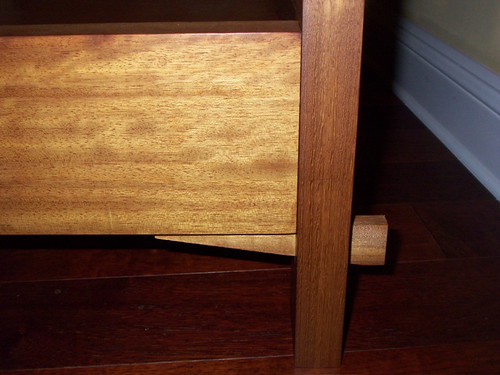
The other consequence of using a tapered leg, thin end at the top, is that the top - bars can extend past the sides of the bed (which looks good - see below photo), yet these ends are in line with the outside surface of the base of the legs. When the bed is pushed side-on against a wall, the ends of the top-bars therefore wont stick into the wall.
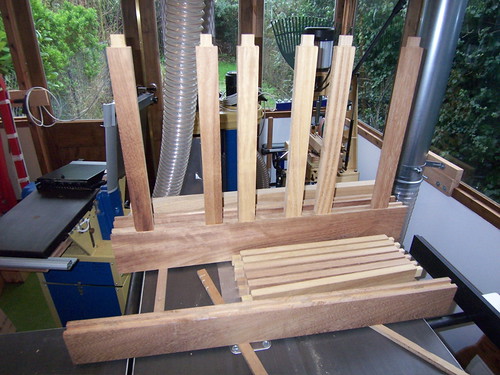
The frame and panel bed ends were produced in the normal way, with a combination of machine and hand work. I won't bore you with all the details, just some WIP pictures which you can skip if you like. Finishing and costs are given at the end of this posting.
Preparing frames for frame & panel bed-ends - trial fitting tennons.
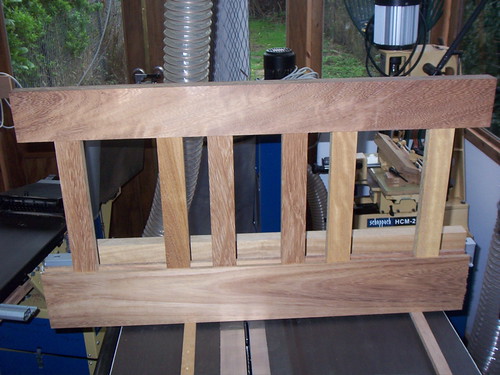
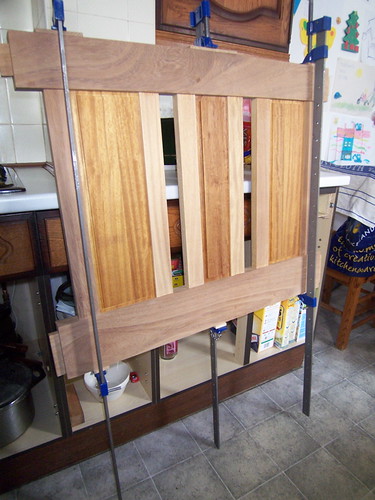
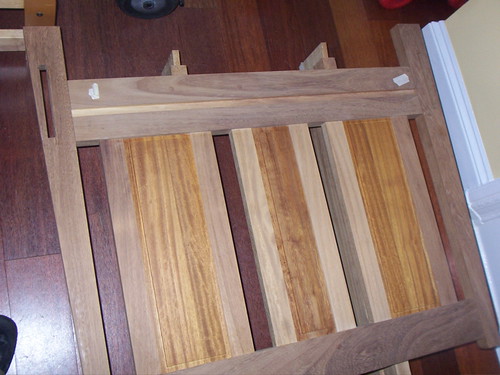
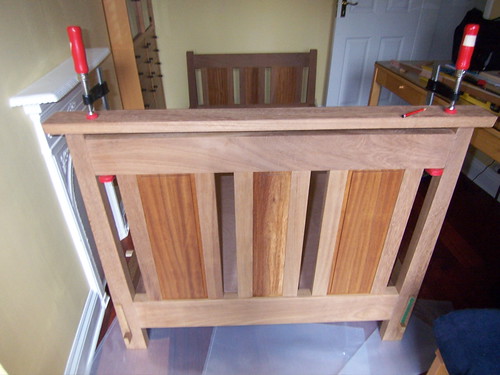
First assembly big end of bed, prior to fitting legs & raised panels :
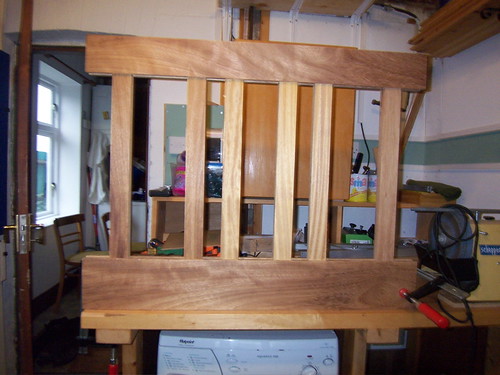
First assembly small end of bed, prior to fitting legs & panels :
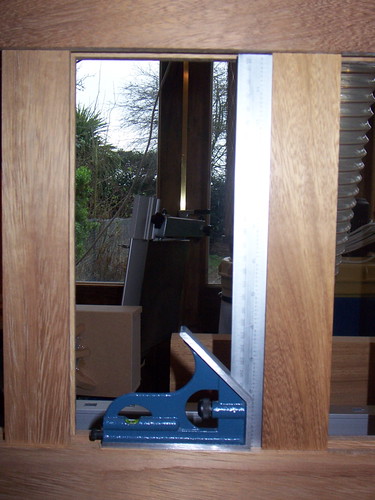
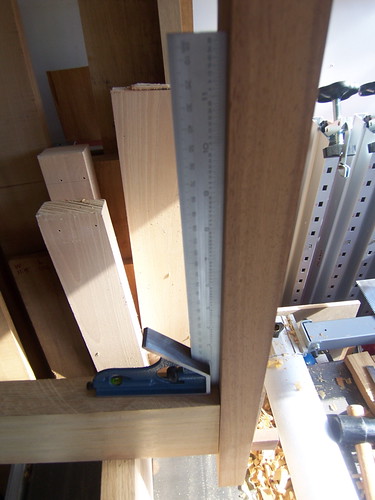
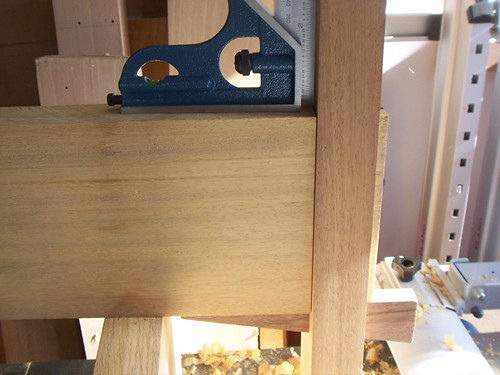
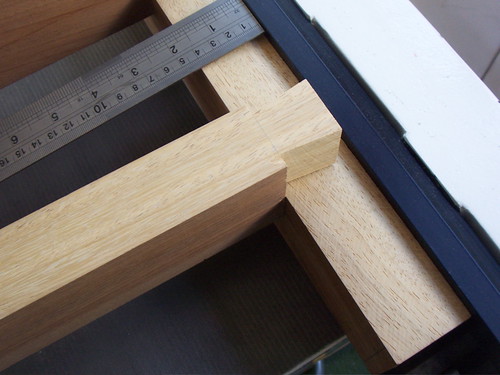
Checking its all square:
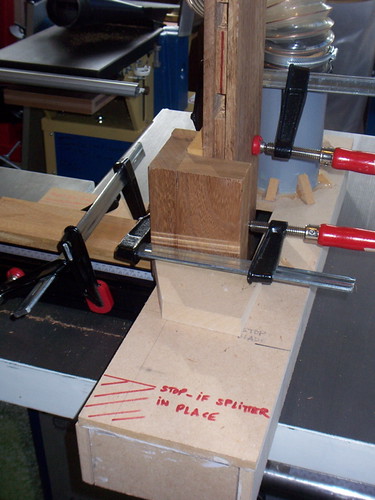
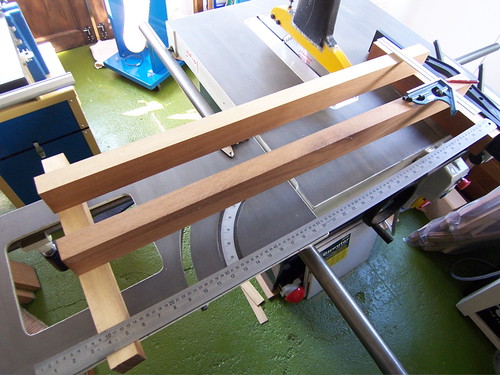
Cutting tennons on the table saw. Note the fully enclosed jig with 4inch extraction:
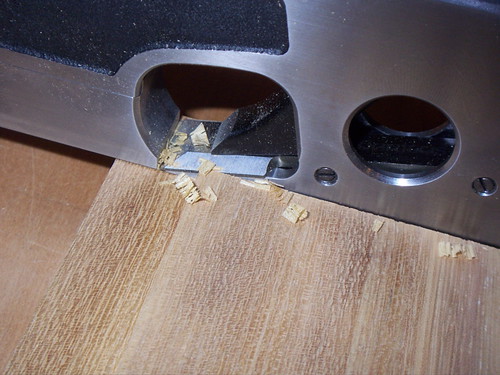
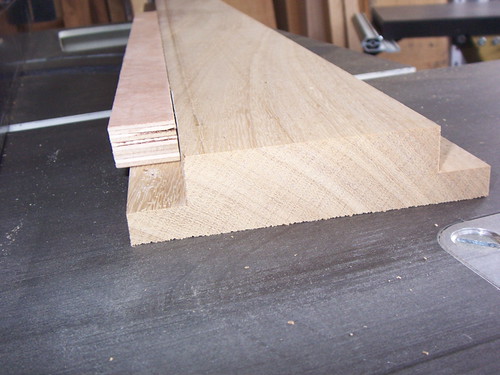
Thinner stock was edge jointed to produce stock for the raised panels. Loathing the Router (it's a sin, I know !) & keeping the design consistent - mostly square components and square edges (cleaned for safety), the panels were given a square profile raising. This was roughed out on the tablesaw & cleaned up by hand with a Veritas shoulder plane (excellent kit):

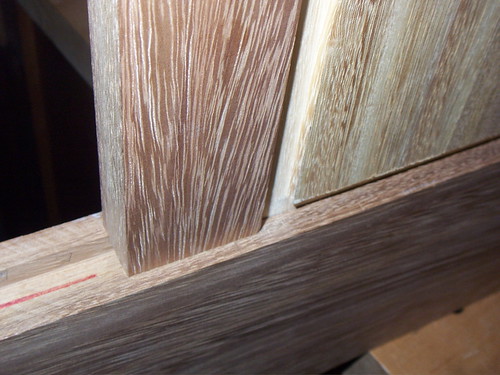
With the panel in place you can see the profile:
The panels were pre-finished before glue up:
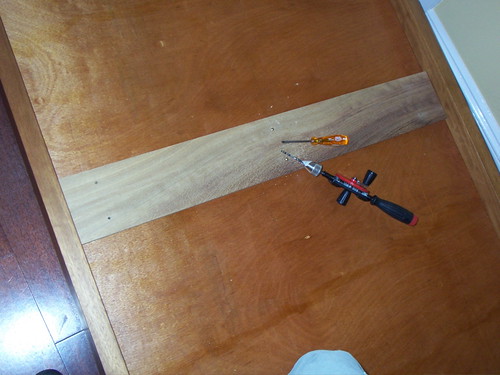
I started making the legs, & was putting in the mortices, when the morticer broke! So back to the chisel for the rest of the project!!
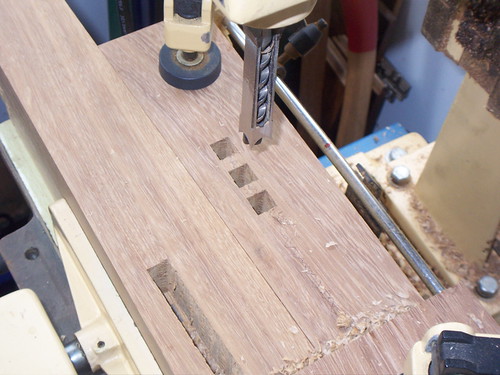
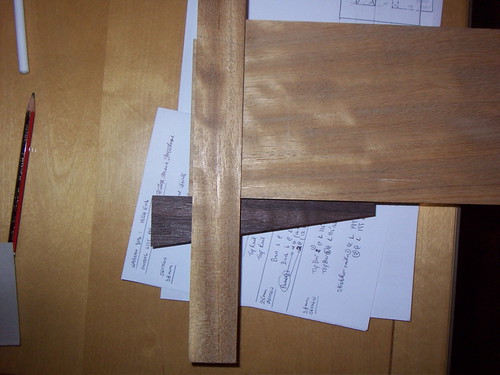
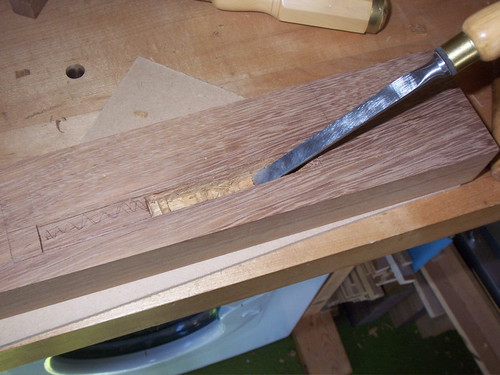
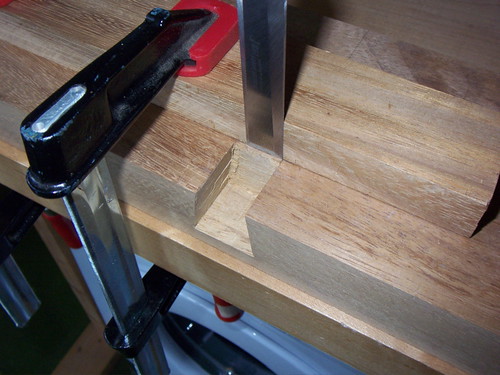
Chiseling the mortice for the wedged dovetail joint, into a leg, below :
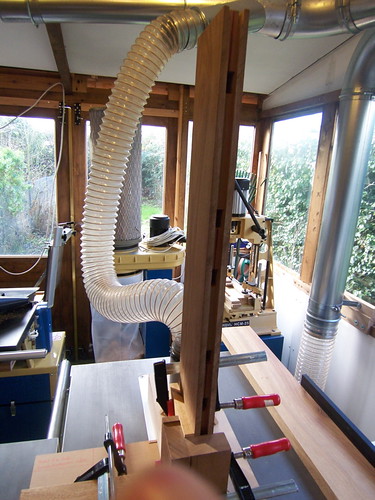
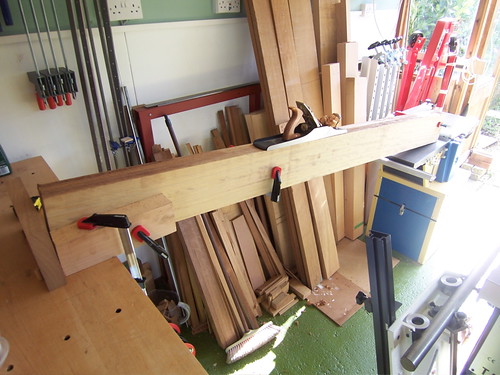
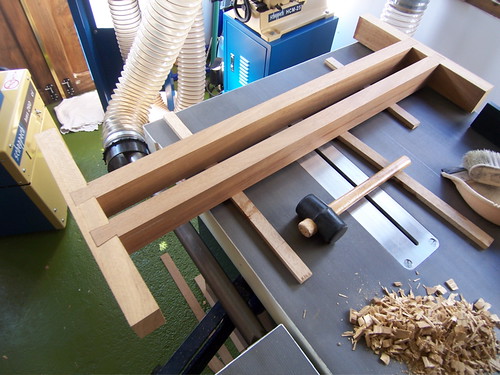
The bed sides are too big to machine the tenons in my small workshop, so after thicknessing the stock, the P/T serves as a trestle whilst the sides are hand planed:
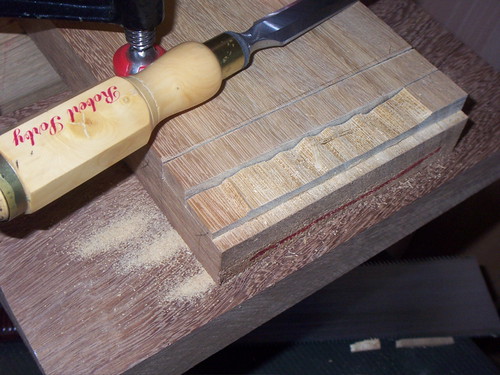
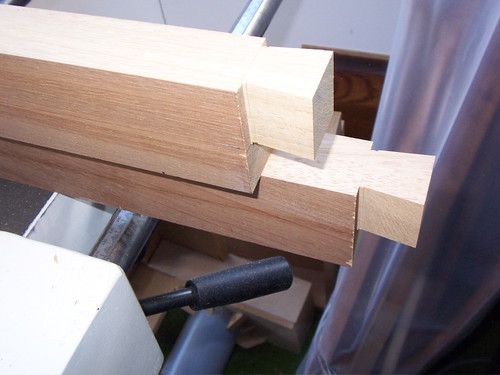
The dovetail tenons are then cut by hand, & trial fitted till all is square :
Once the bed sides fit correctly to the legs, both bed ends have a groove routed into the inside face of each bed end lower bar to accept a mattress supporting panel. Then the legs are glued on to the frame & panel ends:
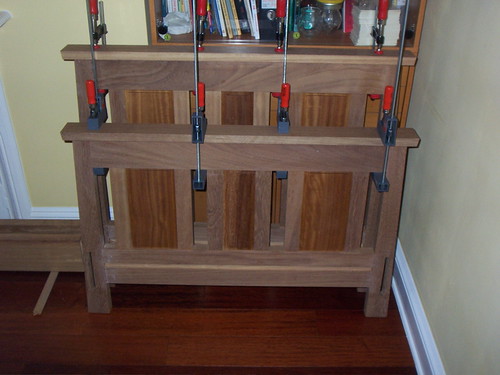
With the legs glued on the top bars can now be fitted :
The bed-end's top rails were scribed, recessed & glued into place :
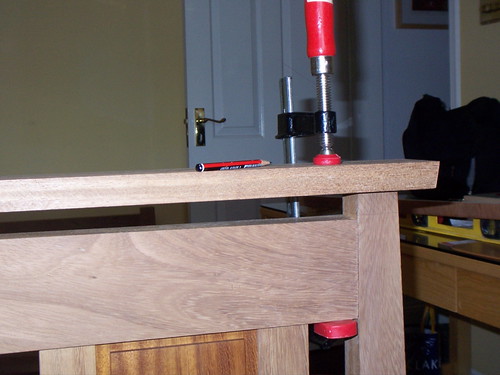
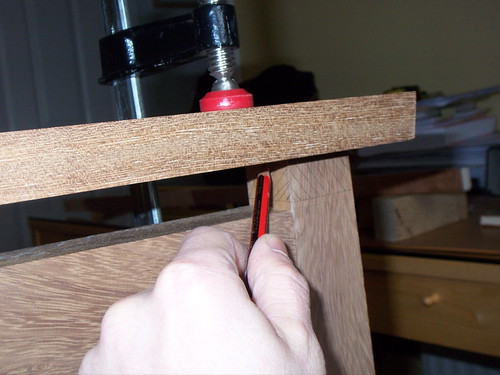
Pencil is hard to see on dark wood, so masking tape assists marking out : photo, cutting a recess in underside of top bars to accommodate leg tops.
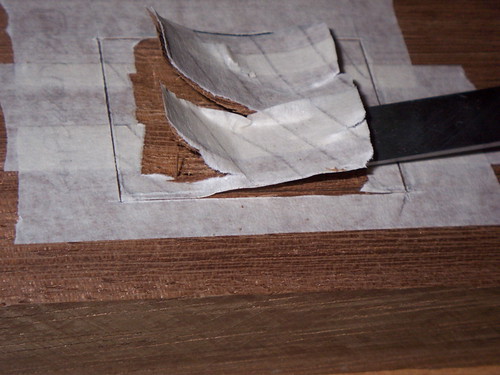
Got both tops glued on now ; masking tape to catch squeeze-out:
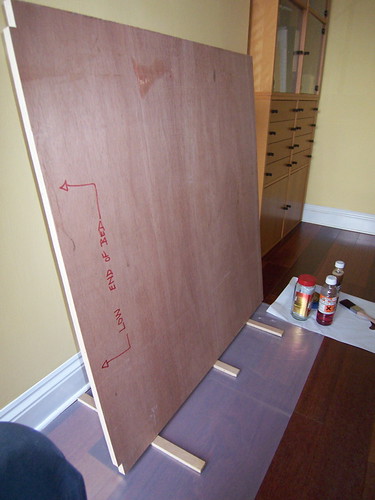
The bed is then fully assembled and the actual location of the ends of the bed-end grooves is transferred onto the bed sides. In this way any height variation between the sides once fitted won't prevent the mattress panel grooves from all lining up properly.
Then the bed is disassembled and the panel grooves are routed into the bed sides :
One design consequence of using the wedged dovetails as the main corner joint, is that to assemble the bed, the sides are inserted and then pushed upwards by the wedge, locking the dovtail top into place. This means that you cannot use a one-piece base panel for the mattress to sit upon - you could fit one bed end to the sides, insert the panel, and then not get the other bed-end on because the free end of the panel is in the way ! So, the base panel to support the mattress must consist of two pieces, which are later supported where they meet in the middle. To allow assembly, these panels can be pulled back into the middle of the bed by about 3cm each, allowing both panels to be inserted and then both bed ends to be put on. The base panel is 18mm ply, but runs in a 19mm groove. If you were to use an 18mm groove instead, any warp in the boards would make fitting the panels, which must slide during the assembly process, very difficult. The 1mm gap doesn't notice aesthetically, and makes assembly easy.
(A further consequence of the panel sliding into the bed end, is that it provides a safety feature against accidental disassembly - if the big wedges were to fall out, the panel within the bed end groove will prevent the bed sides from falling downwards, thus the dovetail joint cannot be disassembled even with the wedges removed, until the panel is also withdrawn towards the middle of the bed.)
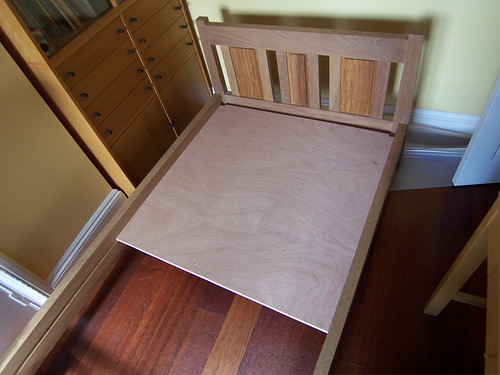
First panel into place:
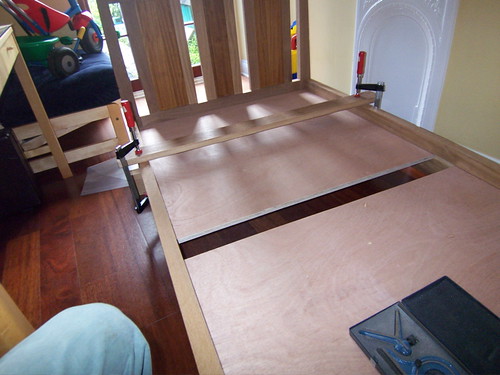
Second panel into place. The spreader clamp is a piece of scrap to avoid the slight bow of the bed sides from giving a false final alignment of the panel ends:
The centre gap is supported by two cross rails dovetailed into mounting brackets which are screwed to the insides of the bed sides. Originally there was to be some nice joints instead of screws, but SWMBO wants the bed, and I've run out of time to indulge myself further on this project. So the cross support screws in under the panels:
Roughed out support:
Finished dovetails cut on the tenoning jig on the tablesaw:
Marking out for chisel:
Removing wastewood from brackets:
Typical joint detail:
Finished bracket shown below:
Bracket assembly then screwed to bed sides under mattress panels:
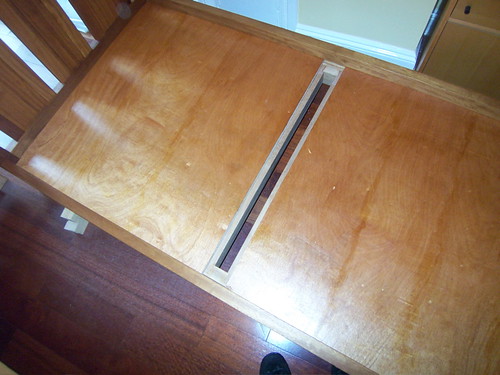
The remaining gap is then covered by a t - shaped top cap, retained by screws which enter the cross support. The lower part of the cap retains the middle facing ends of the two panels, preventing them working their way back towards the middle of the bed:
Fitting top cap:
The finish was a mixture of 50/50 sanding sealer and button polish, applied with a brush very liberally (its quite a thirsty wood), then wiped off with a clean cotton rag. If you work fast & give it a good soaking you won't get drying marks. The finish is smooth, matt, and has a low shine & will go off overnight ready for a recoat if desired. The finishing was done in my office, due to lack of space:
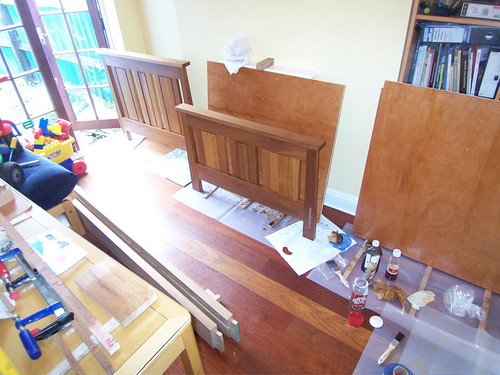
The finish shows the grain well, and evens up the range of wood colours a little, making the piece more uniform.
I ran out of time and had to put off applying finish to the sides until the following day, when I made one of those mistakes - picked up the wrong bottle & put on an oil finish by accident. The colour was quite similar and I was half way through before I realised my error. Nothing to do but to let it dry and then scrape it all off with an old plane blade the next day.
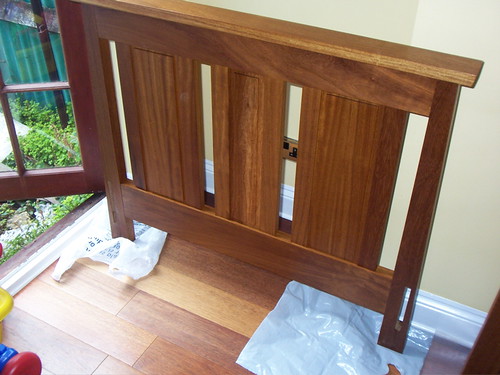
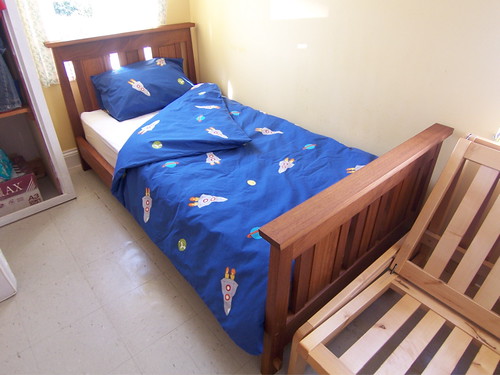
And here are the ends finished!
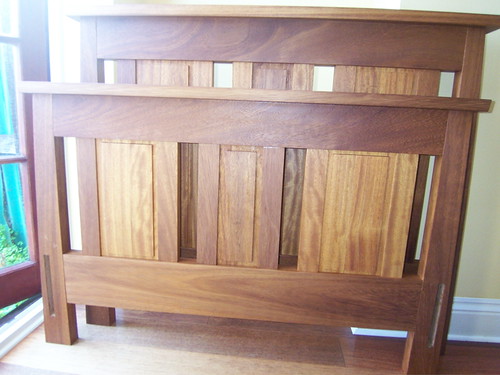
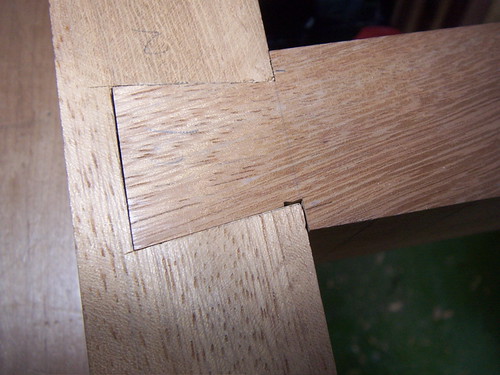
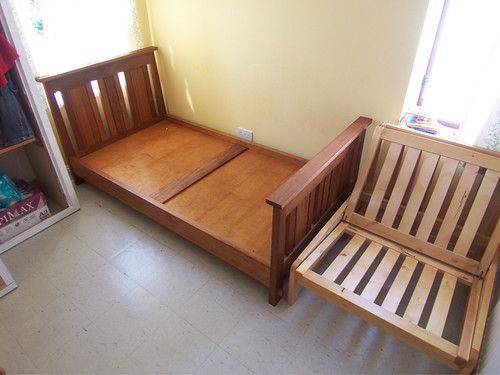
Its not an exhibition piece, just good solid joinery, but it all fits as it should:

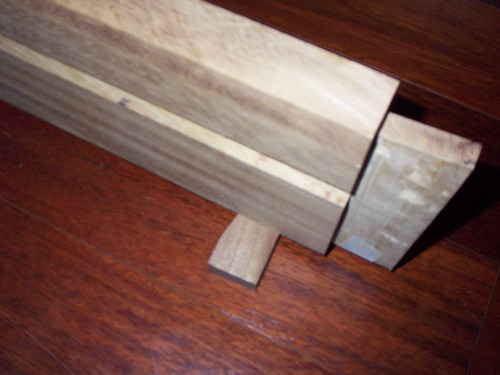
Detail of wedged dovetail tenon joint:
Time to give it to the customer!
Costs were as follows :
Iroko - £ 258 (Thorogoods, Essex)
Plywood - £ 38
Finishing materials, glue, screws, sand-paper, 1 extractor bag, etc. - £ 30
Total = £ 326, plus bedding & mattress.
Making time was equivalent to about 2 weeks full time work, plus a day for finishing. A second one would probably be a bit quicker . . .
I,ve called this bed a pacific coast style bed because similar style furniture bearing this name was produced in America around the time of the famous Greene & Greene furniture, and it is still a furniture style category over there today.
Thankyou for reading, regards, Catface
