New workshop project about to start

UKworkshop.co.uk

Help Support UKworkshop.co.uk:

This site may earn a commission from merchant affiliate links, including eBay, Amazon, and others.
We had frost last night and there is forecast again for frost for the next 2 nights so I didn't want to take any chances and didn't lay any bricks today. Hopefully I can lay them next weekend. In the meantime I will try and source these blocks
 
Sorry about the silence. Weather has been really bad lately with lots of rain and strong winds. There is little progress though. The bricks are down but I'm still to half the blocks and lay them. In the meantime I have cut up the remains of the old shed and it's slowly going up with smoke. I have also built a gate for the back garden so now the whole back garden is secure and a bit more private. I got so annoyed with the rain that I built a temporary shelter for my chop saw so I can still cut in the rain.
Tomorrow I will be ordering the 4x2's, 6x2's, ridge beam, OSB and the rest of the stuff.

I have changed my plans for the door layout. I will have both the garage door and main door at the front of the building. That will make my life easier when getting in long lengths of wood

 
Hi Kris, looking good, you will be surprised how fast it will go when you start building walls and how quickly that huge pile timber that you bought will disappear
 
Quick update:

100mm blocks cut in half with a 9 inch angle grinder and then finished off with a handsaw. Straps fitted and blocks laid. Unfortunately the only day that I finally decided to lay the blocks we had frost. I had everything covered and only the top surface has suffered a bit, the rest is solid so I will leave it. I started measuring and cutting for the walls but it's too dark now, even with the lights on so that's it for now.
Did I mention that I'm a dung bricklayer? I will mention that again, just in case :D

I have also tidied up the whole site a bit


I'm pretty sure I typed something else there instead of "dung" :lol:

The walls should be quick and easy, it's the ridge beam that I'm a bit worried about. This thing ways quite a lot. I honestly don't know how you Mike did it on your own and from ladders! I will plan for at least 3 people and 3 stepladders or even hiring one of those balcony lifts for a day.
 
Come on Kris, the cold never stopped anyone in Scotland working
 

Attachments

  • 7e970d00-ebfd-415d-bc9e-e4f158d4536a.jpg
    7e970d00-ebfd-415d-bc9e-e4f158d4536a.jpg
    64 KB · Views: 170
Framing is much much easier and way faster

One up. That's the gable end facing the fields with the massive window.

Second nearly ready. That's the front gable - main door and garage door. From what I know about framing the gable end opening doesn't need big headers with a pitched roof but I beefed them up anyway


Two up and third one being build. My cat is overseeing all the works
I've decided to ditch the second window. One big facing the field will be sufficient and I will have lots of led lights in there anyway


It was too dark for photos but the third wall is ready and the fourth one is nearly finished but I run out of 4x2's. The 4x2's I ordered were really horrible with lots of knots, splits and chewed up in places. I'm gonna send photos to my supplier because that wood shouldn't have left the warehouse. I will be getting more wood tomorrow from whichever place is open and finish the last wall
 
The build is looking great. Sharing the photos really helps the community, especially for me as I'm planning my own version of Mike's shed at the moment.

I see that the brick course has a gap (for the garage door I assume). Are you not going for an insulated floor with the 500 gauge DPM, and kingspan etc, or do you have a cunning plan for fitting it all together?
 
Thanks jacko. I know that pictures paint a thousand words that's why I'm trying to take photos of every stage. It's also good to show and help others. I will have a standard door and a garage door at the front and no insulated floor, the slab is my final floor which will get painted with a 2 part epoxy... but knowing me this plan may change over time :)

I've gathered some help and the 4 of us put the walls up.
We started with the small one facing the field which was really easy and light. It was levelled and braced before we moved on to the big side wall. That was a beast but we managed ok. Levels checked and then nailed to the first one


here we are pushing the top for level


2 up, 2 to go. I'm putting the mortar down while the rest try and look busy


from then on it was just a repeat process until we had all of them up. After that we checked the distance between the bottom sills and adjusted the top sills to match. I don't know if you can see but my big side walls were overlapping the small ones - that helped with levelling (you should be able to see it on the first 2 photos)


Then I secured all the straps and nailed everything tight together and braced

Weather held up and we managed to finish it all before the rain. It's 70mph winds today and I'm glad we didn't have to do it today.

Next up is the roof
 
I love a workshop build and this one is looking great.

Just some food for thought. When I built my workshop I left the floor as bare concrete (150mm with steel over a DPM). I also went OTT with the insulation in the roof and floors as I wanted my workshop to be toasty. I didn't have any problems with the floor other than my feet always felt cold and then one day I dropped a freshly sharpened chisel on it and at that moment I decided to put T&G MR chipboard over 25mm insulation (didn't want to lose anymore height) and I can honestly say that it was the best thing I ever did in my workshop. Possibly even better than the new roof I just put on to replace the 13 year old shingles (don't use shingles...!).

It was an easy job that would have been really easy if I didn't already have all my machines in. I've just laid the concrete for a workshop extension and I'll do the same in there.

Keep the posts coming.
 
Sorry for stupid question but when you trim the DPM you do it so it's level with the ground? So "A" in this diagram? ->

4Z0G0xZ.jpg
 
Oh, wasn't expecting that!

So does the DPC then come down and overlap the DPM?
 
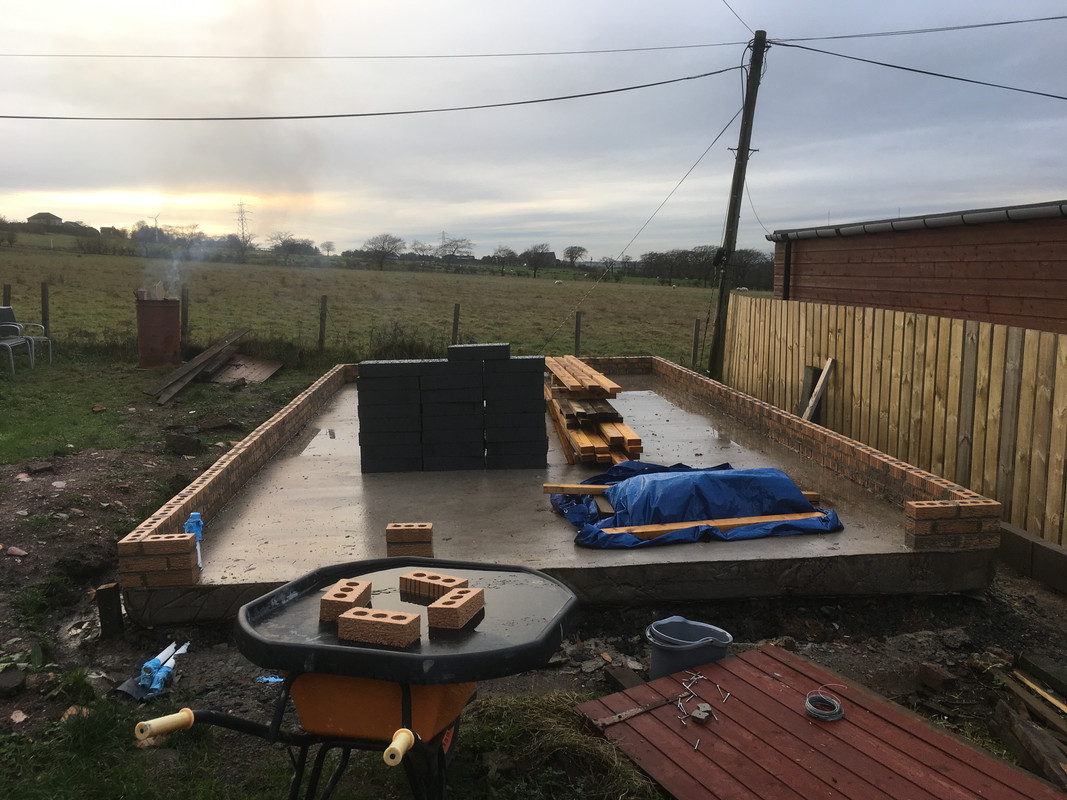
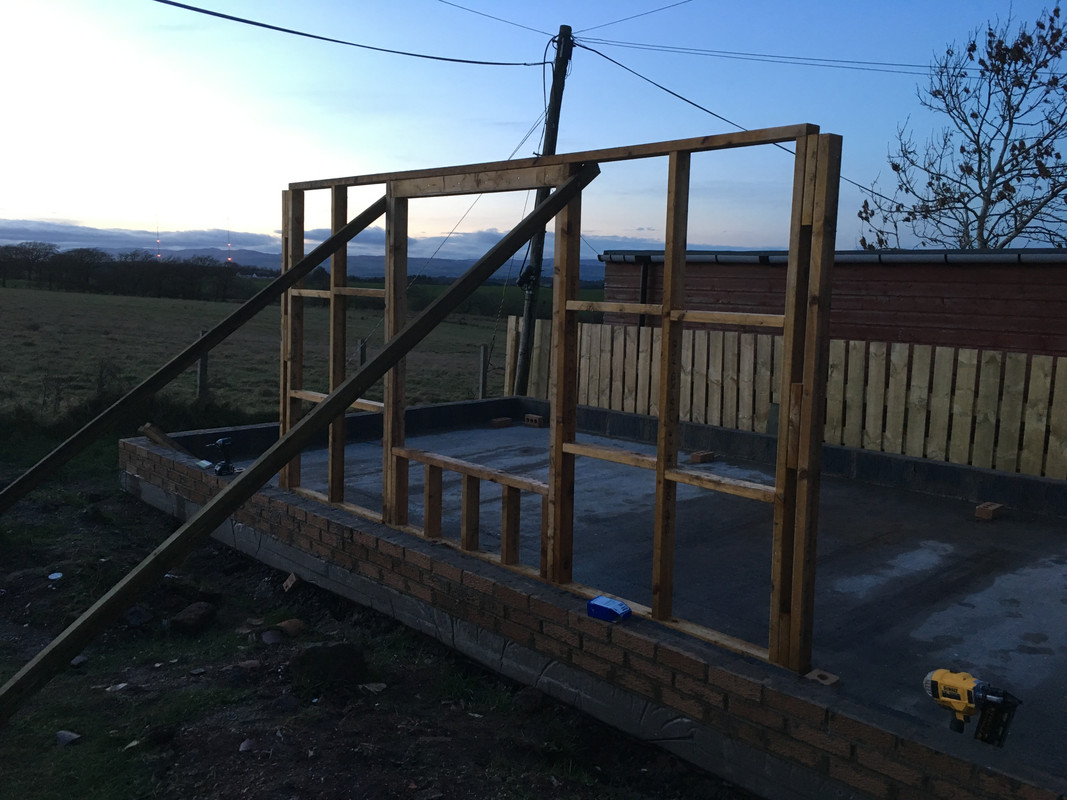
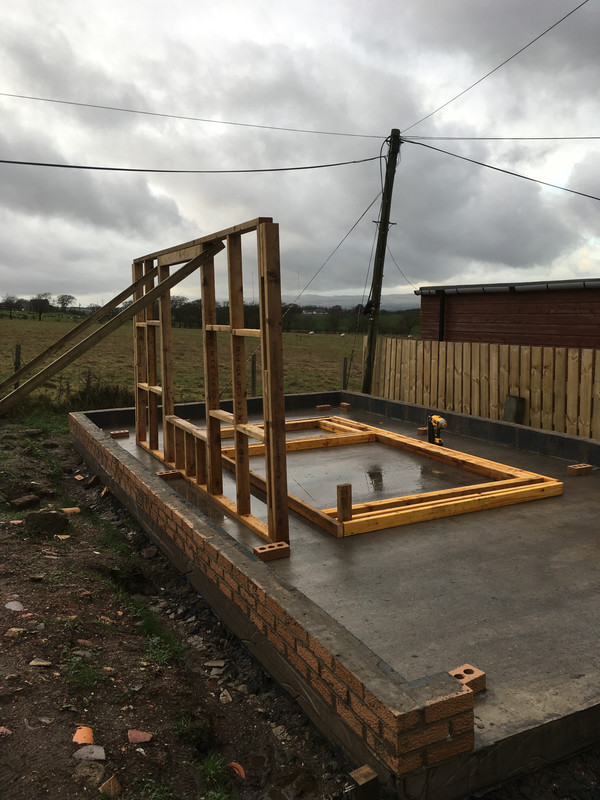
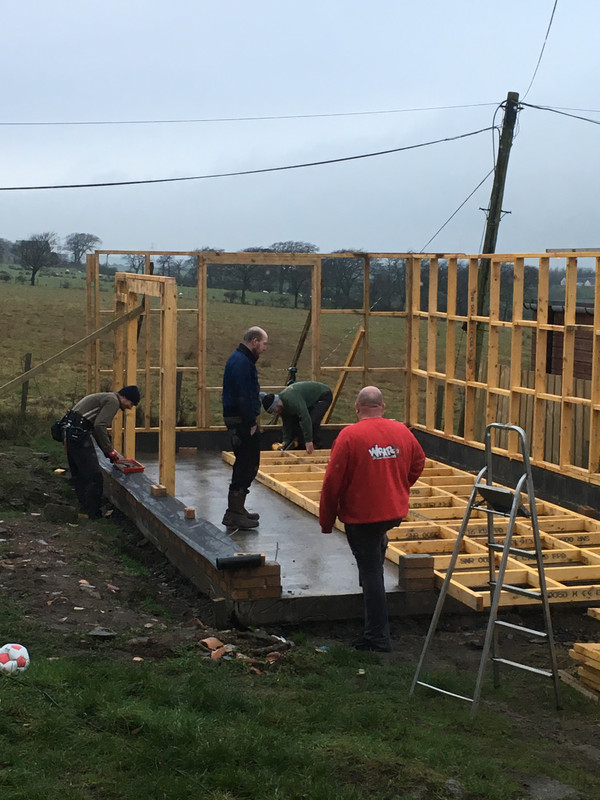
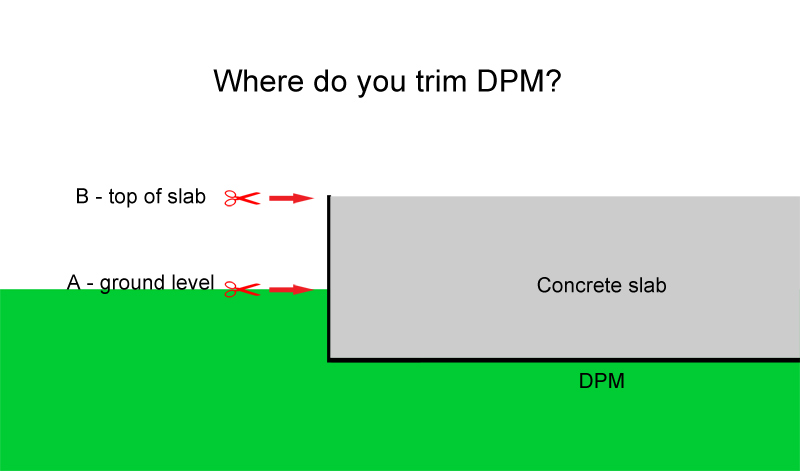
No. This is one of the reasons why I have to be really careful online, because people can take the detail and erroneously apply it to an extension, where it would be non-compliant. This applies only to non-controllable outbuildings, and it is critical that the upper part of the slab is above ground. The DPM here is really only helping the inner part of the slab, and the outer edges dry off by being exposed. The difficulty of trying to protect a path for a continuous DPM/ DPC in a simple outbuilding is just too much. Exposed polythene is very susceptible to UV and physical damage, and would last 5 minutes if dressed up around the edge of the slab and built in under the bricks.

If you dress the DPM upwards at any point (your A or B) then water running down the face of the concrete would be trapped between the plastic and the concrete. Better to let that water go to ground, and for the edge of the slab to dry by being exposed. It's a compromise that works well, but which depends entirely on the slab being partly above ground.
 
Mine will be partly exposed and all the rest covered in pea gravel.

Wood Monkey - Cabershield sheets are on the cards. What insulation did you put under the sheets and does heavy machinery have an impact on the floor?
 

Latest posts

Back
Top