New Fence and Gate - WIP

UKworkshop.co.uk

Help Support UKworkshop.co.uk:

This site may earn a commission from merchant affiliate links, including eBay, Amazon, and others.

planetWayne

Established Member
Joined
13 May 2008
Messages
122
Reaction score
0
Location
UK
Well, following the tradition here of posting your WIP - I'll give it a go!

This is a followup from my initial design I posted in the Design thread.
Admittedly - I've had the wood for a week now and have also cut it to length with my new Makita LS1013 (again after advice sought on the board - I must say that this is one real mean momma of a saw!). Created a subfence to attach to the rear fence of the saw and used that as a cut guide for chopping the wood. This worked out brilliantly! First few cuts I was marking with a pencil and each time splitting the line and getting most accurate cuts :lol: I then thought - why bother marking this - just measure it each time on the saw - clamp it and cut! As I was using the subfence as a guide it was spot on! Very nice tip that - much thanks!

(typicly I didnt take any photos of my sawing antics yesterday but have a few today - not breath taking at this point - but small steps in the right direction!)

As ever the missus was wondering how long before messing somthing up - and I couldnt let her down! Whiles cutting the wood I noticed that there seemed to be 'one extra piece' from the woodyard thought nothing of it at the time untill I was cutting the lengths for the uprights - wasnt untill I had cut the shorter of the pieces I notices a knot and little split - no problem I thought - cut arround that. Wasnt untill I cut the pieces I realised what the spare piece was for - the woodyard had already spotted this and sent over the other piece - the only thing - was for the shorter pieces not the longer :oops: this left me with a piece that wasnt long enough and with a knot in it! - oh well - I remember telling the delivery driver to remember where I was :roll:

Not to dissapoint her again - one thing became apparent - the fence is about 10mm too short! There could be a way out of this though - the spare wood I had - just so happens to be 10mm in depth - just means that the base board on the fence part will be a little 'thicker' looking :oops:


Anyways - enough of the rattle - and onto todays pics (oh the weatherman said yesterday 'watch out for real bad rain' - not a jot!!)

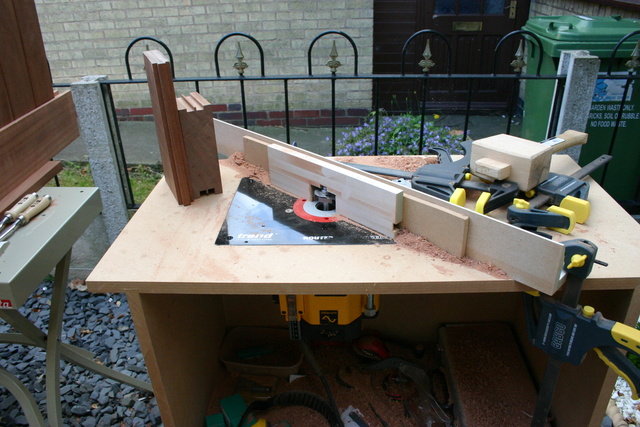
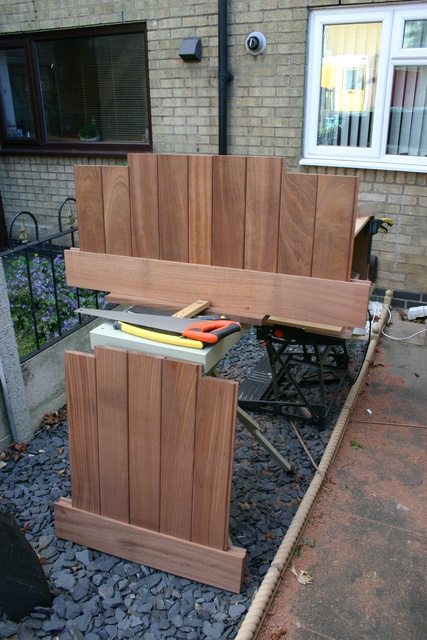
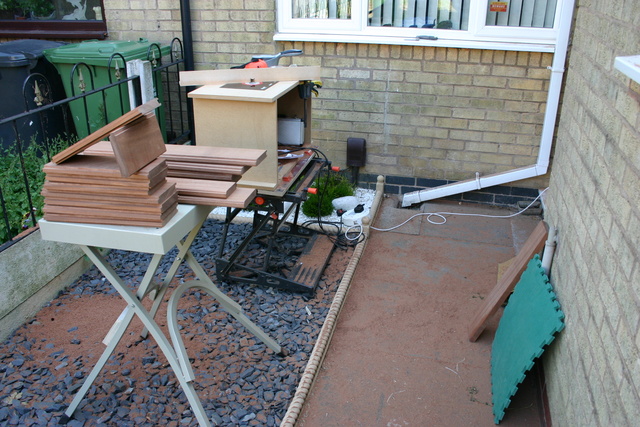
Our front 'area' (my outside workshop!) set up with my 'router' table and part finished fence panels. I'd finnished for the day by the time I'd realsed about taking some photos.
Our_Fence_Just_finished_T_G_panels_08_06_08_002.sized.jpg


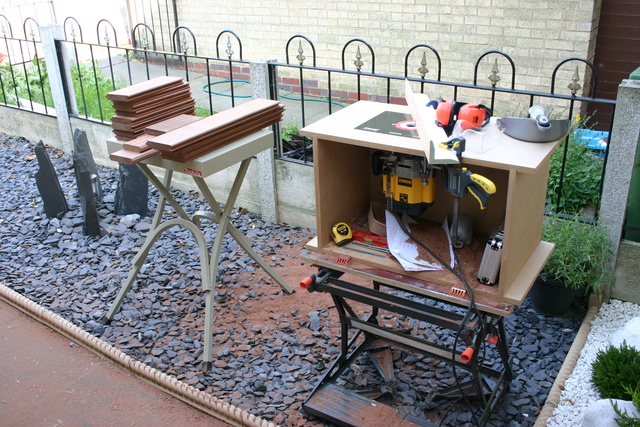
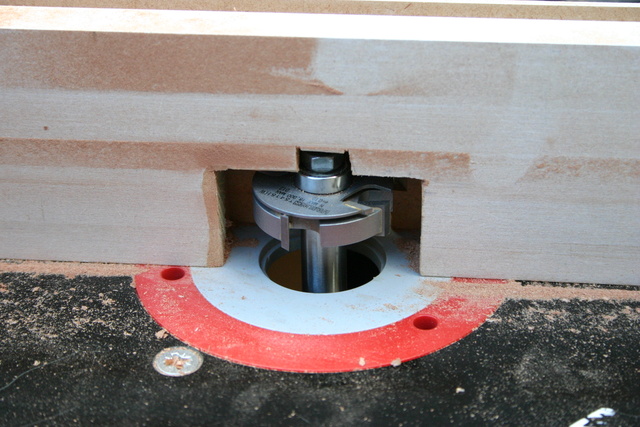
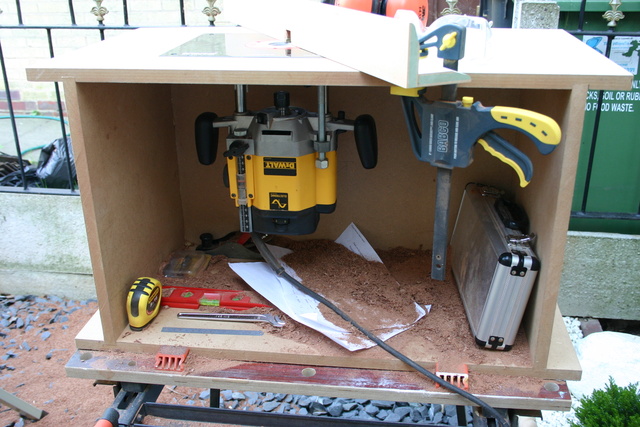
My Router table - ala 'The Router Workshop style'
Dusty_Router_Table_08_06_08_003.sized.jpg


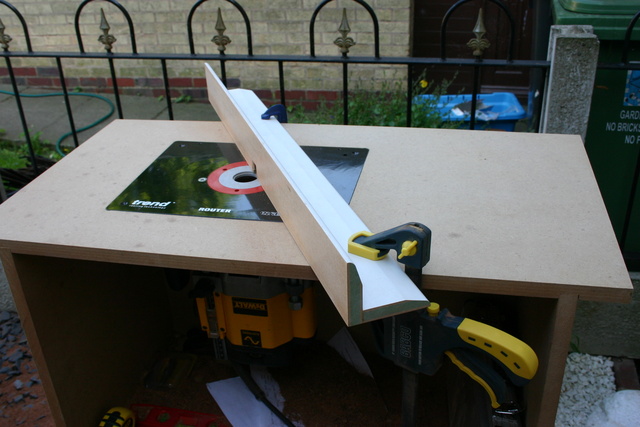
The Fence I cut yesterday whilest playing with my new saw. Its actually two pieces of mdf pre made skirting board I had over from fitting out our porch. Biscuit and butt jointed.
Router_Table_with_MDF_Clamped_Fence_08_06_08.sized.jpg


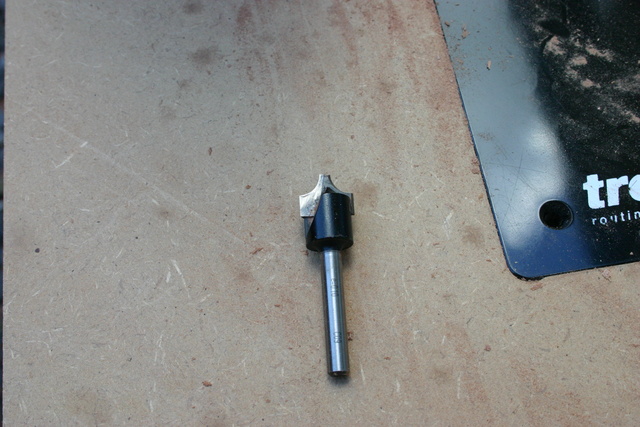
Nearly finished rounding over the edges of the panels here. Need a 'router raiser' or somthing to get the length for rounding where the 'tungs' are.
Fence_Panels_08_06_08_002.sized.jpg


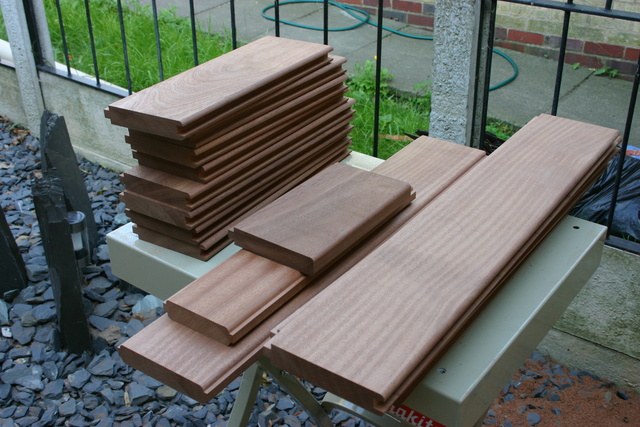
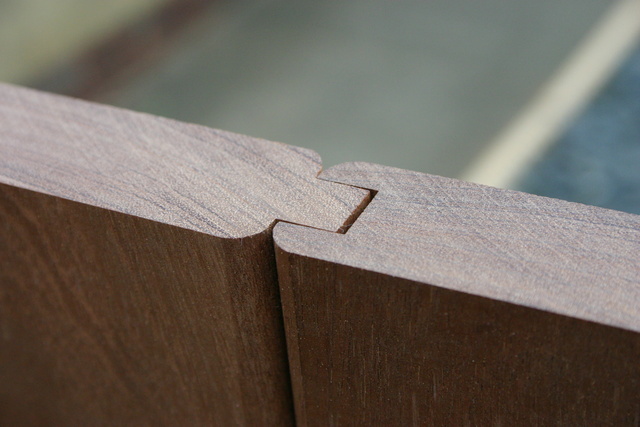
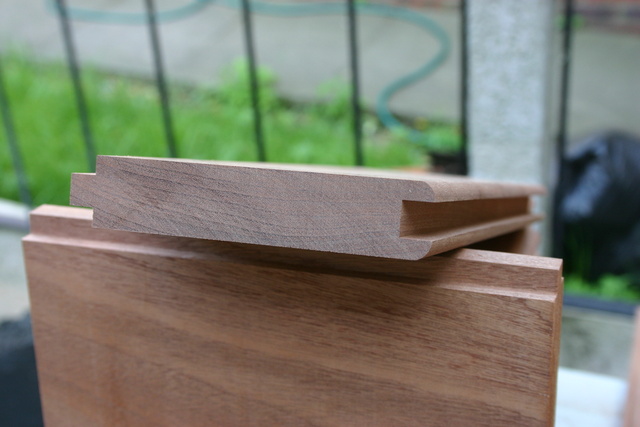
Closeup of one of the panels so you can see the detail.
Closeup_of_the_rounding_over_of_the_panel_08_06_08_001.sized.jpg


Dust EVERYwhere!
Dust_from_a_days_routing_08_06_08.sized.jpg


Comments and feedback welcome!
More to come! (hopefully if the rain holds off!)

Cheers
Wayne.
 
Wayne

Wich way did you route the boards upright or flat as if you did them flat you should just need to move the fence back the depth of the tongue unless the length of the cutter then hits the tongue and if you passed them upright their looks to be enough plunge on your router to raise the cutter unless the cutter hits the tongue this way, if you are cutting in the centre of the cutter it shouldnt matter about changing the way you pass the boards as the arc should be the same it is a case of trial and error but all trials should be on test pieces be certain before using your prepared boards.

Good luck
Dennis
 
Hiya Dennis,
The boards were routed upright. The problem at the minute is the router bit I have is a flush round over bit which is fitted with a bareing :roll: Wasnt a problem with doing the one side as the bareing was riding along the board but its too tall to fit in the grove. I did take it off but still a too tall.

Its a trip to B&Q to try ang get a rounding over bit without a bareing :)

Cheers
Wayne.
 
geez :shock:

the mess you made!!!!

I don't think the neighbours will like you much with the NOISE and MESS

anyway..


The result is perfect work :wink:
 
Looking good wayne.. What wood is that? Looks familiar.
 
planetWayne":1krdispp said:
Hiya Dennis,
The boards were routed upright. The problem at the minute is the router bit I have is a flush round over bit which is fitted with a bareing :roll: Wasnt a problem with doing the one side as the bareing was riding along the board but its too tall to fit in the grove. I did take it off but still a too tall.

Its a trip to B&Q to try ang get a rounding over bit without a bareing :)

Cheers
Wayne.

Wayne,
have a look at Wealden, they do good quality router bits at reasonable prices, they deliver very quickly and usually P&P free.
 
WiZeR: A whole lot of Sapele - supposed to work well outdoors, have very little movement and hard (so far - I can confirm that its hard :) )

Mcluma: Not too much a problem with the mess - ingeniously it stayed my side although everything since is covered in a fine red dust - as for the noise - had ear defenders on :D
 
Look identical to Yellow Balau. Which is also very hard. Oh, and stay away from end grain.... :roll:
 
I looked at that fence in the photo for ages before I realised it wasn't the fence you were talking about....or is it?
 
Well George - I've just added to my credit card with a few cutters from Wealden!

Thanks (i think :shock: ) for that one :) - looks like a nice site for router cutters that one :)

Cheers
Wayne.
 
CWatters":2gzn48ab said:
I looked at that fence in the photo for ages before I realised it wasn't the fence you were talking about....or is it?

Was that the white thing on top of the router table? - that was the fence I made from the skirting board - its not the 'gate + fence' that I'm trying to make for the garden - thats the other one :)


Cheery :)
Wayne.
 
planetWayne":2ts5qkv7 said:
Well George - I've just added to my credit card with a few cutters from Wealden!

Thanks (i think :shock: ) for that one :) - looks like a nice site for router cutters that one :)

Cheers
Wayne.

You're welcome, always a pleasure to help someone else spend their money.
Seriously though, Wealden are very good and the cutters I've had from them have been great value for money.
 
AT LAST - a good weekend without rain! :D

Actually managed to get back out in the 'workshop' this weekend and start making some more mess :)

Only a few photos...

I'm sure we've all seen these roundover and (or in this case) a beading bit. This let me get in and round over the edges on the 'tongues of the panel pieces by running each piece flat on the table.
Rounding_over_bit_20_06_08.sized.jpg


Which leads to this one - showing how all the panels will fit (ok this is one of the better ones :oops: but they are not too far removed from this :roll: )
Panels_now_rounded_and_test_fit_20_06_08.sized.jpg


Next one was this one to cut the grove in the bottom part (rails?) of the fence. This is a stacked 12mm cutter on a 1/2" arbor (another one from Wealdon). Ran each piece twice (flipping along its lenght) which left a little 3mm bead down the middle which was a short job for a sharp chisle to get the full width.
Closeup_of_the_Stacked_12mm_1_4_inch_bit_20_06_08.sized.jpg


Interestingly the bottom piece of the fence ended up with the grove about 4mm wider towards each end :oops: - the only think I can think of was that there wasnt enough support when running such a chunky piece of wood, to which the end dipped and therefor raised the end that was still passing the cutter. I think next time I might take the router out of the table and secure the wood rather than this way round. :(

You can just make out on this with a smaller offcut I had how the two grooves fit together - this middle piece was later removed with a chisle.
Router_with_Stacked_12mm_1_4_inch_bit_fitted_and_temporary_fence_20_06_08.sized.jpg


This is how they are doing so far. Need yet to shape the tennons on the bottom pieces, create the top curves (that will be interesting!) for the gate and fence and route the grove into that (hence the bearing bit). Fit the uprights with a groove for the panel pieces.etc... :lol:
Test_fit_of_Panels_in_Base_of_Gate_and_Fence_20_06_08.sized.jpg


Cheery
Wayne.
 
You may want a 1mm gap in between the T&G boards. We have found that if that are too tight, they will pop out of the gates. The 1mm gap is barely noticable when they all look the same.
 
Sounds like you're struggling a bit with your work on the router table, though I think this would be helped by adding a couple of featherboards for - one above fixed to the fence above the timber, one on the table adding sideways pressure. This should improve the consistency of your routing, help prevent kickback and all you then need to worry about is feeding it through. :)
 
yeah - its not the most 'fully featured' router table ever :) I think that was the first thing I made when I got hold of my router.

The wood for the bottom section is pretty heavy! - I just hope the whole thing holds together when its done! - but yes - take on board that there should have been feather boards or something stopping it from tilting.

Everything done so far is a learning curve which is a little limp excuse but I'll know next time :oops:

joiner_sim: where you say leave a gap between the t&g - are you on about in between the tongue and the base of the grove? I've planned to leave these 'loose' (maybe glue in the middle one), the picture is with things pushed up close to fit.

Thinking about this - I remember watching an episode of 'the american woodshop' where he was doing a floating paneled door. I seem to remember he used little rubber balls as spacers - this apparently kept the middle tight enough not to wobble about but still flexible to allow for expansion. Is that something that is US based or do we use the same idea over here?


Cheers
Wayne.
 
I would also be looking at covering up the exposed cutter somehow when you are using the table.Any kind of slip and the consequences don't bear thinking about.Wizer's (think it was him) finger springs to mind.
 
planetWayne":ixf8sjh5 said:
where you say leave a gap between the t&g - are you on about in between the tongue and the base of the grove? I've planned to leave these 'loose' (maybe glue in the middle one), the picture is with things pushed up close to fit.

Nope, i'm on about the actual fronts of your boards. Where the V is formed from the two boards together. We usually use pins out of a pin gun to create a small gap. Also, I would suggest coating the tongue and grooves with the finish your planning to use before puting all the boards together.
 
ah ok, get you :)

I was planning on getting everything coated in finish before final glue up - a good ol coating or three :)

Cheery
Wayne.
 
If you look on my website, the gates that are in them pictures have just had the tongue and grooves painted. But we are in an "production line" situation, so we only give the T&G's one coat of whatever and then when its finished the painter/stainer does the rest.

Time= Money! After machining....... It takes about 5-6 hours to do a pair of garage gates, glue up, sand, metteing rebate, sand boards, prepare boards for fitting, fit boards, final sand. The company charges 10 hours labour though so we can afford to rest a little in between!
 
Back
Top