New bench

UKworkshop.co.uk

Help Support UKworkshop.co.uk:

This site may earn a commission from merchant affiliate links, including eBay, Amazon, and others.

Dangermouse

Established Member
Joined
23 Dec 2010
Messages
714
Reaction score
0
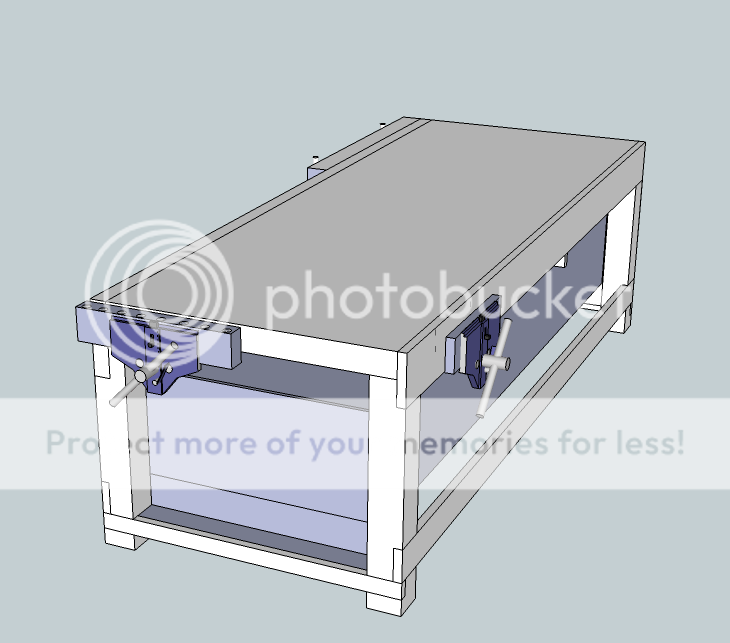
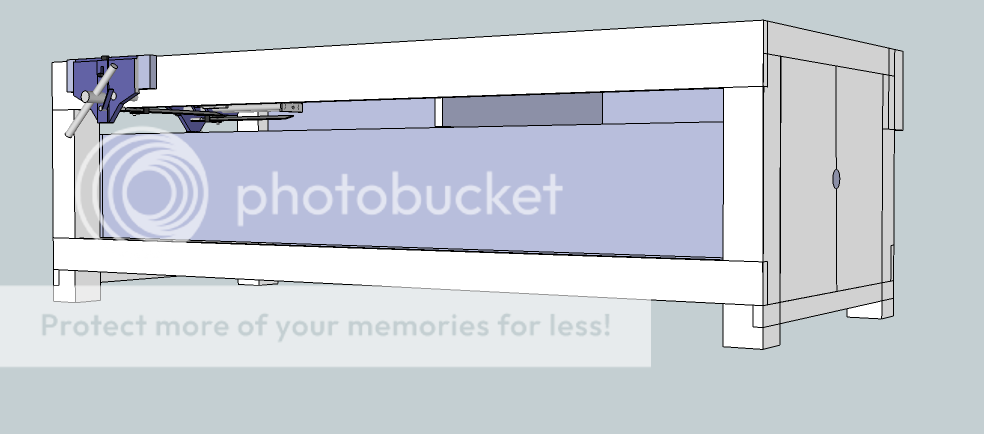
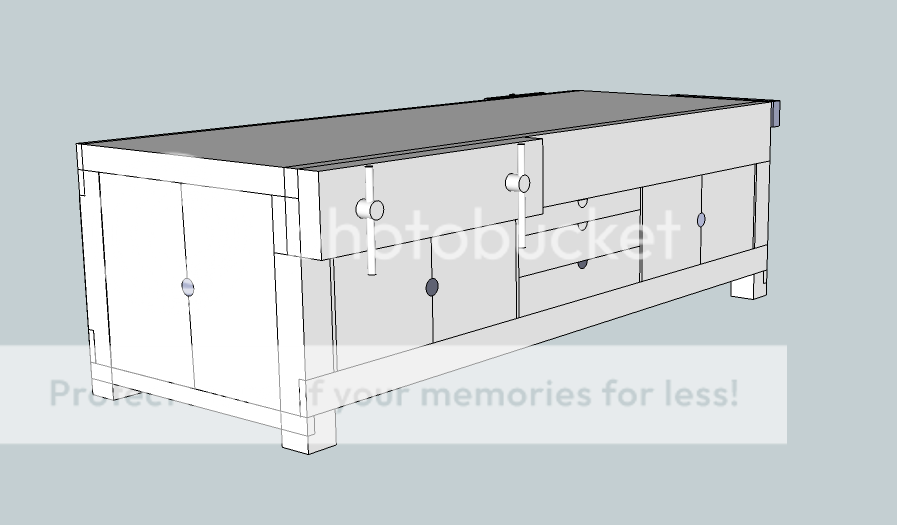
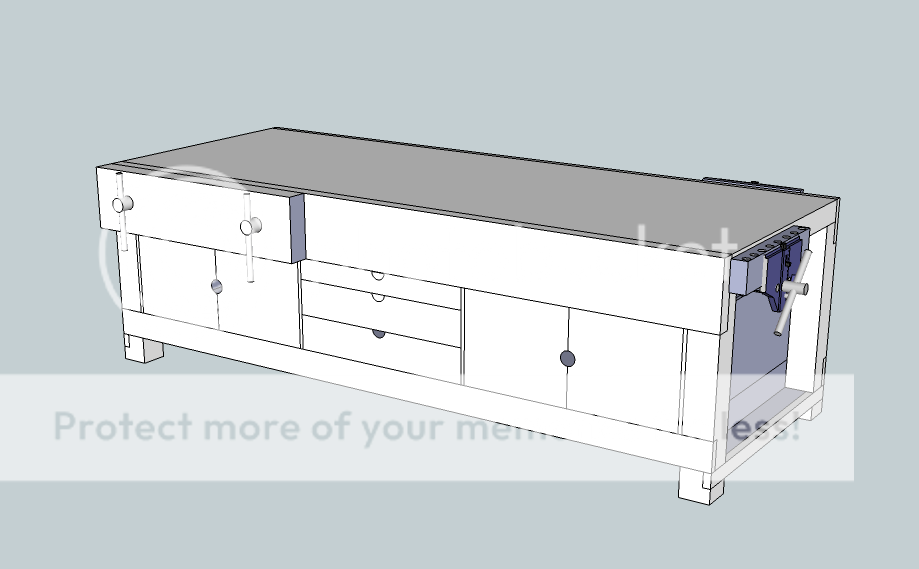
Finally decided to make a new bench, that hopefully will last longer than me. I thought I'd tap into the wealth of knowledge on here and see what people might say. Here are a few Sketch Up pics of what I had in mind. Any imput will either be very welcome or ignored :D :ho2

Woodworkbench_zps40f52128.png


Woodworkbench4_zps9d2104bb.png


Woodworkbench3_zps69851c1e.png


Woodworkbench2_zps18ca749e.png
 
i am not sure on your dimensions, but it looks plenty wide enough in my opinion.

If it was my bench, i would end up with a pile of stuff pushed to the far side, and it would become a dumping ground. other people work in different ways.

i would also make your aprons flush with the front legs, so that you can clamp to both if necassary. this may be the case- i cant quite see.

maybe some dog holes...?
 
This is just a prototype design, the legs are flush, bit difficult to see and there will be lots of dog holes. The width will be about 30 inches, I work on some big stuff and need the width.
 
it is, of course, all relative to what you are likely to build, so i take your point on the width.

It looks nice and heavy, and the aprons/rails/stretchers should make it good and sturdy.

give some thought to height, and try things out- even a pile of boxes- i found that almost all recommendations were too low for me, and i am only 5 10"
 
Yes, make it 3" - 4" too high. It gives you room for adjustment when finished - you may find it better than you thought left higher, if not you may only need to trim an inch or so. You won't really know until it's made. I made mine a couple of inches too low, listening to someone I shouldn't have.
 
I made something similar when I first started DIY carpentry, based on a design in a book called "The Complete Home Carpenter". I still use that bench after 30 years, so they must have got something right :D

I have 3 suggestions/observations :-

1) My bench tended to 'jump about a bit' and walk across the floor when doing something energetic on it. I didn't want to bolt it down, so I made the base hollow (about 4" deep) and filled it with builder's ballast. This both adds weight to hold it in place, and damps-down vibration. I was lucky in that I did this back in the days when we had summers, so I could spread the ballast out out-of-doors first to make sure it was really dry.

2) I'd put a shallow trough at the back of the top, about 1" deep by 4" wide - it's very useful to be able to put e.g. screws down on the bench, where they can't roll off or mark misplaced wood. Give the trough sloping ends so it can be brushed clean easily.

3) Not sure what you propose to make your bench-top from. Mine is 3 layers of chipboard, the top layer being screwed on from underneath. I've replaced my top layer 3 times over the 30 years since I made the bench, only takes a day and makes it almost like new. Chipboard is probably a bit harsh, you might consider a top layer of something kinder to the workpiece (beech kitchen top, perhaps ?).
 
Daft question - Why are there vices on three sides of the workbench? I assume it's not going up against a wall?
 
morfa":2g96lo1g said:
Daft question - Why are there vices on three sides of the workbench? I assume it's not going up against a wall?

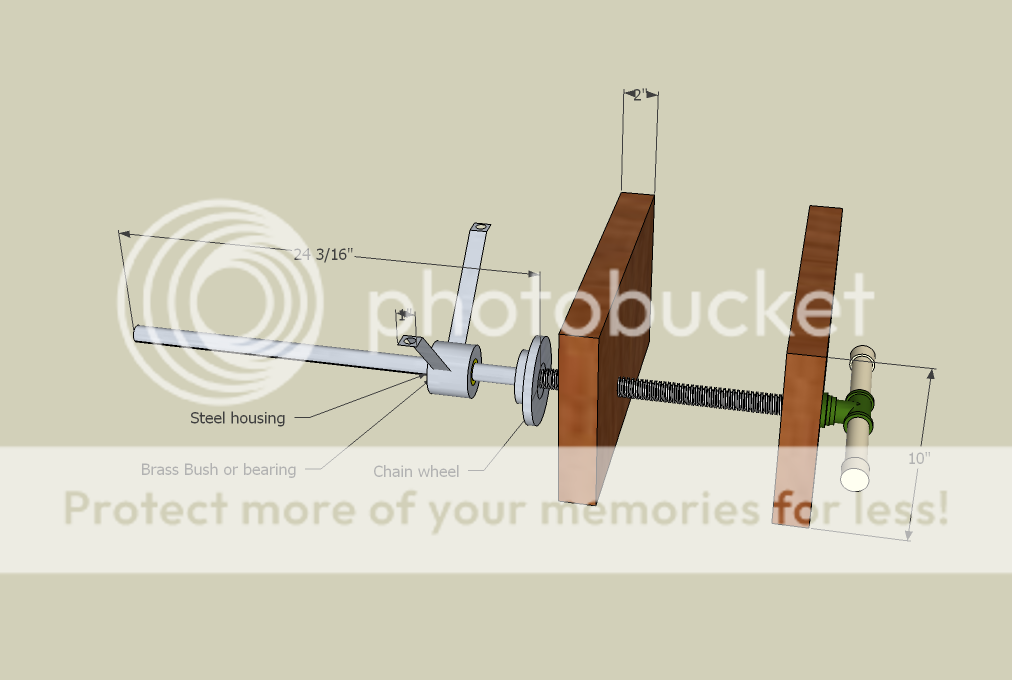
It will be free standing. I put in three vices because each will have a different use. The twin screw vice will be for large pieces and will be about 24 inches long and open to around 14 inches. I intend to make the vice with two york tail vice screws, modified to work as a twin screw vice. see pic

ShoulderViseScrewmod_zps41f3e6dd.png


The other side vice would be for smaller items and the end vice will be used as just that, for bench dog holding mainly
 
WoodMangler":34vl72pt said:
I made something similar when I first started DIY carpentry, based on a design in a book called "The Complete Home Carpenter". I still use that bench after 30 years, so they must have got something right :D

I have 3 suggestions/observations :-

1) My bench tended to 'jump about a bit' and walk across the floor when doing something energetic on it. I didn't want to bolt it down, so I made the base hollow (about 4" deep) and filled it with builder's ballast. This both adds weight to hold it in place, and damps-down vibration. I was lucky in that I did this back in the days when we had summers, so I could spread the ballast out out-of-doors first to make sure it was really dry.

2) I'd put a shallow trough at the back of the top, about 1" deep by 4" wide - it's very useful to be able to put e.g. screws down on the bench, where they can't roll off or mark misplaced wood. Give the trough sloping ends so it can be brushed clean easily.

3) Not sure what you propose to make your bench-top from. Mine is 3 layers of chipboard, the top layer being screwed on from underneath. I've replaced my top layer 3 times over the 30 years since I made the bench, only takes a day and makes it almost like new. Chipboard is probably a bit harsh, you might consider a top layer of something kinder to the workpiece (beech kitchen top, perhaps ?).

1/ I'm makeing the bench out of some English Oak I have had in store from the 1980's so it should be heavy enough

2/ I may incorperate a trough in the middle, like a roubo bench / school bench or have a tool trolley beside the bench.

3/ As said will be of English Oak
 
Hi, Dangermouse

I filled in my tool well, it gives you a bigger surface to work on, try dry fitting a small table with only 3 legs on the bench its not easy :shock:

Pete
 
I tend to agree with you pete, I think i'll opt for a tool trolley beside the bench.
 
I know that I am untidy enough to need a tool well and would not want to be without it.
For the brief period when I need to assemble something bigger than the bench, I just use a piece of decent flat chipboard or plywood kept for the purpose. This also helps if I need to screw temporary bearers on or clamp across the thickness of the board.
 
Mmm I would need to do some serious tidying to do that.

DSC_9957-1.jpg


:lol:

Pete
 
Pete, that photo should be in a gallery. Very atmospheric indeed! Love the black and white treatment.
 
Back
Top