I’ve a project that has to be completed by Christmas for an extremely discerning customer……….my 15 year old daughter. I’ve got to “redo” her bedroom, which was given a generous coat of “ikea” when we bought the house a couple of years ago. The Swedish menace furniture is too large for her room, and if theres one thing a 15yr old needs it’s space. So a cabin style bed, with integrated drawers and a pull out desk, a double wardrobe and a dressing table all have to be done before the big man comes in December.
First sticking point – the workshop. Until a fortnight ago there was plenty of work surface and storage but it wasn’t practical. Major problem was lack of assembly space. So out with the screwdriver and away to the shed with about half the benchwork and cupboards, the shed is now tidy !
So first project is to build a more suitable work bench, available budget is pretty much big enough to buy a sheet of 18mm MDF with which to finish the top off with.
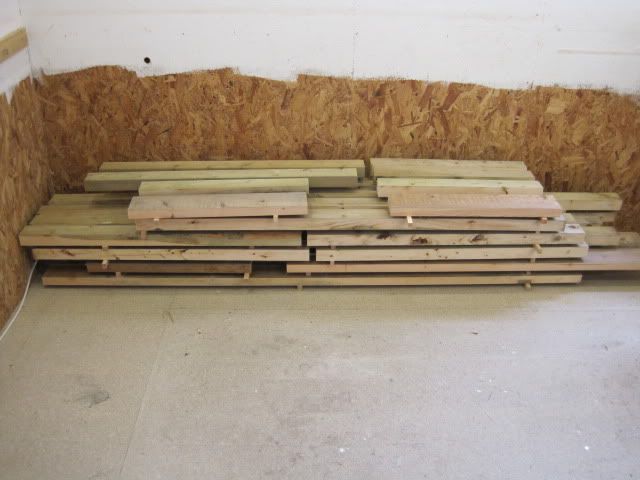
I’ve some lengths of decking timber and some large “planks”, donated by a mate when he moved, for the frame work. Within the frame there will be power tool storage and an odds and sods cupboard. I would sketchup my idea but I fear the end result would be vastly different to the initial design. This is going to be a design in progress as well as a work in progress.
A selection of the materials:

A few hours on the TS and P/T and I’m left with this: I’ve over estimated what I need to cater for design changes.
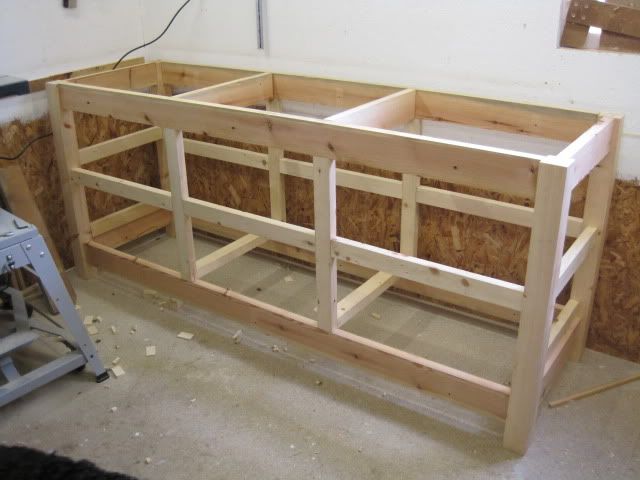
I’m keen to try out some stuff I havn’t done before (something that doesn’t include pocket holes and biscuits) so the plan is to mortice and tenon all the frame joints. Hopefully the only screws on the whole build will be used to hold the mdf on top – we’ll see !
So on to the first tenons, fettled the cheap Axi SCMS so it was cutting straight and square then set the depth of cut, I’ll add here that I thought about cutting by hand, then didn’t think about it again.
Once the shoulders were cut I realised that there had been a fair bit of “flex” in the SCMS carriage, so although the shoulders were nice and square they were a tad deep, resulting in a skinny tenon. Not overly worried though as the frame will be well braced when complete so these first tenons won’t be overworked.
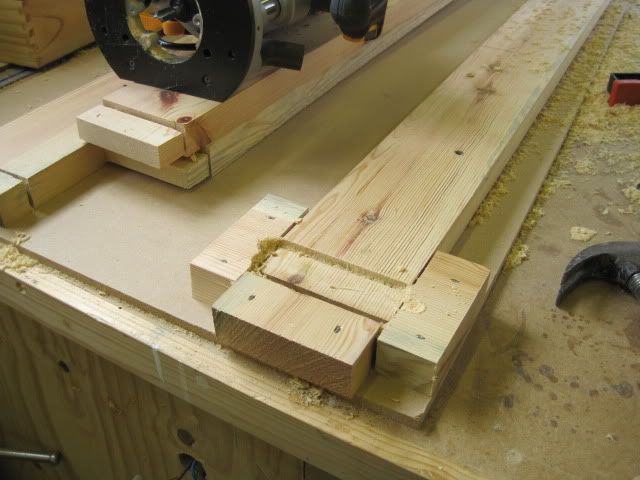
For the faces (is that the correct term ?)I put together a heath robinson jig and got the router out.
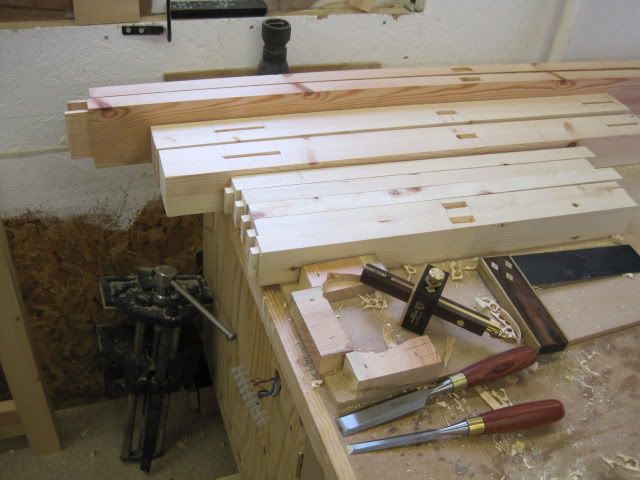
First “skinny” tenons:
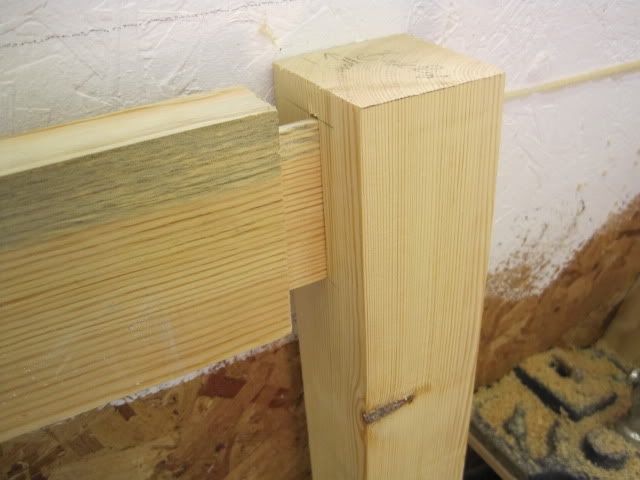
Mortices were then marked out using a temperamental draper gauge (shiny marples one will arrive on Monday to replace it), drilled out on pedestal drill then finished with a chisel. I’m pretty chuffed with the result seeing as though it’s my first attempt.
First mortice.

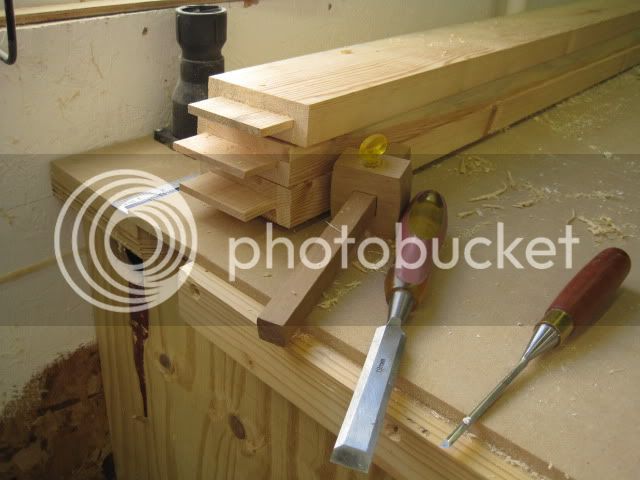
Snug fit:
Only a couple of dozen more to go. New bandsaw arriving from Yandles some time next week, so cutting the tenons should be quicker than it is faffing around with the SCMS.
Vinny
First sticking point – the workshop. Until a fortnight ago there was plenty of work surface and storage but it wasn’t practical. Major problem was lack of assembly space. So out with the screwdriver and away to the shed with about half the benchwork and cupboards, the shed is now tidy !
So first project is to build a more suitable work bench, available budget is pretty much big enough to buy a sheet of 18mm MDF with which to finish the top off with.
I’ve some lengths of decking timber and some large “planks”, donated by a mate when he moved, for the frame work. Within the frame there will be power tool storage and an odds and sods cupboard. I would sketchup my idea but I fear the end result would be vastly different to the initial design. This is going to be a design in progress as well as a work in progress.
A selection of the materials:
A few hours on the TS and P/T and I’m left with this: I’ve over estimated what I need to cater for design changes.
I’m keen to try out some stuff I havn’t done before (something that doesn’t include pocket holes and biscuits) so the plan is to mortice and tenon all the frame joints. Hopefully the only screws on the whole build will be used to hold the mdf on top – we’ll see !
So on to the first tenons, fettled the cheap Axi SCMS so it was cutting straight and square then set the depth of cut, I’ll add here that I thought about cutting by hand, then didn’t think about it again.
Once the shoulders were cut I realised that there had been a fair bit of “flex” in the SCMS carriage, so although the shoulders were nice and square they were a tad deep, resulting in a skinny tenon. Not overly worried though as the frame will be well braced when complete so these first tenons won’t be overworked.
For the faces (is that the correct term ?)I put together a heath robinson jig and got the router out.
First “skinny” tenons:
Mortices were then marked out using a temperamental draper gauge (shiny marples one will arrive on Monday to replace it), drilled out on pedestal drill then finished with a chisel. I’m pretty chuffed with the result seeing as though it’s my first attempt.
First mortice.
Snug fit:
Only a couple of dozen more to go. New bandsaw arriving from Yandles some time next week, so cutting the tenons should be quicker than it is faffing around with the SCMS.
Vinny