My TS-200 fettling and saw/RT bench build thread...

UKworkshop.co.uk

Help Support UKworkshop.co.uk:

This site may earn a commission from merchant affiliate links, including eBay, Amazon, and others.
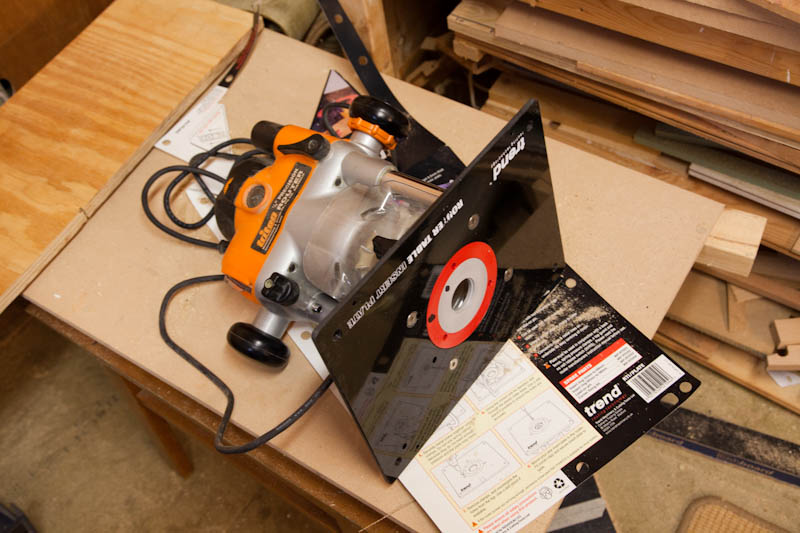
Should have a mitre gauge with luck. Seller seems diabolical with emails but i phoned and agreed to send them some postage money by paypal so they could send the mitre gauge on to me. So if they ever check their emails for paypal it should turn up next week some time.

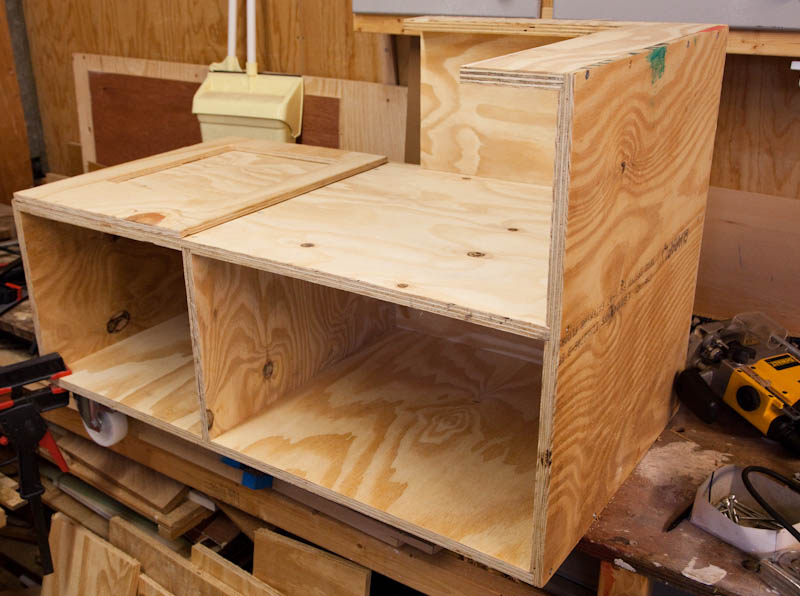
Still playing with the design....

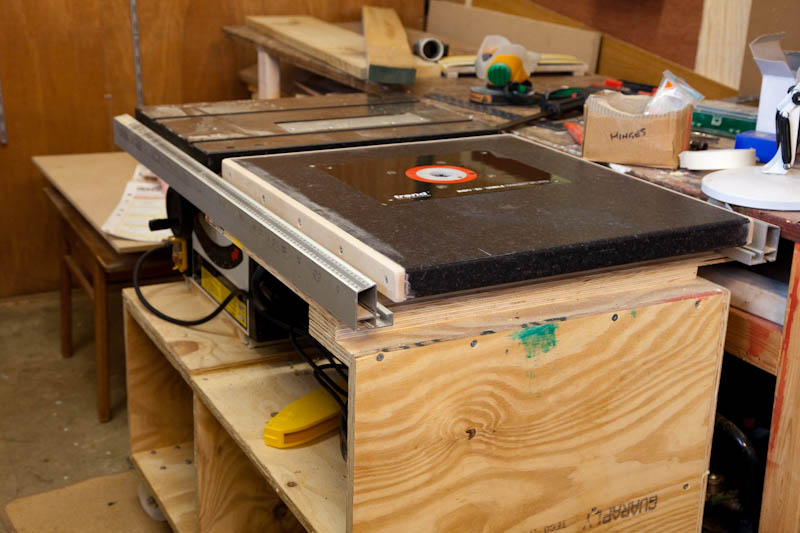
It occurred to me that the bench will be along a wall most of the time and would need pulling out to use it - which is fine for sawing but seems more effort than need be when doing a small routing job.

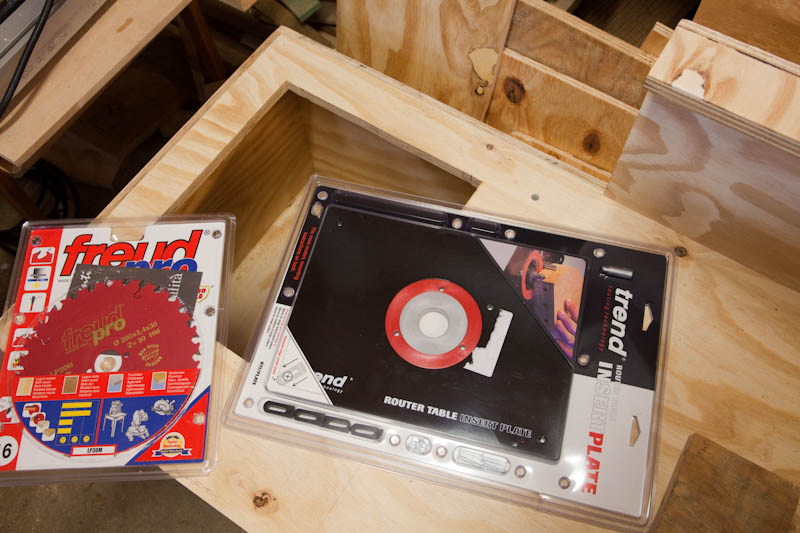
On my current B+Q el cheapo router table I threw the plastic fence away and just clamp a batten across as a fence..... so I've changed the table top edges to have overhangs suitable for clamping to - which would mean i could clamp a fence 90deg to the one in the drawing and run the workpiece along the bench instead of across it if that makes sense :)

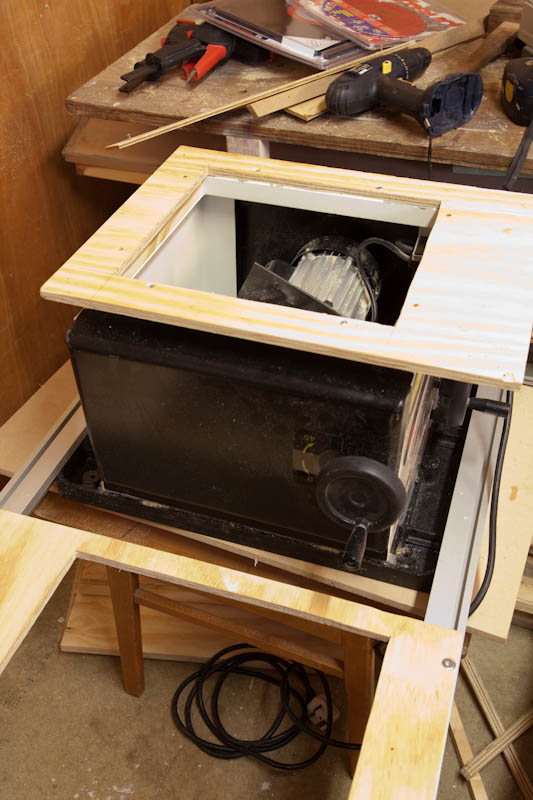
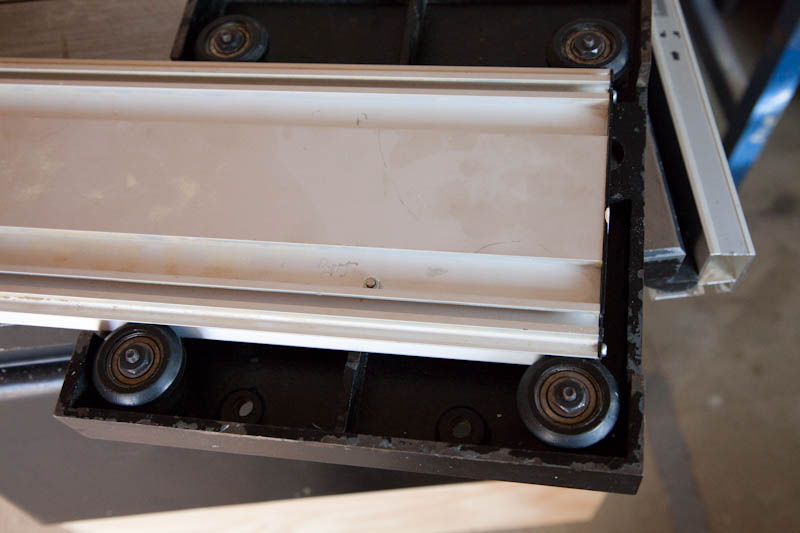
I've 'hidden' the nearest aluminium extrusion saw fence mounting rail to make it clearer..
ts-42.jpg
 
Interesting design Robert. It's hard to work out the best configuration isn't it? I think mine will very much be a '1st Revision'. The only way to see if things will work is to suck it and see.
 
Needed the wheels for my cabinet to check the height so took a look at the sliding table while I was waiting. It slides a bit like it has slightly square wheels!

Taking the rollers off they are not square but they do have a lot of digs in the plastic
ts-43.jpg


there was also some lumps of compressed sawdust in the runner
ts-44.jpg


the wheels turned up from Toolstation just as I had cleaned off the rust and cup rings from the table itself.
ts-45.jpg


With the bearing free to run in the vise I lightly held the ROS to it with a 320 grit disc on. The wheel spun as it lightly sanded - just enough to take off the high spots.
ts-46.jpg

it feels better just running a single bearing in the groove now. Re assembly can wait until I've made the cabinet.

Decided to go with the last design in my previous post. Set the saw up on an old chair frame and no dust extraction of course.... and rapidly produced a set of blanks from the sheet of 18mm construction grade ply I bought this morning.
ts-47.jpg


Also discovered you can cut the wrong size really easily by looking at the wrong scale on the fence. What a daft idea making a reversible fence handed so you need to look at a different scale according to which way round it is!

While I think of it.... why is there a shallow height side anyway? I'm using the shallow side as that is the way it was left. Also seemed to me that the fence not being full width of the table wasn't helping when cutting panels.

Just cutting those few pieces I could see how the sliding table could be useful so I'll have to come up with a quick fix and remove connector so I can fit it easily when I need it and leave it off the rest of the time.

Edit. The blade is blunt but didn't do too bad. 30T freud blade is on order. hoped it might turn uo today but seems not.

Now to start making some shoulder cuts to some of the panels with a router...
 
RobertMP":3gsbdfg5 said:
Also seemed to me that the fence not being full width of the table wasn't helping when cutting panels.

Just cutting those few pieces I could see how the sliding table could be useful so I'll have to come up with a quick fix and remove connector so I can fit it easily when I need it and leave it off the rest of the time.

the short fence is a protection against trapped kickback when ripping wood (you can buy a full length fence from axminster - but with your design it will soon be irrelevant anyway)

regarding the sliding table with my kity 419 ed (who owned it previously) has just replaced the nuts on the bolts that mount it with plastic handles , so it is easy to quickly release them and slide the table on and off.
 
RobertMP":2xr0p9iq said:
Now to start making some shoulder cuts to some of the panels with a router...

Robert, not sure if I'm understanding you correctly but if you mean cutting slots at the edge of the plywood (rather than away from the edge) then I avoided this, i always cut the slots within the plywood so the connecting piece is pinched on both sides. Also needed to do it because there was no top to the unit (plywood at least) and at the base the base was 3 inches above the bottom with a 3 inch support beam underneath the strengthen the whole unit (without which there is a fair chance of the unit sagging I think)
 
Bit late now as the deed is done :)

All held together with screws for now. plan is to glue it and use the screws instead of clamping it up... seeing as I don't have enough suitable size clamps. Wheel is just clamped on to look at :)

holes for dust exit to be cut yet too.

ts-48.jpg


Close up of a bottom corner.
ts-49.jpg


Being 18mm construction ply it seems reasonably strong. guess I could add a batten to the front underneath between the wheels.
 
When you are cutting very think pieces on the table saw you will be thankful for the shallow sided fence. You could make a push stick that runs along it as well to push the wood clear of the blade. Try that with the fence upright and see how far you get :wink:
 
Some useful items arrived today. Chose the Trend plate as it was the only one I could get via Amazon and I had a voucher I hadn't used.
ts-50.jpg


Having checked the position by putting the saw on the new table i marked then fitted and sealed the flange plate foot to the underside of the saw.
ts-51.jpg


Dust chute... I did draw one in sketchup but it didn't seem worth all the head scratching with angles so I screwed temporary end plates onto 2 bits of mfc offcut, marked the shape then just used a hand saw to keep the cuts in one plane.
ts-52.jpg

^ I do have a wood vise* - it's what the metal vise is clamped into. too lazy to take it out :)

Having watched the sawdust being propelled out from under the saw when i used it with no extraction it was obvious most dust is directed straight down. So I made a compound angle to the chute so that the stream of dust is bounced towards the extraction point... in theory.
ts-53.jpg


Just been out and got a drainpipe connector so I can make the hole for that now. Then it's take it all apart and put it back together with glue this time.

* vise or vice ? lol
 
All glued and screwed together now and dust chute too. With the idea that i can see if dust builds up in the chute I sprayed a bit of white aerosol in the inside. The saw is ready to be rolled over into position.
ts-54.jpg


I knew about this miscalculation earlier. I seem to have ended up a thickness out with the support to the router table end. Easily fixed by cutting down some offcuts to fill the gap.
ts-55.jpg


Router table top to make next. I did look at the fireback laminates in Homebase and they looked ideal. Shame there were no damaged ones going cheap as I'm not paying £25 or £35 for one! So lump of kitchen worktop it is for now. Should be relatively easy to change the table top if I see something better at a later date.
 
Pressing on...

I've fitted the Trend plate to the Triton router. Of course the screws were too short and of course the thread on the router is not metric! Well they weren't but they are now. Ran a M6 tap in a battery drill in and out of the tapped holes. Cut a deep enough thread to hold onto the screw OK but wouldn't want to try tightening it too much. meant I could use some M6 x 20 countersunk screws that I already have. Plenty strong enough.
ts-56.jpg


trends plate smells horrible when you drill it! And why are the insert rings so tight?? Levering them out with a screwdriver dents the near edge. I've removed part of the snap in lip and marked that point with a marker pen so I know where to lever to get them out without quite as much force.... still tight though.

Then there is the edge of the plate.... I made a precision fit cut out using clamped on bits of 12mm mdf template. Put the plate in place and it seemed tight dropping in the last 2 mm but it went. go to take it out again and it breaks away the laminate in 2 corners! there is a moulding flash line running around the edge of the plate and that is what ruined my nice cut out. Sanded it off now.
ts-57.jpg

I couldn't be bothered messing about with the little plastic toggles they give you so I glued some small beech blocks into the corners and drilled for screws. Prepared and glued + screwed on some more beech to edge the panel. Takes a lot of time for not much to show.

...........

I put some masking tape over the table slot where the blade rises and turned on my shop vac. The hose contracted showing it could not draw enough air so I'm quite pleased with my dust sealing and chute arrangement. I reckon if i do make a ZCI it should contain most of the dust pretty well. Question then is - is there enough flow to carry it out of the saw and into the vac...
 
Nice to know someone is looking. Been talking to myself for a while now :lol:

Fitted the router table top and called it a day
ts-58.jpg


ts-59.jpg


This is the simple fence I used to use on the old B + Q benchtop table. As you can see with the gap between the table top and the saw and the space under the ends I can clamp a simple fence crossways on this table.
ts-60.jpg


Proper fence as per my sketchup still to do and some drawers to make. Need to get a NVR switch from somewhere too as the one with the B+Q table fell apart.

Once it is all done I need to attack my 8ft x 2ft bench you can see in the background above. Plan is to chop about half of it off and then I'll have a home for the new saw/router bench.
 
Was that gap between the two tables intentional??? :D

It's a great idea, though, and appears to work very well for you. :)
 
OPJ":23hwbnyl said:
Was that gap between the two tables intentional??? :D

It's a great idea, though, and appears to work very well for you. :)

Yes :)

See the sketchup view at the top of the page (p5).

The idea behind it was that the bench will normally be against the wall and the 'normal' fence would be 90 deg to the wall so it would need pulling out to use it. being able to take a simple clamp on fence like above means I can do the odd small job without pulling the unit out.
 
Another update...

I chopped a table saw sized lump off of my 8ft x 2ft layout table bench thing... which means I can turn the saw sideways to use it and still get past it :)
ts-61.jpg


Decided the sliding table could be useful while making the drawer boxes so thought I'd sort that out first.

There were no end stops of any kind fitted to the sliding table track. So not knowing what they should look like I just made my own.
There is a cast web central on the underside of the iron table which is milled back to miss the track by about 5mm. I drilled and tapped the web and fitted a M4 cap screw. I then drilled through the aluminium track and fitted M4 cap screws and nuts near the end - positioned so the screw heads clash when maximum travel is reached. Works well and gives as much travel as possible.
ts-62.jpg


I can't have anything sticking out the side of the saw when the sliding table is not fitted so the original brackets that mount the sliding assembly to the saw table top were out of the question.
So I set to with some heavy gauge steel sheet, a couple of bits of 40mm angle iron, a metal cutting blade in the jigsaw and metal cutting blade in the scroll saw. Only the angled slotted holes were cut on the scroll saw. Very slow process but the tiny blade cuts like a laser.... albeit a wobbly one :)
ts-63.jpg


I drilled the saw chassis and fitted threaded bushes for the M4 x 20 screws.
ts-64.jpg


I fine tuned the joint between the angle iron and the plate to get the level right and the table running parallel to the saw blade (set it to the table tee slots as the blade is already true to those. Then I tightened the screws holding my plates to the saw chassis and double checked alignment. So now I can just loosen the 6 screws on the saw chassis and lift the sliding table away. When I put it back again it is perfectly aligned.
ts-65.jpg

You can see the head of the screw that acts as a travel stop in the above picture too.

I imagine the sliding table will be used mostly for square cuts on panels so I have arranged the track position such that I get maximum travel which ends when the squaring arm is just past the blade axis. I can see this causing problems with travel if I want to cut angles but I guess finding the ideal position will come with experience.

Anyway just need some drawers and a router fence now and it's job done.
 
Be careful with the ends of the sliding track, they are as sharp as hell. On the advice of Rob (Woodbloke) I made a wooden plate that fits into the track end with rounded corners so when I walk into the end of the track I don't rip a hole in my leg. :D

Although the far end of yours looks like it has a plate riveted over it?

Mick
 
MickCheese":2zepzuu9 said:
Be careful with the ends of the sliding track, they are as sharp as hell. On the advice of Rob (Woodbloke) I made a wooden plate that fits into the track end with rounded corners so when I walk into the end of the track I don't rip a hole in my leg. :D

Although the far end of yours looks like it has a plate riveted over it?

Mick

too right , mine has got a rounded wooden dish on it that ed made, handy for keeping allen keys etc to hand as well
 
There are screwed on painted steel plates on both ends that look original so nothing particularly sharp.

Quite pleased with my hook on hook off mounting brackets as it is very easy to take the track assembly off and put it back accurately positioned :)

Made the drawers up today and fitted them. Was nice being able to use the sliding table then just hang it up out of the way afterwards.

Should get round to the router table fence tomorrow. More (and probably last) pictures then.
 
Back
Top