my new workshop set up for lathe

UKworkshop.co.uk

Help Support UKworkshop.co.uk:

This site may earn a commission from merchant affiliate links, including eBay, Amazon, and others.

devonwoody

Established Member
Joined
11 Apr 2004
Messages
13,493
Reaction score
25
Location
Paignton Devon
When not in use, lathe is positioned against the wall out of the way of the SCMS saw.


setup1w.jpg


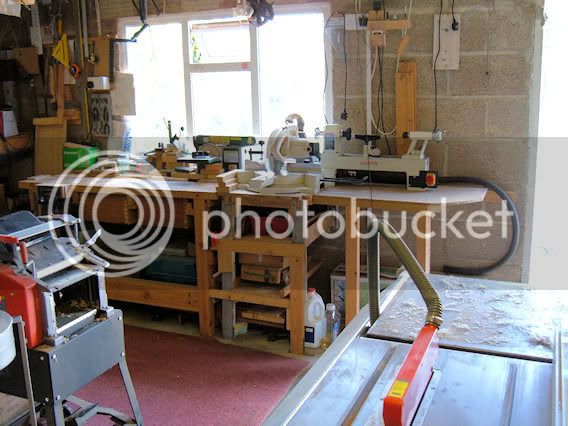
When intended to use lathe I will drag it forward to this position.

setup2.jpg


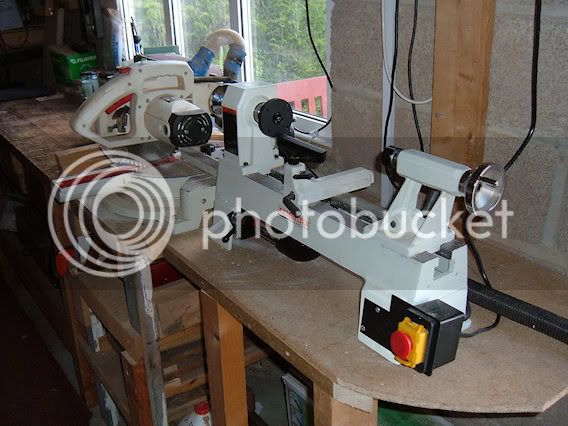
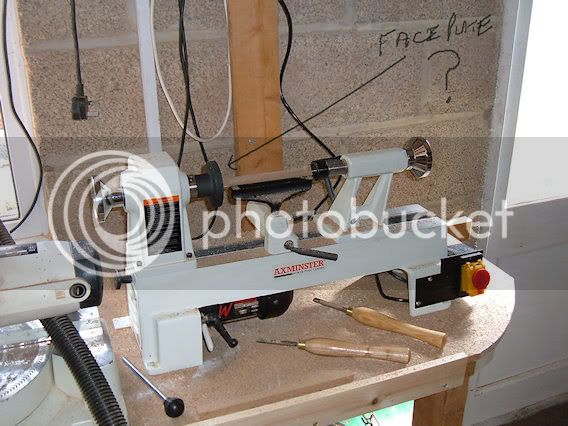
At he present moment the lathe rocks so I don't know at the moment if the castings is twisted or my bench is at fault. I intend to investigate again tomorrow afternoon.
 
Took me a minute or two to work out what had moved between the two pics :oops: . I assume the lathe just sits loose on the bench - not an ideal method IMHO, even for a heavy cast jobby like yours, especially if it doesn't sit firmly. If you put an out-of-balance piece on the lathe, there's every chance it will vibrate itself all over the place! Could you make some sort of rail system to hold it down, but still be able to slide it to and fro?

One other thing I noticed which made me think. Your on-off switch is on the tailstock end, and my first thought was that this might be more awkward (dangerous?) for a righthander. But is this the case? My old Avon had the switch on the motor mounting, and so I'm programmed to go left to switch off. But on my new Mystro, it's halfway along the stand, and it's taking me a while to reprogramme my reflexes accordingly. Any opinions as to where is the best/safest place to have switches?
 
dickm":2prqly4g said:
... Any opinions as to where is the best/safest place to have switches?
anywhere convenient to hand with clear access... mine are all on the left...
whereas I'm a little to the right.... of Genghis Khan :lol:
 
Looking good DW :D
I can see a tool rack behind the lathe soon with a grinder next to it,then some shelves for all the finishes,abrasives,and then a rack for all the blocks of timber.
A vision of the not to distant future :lol: :lol:
Don't get asking me for the Lotto numbers though :lol:
 
Switch on the right is fine by me if you get used to it from the start John, at least you can move out of the line of fire if you need to stop machine in a hurry, I have a remote "emergency stop" to the right of my machine for just this reason.

I would mount machine on a false base board and lock this to your bench with a couple of hand operated knobs/bolts into captive nuts in the workbench when in working position.
 
Thanks for all tips and advice above, definitely going to lock it down, and I like the idea of shelves etc. .

Started thinking with some whacky ideas, how do you make square boxes with a lathe. :)
 
devonwoody":1kwxfr7t said:
Thanks for all tips and advice above, definitely going to lock it down, and I like the idea of shelves etc. .

Started thinking with some whacky ideas, how do you make square boxes with a lathe. :)

What's wrong with round ones? Simple version here

More fancy ones here

Slippery slopes startimg :lol:

Pete
 
Prepared a piece of oak to practice turning with the new chisels, 19mm squared.

oak1w.jpg


turned this small piece. But how do you get the prongs to centre correctly on the drive shaft and tail end?
The prongs seem to wander to their fancy.

oak2w.jpg


When using the drive prongs (4) would it be better to remove the faceplate for safety reasons?

oak3w.jpg


BTW I can report there is no noticeable vibration on the workbench, but I do intend to add a thicker base and would like the rubber mat idea but cannot see how I could then slide the lathe into its working position.
 
John, re drive centre prongs.

Mark centres, place wood on firm surface (floor) position centre point on mark and strike end with wooden mallet or other non bruising hammer until prongs make adequate impression to drive.

In very hard wood a small (3-4mm) hole to accommodate point for starters may help.

You do have Keith Rowleys book don't you?

Tail stock end should have live centre for preference, once again on hard wood a small drilled hole may help.
 
CHJ":10nw4om5 said:
John, re drive centre prongs.
Mark centres, place wood on firm surface (floor) position centre point on mark and strike end with wooden mallet or other non bruising hammer until prongs make adequate impression to drive.

Just a couple of points :)lol:) to add to Chas' sound advice:
Making a saw cut (Tenon/gents/band) on the 'cross hairs' will help to locate the prongs.

On your drive dog make a centre pop mark... mark the wood with a pencil to correspond.... it can help if you need to take the piece off and on for any reason :wink:

Faceplate... if it interferes with locating the drive dog then remove it...
 
Quote.


You do have Keith Rowleys book don't you?


Err. err, I told the wife I didn't need to order anything else, so she hit me with a new fridge, coming Tuesday. :wink:

Thanks for the tips on centring.
 
Those saw cuts make a difference to the lining up
Next problem, my face plate wont come off now.
Is it normal thread of lefthand?

Do you whack it with something to release?
or WD40?
 
Use the levers (rod) hold the left one steady and gently tap the right one with a mallet (this one turns towards you) hth
 
Back
Top