exigetastic
Established Member
I've finally been inspired to make a piece of "furniture"
Basically I was short of shelf space and had a load of spare 12mm ply left over from lining my shed, so I have decided to build a basic cabinet.
I've never made anything this small, used a router table, or accurately cut boards to square before!!! Up until now every project has pretty much involved rough sawn timber a cheap SCMS an impact driver, and 3" screws (oh and a hammer for fine adjustments") )
)
So please be kind with your comments!!!
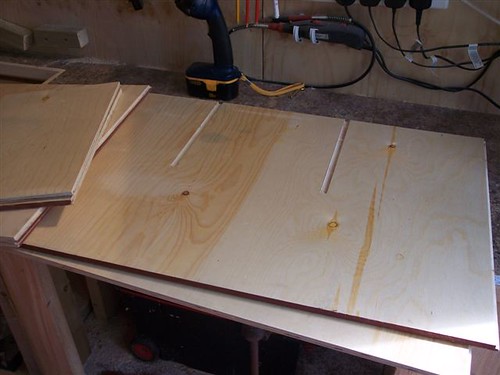
Firstly I cut the timber down to size with a circ saw using a spirit level for a guide. My plan was to have 2 sides measuring 600x 900 (600 is the depth of my worktop, 900 is the length of my spirit level ) The top and bottom are 470 x 600 (470 was determined by an existing space I have to put the cabinet, 600 is obviously the depth again)
My first attempt didn't exactly come out straight, so I modified my technique a bit, and firstly cut the boards a few mm over, then used a straight bit, and some planing shims on my router table to bring back down to the line. Bingo some nice square, straight boards 8)
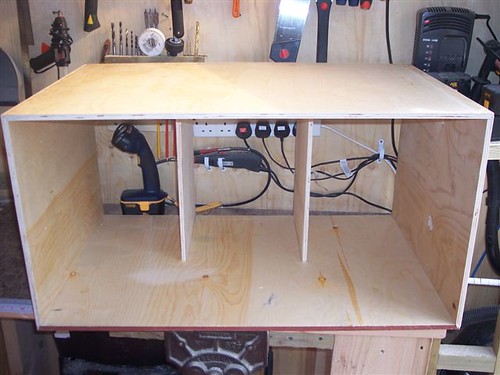
Next I started on the joints. Rather than simple butt joints with screws/ braces I decided I'd try and go for a glue only approach. Not sure of the name of this type of joint, but this is what I came up with....
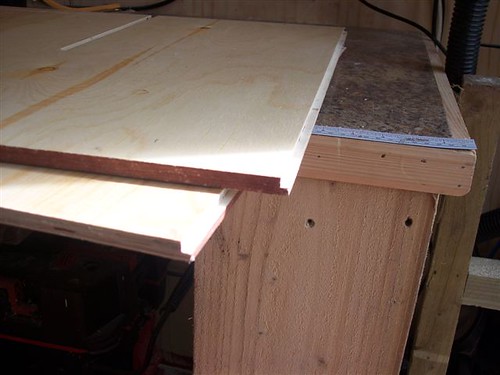
Again using a straight cutting bit in my router table, with the fence 6mm back and the bit protruding 6mm up (going via 3mm first pass). I ran these on all the edges where the board meet.
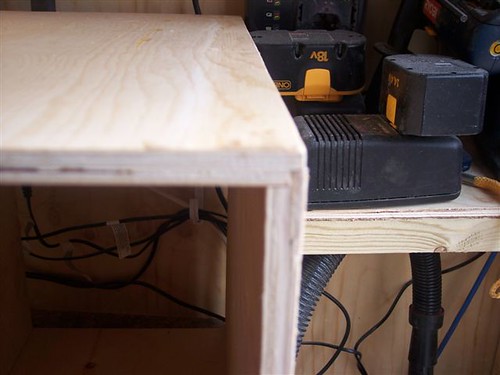
Finally I routed some rebates using a 12mm straight cutting bit in both sides to fit the internal shelves. Remembering to mirror them :lol:
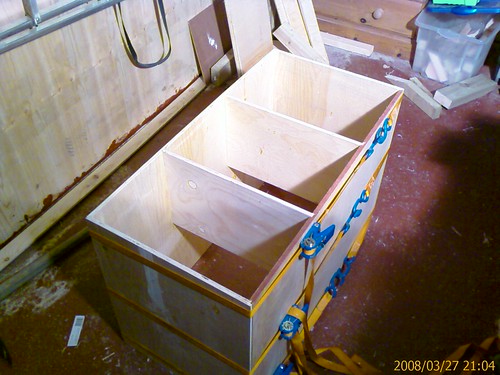
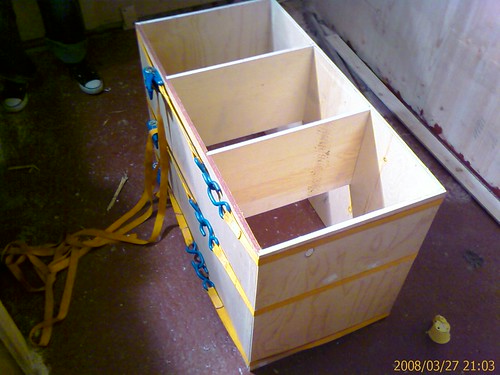
This is the dry fit of the components so far...
I need to get some new wood glue as the stuff I have is drying white, and come up with a plan for clamping.
Not sure what I'll do about the back as I'm going to put it on a wall made of the same stuff any way.
All in all I've enjoyed this so far, and learnt a great deal.
Feed back greatly recieved!
Basically I was short of shelf space and had a load of spare 12mm ply left over from lining my shed, so I have decided to build a basic cabinet.
I've never made anything this small, used a router table, or accurately cut boards to square before!!! Up until now every project has pretty much involved rough sawn timber a cheap SCMS an impact driver, and 3" screws (oh and a hammer for fine adjustments
)So please be kind with your comments!!!
Firstly I cut the timber down to size with a circ saw using a spirit level for a guide. My plan was to have 2 sides measuring 600x 900 (600 is the depth of my worktop, 900 is the length of my spirit level
) The top and bottom are 470 x 600 (470 was determined by an existing space I have to put the cabinet, 600 is obviously the depth again)My first attempt didn't exactly come out straight, so I modified my technique a bit, and firstly cut the boards a few mm over, then used a straight bit, and some planing shims on my router table to bring back down to the line. Bingo some nice square, straight boards 8)
Next I started on the joints. Rather than simple butt joints with screws/ braces I decided I'd try and go for a glue only approach. Not sure of the name of this type of joint, but this is what I came up with....
Again using a straight cutting bit in my router table, with the fence 6mm back and the bit protruding 6mm up (going via 3mm first pass). I ran these on all the edges where the board meet.
Finally I routed some rebates using a 12mm straight cutting bit in both sides to fit the internal shelves. Remembering to mirror them :lol:
This is the dry fit of the components so far...
I need to get some new wood glue as the stuff I have is drying white, and come up with a plan for clamping.
Not sure what I'll do about the back as I'm going to put it on a wall made of the same stuff any way.
All in all I've enjoyed this so far, and learnt a great deal.
Feed back greatly recieved!