


OPJ
Established Member
Hi guys,
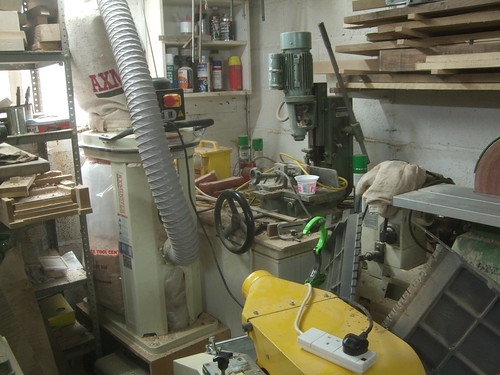
As some of you may recall from almost a year ago, I bought an old cast iron benchtop mortiser (labelled "Smiths Woodworker"; very similar to Multico in appearance) off eBay (barely visible in the shot below... ).
).
Overall, I'm still impressed and very pleased with it - it remains a vast improvement over my former Fox mortiser! :wink: It has a cast iron bed that moves left and right but, not forward and back. This means I have to manually adjust the fence by slackening off the two mounting bolts and sliding it (near-impossible to keep it parallel and square to the chisel).
That's the only thing I really don't like. One suggestion I was given previously was to set it once and cut a load of spacers to reduce the distance from the fence to the chisel. However, I'm now thinking of building a pair of setting jigs, like this:
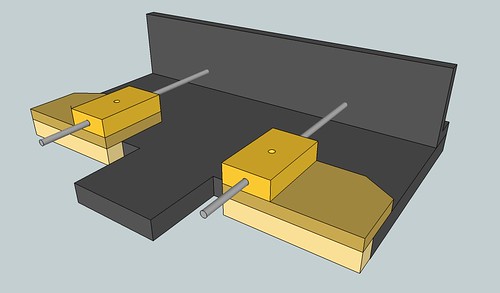
Yes, it's heavily inspired by something I've seen Steve Maskery do (on his router table, I think?). :roll:
I can't think of a way to join them together - at least, not without removing the clamp in the centre - so, I think it'll have to be a pair - unless anyone can see another way? There's not enough room behind the fence, either.
Basically, I'll use a length of M6 studding to set it to the current fence position and then wind in back or forward by a certain amount, depending on where the fence needs to be, and offer the fence up to the new setting before retightening. M6 has a 1mm pitch, apparently and, as Steve always says, a Bristol lever on the end [not illustrated] makes it simpler to count the number of rotations. :wink: I may try and add another lever on top (hence the two holes) to lock the setting. Or, I may not bother.
Each jig can be G-cramped to the bed of the machine. I may even add a couple of rare earth magnets as well.
So, what do you think?
Thanks for looking.
As some of you may recall from almost a year ago, I bought an old cast iron benchtop mortiser (labelled "Smiths Woodworker"; very similar to Multico in appearance) off eBay (barely visible in the shot below...
).
Overall, I'm still impressed and very pleased with it - it remains a vast improvement over my former Fox mortiser! :wink: It has a cast iron bed that moves left and right but, not forward and back. This means I have to manually adjust the fence by slackening off the two mounting bolts and sliding it (near-impossible to keep it parallel and square to the chisel).
That's the only thing I really don't like. One suggestion I was given previously was to set it once and cut a load of spacers to reduce the distance from the fence to the chisel. However, I'm now thinking of building a pair of setting jigs, like this:
Yes, it's heavily inspired by something I've seen Steve Maskery do (on his router table, I think?). :roll:
I can't think of a way to join them together - at least, not without removing the clamp in the centre - so, I think it'll have to be a pair - unless anyone can see another way? There's not enough room behind the fence, either.
Basically, I'll use a length of M6 studding to set it to the current fence position and then wind in back or forward by a certain amount, depending on where the fence needs to be, and offer the fence up to the new setting before retightening. M6 has a 1mm pitch, apparently and, as Steve always says, a Bristol lever on the end [not illustrated] makes it simpler to count the number of rotations. :wink: I may try and add another lever on top (hence the two holes) to lock the setting. Or, I may not bother.
Each jig can be G-cramped to the bed of the machine. I may even add a couple of rare earth magnets as well.
So, what do you think?
Thanks for looking.
