More Infills not Landfills...Somebody stop me PLEASE! ;o)

UKworkshop.co.uk

Help Support UKworkshop.co.uk:

This site may earn a commission from merchant affiliate links, including eBay, Amazon, and others.
I'm not sure about why plane irons have to have movement side to side - never known why there should be any probs if they aren't and are sharpened square. If it were me, I'd make 'em/buy 'em as near as xxxx it. If too wide they can be ground but if too narrow there are no grubscrews to correct them, just more work setting them square every time.
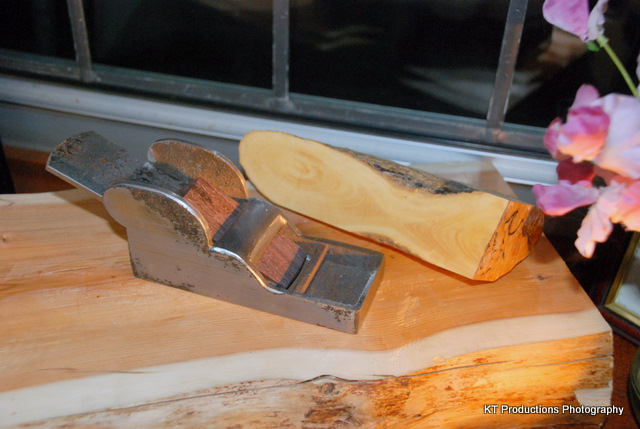
I would guess that a nice, flat iron would benefit no end from being held by a very accurately made wedge under a flat undersided bridge.
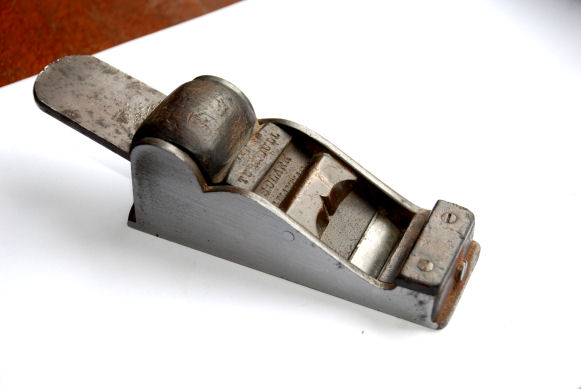
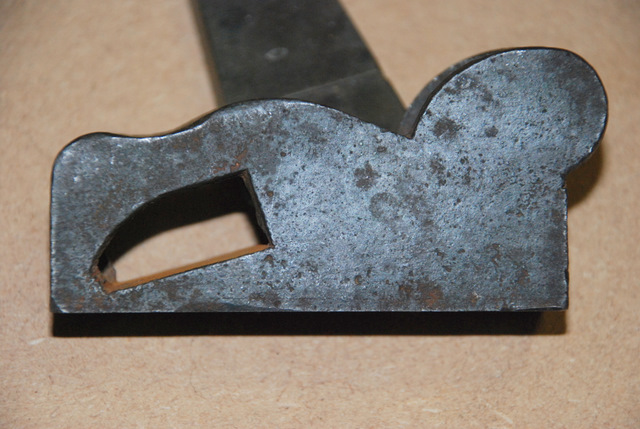
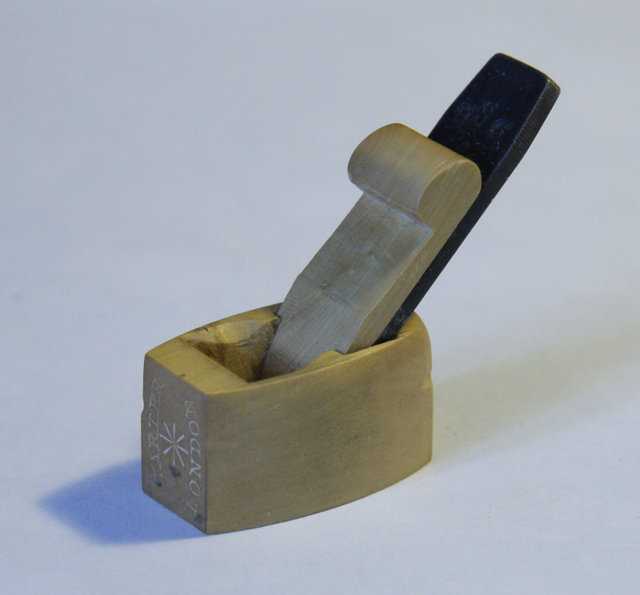
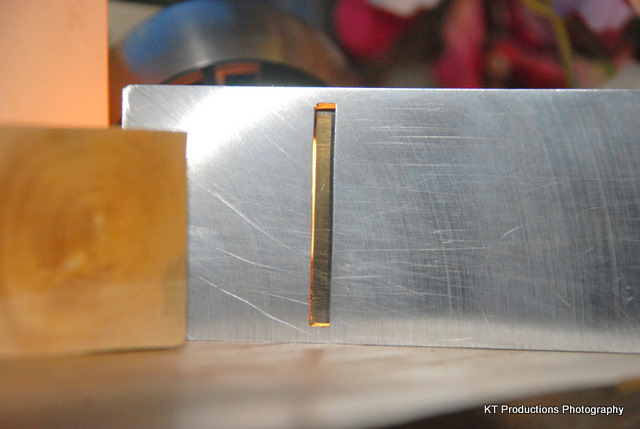
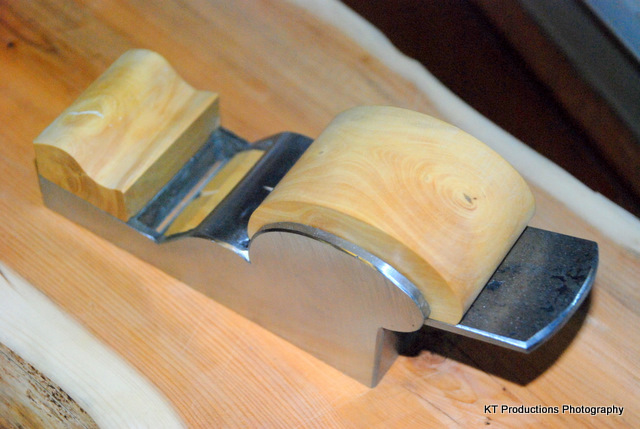
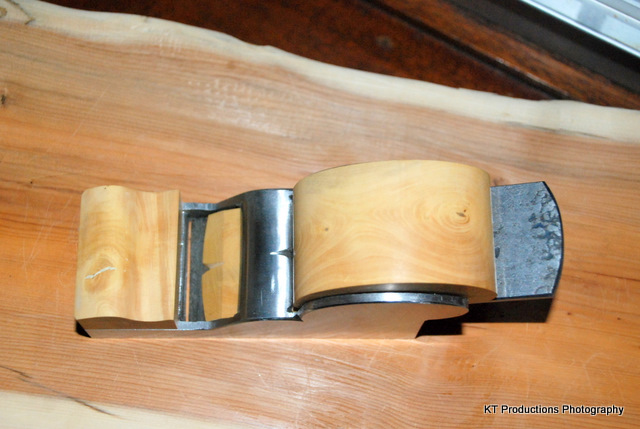
Which brings me back to what I said before - I don't envy you cutting the mouths. They are all bevel up - so the last of the frog slopes have to be parallel with the ends of the irons to give uniform support, and the fronts of mouths need to be tight (and square) enough to do non break-out with just enough room for the shaving to easily escape. .... some highly accurate sawing/boring/filing here I fear.
..
 
Very nice purchase and set of projects Jim. :wink:

Have you considered openng the mouths via a slitting action using the edge of a cutting disc of a suitable diameter? This is similar to cutting blind fret slots in unbound guitar fingerboards and would allow you to hand finish each end and both faces of the mouth after completing the straight disc cut. A simple jig should allow you to mount the plane body square to the disc and you could make a slotted guard for the disc that allows only the amount of cutting edge needed for each plunge cutting operation. Planting a small pilot hole at each extreme end of the mouth should help prevent marring and help provide a visible reference if the piece is viewed from above and with the plane body between yourself and the cutting disc.

Lateral adjustment (Leaway between blade sides and mouth/body) simply allows you to vary the cut from square to off-square if necessary, but also allowing for adjustment if a blade has been accidentally ground out of square.
 
Hi Guys

Thank you so much for your deliberations...this is what I love...the collective brain and experience that is the UKW!

So...I need leaway...and 1 1/4" parallel it is then.

Also I have a plan to cut the mouth with a jig for my Dremel which will be like a mini-table saw with rise and fall and allow cutting discs, mounted on the chuck....to rise and fall into the metal creating the slot. Exaclty like blind frets cutting from underneath against reference pinholes.

I am lucky in that I have little Isaac to take reference geometry from:

iginfillgen1.jpg


This little baby was a 20p rumble purchase at the end of a bootfair one mid-summer morning...all I had left in my pocket and I hate going home without maximising the value of residual small change...don'tcha know! :mrgreen:

Why do I feel a Proxxon purchase coming on this Christmas? Do you reckon they consitute "tree presents" owing to their size? :ho2

Jim
 
jimi43":29pi0yv7 said:
Though I really don't envy you of the task of opening the mouths. Any thoughts so far?

This is going to be a challenge...the lateral brain is on overtime on that one Richard.....will be sure to post ideas and techniques...when I get them! :oops:

It might be worth trying to find the instructions (or WIPs) from SJBTC projects - they sold (and still sell) infill castings.

BugBear
 
Good idea BB...I hadn't thought of that! I used to read up on the St James stuff ages ago and completely forgot that they still did kits.

Looking at their website afresh...I see the little bullnose they have is very similar to the casting I have.

At first I was a little confuse about the bed angle but it all makes sense now if you follow the curve of the aperture and then intersect this with the bed line...clearly the sole needs skimming...

DSC_0340.JPG


Intriguing stuff this!

Jim
 
Today I decided to at least try one of my infills with box...

I have a little bit which really isn't much use for anything else other than a handle for a chisel or screwdriver but does have a fascinating knot in it...so I thought I would make a wedge to see what's underneath the bark.

DSC_0392.JPG


I whittled up an iron from some very old original...working on the basis that a) I don't have a stock of suitable 01 at the moment and b) it's too bleedin' cold to go outside and fire up the kiln even if I did have some!

It actually fits beautifully...I think it was an Isaac Greaves one...but it was too wide so I ground it down to fit.

I have also run out of course paper wide enough for my disc sander so I have been taking it down by hand...nearly there but some way to go yet...

DSC_0390.JPG


Just a few pits left on one side which is quite annoying...once I am down below these I will lap it properly.

I have managed to keep it coplanar with the bed...and actually...the bed is quite flat really...just needs to be milled out.

I have a tiny end mill (courtesy of my wife's dental surgery..) which fits my Dremel so now all I have to do it make a jig to act as a milling machine and I should be able to machine it down quite easily.

I have also determined exactly where the mouth needs to be now I have the iron to work with and it is slap bang in the middle of the indent from the casting...so all is well there.

More later....I can't wait to see what is under that knurly bit of knot!....I'm hoping that I can at least approach emulating the great Bill Carter...he uses box to great effect..

50+th+1.jpg


Simply beautiful!

Jim
 
Here's another Box one - my one and only BC!

billcarter1.jpg


Rod

It's about 25mm long, but a genuine one - bought direct from the maker. :)
 
Ok....got the course abrasive on the sander and finished the sole grinding...and the mouth...so from this:

DSC_0325.JPG


....to this....

DSC_0411.JPG


The mouth turned out to be rather easier than I thought it would be....the method was to mark out the position where it needed to be and then starting from below in the middle and at a slight backward angle, use an abrasive disc on a Dremel.

If you don't move and you keep it steady...those discs cut really well and I managed to break through and then cut each way...following the line by eye to the edge. The disc only broke when I snagged it at the end of the final cut!

Then it was just a case of using a needle file to expand it towards the front...and finally use a four-square file to tidy it all up. I did this before I ground the sole further so that I could then grind down enough to line up the end of the iron bevel perfectly and have it just appear...

DSC_0415.JPG


There is a few thou to go...but it is going in the right direction.

So...what started out as a rusty casting....
DSC_0324.JPG


....is now ready for final bevel and infill....

DSC_0413.JPG


Back later with more....

Jim
 
Lovely, you're doing a grand job there!!

I assumed for some reason that the casting was bronze, but it looks equally as good in steel.

Just a word of caution, keep an eye on the flatness of your sole, as the outside of the disk sander will remove material quicker than towards the centre. As you've ground the sole, I'd expect the rear of the plane to have more material removed than the toe, and possibly also to be slightly convex. You've probably already thought of this, but I thought it wise to mention it, just in case.

Carry on with the good work, I can't wait for the next installment.

Cheers
Aled
 
Aled Dafis":28tcfigg said:
Lovely, you're doing a grand job there!!

I assumed for some reason that the casting was bronze, but it looks equally as good in steel.

Just a word of caution, keep an eye on the flatness of your sole, as the outside of the disk sander will remove material quicker than towards the centre. As you've ground the sole, I'd expect the rear of the plane to have more material removed than the toe, and possibly also to be slightly convex. You've probably already thought of this, but I thought it wise to mention it, just in case.

Carry on with the good work, I can't wait for the next installment.

Cheers
Aled

Cheers PR...very kind of you....

And you too Aled. I take it you are snowed in tight!

Regarding the disc sander...I routinely work one way then the other to even out any bias...the picture shows a final whisk to make a nice pattern and the sole is dead flat and at right angles to the sides.

Yes...these are cast steel indeed....bronze is my favourite...actually gunmetal is...but these are all steel hence the rust on the original castings. Of course this makes for better wearing soles...and the edge is very very crisp...so crisp in fact I nearly cut my hand on it so will need to take the edge off a tad....once I have done the bevel.

In fact I still have a ways to go on the sole...I want to bring the thickness down a tad to line up the mouth that way. I want to keep the mouth as tight as possible so if I grind to the point where the seat is totally as a point to the sole...it should be perfect.

More later...I am out in the shop tonight to get the last bits done.

Cheers

Jim
 
If anyone here is a painter they will realise how difficult it is to take some handmade watercolour paper...costing a fortune...stretch it over a board and then take the plunge with the first wash....well cutting into a large lump of pretty rare boxwood is ten times more frightening!

But I bit the bullet and once again was make acutely aware why I love this wood so very much...

It really is the Rolls Royce of British hardwoods...

So...the large lump pictured here on the left:

DSC_0378.JPG


....from some monster hedge laid down in 1981...was finally chosen for the infill for the "Ebay Three!!"

First the wedge...I want to follow Bill C's thinking that parallel edges are far more beautiful and so (for now) am following his genius...rough shaping so far:

DSC_0437.JPG


...getting the wedge angle correct...the toe reach and the amount left trailing is quite something I didn't want to make an error on with such precious stock....and I managed to get the geometry right first time...

The iron laid down perfectly...just a touch of the sole released the tip of the bevel....and the mouth remains very fine....

DSC_0445.JPG


....the block for the front is roughed out to make the front infill...now I just need to decide on whether to lay it flat across the cavity ala Carter or to echo the back contour as found in a number of vintage models....

DSC_0447.JPG


I couldn't resist a little test...before a final hone on the bevel which I will do this afternoon but initical cuts are very fine...if not slightly out of alignment (at the mo!)

DSC_0449.JPG


Now I just need to bring the wedge contour down a tad...lose a bit of plumpness there...cut a nice indent in it to match and then sort out the front infill..oh...and make the chamfers....

This is fun!

Jim
 
Getting a bit closer now...but it's getting late so will do more tomorrow.....

The front infill is loose fitted...this will need to be shaped when I get my head around what would be the best shape...at the moment it is just a block...but luck with the stock means that the interesting knots are exactly where I want them....

DSC_0458.JPG


I sharpened the iron a bit more and it takes very fine shavings so I need to do more tests tomorrow too...

DSC_0461.JPG


The sole needs lapping too...then to shape the wedge and add detail....the bed infill needs sorting and I have blunt flattened a couple of chisels...a gouge for the concave bits and a firmer for the flat bits...(this is a technique again recommended by Bill Carter and really works!)

I am rather glad I have chosen boxwood...something I have wanted to do for ages and get away from my favourite rosewood for a while...I will age it with raw linseed oil after I have the bits shaped....I like the idea of the more mellow orange look....

So...lots more to do but getting there slowly...the worst part is over now...the mouth...so I can now concentrate on refining the look of this little cutie.....

DSC_0464.JPG


I think this will be a keeper...can't wait to put my stamp on it....

Later....

Jim
 
Astonishing.

You need a before and after picture with them next to each other just to get the difference.

Really nice, I see this as art as well as tool reclamation.

Congratulations.

Mick
 
Gentlemen...I thank you most kindly.

One of the greatest things about restoration is the rebirth of something that was once someone's pride and joy...to live again as that of another.

But this is different. It is not a rebirth...rather a birth...as these castings have never before shaved anything....and so the responsibility of interpreting the maker of the casting and doing it justice is both frightening and thrilling for me.

As Mick said....now is probably time to do a bit of a side by side...as I am confident that short of a few blemishes and some more bevel work...we are nearly there in terms of completeness...so....here is the egg...

DSC_0324.JPG


....and finally...the embryo has moved to the next stage...

DSC_0524.JPG


The fat teenager has slimmed down...the wedge is now slender and the front handle is now a flowing replica of the back curves.

DSC_0527.JPG


I like curves...but more...I needed a thumb grip...and this works really well...

DSC_0532.JPG


It's a bit rough at the moment....and needs finishing and gluing and removing a few scratches from the wood and the metal, but nothing major...

DSC_0533.JPG


I also need to get out the warm raw linseed oil...but that's for tomorrow...while I finish the bevel and can see better in good clear daylight...

But for now...I am starting to love this little baby...she is quite a looker now!

DSC_0535.JPG


More later....don'tcha just LURVE English boxwood! 8)

Jim
 
While the Araldite Original sets the front infill in place...the wedge was shaped...I like the cupid's bow for a front to reflect the one I shall do in the wedge bridge....

DSC_0536.JPG


...and then the wedge was soaked in raw linseed oil all day...(I love that smell) and then given UV treatment.

The linseed had the effect of heightening the grain and mellowing the wood but also showing up the marks created by tapping the wedge under the bridge.

DSC_0537.JPG


I am not overly concerned about this as the wedge will spend most of its life under the bridge anyway. The key objective of bringing out the wonderful knots has worked as I wanted....

The best thing to come out of today was the success of the 3M Micromesh lapping film. I wanted to try this out on wood rather than the usual purpose of sharpening a bevel...so the top and sides of the wedge were rubbed down to remove the disc sander marks....starting with blue and working up to white. There is no finish on this wedge at the moment and the only thing that will ever be used on it will be the linseed oil.

I shall have to make a shopping trip to Matt again soon!

I do hope you all had a wonderful Christmas....have fun in the shop in the New Year!

Jim
 
Back
Top