Mobile Mitre Saw Station - Finished

UKworkshop.co.uk

Help Support UKworkshop.co.uk:

This site may earn a commission from merchant affiliate links, including eBay, Amazon, and others.
Hi Olly,

I've been following your WIP write up with interest. Can you give me some more details on the 'Maskery dust cowl' It just seemed to turn up in the middle of your write up with no links as to the source of the design. I've got various bit of roofing membranes breatheable and otherwise. Just need the details of what to do with it.

Regards

Bob
 
Slim":1gbamccy said:
Isaac Lord will have the screws you are after.

Thanks Simon, but won't I need a Trade account with them? :? Do you reckon Woodfit will have any otherwise?

Bob,

Steve's dust cowl can be found in the current issue of British Woodworking. You might be able to get some more information from the thread in the General Woodworking forum.

Steve refers to it as "roofing membrane"; I assume it's used as a kind of underlay. It seems to be slightly shiny on one side and quite soft on the other. If you send Steve a PM, he may still have some spare left over - it'd be easier than having to buy a large quantity of the stuff.

It seems to work quite well, for me. It won't catch every last particle of dust, but, it stops a lot of it from disappearing behind the saw and has made a definite improvement. :)
 
Thanks Olly,

I'm hearing more and more good things about British Woodworking. I looked in my local Sniffs yesterday for it but it is only a small branch and I could not see it. Is it available on line do you know. I guess that might defeat sales - maybe it comes on line after the next issue comes out perhaps.
The roofing underlay I've got scraps of is smooth & slightly shiny on one side and more evidence of a woven texture on the other. I got it from screwfix when I built the workshop.

I presume it just needs to be moderately stiff to keep the cowl shape and soft enough to be displaced if it gets in the way.

Bob
 
Thanks Simon. I must be thinking of somewhere else then! :)

Bob, you've got the right idea there. I also found it made more sense to have the shiny side directly behind the blade, so the dust is less likely to stick to it. This also means that you can fix the softer side in place with spray adhesive, which should help the glue to adhere. Steve initially tried double-sided tape but, that didn't hold for as long as he could have hoped.

As for dimensions, it may differ depending on the manufacturer of your saw, but Steve found a piece 135mm long x 120mm wide suited his 10" Bosch saw quite well. For my 12" Bosch, I found I needed something about 150-160mm long; the width was spot on. You also want to round-off the two protruding corners so they're less likely to snag or catch.

Whatever size you go for, you're basically looking for something that will sit behind the blade at its lowest position. As you can see in my earlier photo here, I found it easier to unscrew the black ring-thing from just inside my saw before applying the spray adhesive.

Hope it goes well. I guess you have plenty of spare should you feel the need to make a couple of trial pieces or muck something up... :wink: This idea seems to be catching on fast though. I've seen and spoken to a few people over the forums who are very intrigued by this - I hope you've registered the patent for it, Steve!! :D :wink:

As for British Woodworking, you can of course pay for a subscription and have it delivered to your door. Maybe you could try e-mailing Nick Gibbs? If he can't send you a single issue, I'm sure he'd be able to tell you where you can find one in-store. :)
 
Olly,

Got the material, but then realised I didn't know what I was making from it ! Only reference I had was you posted picture, so here's my attempt, does this look right ?
2429087200_865f2455e4_o.jpg

2428275301_e877cd2a4d.jpg
 
Ah, this is the picture that's worth a thousand words. Exactly same chopsaw as I have and exactly same problem. Now I have to see if I can also re-use the solution... Thanks a million!
 
Paul, I thought you'd just taken out a subscription with British Woodworking? :roll: :wink:

It looks about right. The only thing I'd suggest you might want to try is to round-off those two protruding corners, so there's less of a tendency for it to snag or catch on the timber or fence.
 
I haven't given you an update in a while, so I thought it'd be about time to say that I'm very nearly at the end of this build.

I had to wait a while for a delivery of some screws from Isaac Lord. I bought some brass ones along with some pozi-drive Reisser screws, designed especially for these hinges apparently, and settled on the later in the end, simply because they were much easier to drive and this is only going to live in my workshop.

First thing was to replace those horrible screws I bought from Axminster a couple of years ago. Yet more heads began to break-out, so I had to re-drill and countersink the hinges in a few places, just to be sure of things. This first photo shows the swingarm brace in position. It's gonna need a little support to keep it at an accurate 90º though.

2454201783_250a8a5bf0.jpg


When it came to screwing the uprights to the sides of the cabinet, I decided to cut myself a spacer from MDF and clamp it in place to get the correct offset and also to maintain they're both set at the same height. In my case, in order to ensure I had enough clearance to raise the saw and get it level, I settled on 150mm.

2455028160_0f9476392a.jpg


The spacer is flush with the top edge and just hangs in place while I fix it. These clamps seem to work particularly well, although I wouldn't necessarily expect the same success with quick-grips.

2455028044_e03e517c0b.jpg


Okay, so I still need to remove them again to fit the wings, before re-fitting them again and getting the braces in place, but you can see how close I'm getting to finally finish this build! :D

2454201071_c59966736e.jpg


I'm gonna leave the doors until the very end, but I've already started "working" on the fence. These strips of MDF (haven't gone enough ply left over in 1m lengths) hadn't been stored very well, so I'm hoping that they've find their straightness if I can leave them like this for just a few days more... :roll:

2454201195_928a882cd1.jpg


While both the saw and riser were off, I decided to glue some nuts in from underneath in place of the bolt-heads. This way, I don't have to worry too much about dropping the saw on to the bolts; instead, I can drive the screws down from above. The adhesive is an epoxy resin. It doesn't require an awful lot; just enough to prevent them from falling out.

2455029222_ea78792d84.jpg


I've turned the cabinet upside down, removed the wheels and sanded the base in preparation for its first coat of finish oil, so I can get on and tidy up the rest afterwards. I'd like to go slightly off-topic here...

When planing up the ash (oh, several weeks ago now), I noticed these markings in the timber that I couldn't seem to remove. I'm not fussed because this is a workshop project, but they look a bit suspicious to me; perhaps they could be tracks from a wood-boring insect...?

2455028482_1a19cb49ae.jpg


2455028720_507cea2e5c.jpg


They're about 3-4mm wide and I've had this particular batch of ash leftover from two years ago. I can't imagine it's anything to worry about therefore, since I'd expect I would have noticed something elsewhere before now... Anyway, I'd be interested to hear of anyone's thoughts on this (this is one of those subjects at college I've failed to take in! :) )
 
Olly,

At first glance, I thought I was seeing resin pockets, but again, I never had these problems either with ash.

I don't think there is anything to worry about if you aren't seeing piles of fresh dust. In other words, any insect has long gone. I've never seen worm holes in ash myself. So, do the white trails plane away into 'furrows', as they would if they were left by a 'borer'.

I suppose a treatment with a woodworm repellant wouldn't come amiss if you really think that's what they are.

Woodworm beetles fly of course, so that's another reason I leave the spiders in my shop to themselves!

Regards
John :)
 
Thanks John, I knew it probably wasn't worth cleaning all those cob webs after all! Wasps on the other hand... :D :wink:

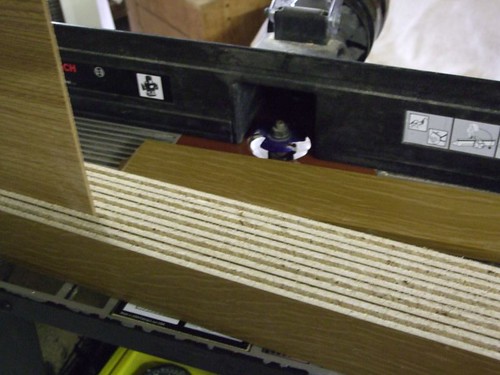
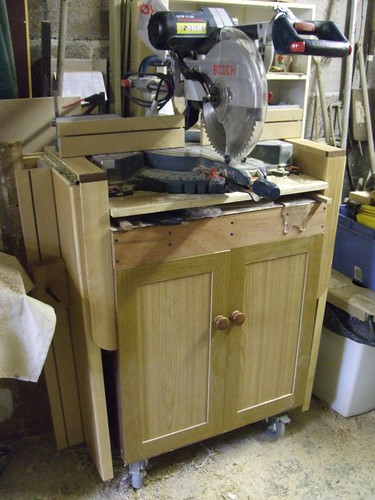
In the meantime, my Mitre Saw Station is very nearly done after a weekend of fair progress. Not to mention a couple of mis-haps along the way...

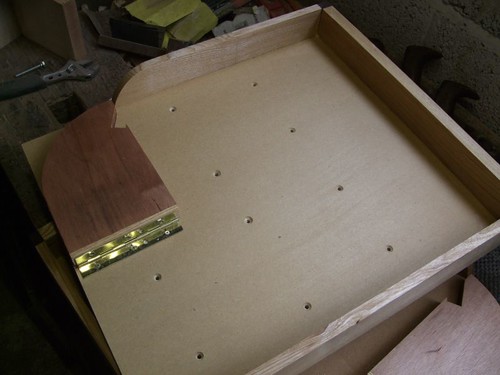
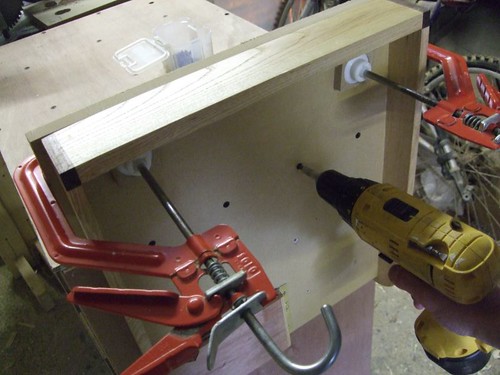
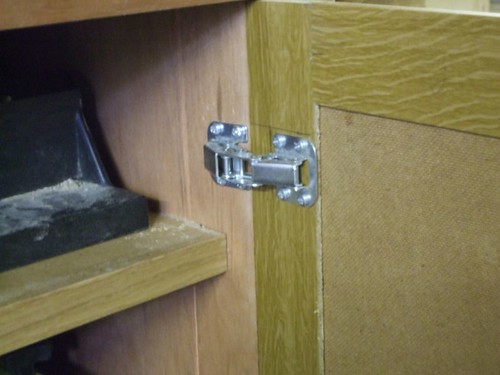
Once the third and final coat of Liberon Finishing Oil has dried on the cabinet, it was time to fit the wins to each riser, before re-fixing them to the cabinet sides. I found it much easier to get the accurately in place like this.

2466639913_3007d53b45.jpg


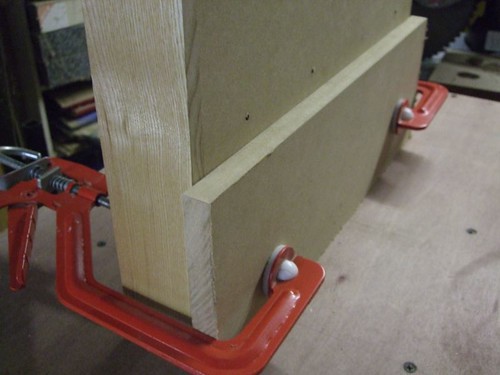
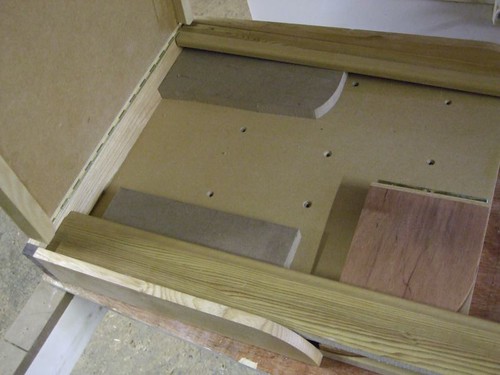
To keep the wins supported at the correct height in order to fit hinge leaf where it should be, accurately, I added some scraps to support it from underneath. 19mm MDF with 16mm chipboard seemed to work well. :)

2467466772_593143cb25.jpg


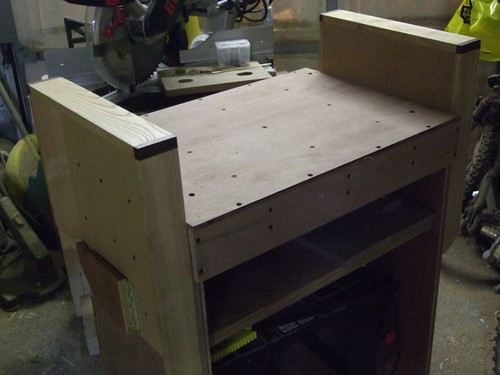
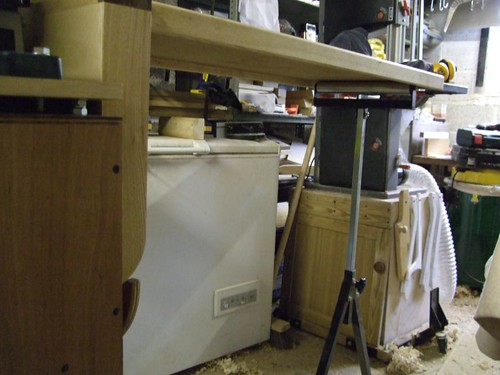
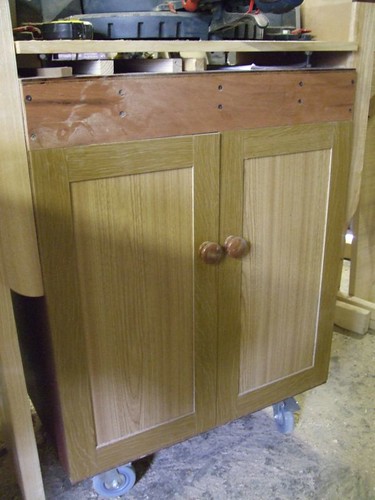
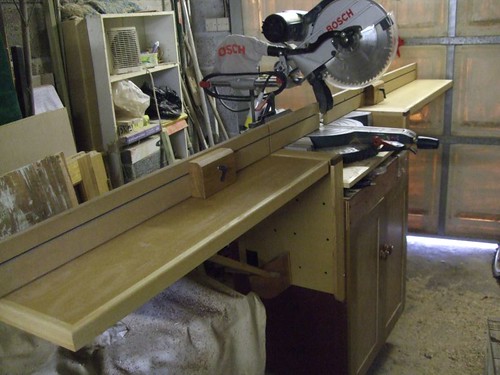
Fitting the uprights with the wings attached was no easy task for one man - somehow, though, I managed to do it; torch in my mouth and all!! :D A roller stand came in as a great help to keep the wings off my head while I used the existing screw holes to relocate the uprights. :wink:

2467466882_8bd540083d.jpg


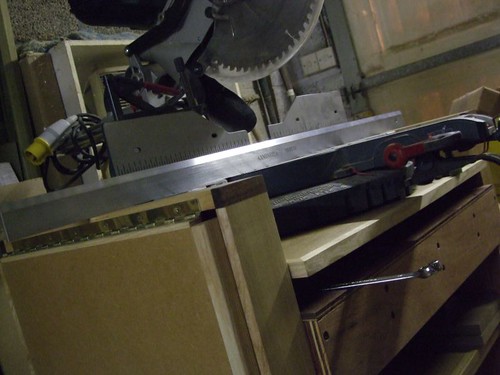
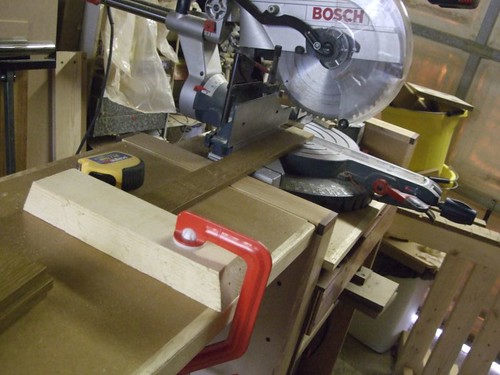
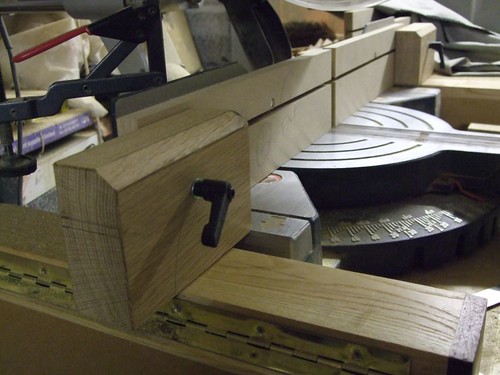
Next job was to level the saw with the top of the uprights, I decided, before looking at the wings and fixing the support arms.

2467467092_f718dfcde7.jpg


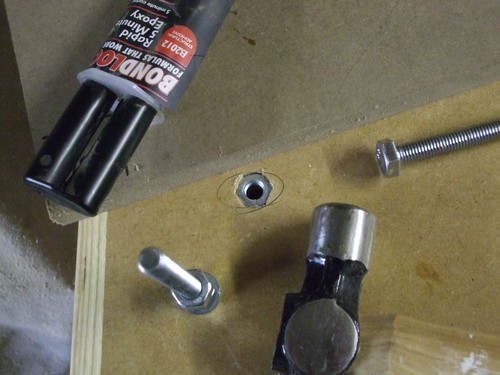
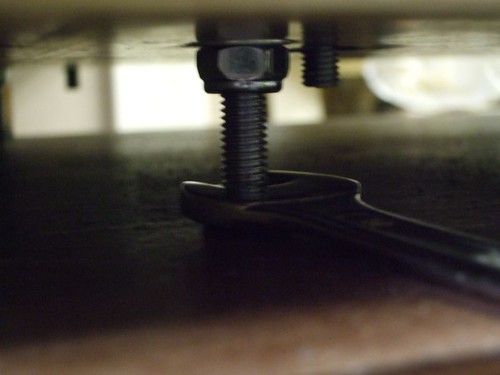
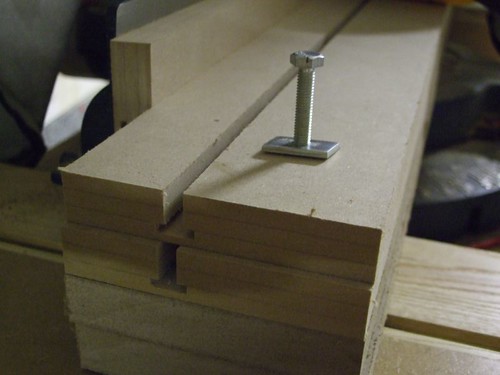
All you need to do is to adjust the lower bolt of the two (not the lock nut) under the riser, making sure the wing nuts inside the cabinet are free, of course.

2466640377_ceb895ffbb.jpg


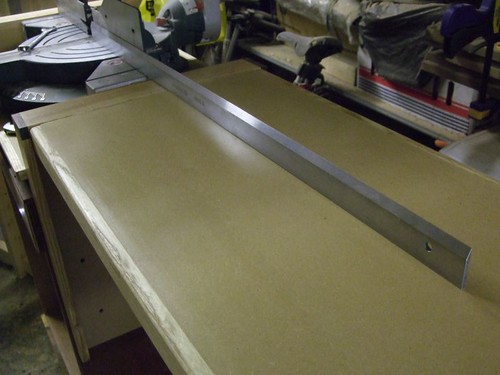
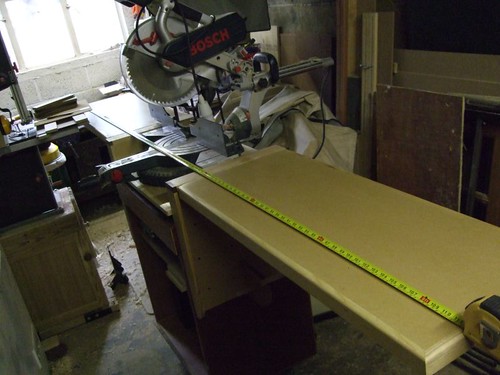
With the saw now in its position (the levelling of that is really easy!), I could use my straightedge and the rollers stands to level everything up and mark out underneath the wings as to where the support arms will need to be fixed.

2467467016_e7b3d96b61.jpg


I should also mention that I took some advice from the FWW walkthrough and added a couple of screws to the swing-out support piece to allow for any fine adjustment. For this reason, I only got the wings as "near as dammit" to being perfectly level. :)

2467467214_42eed9ae92.jpg


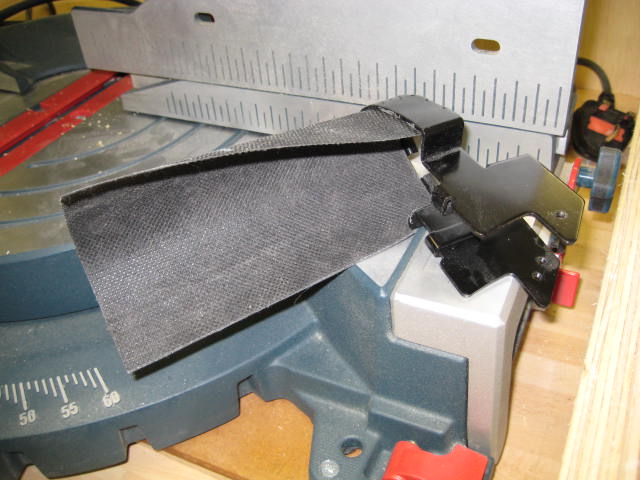
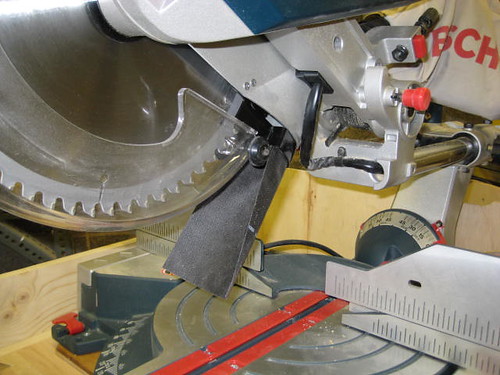
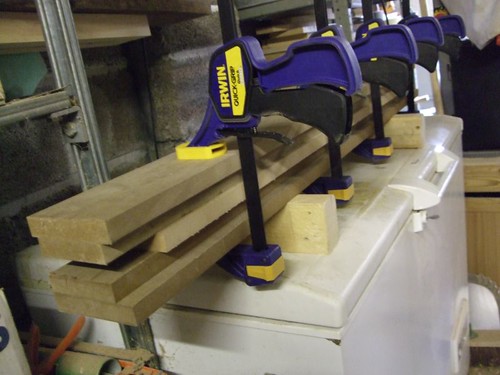
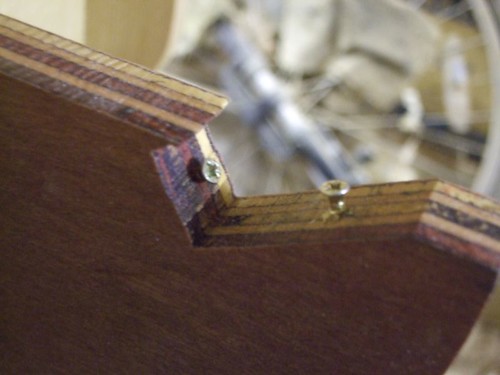
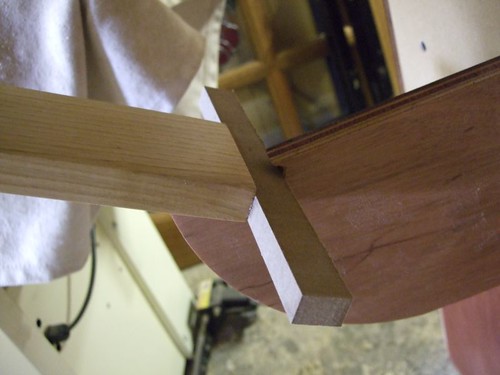
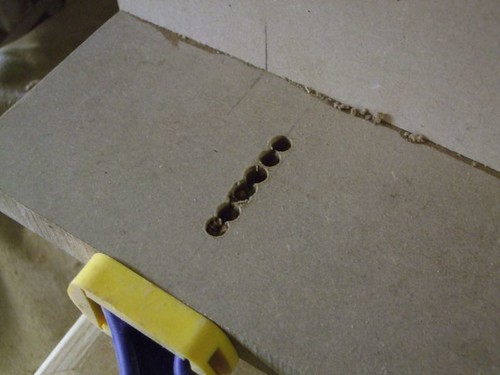
So, after removing the wings to fit the support arms (they can easily be re-attached to the uprights again, now the holes are all pre-drilled), I came across a big problem... They're too long! :shock: Basically, when I come to fold everything away again, as you can hopefully see in the picture below, the support arms protrude further than the hinge-edge of the wings and don't allow it to close flush! :(

I've tried shifting them back 20mm, but now they're too short. I cannot adjust the flip-out supports anymore without interfering with the sides of the upright. :x

I'm not entirely sure what I'm going to do now, so I'll get on and tackle the doors today while I figure it out. Unless anyone has any suggestions.

This method seems to be inredibley strong, so I'd like to stick with it if possible, rather than to remove it and try something else. What I might try and do is to add a short piece of timber to the arms/braces which is fixed by means of a screw and washer, that allows it to swing out of the way when everything's folded up for storage...? :?:
 
OPJ":xfmcnb8t said:
Thanks John, I knew it probably wasn't worth cleaning all those cob webs after all! Wasps on the other hand... :D :wink:

Olly,
A used jam jar (leave the remains of the jam in it.) with about 2" of water in the bottom, just outside the shop. They wasps won't reach the shop. They like jam more than they do wood resin; so much so, they'll drown to get the jam! :wink:
Regards..
John :)
 
I am surprised that the support arms do not fold clear, they do on my low cost effort so check sizes of parts on drawing n,r,&q .
I have fitted ordinary 3'' hinges o to m (under to provide 90 deg. movement) and a small block of wood to hold p in the correct position on m then fitted pivots through u to p . also hinged r with 3'' to allow full contact between r & n this was done as they are not seen and are a lot simpler to fit than continuous hinge.
 
Thanks OLD.I think the problem may be that I actually stopped working directly from the drawings some time ago... :oops: I made each wing 1m long instead of their measurement and therefore decided to make the arms 'X' amount longer to try and compensate for it. Needless to say, I cut them too long (better than too short, eh!) :)

I've found a brilliant quick fix though; I really can't believe my luck...

A scrap of 19mm MDF inside the notch on the flip-out supports, and everything lines up beautifully again! :D

Yes, I could try shortening and repositioning the existing arms, but this is working well for me right now. I'm just waiting for some velcro strips to stop it all from flapping around while in storage. They're still incredibley strong as well. I loaded some oak on there earlier and there wasn't even a hint of flexing or deflection. If I push down hard on one wing, the entire unit begins to tip very slightly! :wink:
 
Just a thought if you size the support parts to drawing it will not matter how long the wings are they will fold back ok and stay strong.
 
I just thought I should post a photo of my quick-fix. I still cannot believe my luck in that a scrap of 19mm MDF would be just the job! :D

2471578952_a42aa6153c.jpg


Here, in this next shot, you can see the incredible amount of support I now have available to me - yes, it really is too big for my workshop! :wink:

2470756467_9bbb20b3f9.jpg


Total span from end-to-end is...

2471579372_27550126f9.jpg


I began work on the doors yesterday, using some of that salvaged oak-laminated chipboard, which I've probably mentioned before... I'll have to make do with a stop like this until I get around to making and fitting a decent fence.

2470756801_3cb8271610.jpg


I mentioned before that these wings were sturdy - I've even been using it to cut the biscuit slots to join the door rails to the stiles! ...Yes, thank you, I really ballsed this bit up, as you can probably see! I cut some "half-biscuits" from a scrap of 4mm ash to plug these gaps so I can re-cut them in the correct place again tomorrow. :oops: :)
 
Thought is was about time I let you know I finished this build! :oops: :D

Picking up fro where I last left you then...

With the stiles and rails all cut to length for the chipboard doors, next job was to rout a small groove for the hardboard panels using a slot cutter in the router table.

2558670085_e4246b8f58.jpg


After adding biscuits to all four corners in order to fully-strengthen each door, once the glue was dry it was time to fit them. As the material is only 13mm thick, I found these hinges were ideal.

2559495222_b69c64ac93.jpg


Here are the finished doors, fixed in place. I'm very pleased and impressed with how clean and tidy they look - for chipboard! :wink:

2559495550_243e64d1a2.jpg


On to the fence...

After speaking to Steve Maskery about one of his designs previously featured in Good Wood, I decided to build the face from three layers of 6mm MDF for stability, with grooves cut on the router table to allow for a sliding nut configuration, which is how I'll lock the repeat stops in place. You have to rout the wide 1/2" groove first before gluing the rest together. Make sure the bottom edges are flush before cutting the second groove.

2559495984_c91d6bb07c.jpg


The two longer fences have a base with elongated holes that allow them to be adjusted. They're fixed in place with a coach bolt from below and wing nut on top. This adjustment is basically in case I decide to add/remove the shorter wooden facings from the main saw...

2558671255_b3fed8d939.jpg


Which you can see just below. I found these are necessary for two reasons; one being so that I can easily position a stop close to the blade for short cross-cuts, the other being that I can reduce the gap directly behind the saw blade. This may affect the efficiency of dust extraction but I hope it'll stop small offcuts from pinging around! :shock: :D

2558670425_4a7bf61364.jpg


This next shot gives you a good view of the stops, made from 2" thick oak with all corners chamfered off. I also cut a small 5mm chamfer on the bottom corner of the block, closest to the saw blade, which should allow a small amount of dust to build-up without interfering with the timber (which would of course shorten your length of timber!). I also chamfered the bottom edges of the fence for the same reason.

2559495752_f27b8d49ba.jpg


So, here we are then, the finished piece, as it goes away in to storage over night. It's actually fairly compact for a 12" monster like this, just as long as I remember to pull the head forwards and lock it down! :wink:

2636641880_802c812822.jpg


And when it's fully open, with a total span of nearly 3m, it takes up quite a lot of room in my small shop - but provides plenty of support for much bigger and longer stuff. :)

2635817253_e0a0d1c982.jpg


I hope you've enjoyed following this thread as much as I am pleased to say that I'm very happy with the end result. All I need to do know is get hold of a decent blade! Thanks for following my thread. :D
 
Back
Top