I've been working on my basement wood shop since May this year, and it has been a challenge balancing the project with my job and continuous travels. In addition to the equipment selection and acquisition, which might be mostly done by now, I had to build the dividing wall, design and install the electrical distribution, design and install the dust collection system, relocate the equipment to the basement, commission the Minimax SC2 saw, and complete the equipment installation. Finally, the first four tasks are complete, aside from some minor tasks, and I am ready to assemble the SC2 and have the tech commission it.
I decided to contract out the wall build and add a separate 1 x 2 meter closet for the dust collection blower and air compressor. Because of the constraints I had with the low ceiling and drain pipe running across the ceiling, I had to use 120mm ducting for the DC system. The company I bought the SC2 from gave me a nice discount on the Schuko ducting and accessories, so I decided to use metal ducting instead of DIN 110 drain pipe from the local hardware store. This saved me from having to build my own blast gates and flexible hose couplings.
The heart of the DC system is a Bernardo RV 350 3HP blower, an Oneida Steel Super Dust Deputy cyclone separator, and a pair of Wynn 35BA222NANO filters, each with an 18FP30 filter pan.
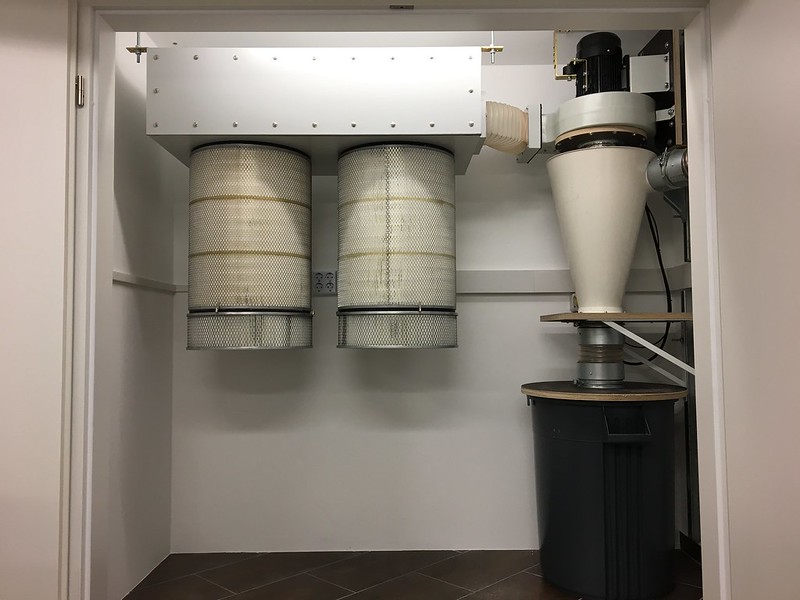
Here's an image of the DC closet showing the system. The filter box is made of 12mm plywood on a 44x44mm frame. I had to suspend the box from the ceiling in order for the end panel to align with the output port of the blower assembly. My air compressor will fit below the filters.
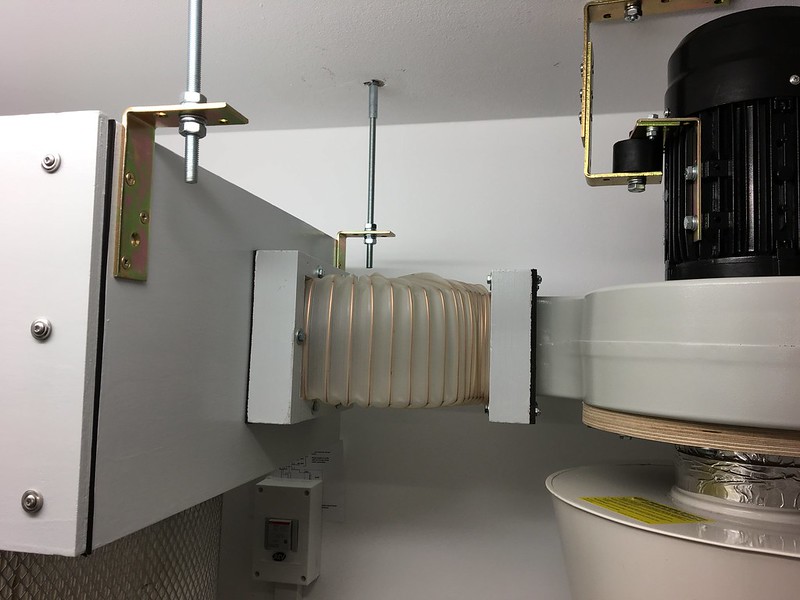
Here's a closeup of the ducting that connects the blower assembly to the filter box. I used a section of 180mm flexible ducting and reformed it to fit the opening of the blower assembly.
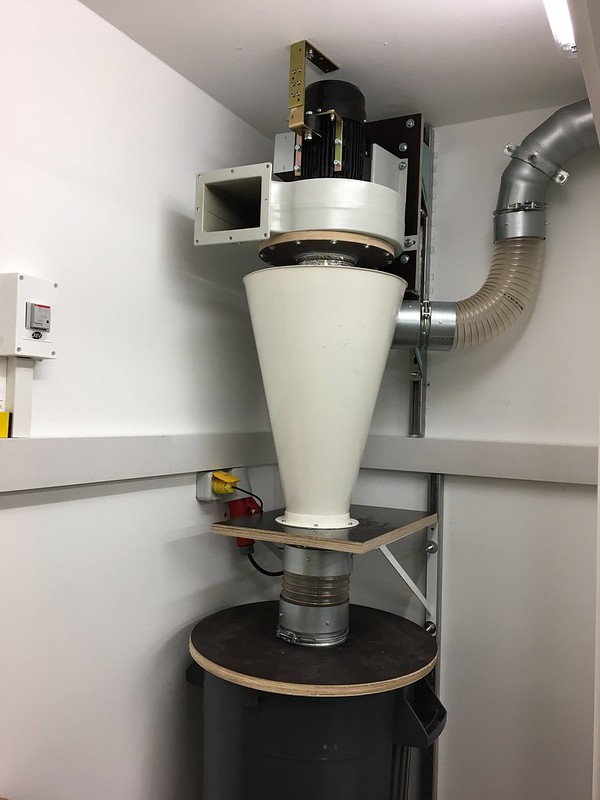
This is another view of the blower assembly and cyclone separator before I installed the filter box. The output of the cyclone separator drops into a 35-gallon trash can. The plywood cover has a gasket that matches the top of the trash can and provides a great seal, even without hold-down straps (to be added later).
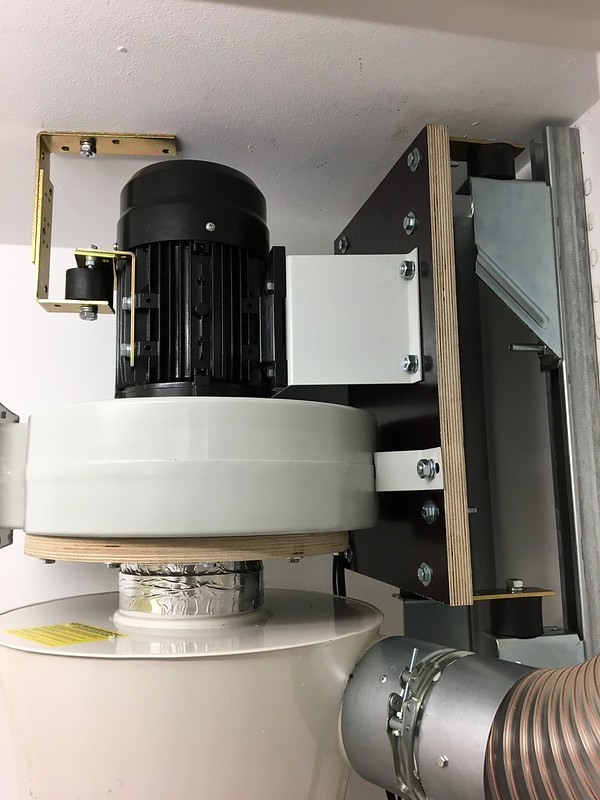
Here is a closeup of the blower assembly mounting. I used rubber isolation mounts to reduce the amount of vibration and noise from being transmitted to the dining room above the shop. The isolation mounts have a good sheer rating, but work best when in compression, so I used hardware available locally to make the brackets. Four mounts hold the main panel to the wall-mounted strut and one mount attaches to the motor to counter the torque created by the top-heavy assembly.
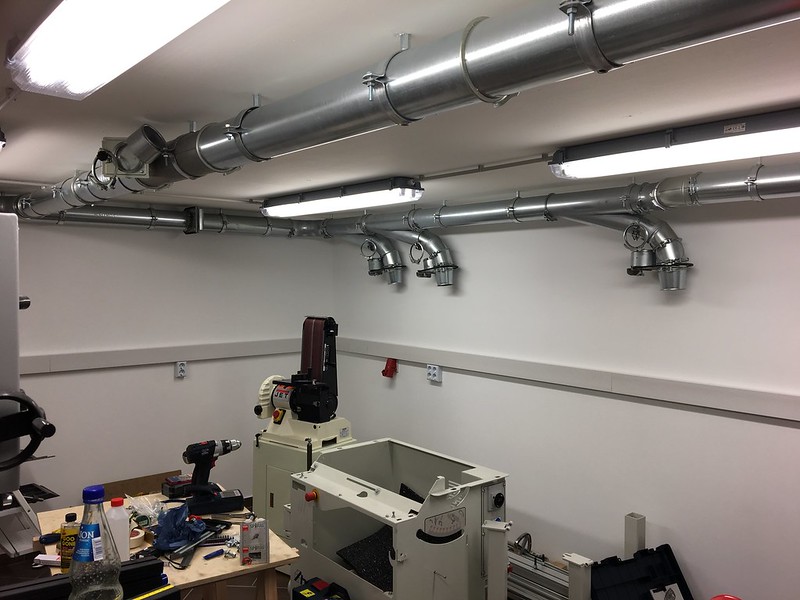
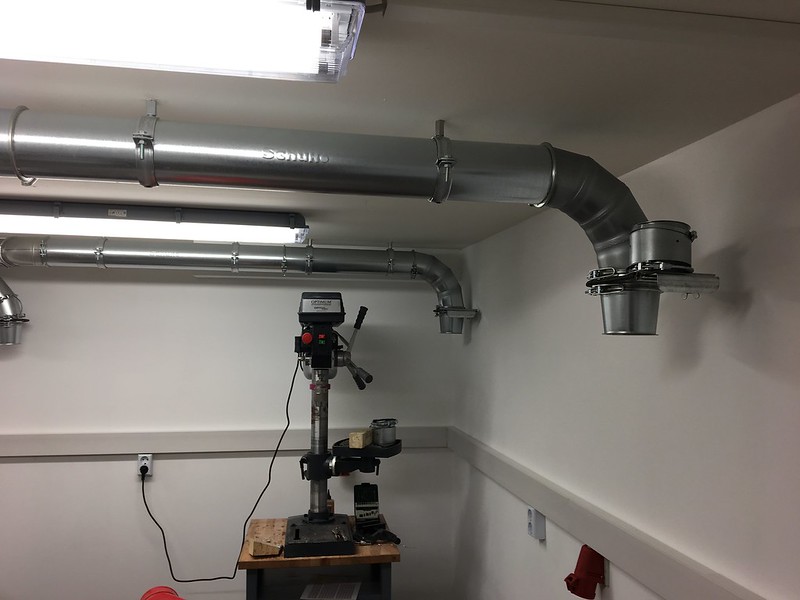
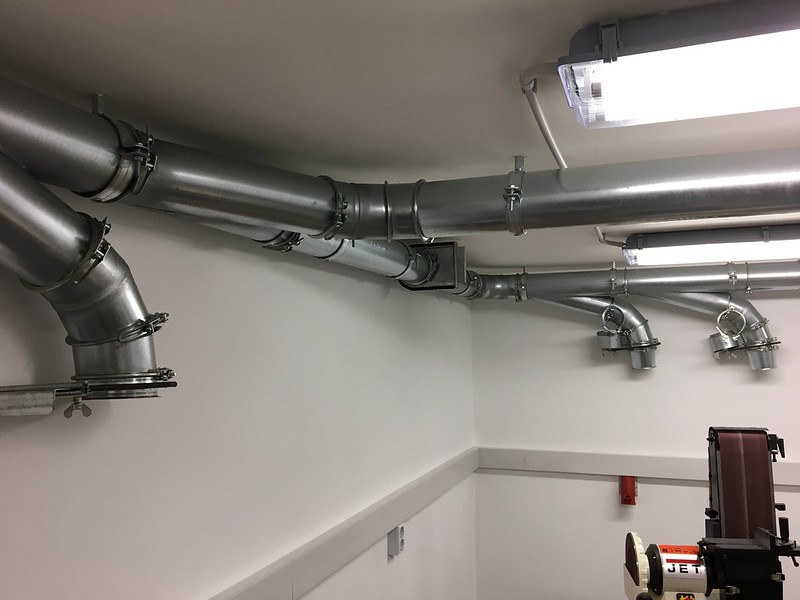
Here are some images showing the ducting, blast gates, and 120-100mm reducers. With the exception of the SC2, all of the shop equipment has 100mm extraction ports. Since I don't have the equipment positioned yet, the reducing rings and clamps are positioned at each blast gate ready for the 100mm flexible duct.
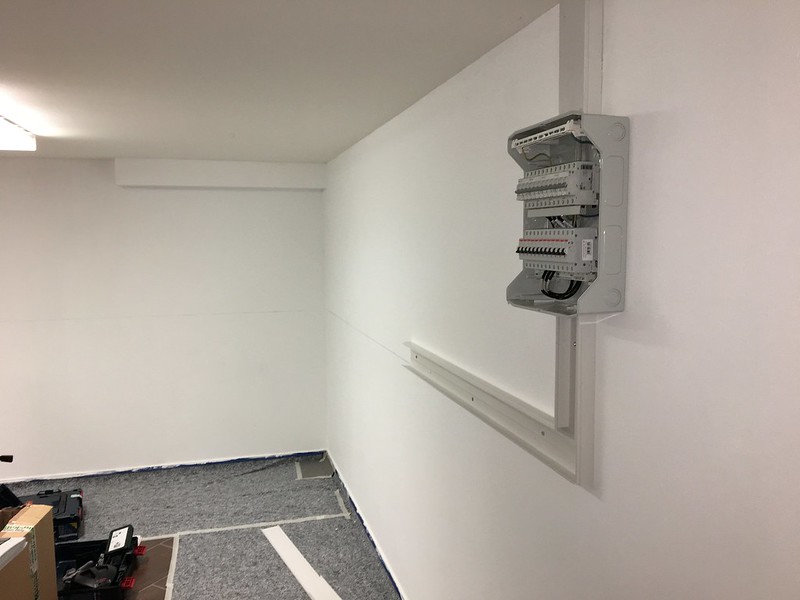
This is an early image after the wall was installed and I painted the existing walls. I extended a 32A 3-phase feeder from the main panel to the basement shop. The top row of breakers are 3-phase and the bottom row are single phase. The SC2, DC blower, and air compressor are 3-phase, while everything else is single phase.
I decided to contract out the wall build and add a separate 1 x 2 meter closet for the dust collection blower and air compressor. Because of the constraints I had with the low ceiling and drain pipe running across the ceiling, I had to use 120mm ducting for the DC system. The company I bought the SC2 from gave me a nice discount on the Schuko ducting and accessories, so I decided to use metal ducting instead of DIN 110 drain pipe from the local hardware store. This saved me from having to build my own blast gates and flexible hose couplings.
The heart of the DC system is a Bernardo RV 350 3HP blower, an Oneida Steel Super Dust Deputy cyclone separator, and a pair of Wynn 35BA222NANO filters, each with an 18FP30 filter pan.
Here's an image of the DC closet showing the system. The filter box is made of 12mm plywood on a 44x44mm frame. I had to suspend the box from the ceiling in order for the end panel to align with the output port of the blower assembly. My air compressor will fit below the filters.

Here's a closeup of the ducting that connects the blower assembly to the filter box. I used a section of 180mm flexible ducting and reformed it to fit the opening of the blower assembly.

This is another view of the blower assembly and cyclone separator before I installed the filter box. The output of the cyclone separator drops into a 35-gallon trash can. The plywood cover has a gasket that matches the top of the trash can and provides a great seal, even without hold-down straps (to be added later).

Here is a closeup of the blower assembly mounting. I used rubber isolation mounts to reduce the amount of vibration and noise from being transmitted to the dining room above the shop. The isolation mounts have a good sheer rating, but work best when in compression, so I used hardware available locally to make the brackets. Four mounts hold the main panel to the wall-mounted strut and one mount attaches to the motor to counter the torque created by the top-heavy assembly.

Here are some images showing the ducting, blast gates, and 120-100mm reducers. With the exception of the SC2, all of the shop equipment has 100mm extraction ports. Since I don't have the equipment positioned yet, the reducing rings and clamps are positioned at each blast gate ready for the 100mm flexible duct.


This is an early image after the wall was installed and I painted the existing walls. I extended a 32A 3-phase feeder from the main panel to the basement shop. The top row of breakers are 3-phase and the bottom row are single phase. The SC2, DC blower, and air compressor are 3-phase, while everything else is single phase.


