MFT-style vs. Trad-style workbench design (is there a middle ground??)

UKworkshop.co.uk

Help Support UKworkshop.co.uk:

This site may earn a commission from merchant affiliate links, including eBay, Amazon, and others.
I’ve got one of each. A traditional bench I built nearly 30 years ago which is still doing its job and the recent addition of an MFT cart. I’m finding the cart really useful as I can take it to where the job is rather than being confined to the workshop.
IMG_3745.jpeg
 
As others have mentioned, a work bench for hand tools and a MFT for power tools are two different animals.

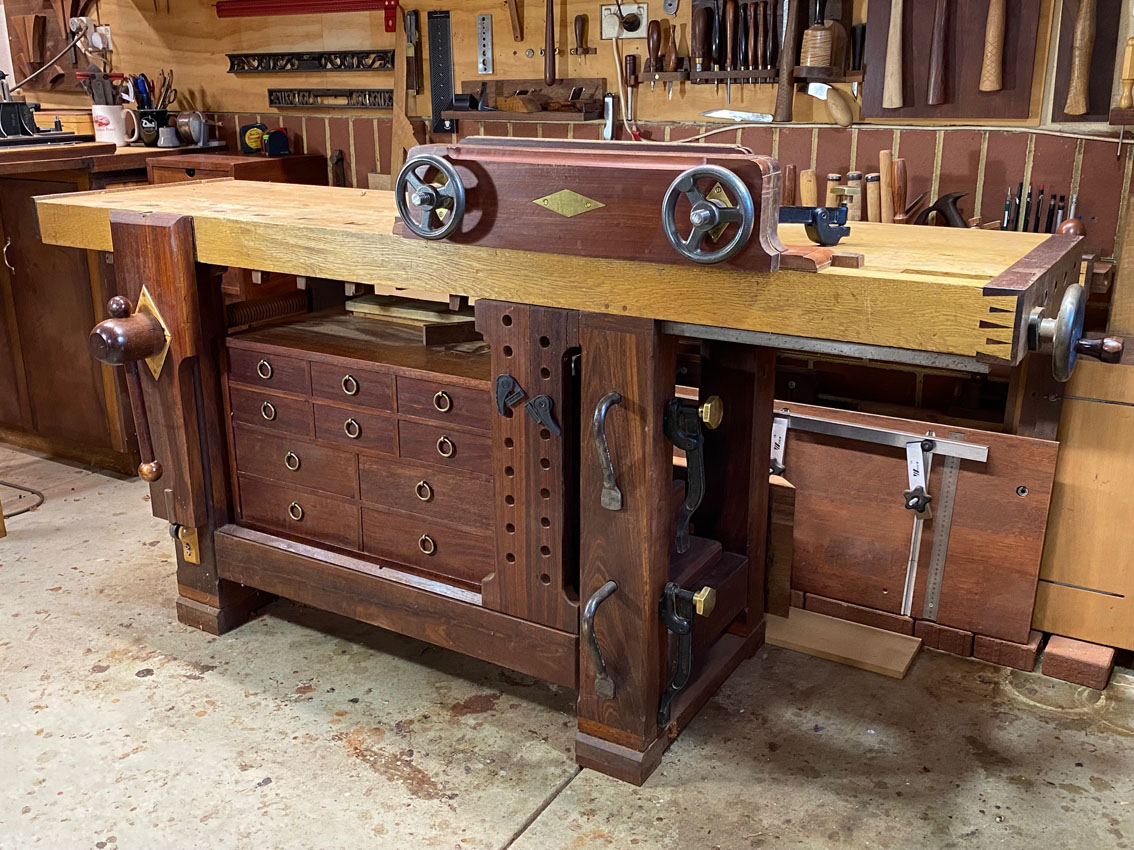
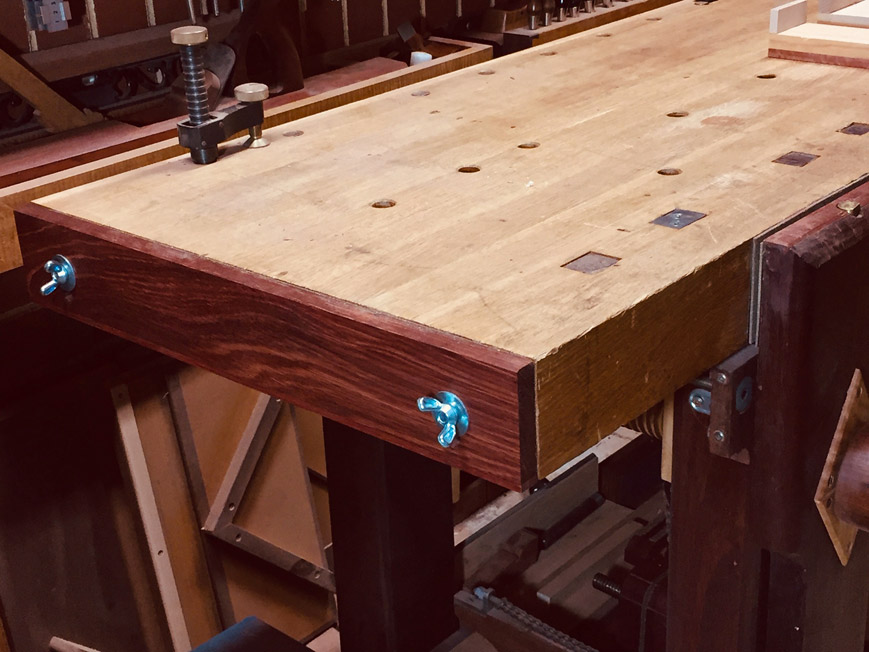
A hand tool bench needs to be as solid as possible. Being pretty is a bonus. This work bench is all about work-holding and being solid and immovable. A face vice and a tail vice are standard, with dog holes positioned for practicality.

I built this on about 10 years ago, and it is the most important tool in my workshop ...

1.jpg


End-stop3.jpg


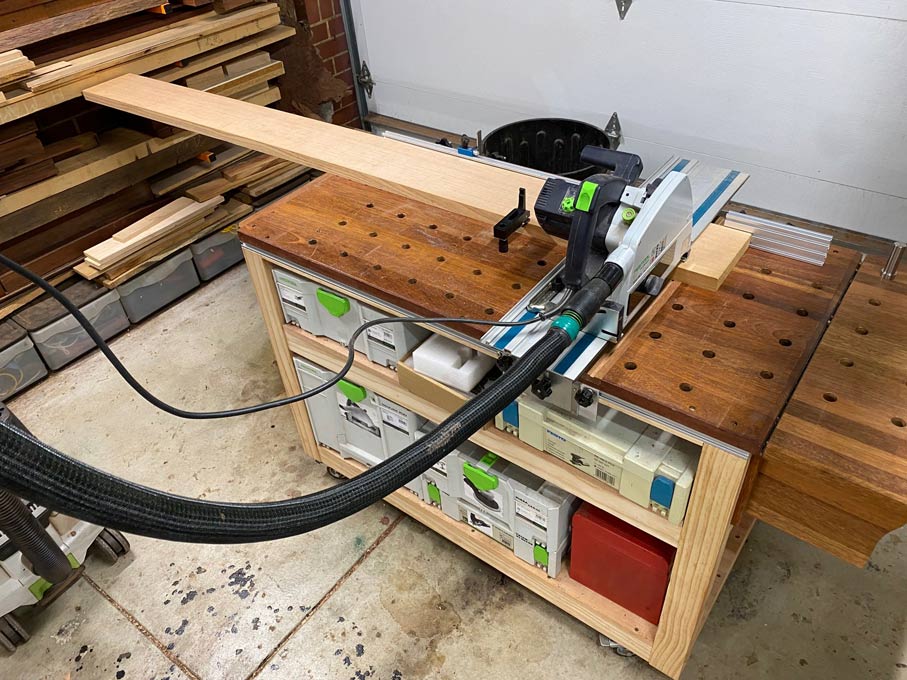
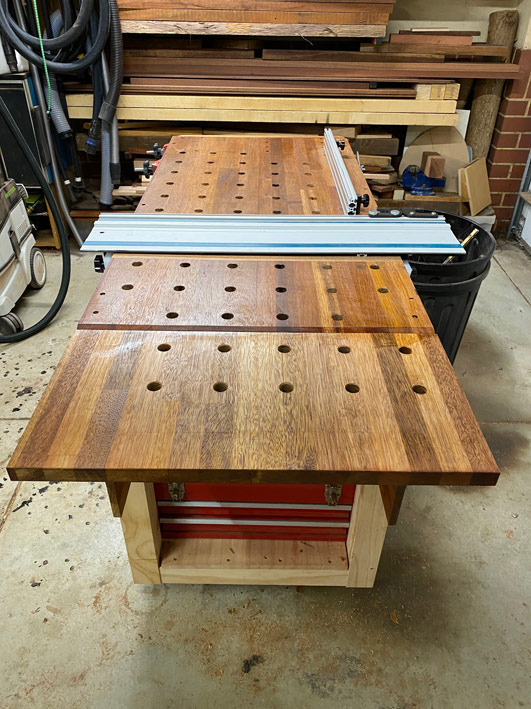
Earlier this year I built an MFT. It was designed for three purposes: 1. For storage of the power tools whiuld be used with it, 2. As an outfeed table for the tablesaw, and 3. To hold work pieces for power tools, such as a track saw and router (on the track).

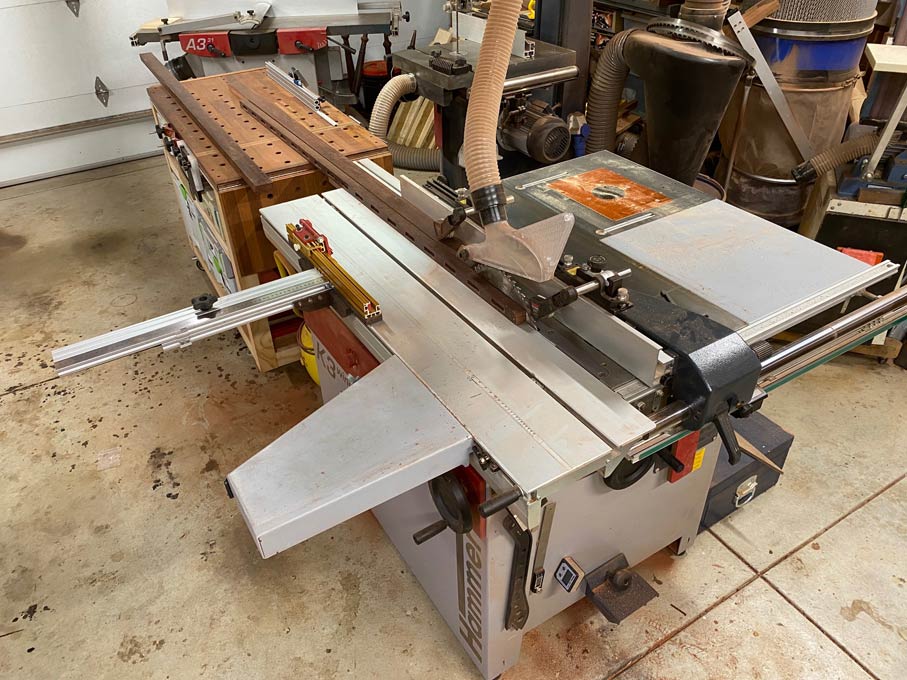
I strongly advise that a router table is NOT built into a work bench, unless you only do DIY stuff. If building furniture, it will get in the way of what a bench is needed for ... work holding. My router table is built into my tablesaw (a Hammer slider), see in a photo below.

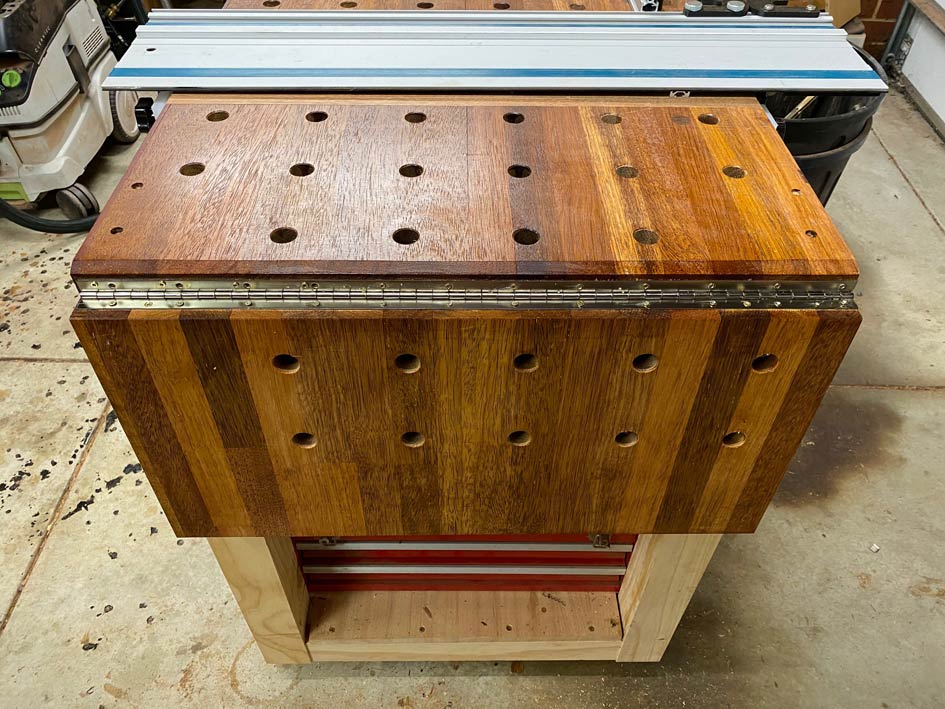
Holding work for power tools is different from a hand tool bench. The dog holes in the MFT form a precise grid to position the wood or the tools for sawing, routing or sanding. Since the forces here are downward, unlike the hand tool work bench (where they are lateral), the MFT can be built lightly. Mine is on wheels to move around.

The top is a laminated hardwood, and this construction should resist movement better than my main work bench. The MFT is built with precision in mind; the work bench is not.

saw1.jpg


Oufeed ...

outfeed.jpg


Note that the work bench uses 3/4" round dog holes for hold downs. The Grammercy and Veritas hold downs excel at down force, but are large and bulky. I also have square dogs along the front of the bench, and these are used predominantly.

The MFT uses lightweight and small clamp into 20mm holes. Mine are mostly from China. They do not need to be built like a brick outhouse.

Regards from Perth

Derek
 
I’ve got one of each. A traditional bench I built nearly 30 years ago which is still doing its job and the recent addition of an MFT cart. I’m finding the cart really useful as I can take it to where the job is rather than being confined to the workshop.
View attachment 170108
I tend to just take the tools I need, rather than all of them.
 
I agree, just something that makes you initially mute the sound and then watch no more but the other one by Tamar is just as bad so is this just a sign of people wanting there moment of fame !
 
I agree with you 100% Jacob. The bench is a work bench on which to create the components that make up the project.

But today it seems more about creating the bench itself, rather than using the bench as, as you say 'The Anvil'

Prior to posting, and on looking at this thread I googled 19th century, 18th century,17th century cabinetmakers, and all showed the work bench as a simple yet sturdy table on which to work. The latter century incorporated a vice, but that was the extent
I've always wondered how long it took joiners from an earlier time to make their bench and I reckon it was a day or two at the most and they were constructed at their own cost.
 
Hello all, thanks for all of the input and apologies its taken me so long to respond!

Before I posted my initial post, id done a few design sketches but since then taken a few steps back.

I've had a proper good look at the 3x3 custom, Hooked on wood, and Pedulla studio YouTube benches to steal some ideas and general inspiration. Also taken on board the generous advice from your kind selves.

For the sake of reduction and simplicity I've removed one of the main elements being the router table. I do use a router table quite regularly, but as a function, it felt like it was battling with the trad bench aspect too much. Clearly they're very different beasts and trying to combine them was just forcing things not meant to be together.

Of the YouTube workbench designs ive seen, the 3x3 custom one built by Tamar looks great. Way too fancy for me and my budget but definitely a good start point to work from.

What I feel suits my needs is the simple split of the two bench styles. So with that in mind Ive drawn up a preliminary design.

Main design elements:

  1. Trad bench-
    1. Probs beech, maybe ash? Affordable hardwood ideally
    2. 280 x 1800 x 100 thick
    3. Big 500mm front vise (sacrificed a proper tail vise for now - router table will be in the way making it inaccessible - I can use one of those small dog hole ones until I get more space)
  2. MFT -
    1. Plain old MDF
    2. 480 x 1800 x 100 thick
    3. Making a torsion box for rigidity and flatness. The top sheet will be fixed down mechanically so when it becomes knackered I can put a fresh MFT sheet on top.
    4. Apron to help with assembly (only partial width so I have access to tool shelf )
  3. Cross cutting -
    1. Benchdogs fence seems to have plenty of great reviews - happy to go with that
    2. Rail hinge? or maybe rail clips unsure just yet, probs come down to cost
  4. Base -
    1. Softwood - larch, Doug fir, also considering something cheaper like constructional grade pine?
    2. Big open shelf for quick access to tools (plenty hight to accommodate festool track saw for cross cutting sessions etc)
    3. Will put drawers in bottom, just not drawn up yet
    4. Festool extractor lives under overhang and can be pointed to either side easily
  5. Router table -
    1. Doesn't live in the bench, but planning to build one and house it at the end (the non-overhang end) - the reason for non-overhang is so I can securely but removably bolt/clamp/however the router cabinet flat to the workbench to increase sturdiness of everything. But can remove if necessary.
Thanks again for everyones input its very much appreciated! It might be slow progress as I have a lot on at the moment but I will deffo post updates of how I'm getting on.

Also any feedback or advice on my current design is more than welcome!

Cheers,
Calum

Screenshot 2023-11-22 at 14.45.43.png
Screenshot 2023-11-22 at 14.45.50.png
Screenshot 2023-11-22 at 14.46.01.png
Screenshot 2023-11-22 at 14.46.12.png
 
I’ve been a bit quiet on here for one reason or another but I’ve started making some headway with this bench.

The design has evolved a little bit, and I’ve started building the frame, so I though I’d post a few updates.

I’ll try document the process here with photos as much as time will allow!
 
I was debating how to join the frame together, and decided I didn’t have the patience for loads of hand cut mortise and tenons.

Luckily I have a pal who has a jumbo domino at his work, and he kindly lent me it for the weekend to cut all the mortises.
I stumbled across a video on YouTube explaining how to make holes for supersize dominoes, they’re seriously monsterous.
0B364B2A-C0C1-4541-B787-3D066F996CED.jpeg
 
Took flippin ages to get all the timber laminated up, then planed, then thicknessed, then marked out, then dominoed, but eventually got round to the glue up.

One thing I’ve come to realise is that the ‘gluing process’ for loose tenon joints is time consuming. There’s not just two mating parts, there’s quite a bit of extra time involved when glueing a pair of loose tenons per joint. Which makes it a bit touch and go!

Did the frame ends first:

500CDF26-AB69-434F-A1DB-BBE0CE0CCF74.jpeg
 
The dominoes are 14mm thick, which when doubled up is 28mm, almost 1/3 the thickness of the 90mm square pine frame components. It feels seriously strong now it’s all glued up

Here’s a couple of drawings of how the tenons sit in the frame if anyone’s interested.

9361B650-52AC-4FF4-9E2A-80540418A1F3.png
 

Attachments

  • B6754147-7D37-485B-B844-7A6402F077CD.png
    B6754147-7D37-485B-B844-7A6402F077CD.png
    21.2 KB · Views: 0
Back
Top