Marking Knife...that darn kiln again!

UKworkshop.co.uk

Help Support UKworkshop.co.uk:

This site may earn a commission from merchant affiliate links, including eBay, Amazon, and others.

jimi43

Established Member
Joined
12 Mar 2009
Messages
6,921
Reaction score
13
Location
Kent - the Garden of England
Ok...it's like one of those things when you get something that works you start to think of what you can do with it.....SO...following the fun and success I had making the Galoot plane iron in my little enamel kiln...I was wondering what to do with the bit of 01 steel I sawed off the original to make the iron....

It was long and thin....now what would that make I wonder.... :D

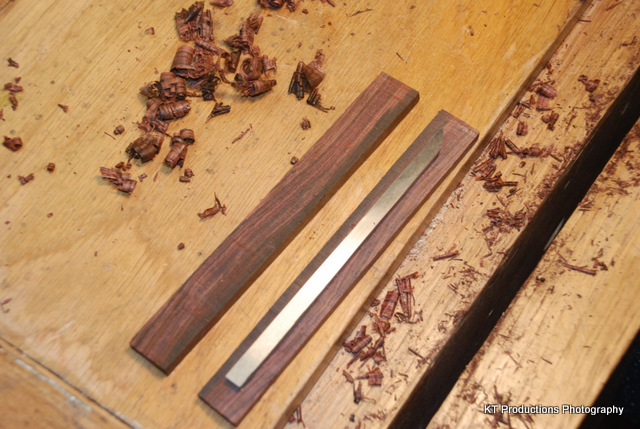
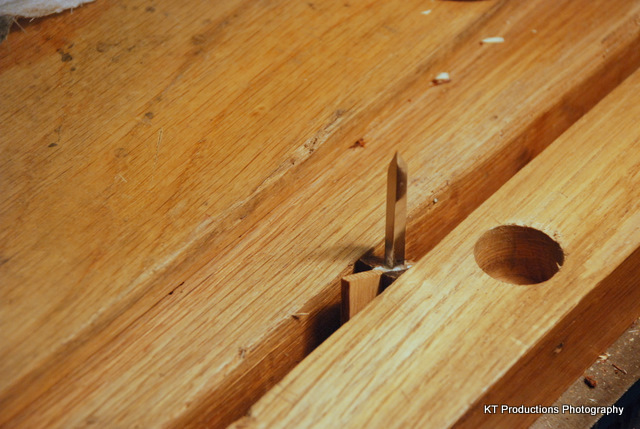
Yup...a marking knife....

DSC_0008.JPG


So .....I filed it a little better and cut a nice little bevel in the end before I fired it up....

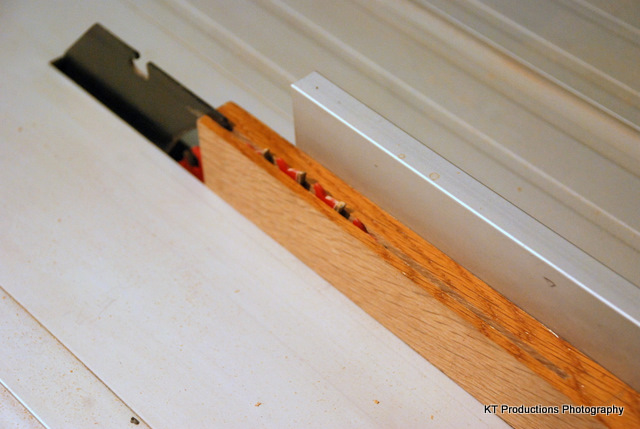
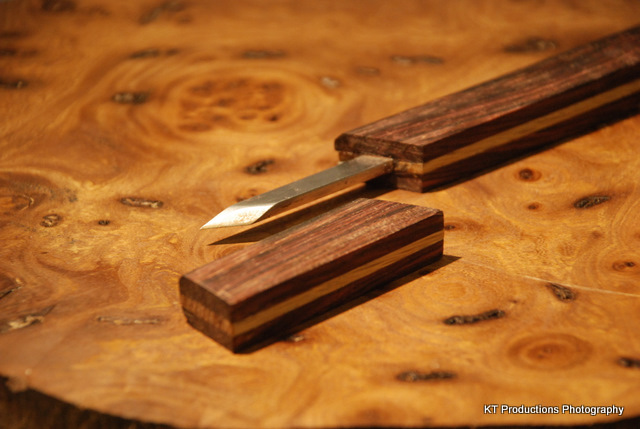
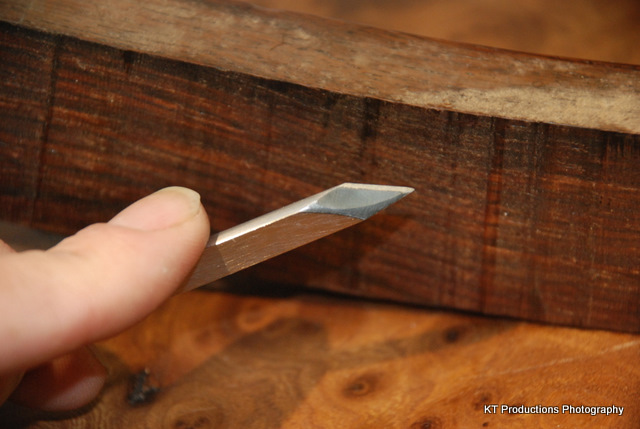
I kind of like angles in a knife so that I what I ended up with....then into the kiln...quenching in a coffee tin and we are there with the blade...

DSC_0014.JPG


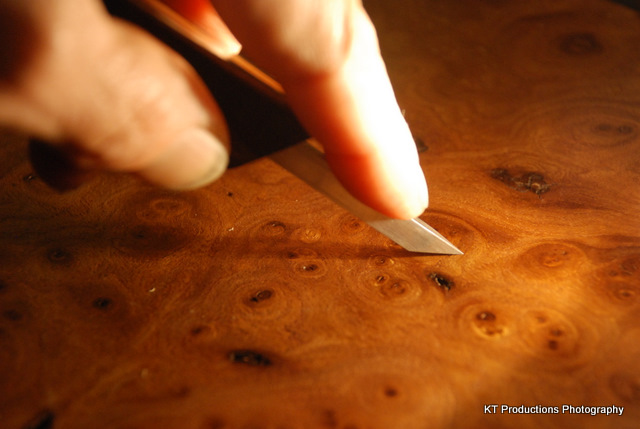
I left the black on the bevel to watch the edge as I sharpened it on "Scary Sharp" kit...but more on that later...

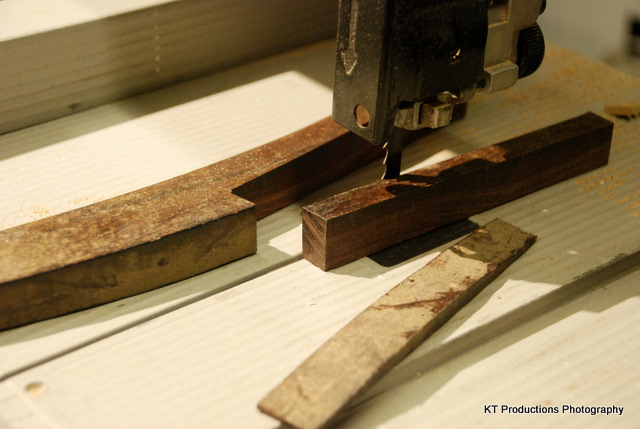
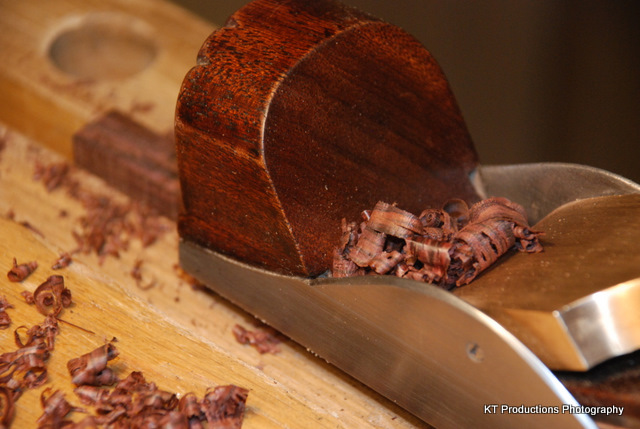
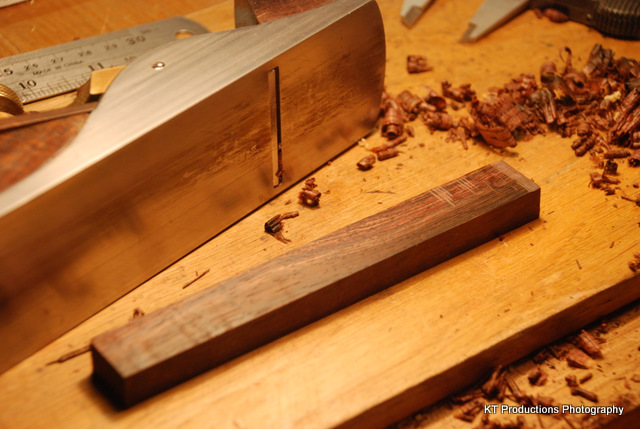
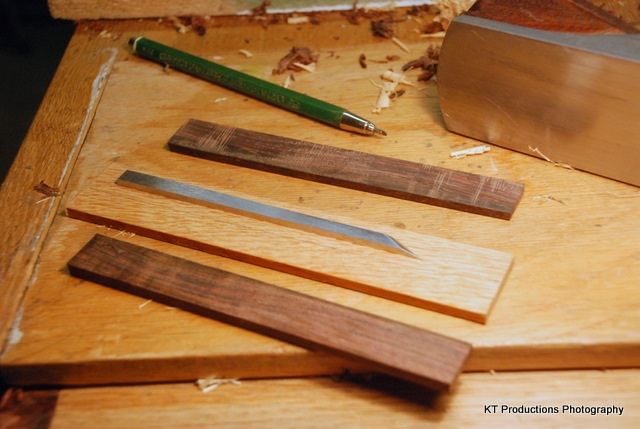
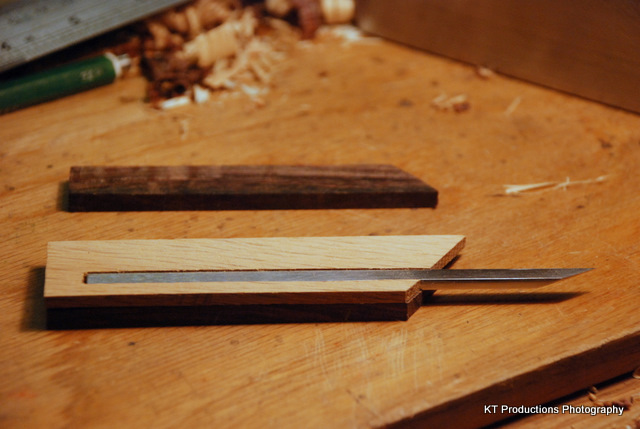
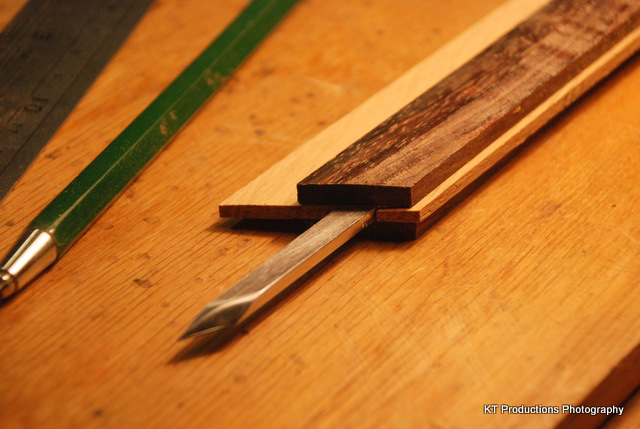
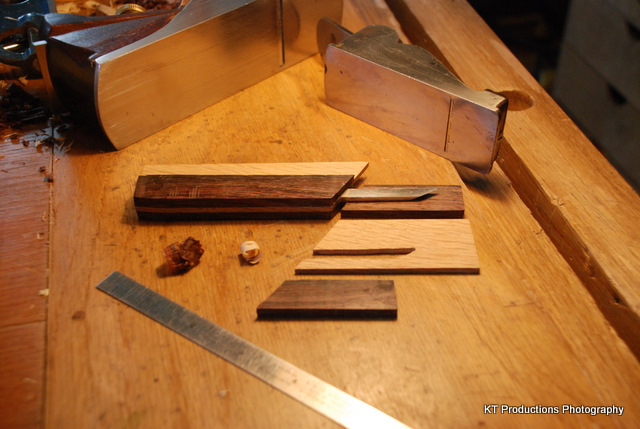
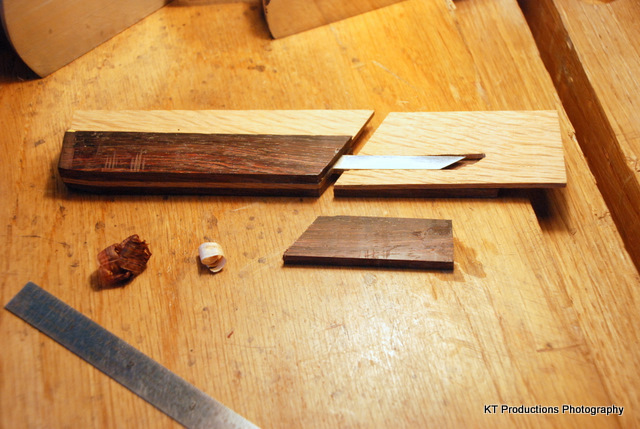
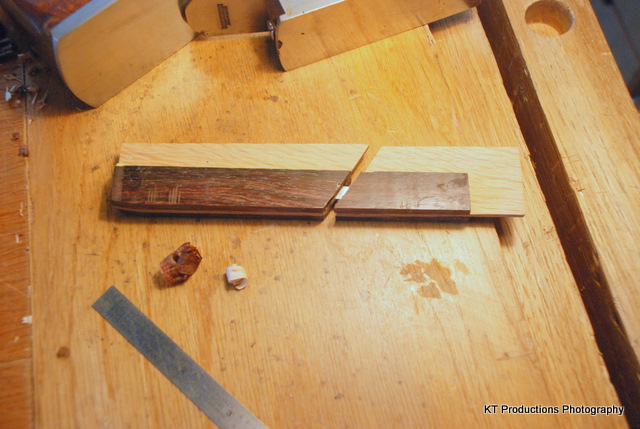
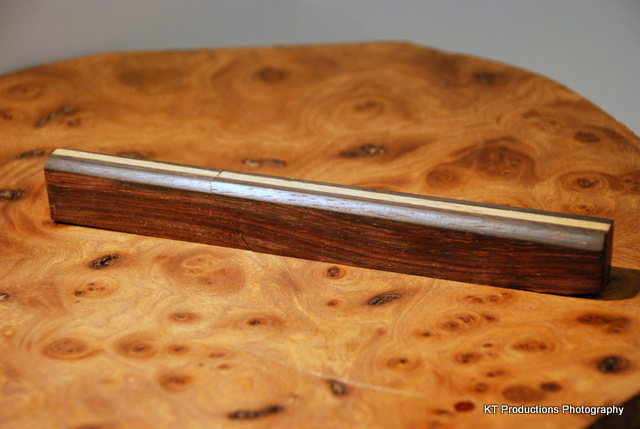
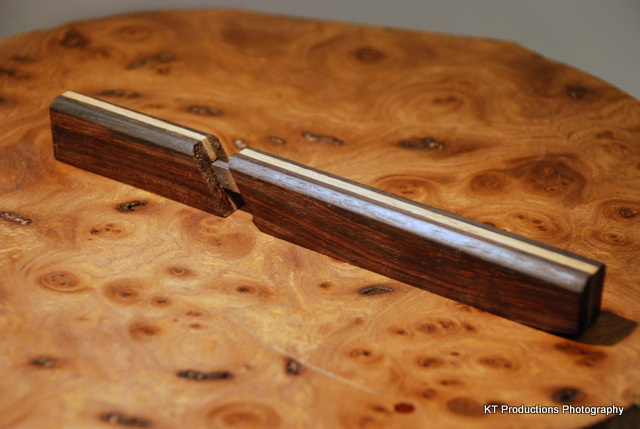
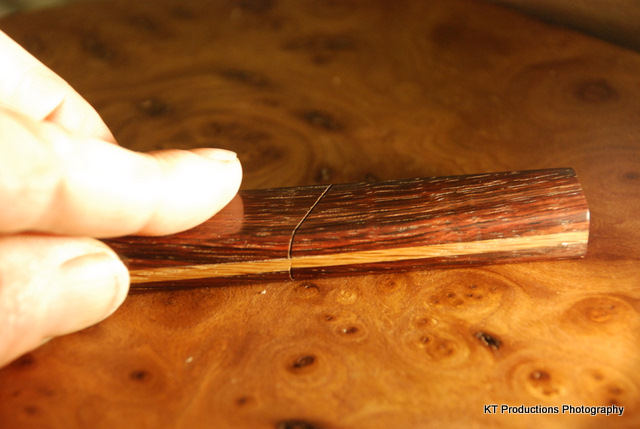
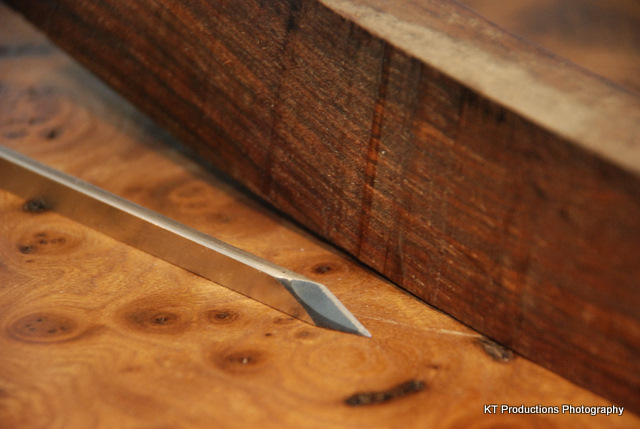
NOW...my favourite wood for this one...my old rosewood...a chair leg...you can see the raw wood in the background....off to make something plain, simple, sleek and NOT turned!!!

Back in a mo!!

Jim
 
Looks good Jim, looking forward to seeing it finished.
 
Cheers Tom and HC....

WIKIPEDIA: "TO DRIPPLE" verb. Salivate uncontrollably as in rabid dog....

:D :D :D

Now...I was drippling at the bandsaw...well it was a cross between drippling and crying uncontrollably as I cut into this ancient chair leg....I just know I am going to need it for something important one day...at which point I will have all these rosewood handled tools and no bleedin' rosewood! :D

DSC_0018.JPG


Oh well...it still has three more legs I suppose! I just have to relieve my mate in the village of them! 8)

Now I am a firm believer in making one thing....having some left overs...using the first thing to turn the second thing into the next thing and so on...so I would HAVE to use the Galoot on the rosewood bandsaw marks now wouldn't I!!?? :wink:

DSC_0023.JPG


Gotta keep checking! A tad more to go...

DSC_0024.JPG


That's better!


DSC_0026.JPG


Now....contrast wood? Um....how about some more of those old hotel doors...some oak...

DSC_0028.JPG


No spinning blade, squirting blood shots I am afraid...my photographer has retired for the evening (morning!)...

Then to scribble around the steel...

DSC_0031.JPG


A tad proud....nothing a bit of 80 grit won't sort...give a nice rough gluing surface too!

DSC_0036.JPG


Lots to play with...nearly ready for the gluing now...Titebond Original..

DSC_0038.JPG


Now to leave it clamped in the vise until the morrow...

DSC_0040.JPG


Tomorrow I will form the cap...and then think on the shaping of the block...

Later guys and gals....

Jim
 
hi jim

now that's a nice touch with the contrast, can't weight till later , hmm got me wondering now as to the shape of the handle. hc :D :D
 
HA!! You guys are too funny! :D

Here are just a few more shots....

DSC_0043.JPG


I wanted something a little different to the standard cap cut at right angles....I like echoes so I wanted to follow the blade angle with the cap cut...

Now conventional build would involve embedding the blade entirely THEN cutting the cap slot but I don't like this idea. The reason being I hate steel to steel which is inevitable with sawing down...and secondly you have to make the cavity fairly loose to get the blinkin' thing off again with glue etc..merging into the cavity...so I cut first built afterwards...

DSC_0048.JPG


Needs a bit of trimming to get it tight but you can contol the fit this way and avoid most glue leaking into the top cavity.

DSC_0052.JPG


You have to be careful here that you dry clamp to test the fit when glued up otherwise it will be too tight...DAMHIK!!!

Rushing to get the cap ready and photo for you guys...and even WITH an accidental trip to Axminster ( :oops: )....the glue was not completely set when I got back so you will have to wait quite a few hours more for the next phase...

See ya later!

Jim
 
Well on the second attempt and after letting the cap glue dry....we now have a blank which I have started to shape:

DSC_0060.JPG


Before I go too far I want to make the cap and base surfaces totally flush...they are not bad but could do with a bit of shoulder work with the Aled kit..!

DSC_0063.JPG


But my patience with the cap doing it the difficult way has reaped dividends...the fit is tight so it won't fall off easily and only a drop of Camelia oil keeps it slick inside...whilst adding metal protection as a by-product!

DSC_0070.JPG


I'm keeping the "engineering pencil" look but later tonight I am going to play around with some contours. I want the thumb to sit comfortably but grip...perhaps some knurling?

I am also contemplating putting small brass square ferrules at the cap/body transition....if I am feeling energetic!! :wink:

Cheers lads and lasses

Jim
 
Cheers Steve....

You know...the grain on this old rosewood (proper rosewood) is so stunning...I am really pondering the shape...

DSC_0087.JPG


Having polished it up with MicroMesh it is like touching silk...

The straight "engineering pencil" design so far is quite tactile and comfortable....assuming I am going to hold the blade in the middle tbus...

DSC_0088.JPG


I think I will sleep on this one....it is stunning grain as you can see...and the oak really sets it off now:

DSC_0113.JPG


Nite all!

Jim
 
That is a very handsome looking marking knife.

I was just wondering about the use of Titebond. Isn't that a water based glue? And won't it tend to make the blade rust inside the handle?
 
SDF":3q0ik9oy said:
That is a very handsome looking marking knife.

I was just wondering about the use of Titebond. Isn't that a water based glue? And won't it tend to make the blade rust inside the handle?

Hi SDF....

I think Titebond Original is an aliphatic resin glue..I have used it on neck/fretboard joints with steel trussrods which I oil first.

I put a very thing coat of Camelia oil on the steel on the knife and I think that and the lack of oxygen shouldn't prove a problem...I hope not!

If you look closely at the earlier pictures where I started to assemble the layers...the blade is slightly tapered with the wider part in the deep end of the handle. The oak inset tapers with it to the join of the handle and cap so that the blade will not work loose.

I think I have it all covered....

Cheers mate

Jim
 
Nice looking knife...I'd be interested to see what the final shape is going to turn out like, or is the rectangular section of the handle final? - Rob
 
Thanks guys...and yes...I am left handed. :wink: Well spotted HC!

You know Rob...I don't quite know...I like it as it is....as a fat pencil. It is very simple, comfortable and fit for purpose.

I may sit and ponder a while...try it in anger...then change my mind.

It really is part of an overall project to build myself all the tools I need to build my Martin 000 acoustic guitar for me....my heirloom project. The saw I need is still at the "in my head" stage but hugely pushed by the Pedder and Klaus masterpieces...but I may have to weaken and use the newly acquired Japanese one for that...

I think I will play with the brass inlay for a while...I'll be back!

Cheers guys and gals

Jim
 

Latest posts

Back
Top