Latest kit to have wheels - sawbench

UKworkshop.co.uk

Help Support UKworkshop.co.uk:

This site may earn a commission from merchant affiliate links, including eBay, Amazon, and others.

Vinny

Established Member
Joined
19 Sep 2008
Messages
175
Reaction score
2
Location
Wilts
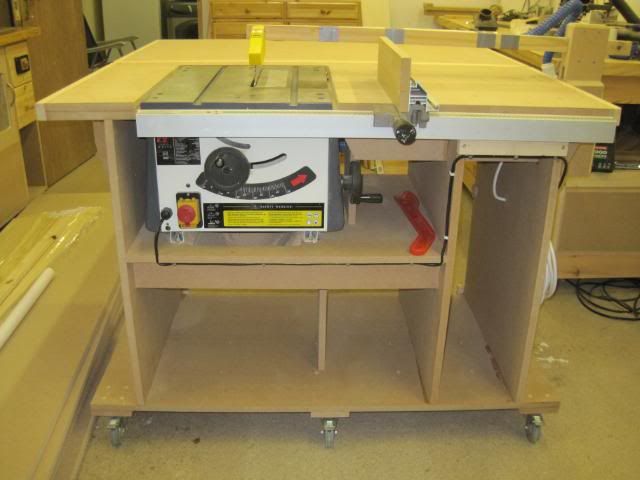
After the router table the next piece of equipment to go mobile is the table saw.
Initial construction was 2 ply 18mm mdf for the top, with more 18mm for the sides, uprights, saw stand and base.
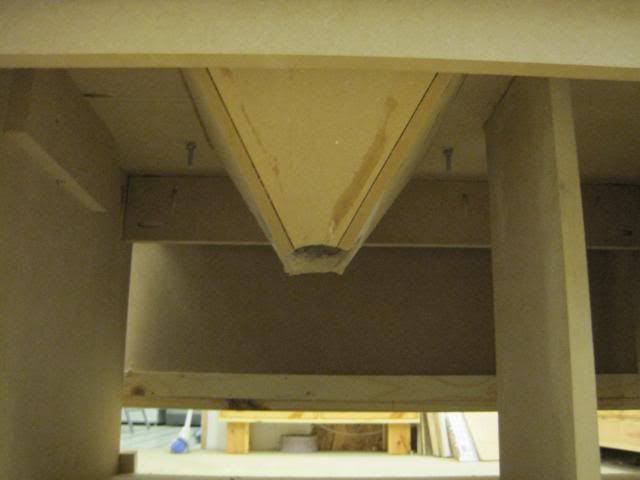
Built unit, added wheels, fitted saw and left overnight, come the morning there was a bit of a "sag", the saw was too heavy for the construction, don't think it was helped by the fact that I had mounted the castors outside of the main load. I made a torsion box and fixed it under the uinit, then added some extra bracing, it was better but still not quite there. Only one thing for it, add an extra set of castors in the middle of the unit. hey presto, solid as the proverbial rock with absolutely no sagging.

IMG_0375.jpg


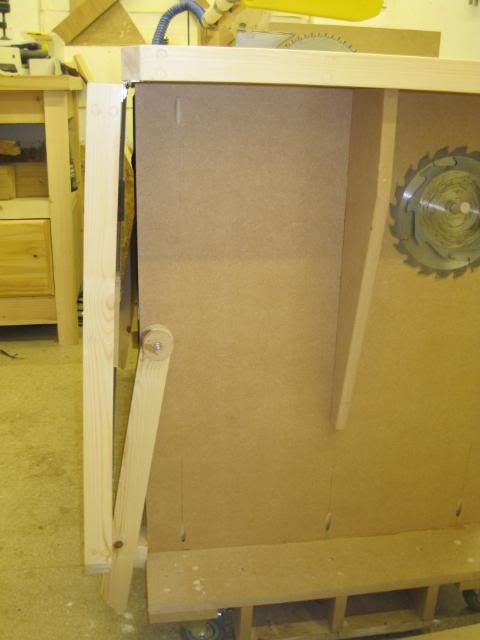
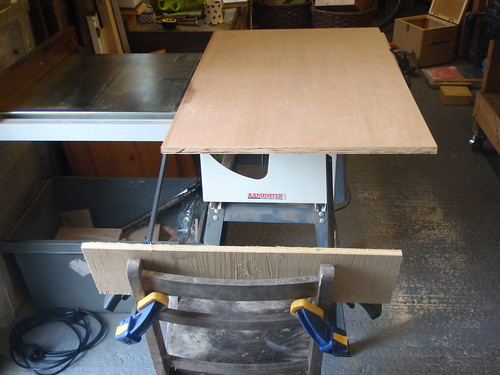
Next added a drop down outfeed table.

IMG_0378.jpg


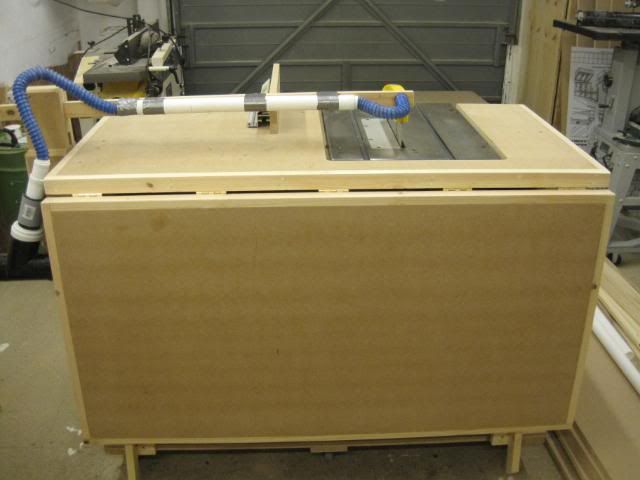
I thought that I'd need to add some fold down legs on the back edge of the outfeed table, but as it is with the 2 swing up braces it easily withstands the weight of a bag of cement.
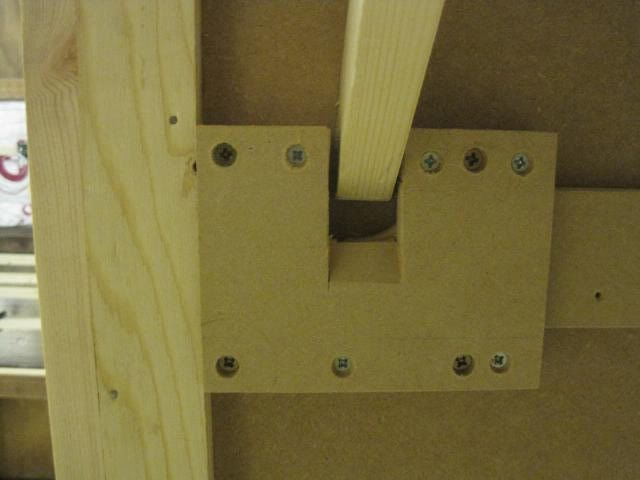
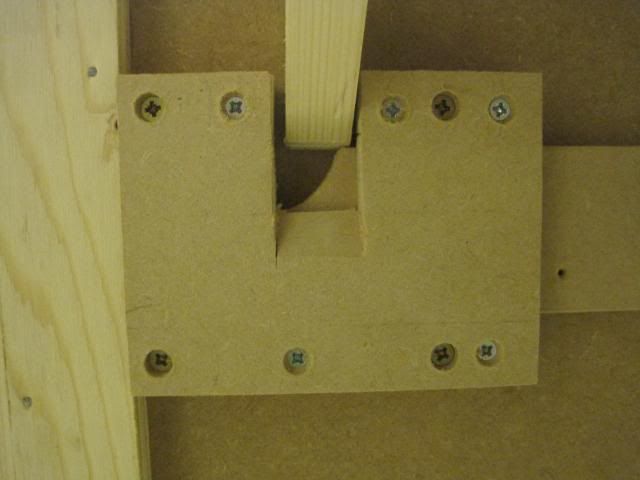
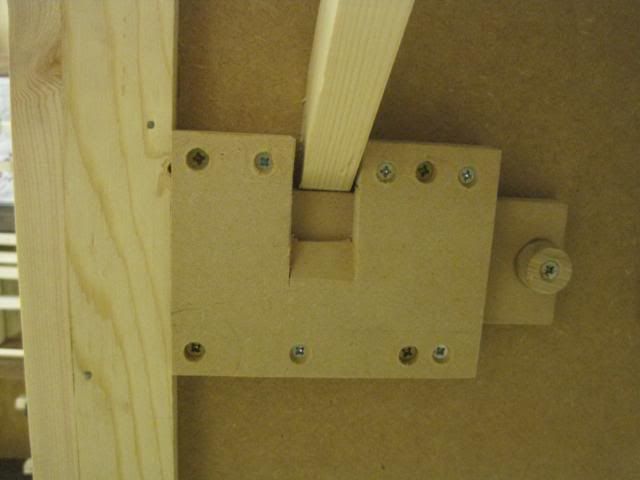
The braces are attached to the side of the unit (6mm nut and bolt) and swing up to locate in the catch.

IMG_0376.jpg


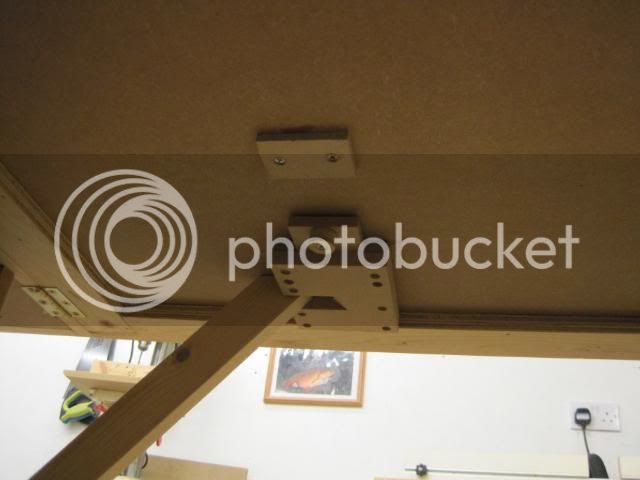
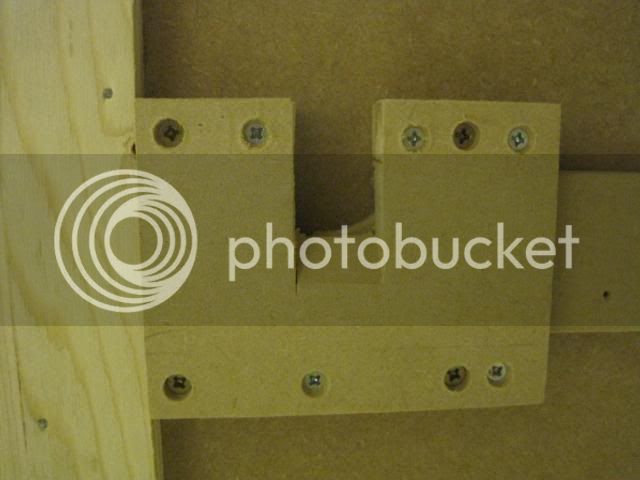
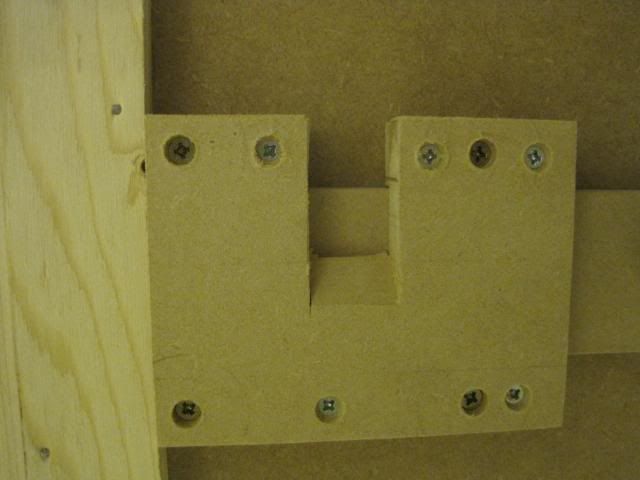
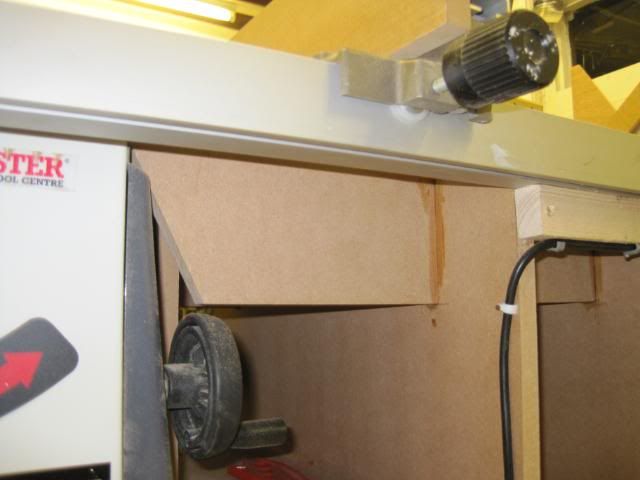
The catch in its "open" position, once the support is in place the slide is moved across, locking the support in place.

IMG_0377.jpg
.

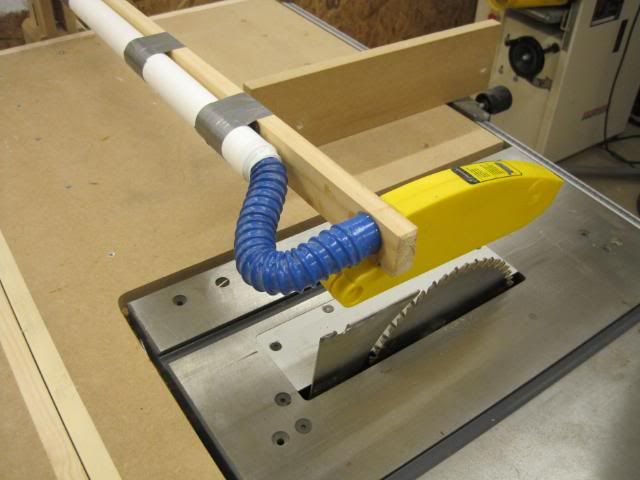
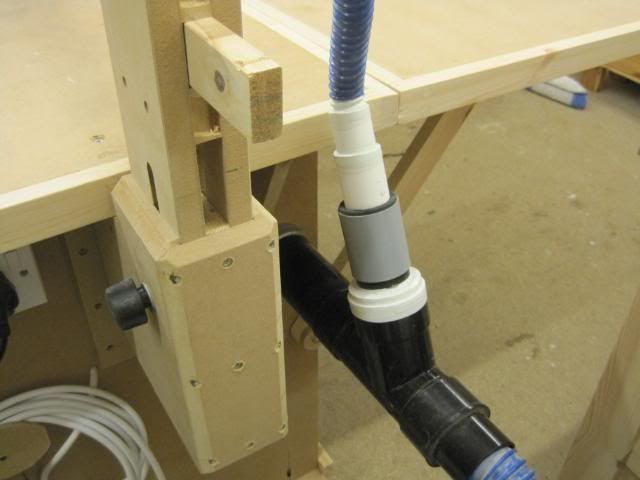
In its previous (fixed) workshop position the extraxtion for the crown guard was from overhead (rafters) now its mobile I don't have that optiuon so onto the whiteboard, eventually coming up with this:

IMG_0379.jpg


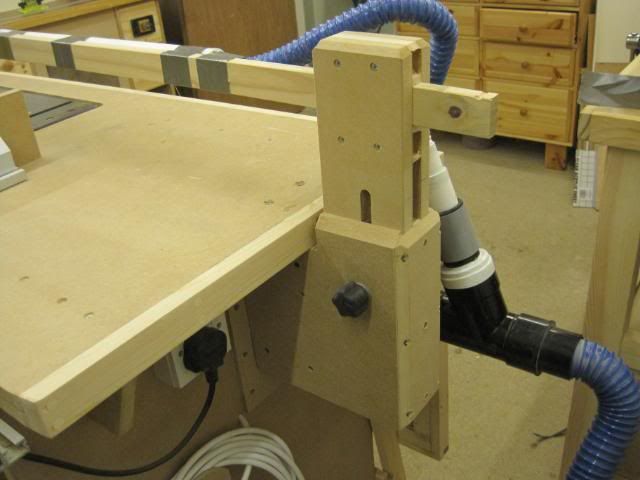
The beam is easily removed if needed and the height is adjustable to cope with a higher of lower blade height.

Next thing on wheels is omething for the pillar drill, scms and new morticer - thats tomorrows job.

Cheers all

Vinny
 
Hurrah! another ts200 sawbench thread - fantastic.

I'm going to build one over winter so cracking timing there - cheers

fold up outfeed table just what I need you should see mine..

5182186233_caaa584cd3.jpg


yeah I know - more of an outfeed chair than a table

but I couldn't figure out how your catch worked I can see it slides but not how it 'catches' - any chance of some more photo's? in fact any chance of more photo's of the whole thing?

cheers
 
Looks good, Vinny. :)

Really like the outfeed table and how you've suspended your extraction hose so that it doesn't get in the way. Does that affect the performance? What do you intend to store in all those other spaces?
 
SB

The catch really is a simple affair:

Open:
IMG_0382.jpg


Still Open, receiving the support:
IMG_0385.jpg


Partially open, showing the "step" in the slider.
IMG_0386.jpg


fully closed:
IMG_0384.jpg


fully closed with support now locked in place:
IMG_0387.jpg


Outfeed table down, legs down:
IMG_0381.jpg


Some of the extra bracing:
IMG_0390.jpg


Business end of the boom, crown guard and extraction hose epoxied in place:
IMG_0389.jpg


Plumbing and a better view of the block assembly that holds the boom:
IMG_0391.jpg


I made a chute thingamy for under the saw, but when I connected it to the camvac the loss of suction from the saw body and the crown guard was significant, so i'm probably going to make do with a bucket underneath.

IMG_0380.jpg


OPJ

the boom doesn't get in the way at all, its clear of the fence and easily removes if i need to use the work surface for anything else. The other spaces will be for a cross cut sled and probably whatever mr Maskerry features in his next DVD :wink:

Vinny
 
Ahh I get it - sort of wedges it in place simples - but effective

thanks for the pics - nicely done
 
Really nice job. I'm building a stand for my kity 419 at the minute, but nothing so impressive as that.

Si
 
I still don't get it, it doesn't look like it engages with anything, merely provides a resting point for the flip-up arm. What's the point in the sliding bit, why not a simple block screwed to the table?
 
If it were just a block screwed to the table you would have to lift the out feed table beyond the capacity of the hinge in order for the support to engage on the block.
 
Vinny, do you ever use a mitre gauge?

It looks like your extension table my fowl it.
 
Gary

I'm in the process of making a cross cut sled for it, and you're correct the outfeed table and the lip from the main table behind the blade will not allow for much movement past the cutting edge of the blade. The plan is to cut 2 extension channels or inlay 2 pices of t-track to extend the mitre slots onto the outfeed table.

Well spotted :wink:

Vinny
 
Vinny

Looks great.

Do you think there is any way of making the guard auto adjustable? What I mean by that is it covers the blade then as you present a piece of wood it raises to keep the blade covered.

I know if it were me I would be tempted to have the guard too high if it were fixed as it looks in your photo's. Or have I misinterpreted the photo's?

Mick
 
Looking real good their Vinny,, Hope you don't mind if i copy your design to do it. Once my garage workshop is converted i will have to have 1 of them 1st then use that for the router table build. How are you finding the Fence, does it glide smoooooothly across the top of the extension table.

Cheers

Dave
 
Forgot to ask about the Sliding Table on the lefthand side, looks like you have done away with that.

Cheers

Dave
 
Tisdai

I did away with the "supplied" extension table the day that the saw was delivered and set up, it had a bow in it that was so big that it looked more likje the bottom of a boat than an extension table. I used mdf then as i have done again on this build, couple of coats of liberon natural furniture wax and it glides like a really good glidy slidy thing.

I did away with the sliding table for 2 reasons, maion one was that it needed setting up a bit too often, i never really got to it bang on true and almost always ended up getting the router and straight edge out. The second reason was that every pair of workshop trousers that I own have no belt loops on either side as i kept catching them on the end of the slide.

Mick

The guard is only high in the photo becuase I had just put the boom on for the shot, had it been used before the kodak moment it would have been lower. I hadn't really thought of making it adjustable at the guard end as the block at t'other end is height adjustable, but it is a possibility, although adding an adjuster would add more weight which may lead to a bit of sag, as it is it works well so I'm happy enough for the trime being, but who knows what an hour or 2 of "looking" at things with an eye for improvement may bring.

Vinny

Vinny
 
Tisdai

I did away with the "supplied" extension table the day that the saw was delivered and set up, it had a bow in it that was so big that it looked more likje the bottom of a boat than an extension table
:lol:

I have not had a chance to put mine together yet as i don't have the roon in the garage because of all the junk since the move lol,, we have bought a shed for SWMBO gardening stuff and the bike's, and being in the condition i am i have to wait for someone to help put the shed up :( .

I'll get thier in the end i supose, nearly allways do.

CHeers

Dave
 
Vinny, looks like the 'shop is coming together well...some cunning work with that table saw thingy :wink: - Rob
 
The castors are all lockable (theyre the axminste ones) as well as the wheel locking, the shaft also locks so they don't move at all once the lock is engaged.
 
Back
Top