Just ordered a new plane...

UKworkshop.co.uk

Help Support UKworkshop.co.uk:

This site may earn a commission from merchant affiliate links, including eBay, Amazon, and others.
Well, let's get rid of the remaining 4 photos:

So, the knob (the one on the left is the one from the Stanley):
011.JPG


And the trouble with positioning my - let's say it again - smallish hand:
012.JPG

013.JPG


Finally, the small clearance or transverse concavity of the sole; the photo shows the square just in front of the mouth; I "measured" it indirectly, by comparing the light with the one I got from my electronic digital caliper. Not very accurate maybe, but that was as good as I coud get it. Gave me about .02mm (two undredths of a mm). Is that flat enough, or should I do something about it?

I suspect this plane is going to mean more work than I expected! Well, after all I am retired and need some sort of entertainment...
 

Attachments

  • 011.JPG
    011.JPG
    124.7 KB · Views: 790
  • 012.JPG
    012.JPG
    160.7 KB · Views: 790
  • 013.JPG
    013.JPG
    169.8 KB · Views: 788
Thanks for the photos.

If you want to prep the cap iron well this might interest you http://www.woodcentral.com/articles/tes ... _935.shtml

Both the springy and the solid work well, as long as they don't choke you're golden. Old wooden planes have the "slab" and they worked just fine

If you don't like the flatness send it back or alternatively use it. You might find it works fine. The key area is that it's adding pressure in front of the mouth.

Looks like a nice plane although I prefer the look of the QS #4
 
Hello,

The cap iron is fine, you will just need to smooth the leading edge a bit with some wet and dry paper. The thicker blade and thick cap iron work very well, the springy cap irons tend to put an arc in the blade, which defeats the object of the finely machined bed of the frog on good quality planes. We want as much blade in contact with the frog as we can get to eliminate chatter. As long as no shavings can get under the cap iron, there is no need for it to be so springy as to bend the blade.

As to the slight hollow area. It is very slight and may not be worth worrying about. If it is an 'island' of hollow, surrounded by flat areas, then this is actually a good thing. As long as the hollow does not extend back as far as the mouth area, all is well

Mike.
 
Richard T":18nim8hz said:
A bronze lever spring???:

Phosphor bronze has 'springs' listed as one of its uses, and so do other recipes of harder bronze that I have noticed in my metal trawlings such as:

http://en.wikipedia.org/wiki/Phosphor_bronze

http://springs.aero/uncategorized/nicke ... e-springs/

http://www.springworksutah.com/index.ph ... ronze.html

As said above the lever cap cam spring does not have to be a super springy steel one.

It's wear and deformations I was thinking about, not so much "springiness". That cam will be worked a lot along the years. Anyway, this being brass on bronze, most of the wear will probably take place on the hole for the pin - which pin I expect to be made of steel, not brass or bronze...

Thanks for the links, they probably will make for interesting reading.
 
I've got some similar looking phosphor bronze springy bits out of old heavy duty switches and they lasted ok so I think a spring on a lever cap should be fine.
 
Just ploted (from the previous pictures) and superimposed the profiles of the Jumma and the Stanley totes. I took care that the grid size was the same on both pictures when plotting.

No wonder the Juuma's feels smaller. Then you add 2mm to the thickness and a much less roundish section, and there you have it...
 

Attachments

  • Profiles.png
    Profiles.png
    25.8 KB · Views: 614
The difference between the two handle shapes may not look much in the diagram - to a non-user of planes - but it's as significant a difference as someone with size ten feet trying to wear size seven shoes.

So disappointing to think that the properly shaped handles wouldn't cost any more to make.
 
I guess they knew I like wodworking...

No point in trying to modify this one, it will have to be a handle made from scratch.

I will have to decide if this plane deserves a good piece of wood for the handle or a piece of any wood whatever... It will probably depend on what I happen to have at home, as I don't intend to buy wood on purpose.
 
Sounds to me that you've decided that this Plane isn't all that good even before you've put it to a piece of wood.
Why not modify the handle? It's just a matter of reshaping the very upper part of the tote, or you can graft a new piece of wood on to that upper section and reshape it. It's a lot less time consuming and it will work/feel perfectly fine.
 
MIGNAL":2no5f84q said:
Sounds to me that you've decided that this Plane isn't all that good even before you've put it to a piece of wood.
...

Not at all, although I admit I may have expressed myself in a way that conveys that idea (I have never been a good communicator, as many a people knows...)

As far as I'm concerned, this plane may be the best cutting implement in the world, - as you say, I haven't even put it to a piece of wood, and will probably not in the next few weeks. Although, I must admit, I don't like the number of parts made of cast brass, especially the yoke, which worries me a little - I ordered a replacement just in case...

I should say there was a time when I was happy to buy any piece of equipment of the quality level I could afford, and modify or improve it to suit my needs or requirements. If I remember right, it took me about two weeks, several hours a day every day, and a lot of abrasive paper, to put my 40 year old Handyman #4 plane where I wanted it - and as far as I felt a Handyman would go. But I didn't have to touch the handle or the knob - they fit perfectly, and still does.

But as time went by, I became less and less happy to do so. I do not think I would do that again on any plane, unless it meant rehabilitating a precious old best quality tool or piece of equipment. Which is not the case now.

So, even if this plane proves to be among the best for its intended work, I can't use it comfortably. As far as I'm concerned, this could happen with a LN or a Veritas, although I doubt it.
But why should I use a fine piece of wood for making a new tote for an average quality plane? I already am going to have some work to do (not to talk about fettling, which is a matter of course...). The knob, which is a different, much plainer kind of wood than the handle, will have to be worked upon too. As for the transverse arching of the sole - which goes all the way front to back - , being so slight, I will just wait and see if the edges score the wood or not. Hope not.

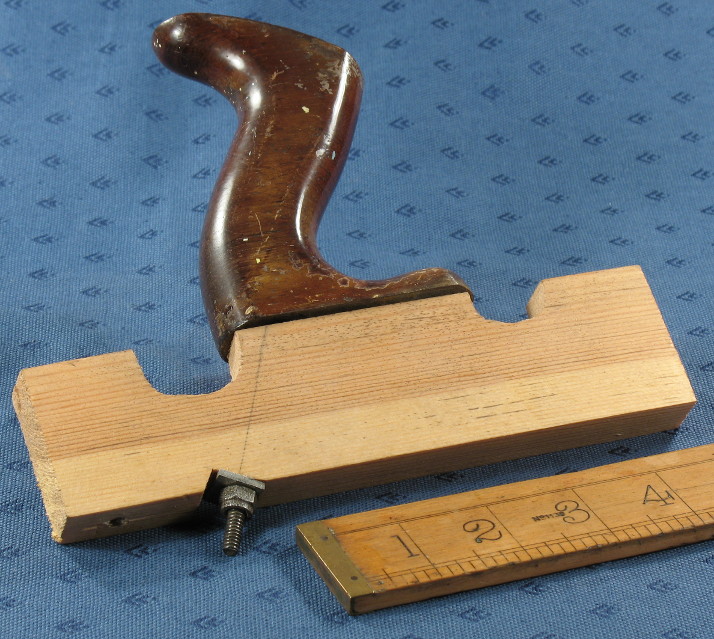
As for modifying the handle, I'd rather make one from scrach - the shape of the original one may not be ok, but the wood is nice and I still may make it into something useful...
 
Thank you. That handle might fit me ok, but then again it might not. I'd rather not risk ending with two ill-fitting handles.

I'll copy a handle that I know fits me for sure (even at the risk of having to make more than one before I get it right...). Only some practical questions to solve concerning the counterboring of the hole (still could not find a 7/16 or a 11mm counterbore, I may have to improvise a little from 11mm drills...). But I'll get there, no doubt.
 
I drill the counterbore first in a oversized blank so any chipping can be removed, I have a long series drill reground to a lip and spur profile to drill the through hole. I mark the centre line of the hole and drill from both ends.

Pete
 
Thank you Pete for your suggestions.

The only time ever I made a plane handle I drilled from both ends with a 6mm (or was it 7mm?) standard drill before drilling the counterbore. I did this so I had a starter hole for the larger diameter drill I would use for the counterbore.

As my DP goes only 50mm deep, I first drilled to a 50mm depth then, without moving the blank on the table and while keeping the drill inside the hole, I lowered the drill shank as low as I could in the chuck so I could get some 1/2" or 3/4" more. I then did the same from the other side of the blank. Managed to do it ok, as luck (and care... :wink: ) had it the holes bored from each side matched perfectly.

For drilling the countersink for the nut, I used a 10mm standard drill, which was what I had at the time, then enlarged the hole with a Dremel bit - which I would rather not do this time, it's just too much work.

In the end, after making all the drilling right, I cut the base at a wrong angle and ended by not being able assemble the handle on that plane... :( I'll be certain to more careful this time!
 
I find a large drill in to a pilot hole tends to snatch, so I drill the counterbore hole first using a 11mm lip and spur bit.

Pete
 

Latest posts

Back
Top