Good Surname or what ?
Established Member
I've finally made some progress in building my Tool Cabinet
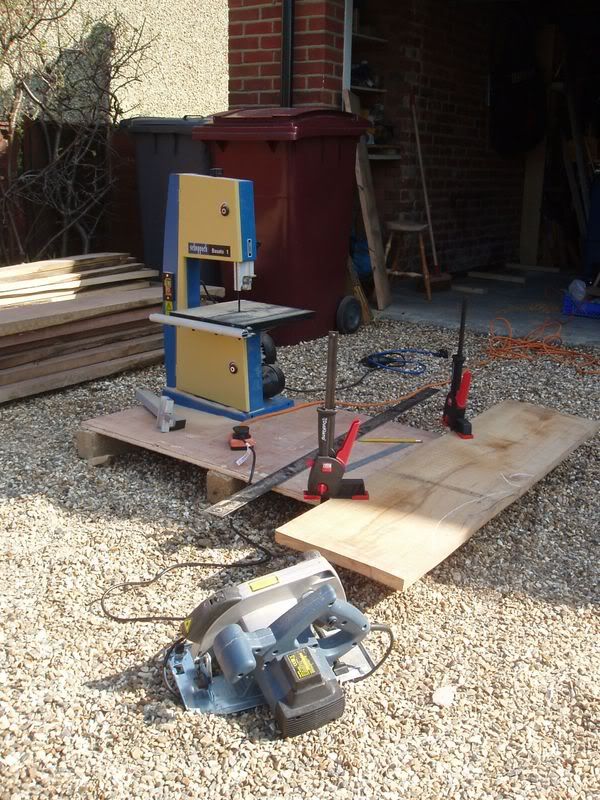
I have a large amount of sawn beech... you can see some of it stacked to the left of this picture showing my "Heath Robinson" approach to roughing out. I don't have a tablesaw so made do with my baby bandsaw and a cheap circular saw (£25 from Aldi)
(I coudn't have done this while swmbo was around - she hates dust on her car!)
I do have a nice p/t. So machined everything to oversize and stickered it for a few months. Not my choice but workshop time has been in short supply .
.
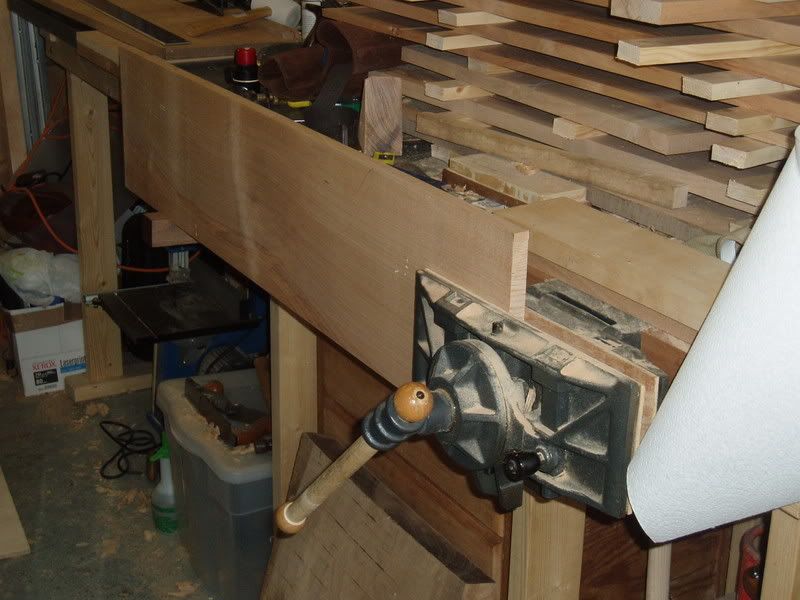
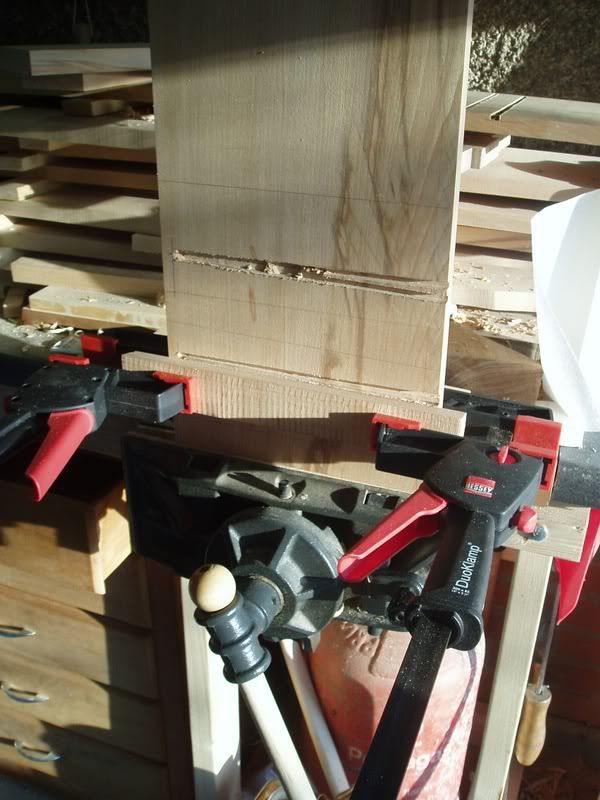
When I finally got started again, I brought everything to final dimension by hand. I hope you like my "bench slave" supporting this board for edge planing. The observant will notice that the patternmaker's vice is on the right of the bench - that's so it's close to the garage door. I use it to hold awkward pieces while shaping with a drawknife so needed the room. It's not so great for holding stuff while planing.
Again I don't have a sophisticated way of accurately cutting to length so did it by hand.
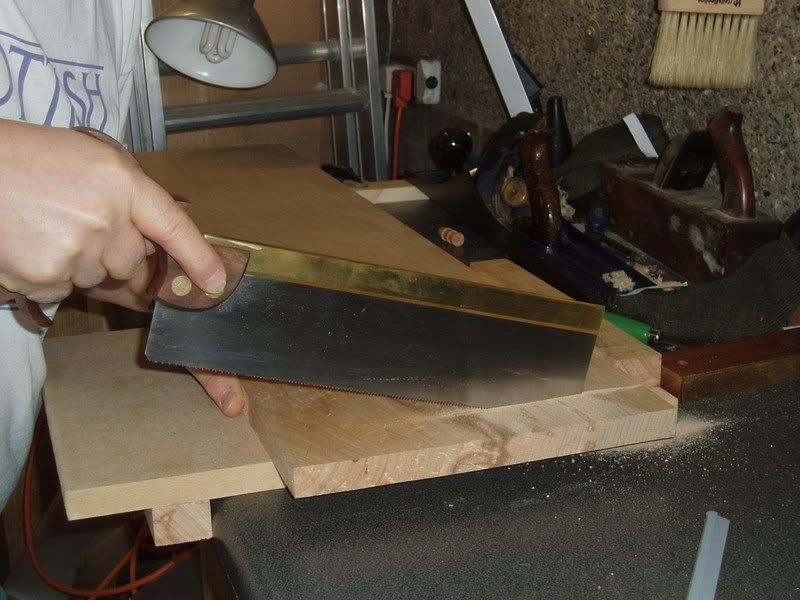
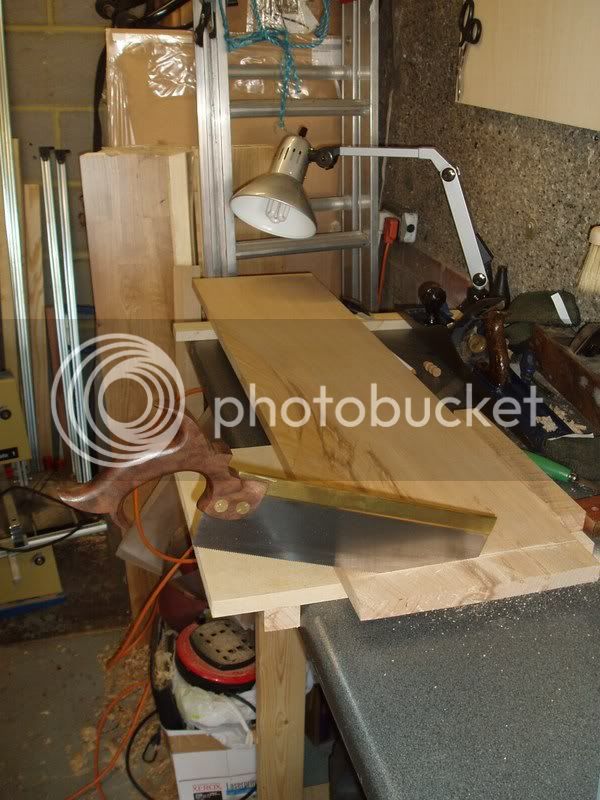
Ok - I know you want to see more of the Wenzloff :roll:
I'm using this piece to try techniques I've not used before so the shelves will be fixed with stopped tapered sliding dovetails. I routed the majority of the waste...
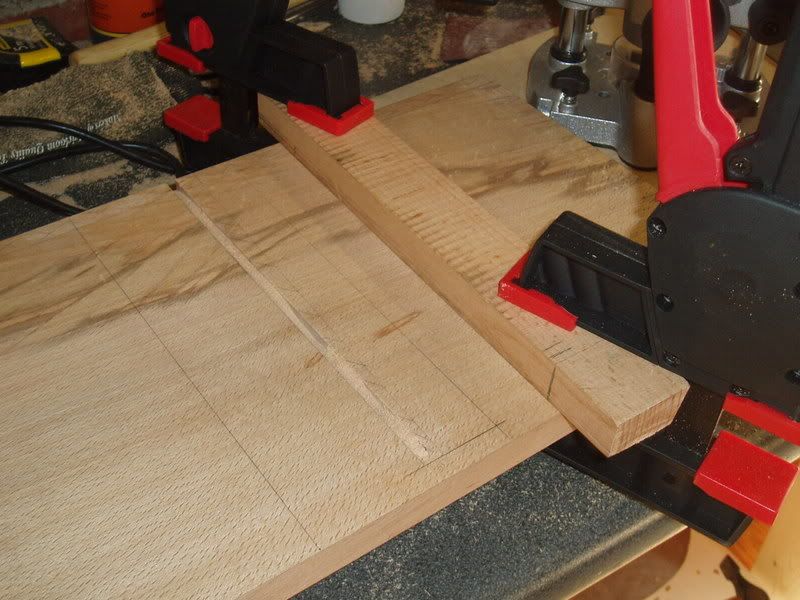
... and pared the rest out using a tapered guide block.
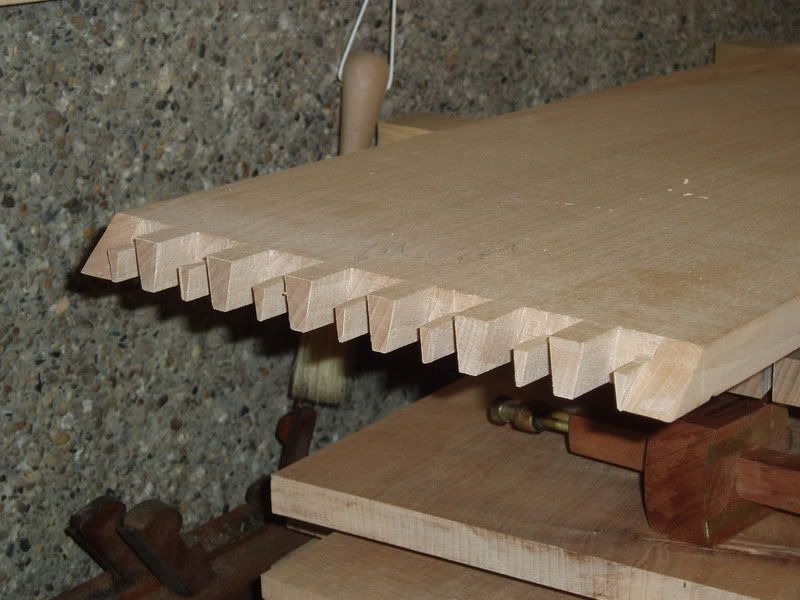
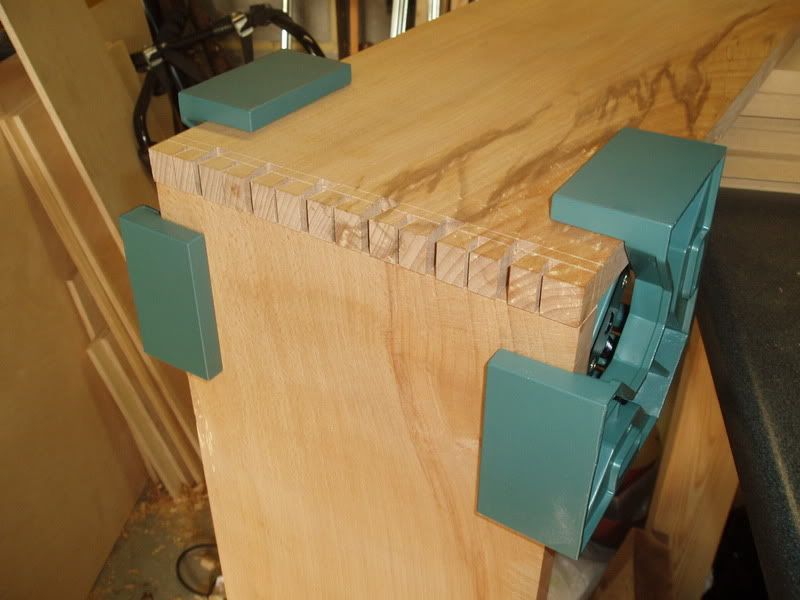
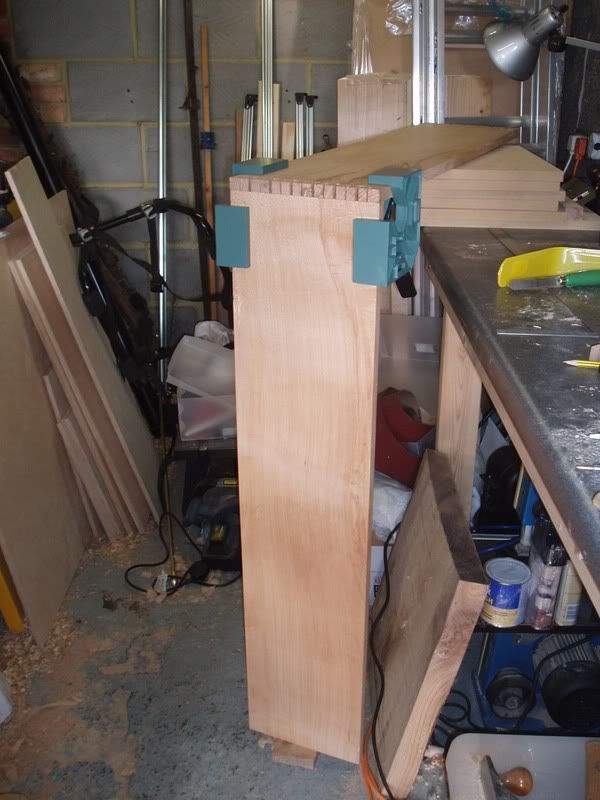
Someone convinced me to try houndstooth dovetails ...
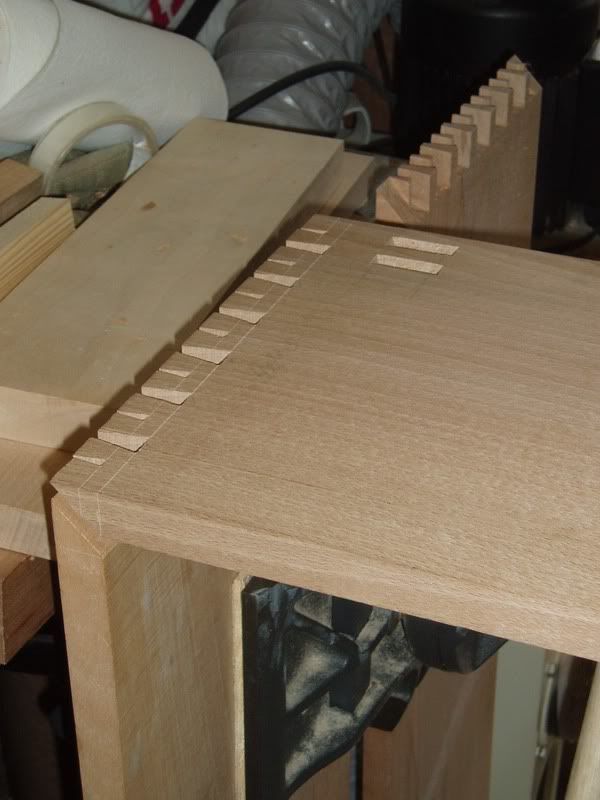
The main cabinet will be 1100 wide by 1000 high by 245 deep. I've found this to be an inconvenient size to work with in all sorts of ways. Holding the boards securely while marking pins from tails being just one. Anyway, I guess Axminster needs the money more than me
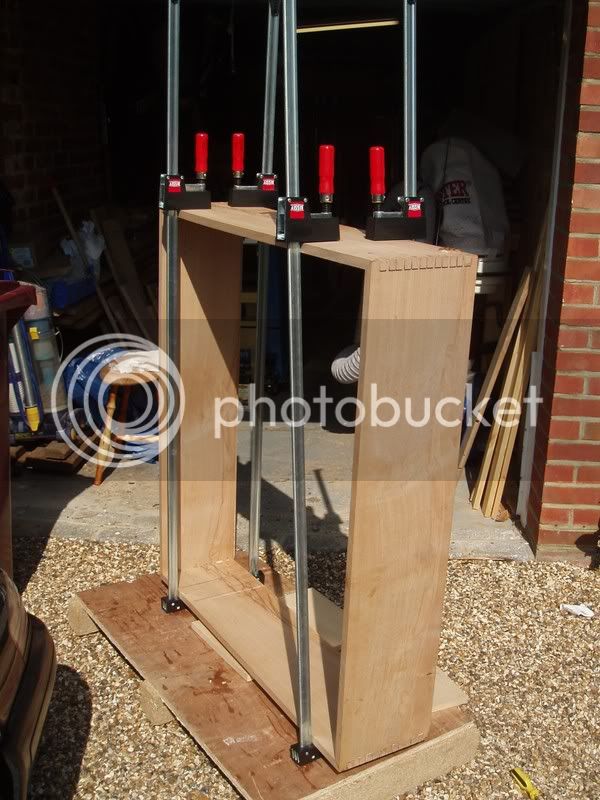
I'm currently cutting pins... when that's done I'm almost ready for glue-up. Weather permitting this Bank Holiday should see that done.
I have a large amount of sawn beech... you can see some of it stacked to the left of this picture showing my "Heath Robinson" approach to roughing out. I don't have a tablesaw so made do with my baby bandsaw and a cheap circular saw (£25 from Aldi)
(I coudn't have done this while swmbo was around - she hates dust on her car!)
I do have a nice p/t. So machined everything to oversize and stickered it for a few months. Not my choice but workshop time has been in short supply
. When I finally got started again, I brought everything to final dimension by hand. I hope you like my "bench slave" supporting this board for edge planing. The observant will notice that the patternmaker's vice is on the right of the bench - that's so it's close to the garage door. I use it to hold awkward pieces while shaping with a drawknife so needed the room. It's not so great for holding stuff while planing.
Again I don't have a sophisticated way of accurately cutting to length so did it by hand.
Ok - I know you want to see more of the Wenzloff :roll:
I'm using this piece to try techniques I've not used before so the shelves will be fixed with stopped tapered sliding dovetails. I routed the majority of the waste...
... and pared the rest out using a tapered guide block.
Someone convinced me to try houndstooth dovetails ...
The main cabinet will be 1100 wide by 1000 high by 245 deep. I've found this to be an inconvenient size to work with in all sorts of ways. Holding the boards securely while marking pins from tails being just one. Anyway, I guess Axminster needs the money more than me
I'm currently cutting pins... when that's done I'm almost ready for glue-up. Weather permitting this Bank Holiday should see that done.