Gallery table and Benches

UKworkshop.co.uk

Help Support UKworkshop.co.uk:

This site may earn a commission from merchant affiliate links, including eBay, Amazon, and others.

Mattty

Established Member
Joined
9 Oct 2008
Messages
1,077
Reaction score
0
Location
Leeds
I recently made a table and benches for my gallery, i thought i would share how i made them.

The table and bench frames are made from figured Beech, with rustic European Oak tops.

Ok- The legs were planed all round and then cut into octagonal section on the table saw. Then time for Jointing.

DSCF4219.JPG

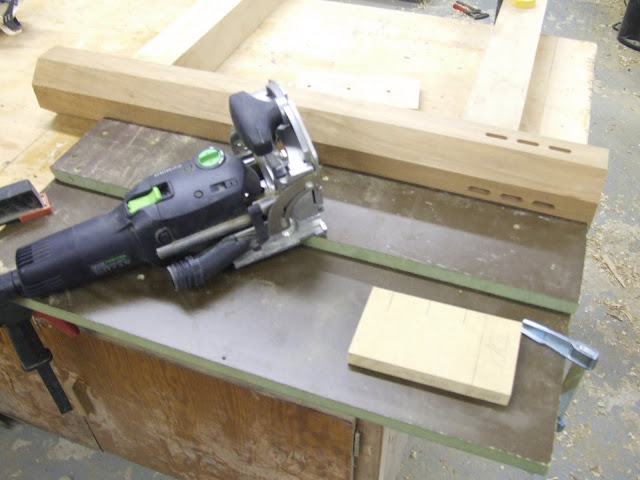
I made a simple jig to reference the domino jointer off the bottom face

DSCF4222.JPG

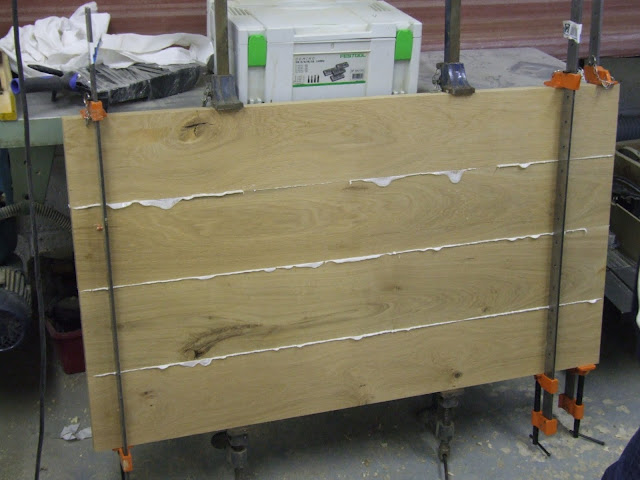
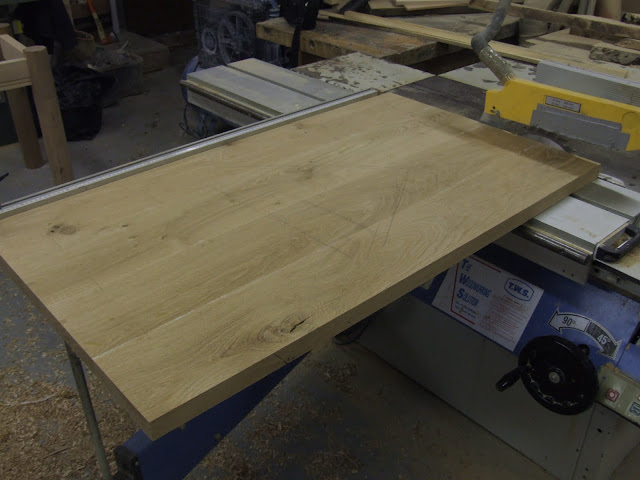
4 boards jointed and glued for the top.

DSCF4234.JPG

Rails machined and cut to length on the scms

DSCF4239.JPG

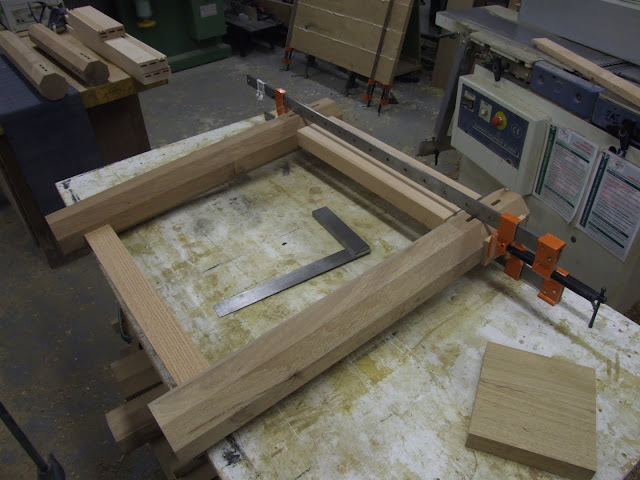
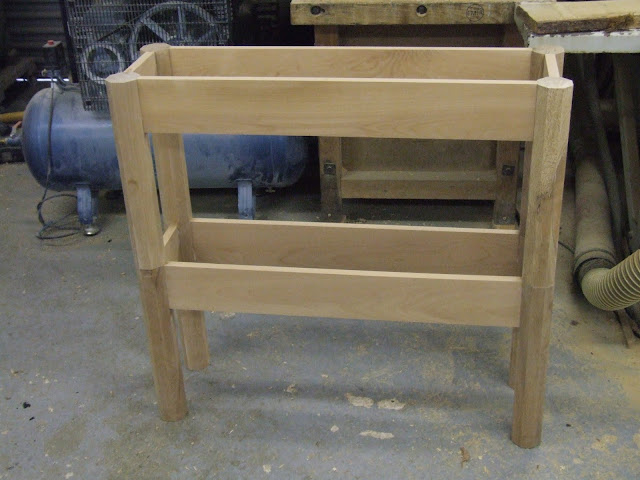
Legs and rails clamped up. I used a piece of timber as a spacer at the bottom to help keep the legs parallel.

DSCF4241.JPG

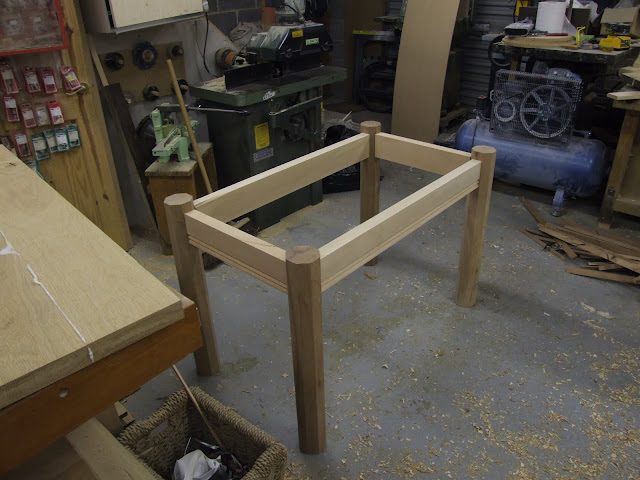
All glued up and clamps removed.

DSCF4243.JPG

Glue scraped off and top sized on the dimension saw.

DSCF4247.JPG

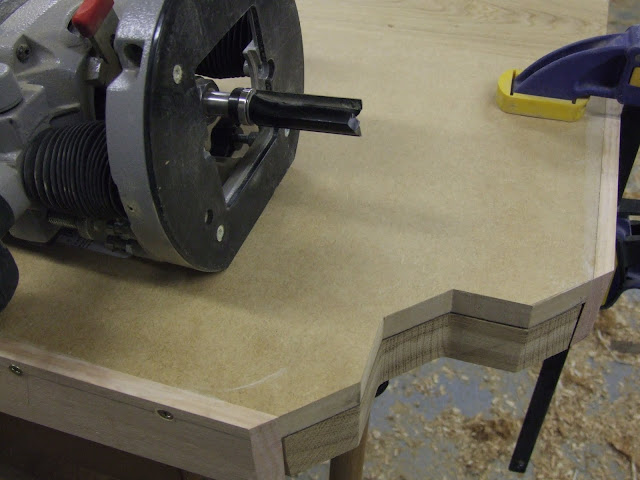
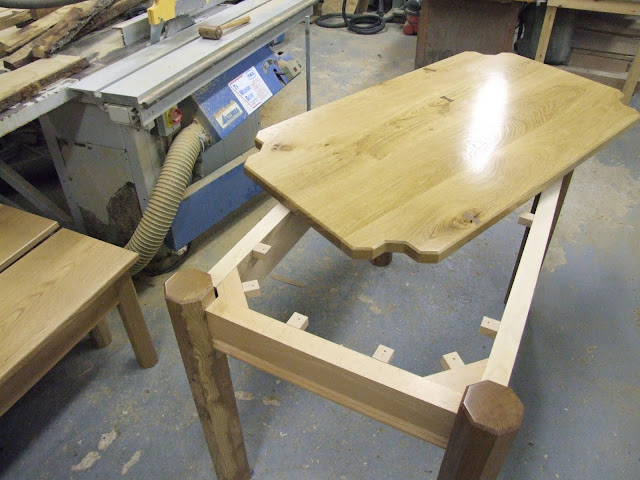
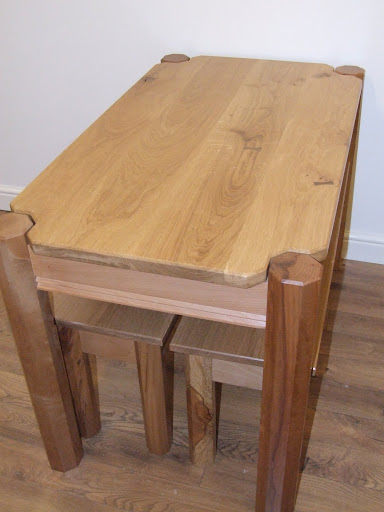
The top shaped around the legs, the waste was first cut out with a jig saw then the router and jig cleaned it all up.

DSCF4252.JPG

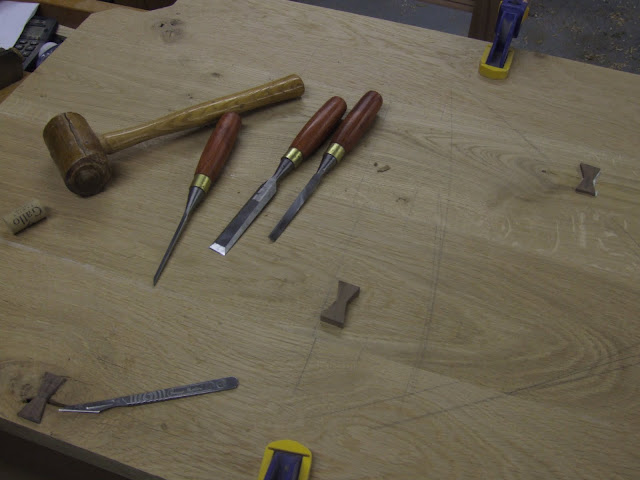
Butterflies set in the top over 3 of the defects. I purposely used a more rustic grade of European Oak so i could do this, I wanted to show a variety of styles in the gallery.

DSCF4254.JPG

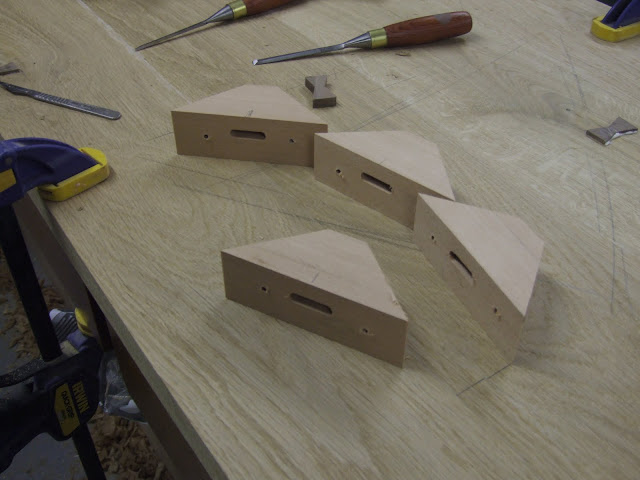
Corner braces, pre dominoed for the table top fixing buttons.

DSCF4255.JPG

Fitted in place with screw and glue.

DSCF4277.JPG

2 bench frames made in the same way.

DSCF4280.JPG

All sprayed up with clear AC laquer. Buttons pushed into the slots and ready for the top to be fixed on.

DSCF4317.JPG

Installed in the gallery.

DSCF4327.JPG

Still lots too finish off in the gallery.
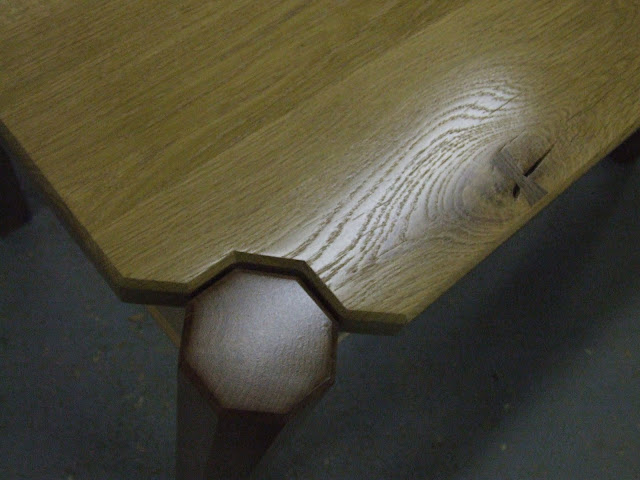
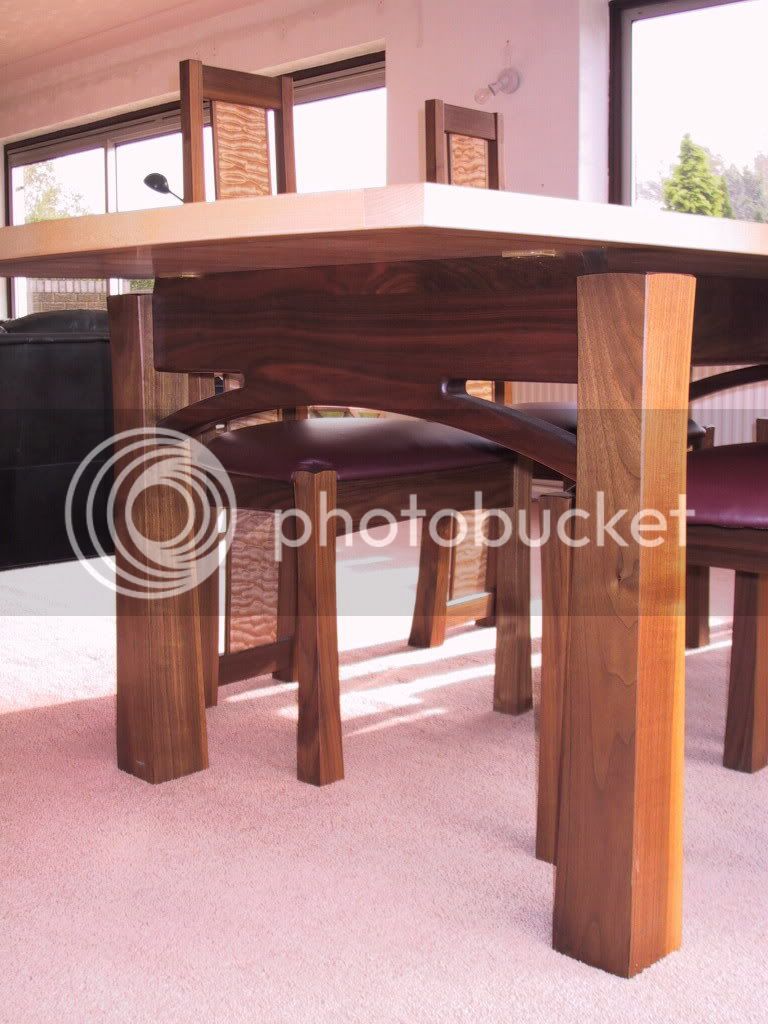
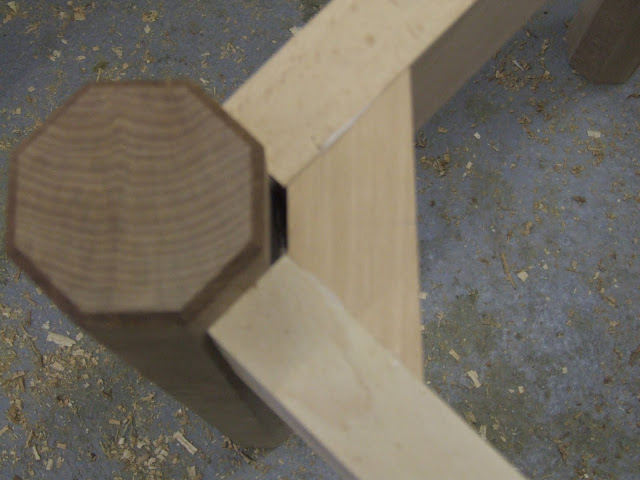
DSCF4285.JPG

The leg detail.

Thanks for looking, any comments (good, bad or just plain ugly) welcomed.

Mattty
 
Very nice mattty. I do like the way the top wraps around the legs. Looks like dominoes are strong enough for a table then. :D
 
An interesting design, Mattty - thanks for sharing.

Gallery looks great, too! Do you have any more photos of this? ;-)
 
mailee":3dcm8bwb said:
Very nice mattty. I do like the way the top wraps around the legs. Looks like dominoes are strong enough for a table then. :D

Thanks mate. Truth be told Mailee, i would normally have tenoned the rails but i thought i'd try it out as it was a job for myself. 3 no 10x50 doms with the corner braces and it seems to be very rigid (as rigid as M&T), i suppose we'll find out over the next few month/years how well they fair.
 
OPJ":i5lcux97 said:
An interesting design, Mattty - thanks for sharing.

Gallery looks great, too! Do you have any more photos of this? ;-)

Thanks Ollie. I'll post some more pics of the gallery when it's complete.
 
Mattty":3kp42krz said:
DSCF4285.JPG

The leg detail.

Thanks for looking, any comments (good, bad or just plain ugly) welcomed.

Mattty

Matt, I quite like the chunkable use of the oak, to my mind oak always looks good if done big rather than delicate. The use of the butterflies is also something that I want to play around with on a future project and using it to accentuate the knotty defects is a neat idea 8) The only thing that doesn't quite hang in there for me is the treatment at the corner...I like the exposed leg tops and the chamfer detailing but I would have left the edges of the table top in line with the rails, this would have the effect of emphasizing the octagonal section of the legs. As it is, there's a 'V' shaped notch each side of the leg which to me looks slightly odd...overall though I like it, nicely done. The use of the Dom is also good...do I need one? :-" 8-[ :lol: - Rob
 
Thanks Rob.
I've used this detail before, this is just an exploration of it and this time i extended the top as you described.

This is the same detail as you described from a pair of desks i made last year-
DSCF2454.JPG

I also extended the legs through on this one finishing in a 15 degree faceted end.
 
Mattty":1zocjq0g said:
Thanks Rob.
I've used this detail before, this is just an exploration of it and this time i extended the top as you described.

This is the same detail as you described from a pair of desks i made last year-
DSCF2454.JPG

I also extended the legs through on this one finishing in a 15 degree faceted end.

To me, that looks more 'balanced' and is probably how I would have done it - Rob
 
I think your showroom is great Mattty but I was thinking the same about the leg detail before I read the later posts.

For me hexagons look nicer than octagons although all the arts and crafts brigade will disagree. I think having the leg half surrounded by the top (no Vee's) with the tops flat and flush looks best but that is only my opinion. I know your earlier design with the faceted leg top is also A & C but somehow detracts from an excellent piece.

Sorry to be a PITA but you did ask :D
 
Further thoughts on the above are that it is difficult to use hexagons on a rectangular table but I still find octagons clunky. Maybe squares with largish chamfers or, being a modernist, radii. I still think you have to follow the leg section closely with the top for best effect.
 
Thanks for the comments Brian. I am always happy to have a critique. Design discussion is something i greatly wish there was more of on this and the other woodwork forums.

Hexagons would be great on a hexagonal table, i agree. I needed 90° corners though and an Octagon or square provided a more obvious meeting surface between the leg and rail.
The gaps between the leg and table look excessive in the photo's, in reality in the second picture they are about 2-3mm, which looks accentuated by the chamfer. The larger table has a gap of about 3-4 mill.
I too prefer the top finishing more in line with the rails and less wrap around with the legs like this
DSCF2458.JPG

truth be told though, the gallery table, was more of an experiment, also it's nice to have people see something a bit more 'extreme' which can always be reigned into suit their tastes if they wished to commision something.
 
Can I make one more "critique" before you cut me off your Christmas card list. Unless it's the angle of the photpo I am assuming that last table with the amazing grain has tapered legs. If so I would taper the edge of the top so they are parallel. I'll go and get a pic to illustrate.

Back in a minute :D
 
Difficult to take as the leg is a foot back from the table end but I hope you can see what I mean

IMG_2706.jpg


Just so the line of the leg is followed by the edge of the top.

Not original - pinched it from JK
 
Thanks Brian.

Yes i understand... i think!
The leg tapers from 48mm to 30mm over its 750mm length. The top is 33mm thick.

So by my calculations the gap is .792mm wider at the bottom, is this what your getting at?

When making it i decided that the difference would be negligible so for ease i cut them square. 3/4 of a mill is a bit much though so i will go that extra distance next time.

EDIT- I've just realised the gap difference would be half of the above, as the leg is tapered from both/all sides, so the effective taper is actually 9mm over 750mm. So the taper should be just under 0.4mm over 33mm.

What is your picture of?
 
Sorry I'm not describing things very clearly. All I'm saying is that I think it is a nice but effective touch to chamfer the edge of the top to match the slope at the top of the leg so that they are parallel.

This is the Krenovian table in question, largely designed by me but not made by me.

IMG_0637.jpg


It's a bit more pronounced in this case with the shape of the leg but I think the same principle applies.
 
Back
Top