Hi,
started this project before christmas and progressing well time permitting, needed to make some false cabinets to go round a pair of gun lockers (keep er indoors happy), they needed to match existing furniture.
Ordered a router table from an excellent supplier, and have had variouse dramas with it that, I have posted else where commenst on that, took several weeks to get it functional and accurate. Then my router died so bought the large 626 dewalt nice pokey machine.
The bay came up trumps with a free standing Sip morticer for 175.00 and only 45 mins drive away, and borrowed my mates desktop axminster thicknesser.
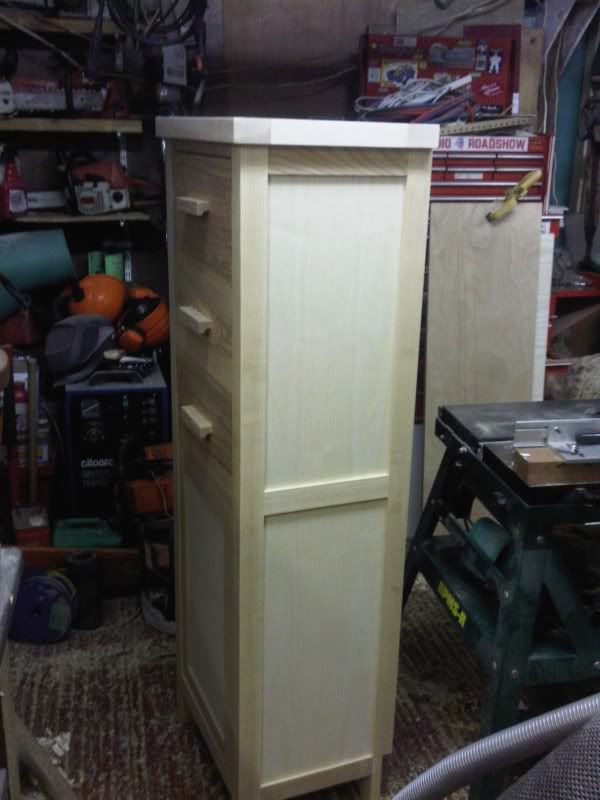
The side panels were mortice and tenoned and white ash faced mdf used as the rebated panels, left loose fitting to expand contract at will.
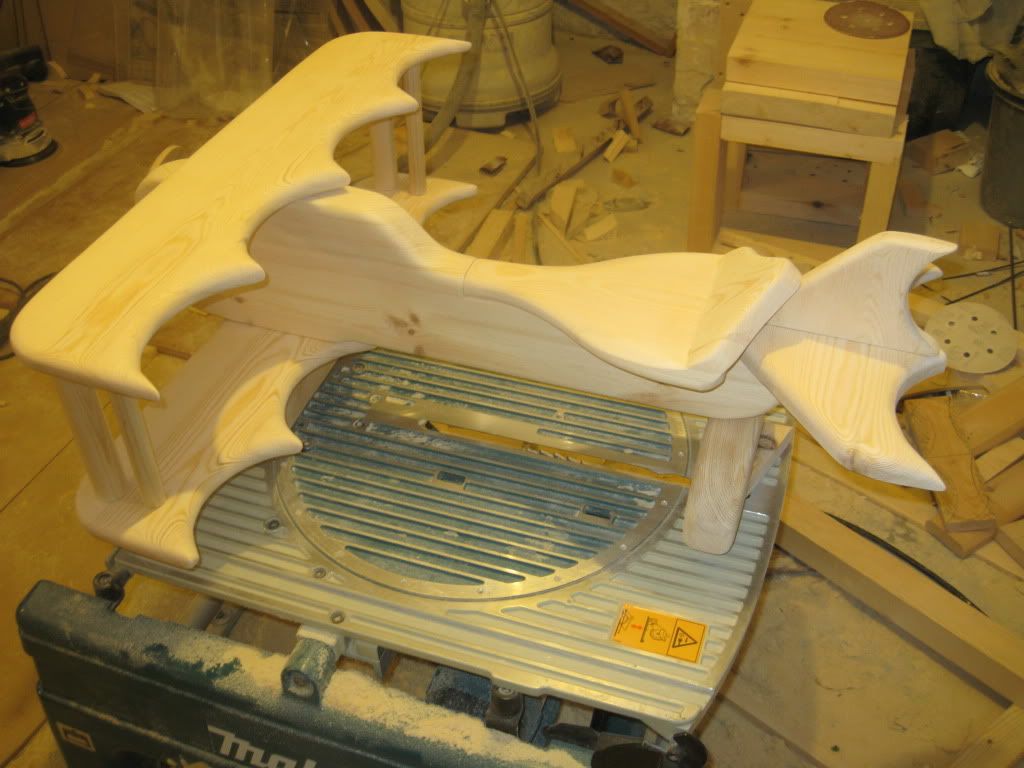
The top was made in similar construction technique, except the infil being solid wood (borrowed biscuit jointer to join up some planks) and then rebated in.
the false door assembly on the front bottom pannel was basic lap joints rebated to take panel, and then false drawer fronts made from solid. All mounted on 1/2 board. This has yet to have its hinges fitted will probably use SOSS hinges, and is just resting in place for the photo, lower door handle has not been fitted yet as decision on opening not been made.
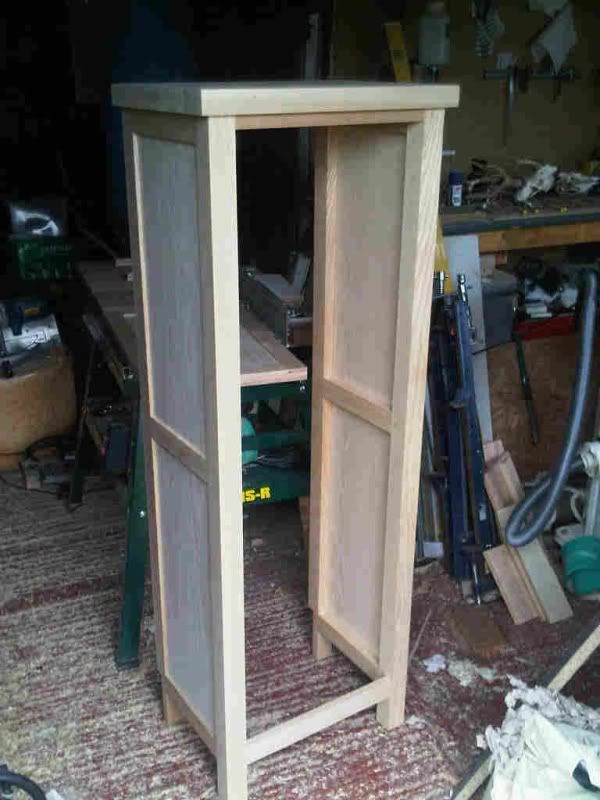
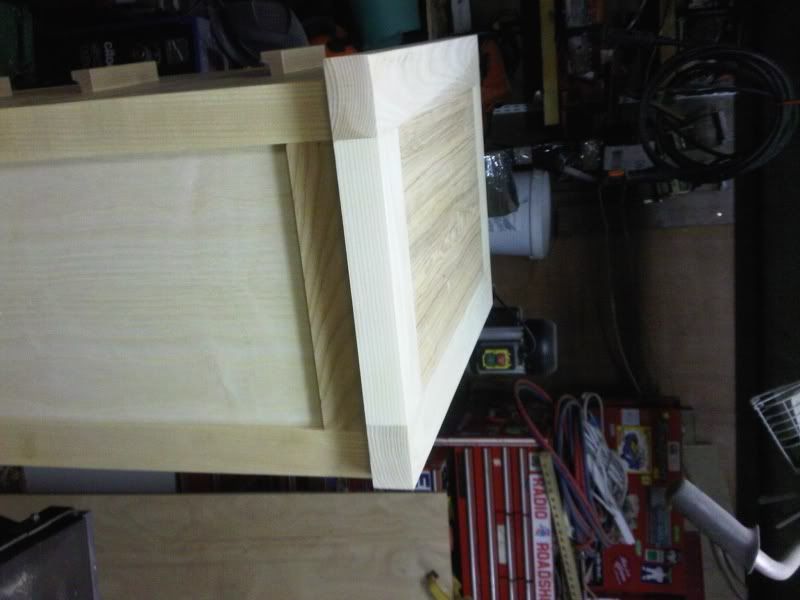
Handles simply made using 25x25 machined out on the router table.
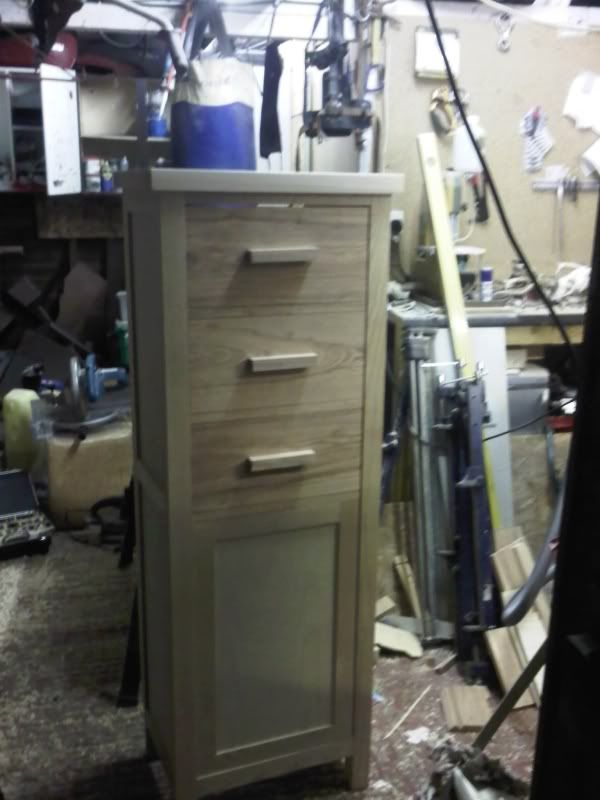
The top has been fixed in position with 8, 8mm dowles and will be glued in place when finally assembled.
As they are hollow and dont have much residual strenghth they will be screwed to the metal cabinets from the inside.
I have posted in 'Finishing advice' for what would be best to finsih with.
The other cabinet is in kit form on the bench waiting to be assembled, lack of space stops me doing both at once, however it been good to learn on the first one so assembly on no2 should go easier and quicker.
Having never made anything out of wood before (apart from the odd stud wok wall) very happy with the results so far, only experiance of making any joints was trying unsuccessfully to plane up some horrible resin filled pine in woodwork classes 24 years ago and getting wrapped over the knuckles with it because the result was cr** and the basic joint we did were only fit for firewood/kindling
best regards
nick
ps if someone knows which bit of code to use from photo bucket so pictures are imbedded let me know
started this project before christmas and progressing well time permitting, needed to make some false cabinets to go round a pair of gun lockers (keep er indoors happy), they needed to match existing furniture.
Ordered a router table from an excellent supplier, and have had variouse dramas with it that, I have posted else where commenst on that, took several weeks to get it functional and accurate. Then my router died so bought the large 626 dewalt nice pokey machine.
The bay came up trumps with a free standing Sip morticer for 175.00 and only 45 mins drive away, and borrowed my mates desktop axminster thicknesser.
The side panels were mortice and tenoned and white ash faced mdf used as the rebated panels, left loose fitting to expand contract at will.
The top was made in similar construction technique, except the infil being solid wood (borrowed biscuit jointer to join up some planks) and then rebated in.
the false door assembly on the front bottom pannel was basic lap joints rebated to take panel, and then false drawer fronts made from solid. All mounted on 1/2 board. This has yet to have its hinges fitted will probably use SOSS hinges, and is just resting in place for the photo, lower door handle has not been fitted yet as decision on opening not been made.
Handles simply made using 25x25 machined out on the router table.
The top has been fixed in position with 8, 8mm dowles and will be glued in place when finally assembled.
As they are hollow and dont have much residual strenghth they will be screwed to the metal cabinets from the inside.
I have posted in 'Finishing advice' for what would be best to finsih with.
The other cabinet is in kit form on the bench waiting to be assembled, lack of space stops me doing both at once, however it been good to learn on the first one so assembly on no2 should go easier and quicker.
Having never made anything out of wood before (apart from the odd stud wok wall) very happy with the results so far, only experiance of making any joints was trying unsuccessfully to plane up some horrible resin filled pine in woodwork classes 24 years ago and getting wrapped over the knuckles with it because the result was cr** and the basic joint we did were only fit for firewood/kindling
best regards
nick
ps if someone knows which bit of code to use from photo bucket so pictures are imbedded let me know