embroidery box with 13 drawers

UKworkshop.co.uk

Help Support UKworkshop.co.uk:

This site may earn a commission from merchant affiliate links, including eBay, Amazon, and others.
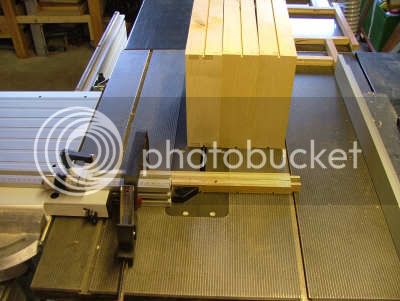
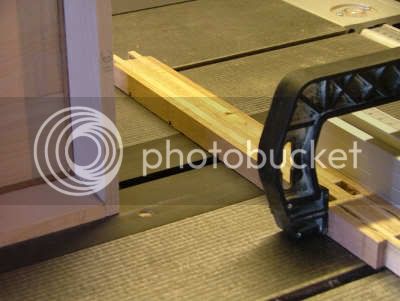
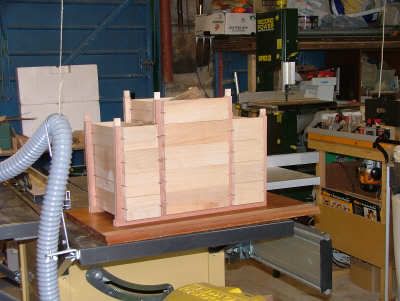
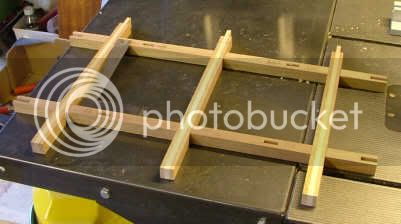
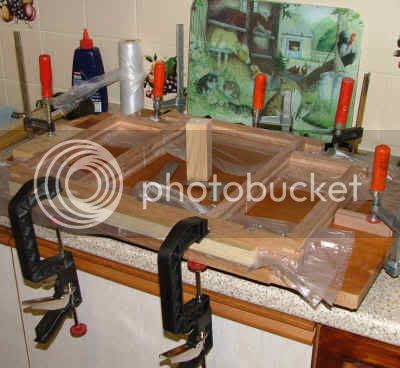
I eventually got out to the workshop at around 13.30 hours and the temp reached 10c with the help of a fan heater. Did a bit more jointing but wanted to do something more active, I therefore set up the table saw and cut all the dadoes dead centre 5 mm deep in all drawers. Used a back up on the second cut each time and avoided any tearout. Decided not to cut the positions on the frames today because I want a very accurate layout after my first box 6 months ago. I am going to make a cut on a frame and then put in a drawer to act as spacer and build up the positions in this fashion. Hoping this will avoid mark up errors. Even now I am still concerned about this step, wondering if I should build a sled to push timber past the unguarded blade. There will only be around 75mm between hand and blade.

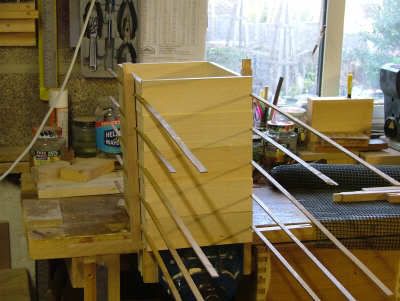
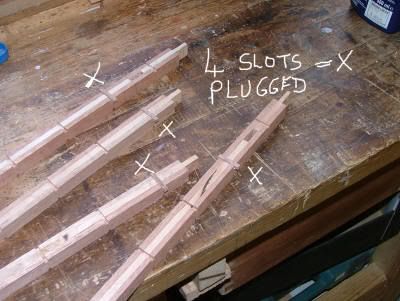
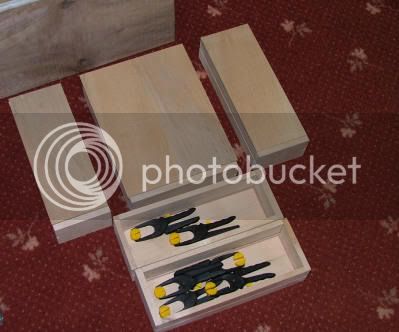
Photograph of four drawers showing slide bars sitting snugly without any play.
stripmonw.jpg
 
Atmospheric conditions, low pressure, kept me out of the workshop until after 14.00 hours. However sunshine came out both in the workshop and outside.

I got the first set of sliders aligned with the boxes to front of frame of the middle section.

cuttingframesw.jpg


framescut9w.jpg


slidesinw.jpg


I should sleep better the next few nights knowing that this set up should work and hopefully only need a little sanding to provide smooth runs with the drawers.

The lady was beating me hands down on her project, but she has come unstuck, she put her umbrella up this morning and trapped her fingers in the mechanism and ripped a small amount of flesh from her thumb, right on one of the joints. Blood everywhere and should take a few days to heal, so I reckon I might get ahead.

kingfisherw.jpg

.
 
All the slots and slider bars have been prepared except four slots have been plugged and will be recut again tomorrow. Trying to cut too many vertical posts for the slots at one time has caused some movement or misalignment.

Pictures show boxes in position on vertical posts and bench pictures shows errors and the replugging method.
repluggedw.jpg


boxesw.jpg


The sliding bars were very easy to produce this time compared to the box made earlier in the year. I purchased a belt and disk sander with some credit that was available on a recent transaction with Record Power. I just had to hold down the bars on the belt and wear off any excess timber to get the bars to slide in the drawer rebates. The process can be a little painful on tender fingers if you slip and touch the moving belt. Quite handy though for quick manicures if needed.

Janet & I had been due to fly out of London to Perth, W.A. this morning but owing to the entretemps back last summer the travel insurance company would not give me any health cover but offered a full refund of holiday booking expenses already made at that time. This was the second time (first time the 1950’s) that I have failed to get to Perth. However one of these days I am going to try again but through the back door might be the way to try.
 
Sorry to report, we went walkies today. The temperature in the W/S was so cold that my fingers would have stuck to the cast iron table top if I had touched it. Forecast for tonight is also listed as minus.
 
Started getting withdrawal symptoms so I set up a bench in the warmth of the kitchen and started to mark out the next set of joints, ( halving joints). There are 12 joints with a mate making 24 in all. I suceeded in getting those marked up before tea and handed the kitchen back to the wife .

Pictures below show how comfortable it is doing the woodwork in the kitchen!

.
measure1w.jpg


measure2w.jpg

.
 
Project has now got to be shelved for a while, the builders are coming in, you know the problem, you have to watch their every move :wink:

Normal service will resume ASAP as they say.
 
Am just down the road from DW (figuratively) and can confirm that its much too cold to get downstairs to the workshop. Seeing your kitchen though DW has given me evil thoughts. WOnder If I can get away with something similar. :D
 
Succumbed to a little work on the box. Prepared the lids which cover the box at the top of each column. Got the thickness down to 5.5mm on my SIP planer/Thichnesser which is a specification lower than suggested in the SIP mnual.
lidw.jpg


But things are slow at the moment because of the cold conditions around, I need to glue the frames, but knowing PVA glue needs 24 hours to cure at around 60f. I am not rushing things.

So went walkies again yesterday, which I think you would agree were pleasant surroundings.

frostnewbridgew.jpg


.
nolaydriversallowedw.jpg


hannafordcottagew.jpg

.
 
Sheesh, times like this I'm glad I live in the warmth of Cornwall. :shock: DW, I'm not sure that's a good place to park btw... :lol:

Cheers, Alf
 
That was a bad 7 days, (weather wise I mean) nearly finished up on a plane to Perth this morning but some circumstances slowed us down.

But now back on the 13 drawer embroidery box.


Got back to the project with earnest but did suffer from lunch , finished off the meal with three pancakes, castor sugar and orange juice. Nice but slows you down a bit.

After fiddling around doing another setup with all the sliders in position ( for the umpteen time) and cutting all shoulders to tighter tolerances, I started cutting the bottom cross lap joints by hand as per evidence below.

basecrossw.jpg


The end result for the day is that there are another 6 lap joints for the top to complete and then 6 bridle joints for the rear vertical struts. I should then be ready to start the gluing up. This of course is when the crunch time arrives.

I am adding two further pictures of a box constructed for my block plane purchased earlier this year. The reason for the box is that manufacturers do not provide cardboard boxes of the same quality as supplied in the past. The object of this posting is that my method of securing the lid is primitive but very satisfactory in operation, I can undo the two screws with finger pressure and the lid top fastens with ease and the same to release, and it was a cheap solution.

boxlid1w.jpg


boxlid2w.jpg


So hopefully with milder weather around I should be posting a completed project by the weekend.
.
 
The gardener never turned up, not that I blame him, we had around 2" of rain during the day with gale force winds, it was drafty in the shop too. So I moved back indoors, the dining room and then the kitchen as usual.

Glued up the front and rear frame as per pics below, I used a roll of poly bags to separate the pieces to avoid sticking together and also between the board and frames.

framesgluedw1.jpg


frameglue2w.jpg


I shall complete the cross pieces hopefully tomorrow and tidy up the frames and hoping the drawers and sliders all line up.
 
It's looking good DW. How about an update on the kingfisher? Or has it flown already?


Andy
 
dedee":2h42ydod said:
It's looking good DW. How about an update on the kingfisher? Or has it flown already?


Andy

I apologise, she flew or fledged successfully around 2 days ago :)

kingfisherwweb.jpg


At the momentthere is another blank canvas awaiting a row of teddy bears :)
 
That is gorgeous DW. Mrs DW has quite some talent.

What is intended as it's final resting place? Will it be framed? Another job for you perhaps?

Andy
 
Back
Top